Ok, here we go. Are you ready for this?
Five. Four. Three. Two. One.
Right now, you’re probably expecting something big to happen.
You’re not sure what it is, and no promises were made. But as you counted down from 5, did you feel that small tingle of anticipation building up?
That’s the same anticipation that we, as marketers, hope to capture with email countdown timers. Why? Because that small bit of anticipation can boost sales in a big way.
Visually showing your audience that an offer is only available for a limited time or that a new product is close to launching is an excellent way to engage them. And the coolest part?
It works really ? freakin’ ? well ?.
So, in today’s post, we’re going to look at a few things:
- What is a countdown timer campaign?
- Why are countdown timers so effective?
- 4 tools to add email countdown timers
- How to combine your email countdown timer with OptinMonster campaigns
- How to sync an email and floating bar countdown timer for a targeted campaign
Let’s get started!
What Is a Countdown Timer Campaign?
A countdown timer campaign is just like any other lead capture optin but with one crucial difference: there is a live timer showing visitors that a promotion will soon expire or indicates that an event will begin soon.
Either way, a countdown timer always serves the same function. It builds a sense of urgency and scarcity.
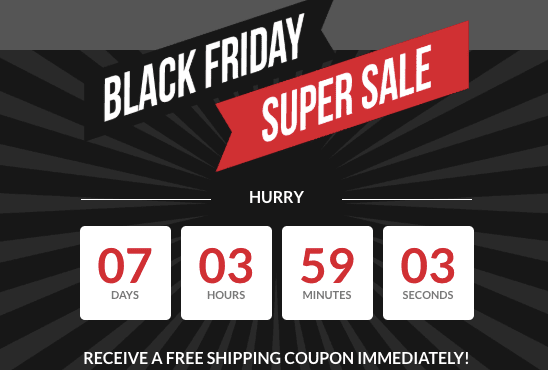
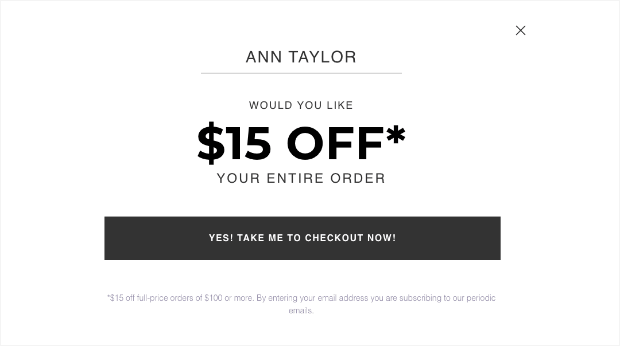
You’ve likely seen countdown timers in action before:
Countdown timers are super effective. With so many online businesses fighting for your attention, a countdown timer is the perfect way of getting your visitors to notice a special deal.
Not only does the timer add some visual movement to your campaign, but it also creates a sense of urgency. And that means some pretty cool results for your marketing campaigns.
That said, countdown timers aren’t limited to your website. They also make a great addition to your email marketing strategy, too. That’s because the same principles that make countdown timers so effective for lead generation, also make them an excellent tool to get your email subscribers to take action.
But before we dive deeper into that, let’s talk about two different types of countdown timers that you can start using today.
Static Countdown Timers
Static countdown timers are the most common countdown timers used. Mostly because they’re the easiest to set up, track, and run.
A static countdown timer means that your countdown will have a firm end date and time for all of your visitors.
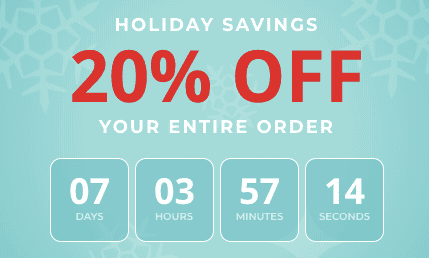
These are popular around the holidays when you’ll be running special discounts and promotions:
Since the promotion will end at the same time for everyone, a static countdown timer is all you need.
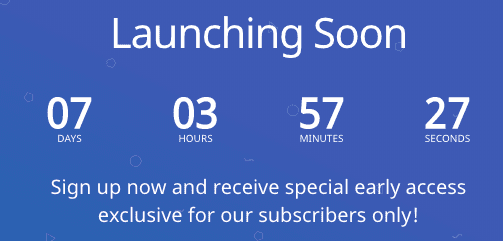
Static countdown timers are also awesome for product launches. Again, the date will always be the same for everyone visiting your site:
But in some situations, you don’t need a fixed end date. In that case, you’ll need a dynamic countdown timer.
Dynamic Countdown Timer
A dynamic countdown timer is perfect for attracting new visitors. It’s different than a static countdown timer because there is no fixed end date.
Instead, you’re giving your visitors a certain amount of time to take you up on an offer starting when they first see the promotion.
When a visitor reaches your page, they’d get a popup like the ones we’ve seen so far. Then the countdown timer would begin. So let’s say you want to run a 7-day only deal from when your customer first sees the promotion.
Customer A visits your page on Monday and sees the countdown timer starting at 7 days (or until the next Monday).
Then Customer B comes on Tuesday and gets the same 7-day countdown timer (until the next Tuesday).
A static countdown timer simply won’t work for that kind of scenario. Hence, it’s dynamic countdowns to the rescue.
Why Are Email Countdown Timers so Effective?
Countdown timers build a sense of urgency and scarcity, both of which have been known to drive conversions.
Urgency is related to that same anticipation you read in the introduction of this blog post. You see numbers counting slowly down to zero, and you know something is going to happen.
Here are a few statistics showing the power of urgency and scarcity to generate leads and sales:
- When given a choice between completing urgent tasks vs. important tasks, people tend to complete the urgent tasks first (even when they’re not a priority)
- A small countdown booster was proven to increase a company’s total revenue by 9%
- A small eCommerce company in the Netherlands created an A/B split test and found that adding a countdown timer increased conversions over campaigns with no timer (and their revenue also increased by 8.6%)
- Email countdown timers have helped eCommerce stores increase their sales by 400% for BlackFriday promotions
Countdown timers are so effective, that large companies like Amazon use it to drive revenue. You can go to Amazon’s Today’s Deal section to see countdown timers in action:
But smaller companies can use it, too.
Cracku, a company that helps students prepare for entrance exams, was able to increase their conversions by 300% by adding a simple countdown timer.
In fact, many of OptinMonster’s clients have found massive success by putting countdown timers into their optin campaigns or by embedding them in their emails.
And later in this post, we’re going to cover how to do both of these things. But first, we want to give you plenty of resources to build your own email countdown timer campaigns as quickly as possible.
So here are 4 tools you can use to quickly add email countdown timers to your emails today!
4 Helpful Tools for Adding Countdown Timers to Your Email Campaigns
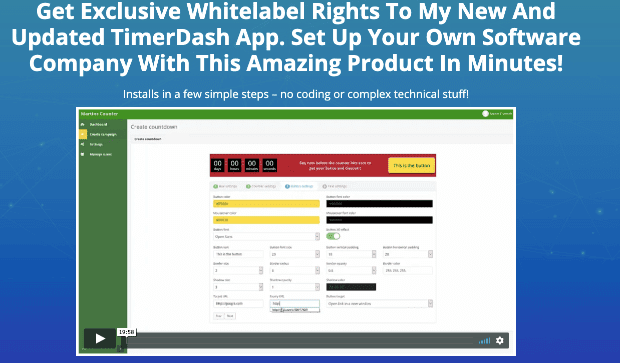
1. Timerdash
Timerdash is a software that allows you to create customized countdown timers to embed in your emails. It works with the majority of email service providers, too.
This software is cloud-hosted, mobile responsive, and is incredibly simple to set up. This is perfect if you run a lot of scarcity-based promotions. However, it comes with a bit of a price tag.
Timerdash is a one-time payment of $97. On the one hand, there are no monthly fees. On the other, you’ll have to decide if you’ll see enough return on investment (ROI) for this $100 purchase.
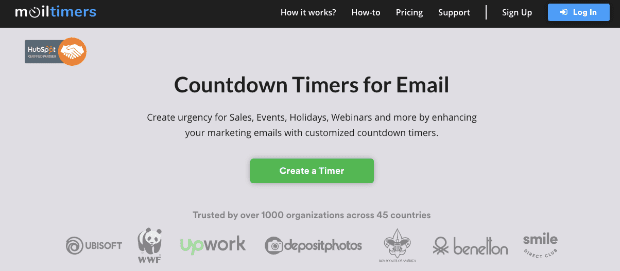
2. MailTimers
MailTimers is a neat little software that does exactly what it promises to: adds countdown timers to your email. Just like Timerdash, MailTimers works with most email service providers.
The cool thing is that MailTimers allows you to set up both static and dynamic timers for your email campaigns. So if you’re running a holiday-specific promotion, for example, you can let everyone see the same timer.
Or you can set the timer to begin as soon as someone opens the email, so no two customers will see the same countdown timer.
Pricing begins with a free trial and allows you to scale. This would be perfect for most solopreneurs or small businesses just starting out. It allows 100,000 views per month, which is far more than most young email lists need.
Then the Startup package starts at $7.99 per month and grows to the Business and Corporation packages at $49.99 and $79.99 per month, respectively.
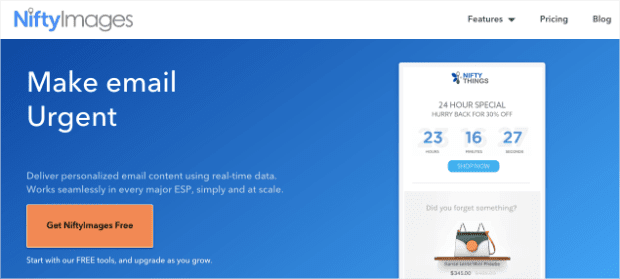
3. NiftyImages
NiftyImages is a really cool application that allows you to send personalized images in your emails. One of their features is a countdown timer.
They also incorporate both static and dynamic countdown timers. Plus, they have a few other nice features like the use of custom fonts, a unique expiration image (for when the countdown is over), and effects like drop shadows, custom label sizes, and more.
You can start NiftyImages for free, but then their price definitely scales. Their Starter package (when billed monthly, not annually) begins at $20 per month and goes up to their Enterprise package at $750 per month with a few options in between.
This is definitely a good software if you need custom images and countdown timers in your emails, but you also have a budget for those types of expenses.
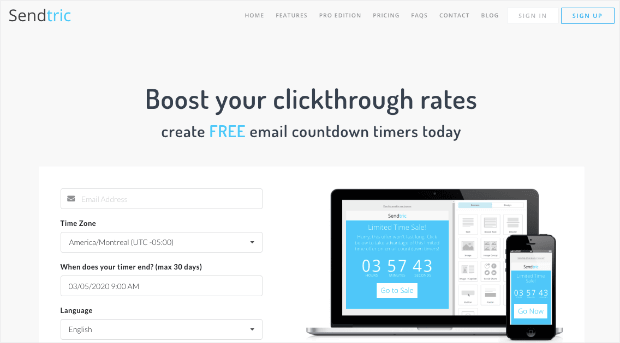
4. Sendtric
You know what they say, “you should save the best for last.” Sendtric is definitely your best bet when it comes to creating free email countdown timers for your automated campaigns. All you need to do is enter your email address, set when the timer ends, design your timer, and you’re all set.
You get a beautiful countdown timer 100% free with no watermarks getting in the way. Plus, it has unlimited use. That means you can use Sendtric for your daily countdown emails all year long without worrying about needing to upgrade plans.
If you want to access the Pro features, however, you’ll need to get on a paid plan.
Pricing starts at $9 per month for the Micro plan and works its way up to $49 per month for the Power Plan. If you’re a small or medium-sized business, Sendtric is probably the best email countdown timer for your buck.
Now that you’re able to add a countdown timer to any of your email campaigns, let’s have a bit of fun.
Let’s see how we can combine our countdown timer emails with our OptinMonster Campaigns.
How to Combine Your Email Countdown Timer With OptinMonster Campaigns
OptinMonster has a really cool feature that allows you to use your email countdown timer to redirect traffic to any of your site’s custom campaigns. How?
Using shareable MonsterLinks™.
And, again, it couldn’t be simpler. In fact, if you’ve ever created a campaign with OptinMonster, then you already have everything you need.
With this strategy, you can combine your email countdown timer campaign with:
- Pre-sell pages
- Sales pages
- Discounts, offers, or special promotions
- Online courses
- Coming soon pages (ideally created with SeedProd)
- Affiliate links
- Product updates
Or any other campaign you’ve built with OptinMonster! Let’s see how it works.
First, you’ll need to create a brand new campaign to send your email traffic to. Or you can simply select a campaign you’ve already built.
Because we’ve written so extensively on how to create your first campaign, we’ll assume you’ve already got one hiding up your sleeve and ready to use.
Pro TipRemember to choose a campaign that doesn’t ask users to enter their email. The campaign you use with your email countdown timer should be promotional offers, sales pages, pre-sell pages, or any other landing page that is designed for something other than capturing emails.
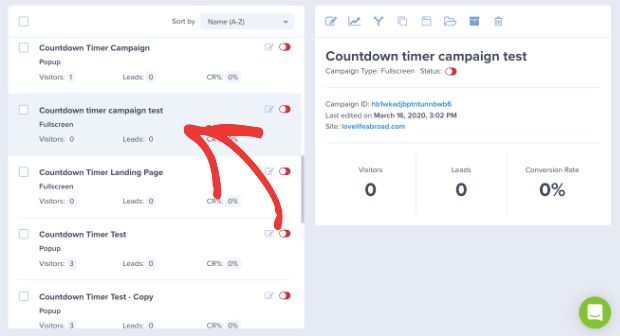
Simply go to your OptinMonster dashboard and find the campaign you want to direct your email traffic to:
Then in your editor, go to the top menu and click Display Rules:
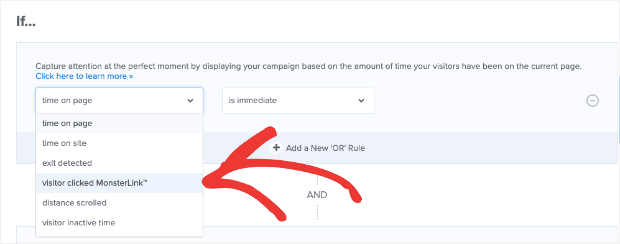
This is where we’ll be getting our MonterLink™. Change your first condition to visitor clicked MonsterLink™:
You’ll see a button Copy MonsterLink™ Code:
Then be sure to delete any other display rules you may have running on your campaign. To do that, click the Minus icon next to any lingering display rules:
Now for the really important part: hit Save.

That will get your MonsterLink™ code automatically saved to your clipboard.
Or you can head to the Publish page:
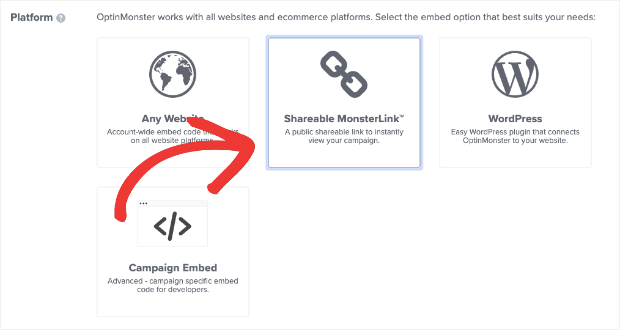
Scroll all the way down to the section called Platforms and click Shareable MonsterLink™:
OptinMonster will generate a special URL that you can now use to embed in your emails:
So whether you’re trying to create a Constant Contact countdown email campaign, or you’ve been killing yourself wondering how to install a countdown timer in outlook email, you’re now good to go.
Simply write your email copy as you normally would, add a countdown timer, and embed the shareable Monsterlink™ under the appropriate anchor text.
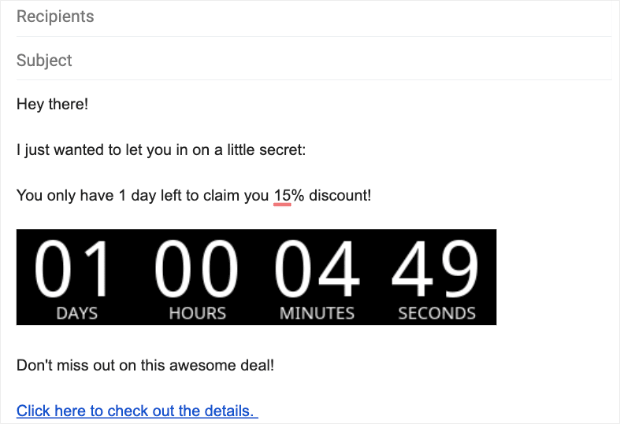
This is how that would look in a standard Gmail message, a countdown timer from Sendtric, and a MonsterLink™:
You can see the anchor text in blue is where the shareable Monsterlink™ is embedded:
That link will redirect your audience to the page where your campaign is active. Ideally, that will be some sort of landing page for whatever offer you’re promoting. When they arrive, they’ll see your campaign:
This is great for using an email countdown timer campaign to drive traffic to a special promotion or offer. But, again, you can use the MonsterLink™ strategy to redirect your email subscribers to any campaign you’ve built with OptinMonster!
Looking for a way to keep your limited time offer front and center in your visitor’s mind? Sync your email countdown timer with a countdown timer on your site!
How to Sync Your Email Countdown Timer With a Floating Bar Countdown Campaign
We’ve already covered why countdown timers make such an effective marketing tool. They create urgency and scarcity, both of which have been proven to boost sales.
So why not keep that sense of urgency directly in front of your audience’s eyes at all times?
In other words, why not link the countdown timer from your email campaigns with a countdown timer floating bar on your site’s landing page. That way, your visitors will constantly see their window of opportunity counting down to zero.
And, consequently, you’ll get more people to click on your call to action.
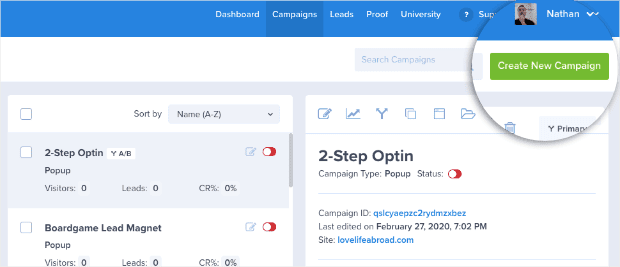
Doing this is super simple. All you need to do is go to Create New Campaign in your OptinMonster dashboard:
Select Floating Bar as your campaign type:
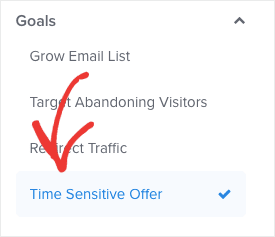
And filter by Time Sensitive Offer when selecting a template:
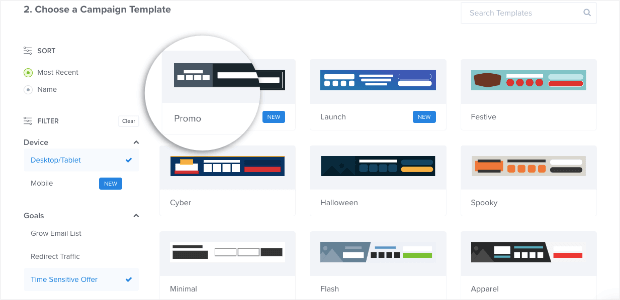
Now you’ll have a bunch of templates that come locked and loaded with a countdown timer. We highly recommend using one of our newer templates, Promo. That’s the one we’ll be working with today:
We love this one because it’s simple, sleek, and has a high conversion rate.
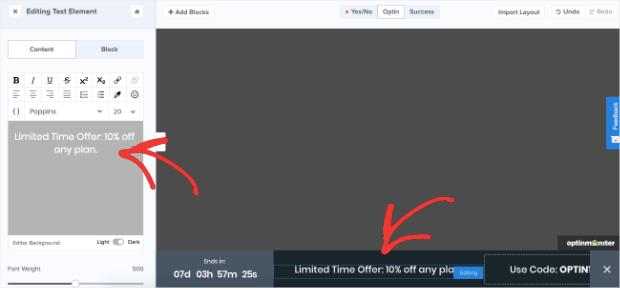
Now you can edit the campaign in your editor. Just click on any element of your campaign to pull up the editing tools on the left-hand side:
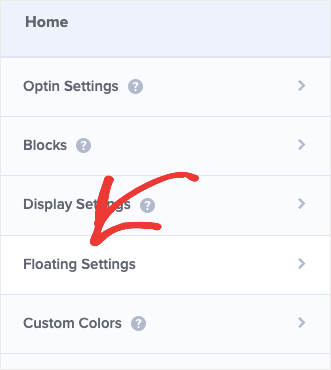
We should point out that you can have your floating bar stay on the bottom of your site (which is the default setting) or move it to the top. To move it to the top, simply click Floating Bar Setting on the homepage of your editor dashboard:
And then move the toggle to put the floating bar at the top of the page:
For this tutorial, we’ll keep the floating bar on the bottom as it comes with the template’s default setting.
Now comes the important part: syncing the countdown timer in your floating bar with the countdown timer in your email campaign. For this to work, you need to be using a static countdown timer for both campaigns with a fixed end date.
Otherwise, your email countdown timer will begin once your subscriber has opened their email. Then when they are redirected to your site’s floating bar (which we’ll cover soon), your OptinMonster campaign would re-trigger the dynamic countdown timer and the time would be off between the two.
So, once you’ve selected your end time and date, simply click the countdown timer for your floating bar in your editor:
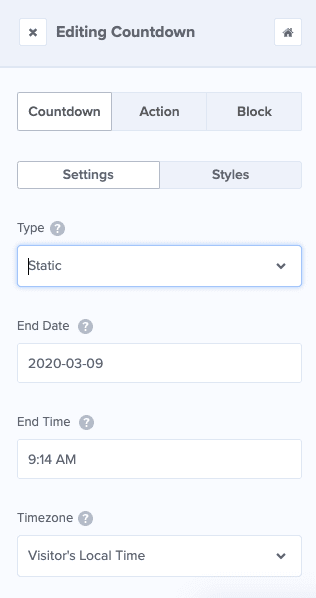
This allows you to edit the countdown settings in the left-hand side menu:
NoteWant to know more about all the customization options? Check out this video on countdown timers to learn more about static and dynamic timer settings.
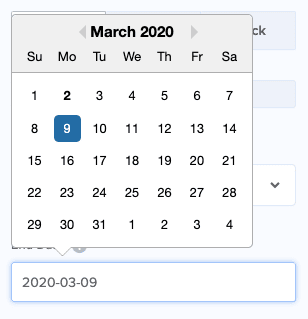
Since you’re using a static countdown timer (meaning it’s the same countdown for all of your site’s visitors), simply select the date:
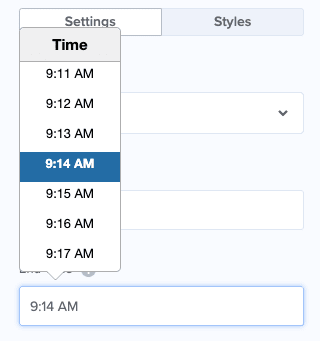
And the time you want the countdown to expire:
Now you just have one last step. Hit Save:
Ok, so the floating bar campaign is ready, but you still need to make sure only your email list is going to see it. To do that, we’ll be getting a shareable MonsterLink™ just like we did earlier in the tutorial. Simply go to Display Rules on the top menu of your OptinMonster editor:
Change your first condition to visitor clicked MonsterLink™:
Again, you’ll see a button Copy MonsterLink™ Code:
Don’t forget to click the Minus icon next to any other display rules so that only your email list sees this campaign:
And, as always, hit Save:
Click Publish in the header menu of your editor:
And change the toggle from Paused to Live if your campaign wasn’t live already:
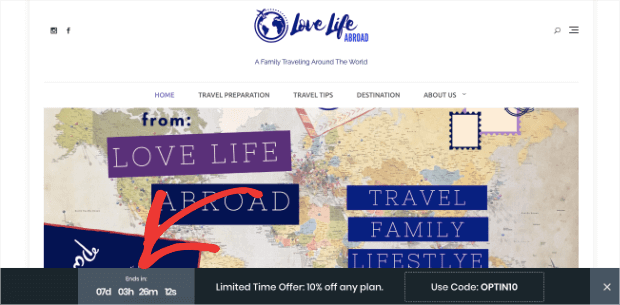
Now your floating bar should be up and running smoothly on your site, but only when visitors come from the MonsterLink™:
And voila! You’re all finished.
You now have an active email countdown timer that is perfectly synced with a floating bar countdown campaign on your website.
Pretty neat, right? Well, we think so. ?
A Few Closing Thoughts
In this tutorial, we’ve looked at 4 tools you can use to add email countdown timers to your marketing campaign. Then we saw how you can sync these emails to your OptinMonster campaigns, or add a floating bar with the same countdown timer on your site.
And how did we do all that? Through the awesome power of MonsterLinks™.
But before winding down, we need to address something very important. In fact, what we’re about to say is the fundamental secret to running a successful email campaign.
Ok. Pay attention… Ready?
In order to run a successful email marketing campaign, you need to have people on your email list.
We know, it sounds like a real no-brainer. But there is a surprising number of companies out there who focus more on crafting the perfect email than they do on growing their actual email list.
That’s a recipe for failure.
Without building a robust email list, even the most perfect email campaigns will fall flat. But the more people you can reach with that perfect email, the more revenue you can count on coming in.
That’s why we definitely encourage people to work with a conversion optimization software like OptinMonster.
OptinMonster is the perfect tool for your email marketing strategy. That’s because it isn’t simply another run-of-the-mill optin form designer. OptinMonster is a conversation optimization kit with all the tools you need to drive traffic, boost email subscribers, and skyrocket your conversions.
Because at the end of the day, if you don’t have a list of subscribers to send the message to, then no email campaign in the world can help you out.
So be sure to invest in yourself, in your company, and in your future customers by working with an optimization conversion kit. Preferably OptinMonster. But that’s up to you. ?
Do you have any hidden tricks for adding countdown timers to your emails that we didn’t cover here?
If so, don’t hold out on us! Connect with us on Facebook or Twitter to tell us how you leverage countdown timers to increase sales, too.
For other killer tutorials, check out our YouTube channel. Just don’t forget to subscribe.
Finally, if you ARE interested in going the OptinMonster route for your conversion optimization kit, we’d definitely love to have you join our thriving community.
So don’t be shy and join OptinMonster today!















Add a Comment