Are you wondering how a tool like OptinMonster can help you make more money?
OptinMonster is a powerful lead generation software that helps you grow your list, increase conversions, and drastically boost sales.
Plus, it’s easy to set up and doesn’t require any coding to get started. But at the end of the day, you’re probably most interested in one question: “Can OptinMonster bring in more money than you’re currently making?”
That answer’s simple: YES!
So, today, we’re going to teach you exactly how to make money with OptinMonster. More specifically, we’ll look at how you can make more money with OptinMonster by:
But first, let’s get crystal clear on what OptinMonster is.
What Is OptinMonster?
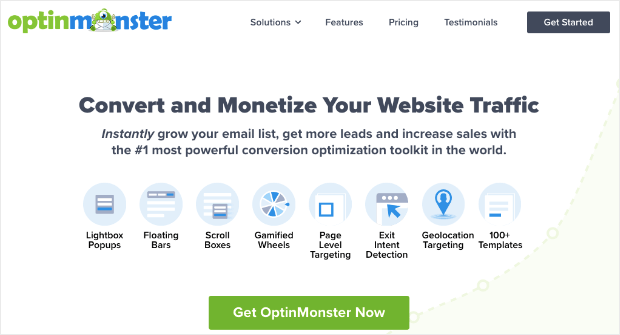
OptinMonster is the #1 lead generation software on the market:
OptinMonster helps businesses of all sizes grow their email list, attract better quality leads, and increase sales. It’s the perfect tool for bloggers, solopreneurs, small businesses, and larger organizations.
How does it work? By allowing anyone to quickly and easily create high-converting “optin campaigns.”
Optin campaigns are things you’re likely already familiar with, such as popups, floating bars, spin-to-win wheels, and much more.
With these campaigns, you can present special offers to your site’s visitors. These are often referred to as “lead magnets,” and they include things like:
- eBooks
- Cheatsheets
- Checklists
- Discounts
- Free shipping
- And much more…
For a more comprehensive list of lead magnets, check out this detailed article: 69 Highly Effective Lead Magnets to Grow Your List.
At this point, you might be wondering, “Yes, but how long will all of these optin campaigns take to set up?”
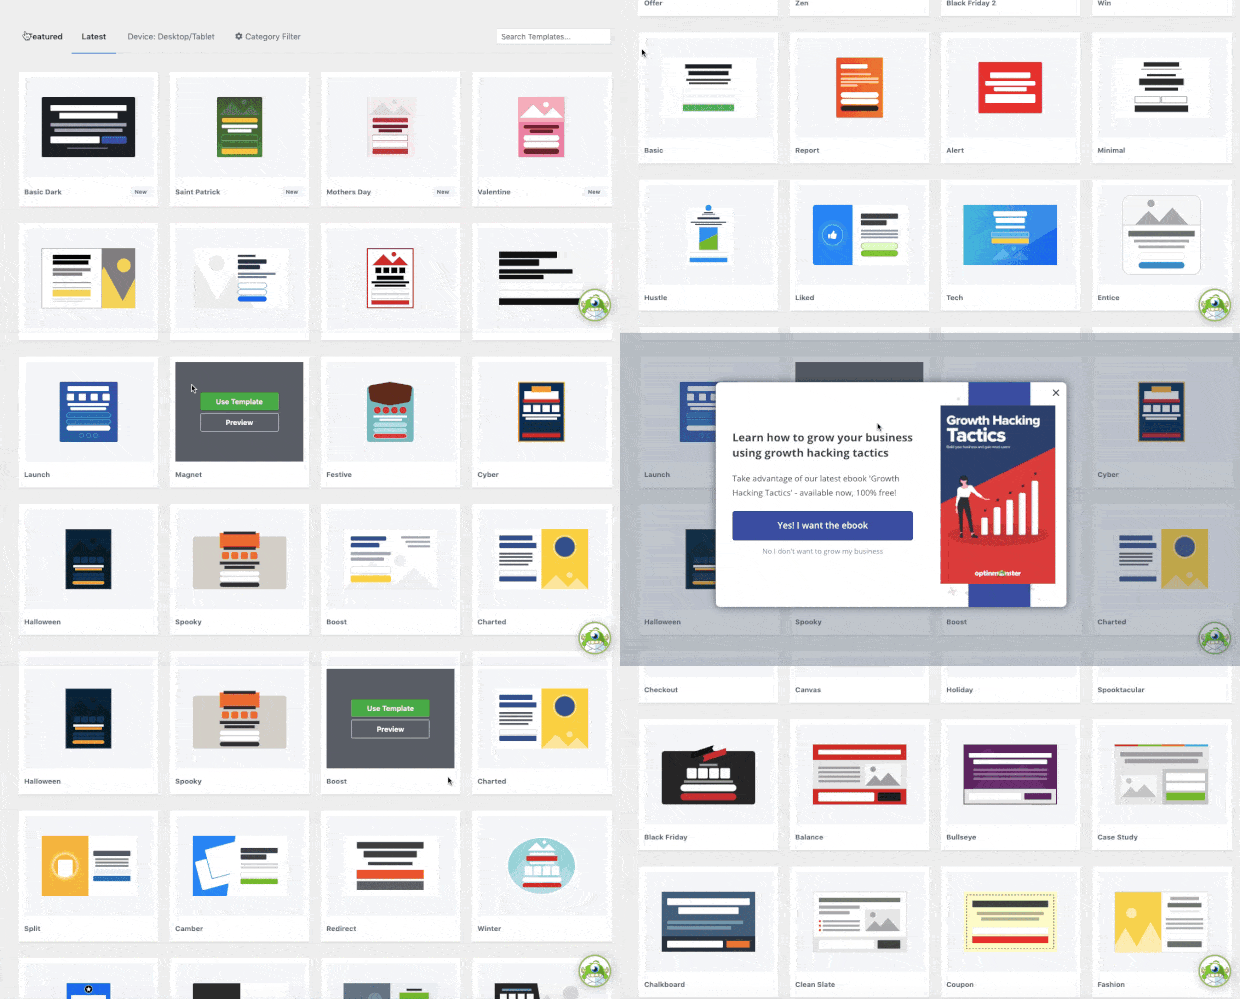
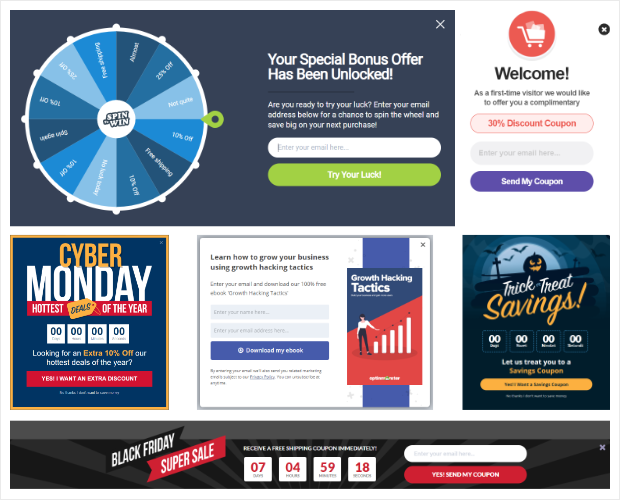
One of the best parts about OptinMonster is how easy it is to use. Once connected to your site, you can select any of our 50+ pre-built templates to start with:
These templates save you time, energy, and headaches in the campaign creation process. They look great across all devices, and they’re fully responsive.
From there, you’ll likely want to make a few modifications to your campaign to showcase your lead magnets. Doing so couldn’t be easier.
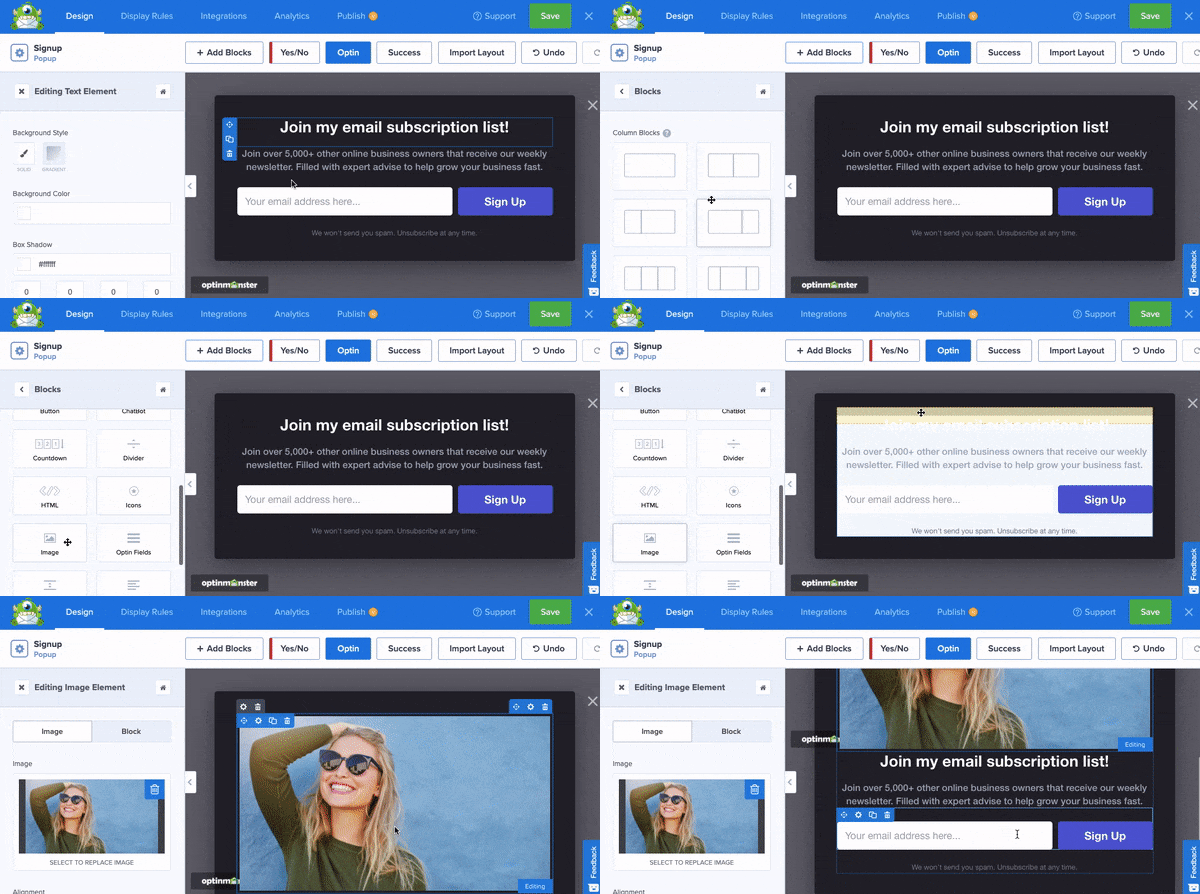
That’s because OptinMonster comes with an inline text editor that allows you to modify your message directly in the campaign:
With this feature, you’ll be able to create personalized messages for your target audience in seconds.
And if you want to add new features to your OptinMonster template, you can do so with a drag and a drop. Simply select the feature you want to add and drop it into place:
And since all of our features are created in “blocks,” you won’t need any professional design experience to make stunning campaigns. Instead, everything falls neatly into place.
Finally, you’ll want to show these campaigns to the right people, in the right places, and at just the right time in their customer journey.
For that, you can use OptinMonster’s powerful targeting rules. Some of the most popular rules include:
- Exit-Intent® Technology: Recover abandoning users by showing campaigns as they’re actively leaving your site.
- OnSite Retargeting®: Keep your audience engaged by displaying new campaigns to returning users.
- Geolocation: Personalize the user journey by showing campaigns to people based on their physical location.
These are just a few of the most popular targeting rules, though there are many others.
And these are the same kinds of rules that allowed companies like Fastrack to recover 53% of their abandoning visitors.
Or how Shotkit adds 40+ new leads per day to their email list.
You can achieve the same massive results by clicking below and starting your 100% risk-free OptinMonster account today:
Now that you have a general understanding of what OptinMonster is and what it can do, let’s get a bit more specific.
Let’s turn our attention to how OptinMonster makes you more money.
How OptinMonster Makes You Money
1. Make Money by Growing Your List
The first way that OptinMonster makes you more money is simple: it grows your email list.
That’s the core function of OptinMonster, which is why it’s better than any other lead generation software on the market.
Literally anyone can sign up for OptinMonster and begin growing their list from day ONE.
And the larger your email list is, the more revenue you can expect to generate from your email marketing campaigns.
How does this work?
As you get new people on your email list, you can send email campaigns to nurture that relationship. Then you can guide new subscribers down your sales funnel.
Plus, it’s easier than you might think, and much of the process can be turned on autopilot once you’ve invested in the right tools.
For more help on perfecting your email marketing strategy, check out these detailed posts:
- Email Marketing Made Simple: A Beginner’s Guide
- How to Run a Successful Email Marketing Campaign
- 17 Tips for Writing Email Marketing Copy That Converts
Those articles will break down exactly how to drive more revenue from your blog or business through email marketing best practices.
But you might be curious, “Why wouldn’t I use the optin forms that come with my email service provider (ESP)? Wouldn’t it be easier to use their forms, too?”
This is a common question from new business owners, bloggers, and affiliate marketers. That’s because many ESPs on the market like Constant Contact, Brevo (formerly Sendinblue), Mailchimp, and others have basic optin campaigns that can be used to grow your list.
The problem with these forms is they aren’t nearly as effective. Since the “optin campaign” is the secondary product for these email providers, you’ll be limited in terms of campaign type, design, and function.
And since many of their optin campaigns don’t allow advanced personalization, they tend to look a bit boring and lack the type of uniqueness your brand represents.
In the end, this is one of the primary reasons why so many people choose OptinMonster over most email providers’ built-in forms.
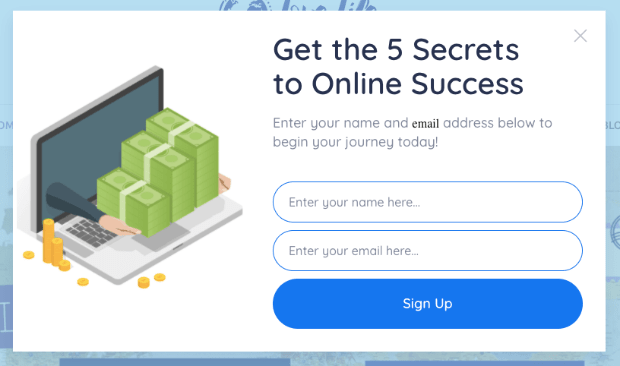
Regardless of your technical experience or background in design, anyone can create popups that look like this in under 5 minutes:
These campaigns showcase your lead magnet and encourage users to join your list.
Not only does OptinMonster give you more abilities to customize your campaigns, but it even gives you more campaign types to begin with, such as:
- Popups
- Slide-in scroll boxes
- Floating bars
- Fullscreen welcome mats
- Inline campaigns
- Gamified spin-to-win wheels
- Gated content lockers
These campaign types are all pre-built and require ZERO coding skills or design experience.
Instead, you can simply start with any of OptinMonster’s pre-built templates, make some minor modifications, and have a stunning campaign that grows your list FAST.
Still not sure if OptinMonster can help increase your email subscribers? Just check out some of these success stories from small businesses and bloggers just like you:
- How Crossrope EXPLODED its list by 900%
- Adam Enfroy added over 11,000 subscribers in just 1 year
- How Bonjour Lisbonne doubled their email list
And, again, what’s important to remember is that you’re not simply getting more subscribers for the sake of having a larger list.
Instead, you need to remember that the larger your list is, the more revenue potential you’re sitting on week after week.
Plus, the more targeted you can make these campaigns, the more successful your email campaigns will be. This leads us to the next way OptinMonster makes you more money.
2. Make Money by Targeting Warmer Leads
Some people think that just by having a larger email list, they’ll automatically be flooded with new customers.
But this isn’t always the case.
That’s because everyone who signs up for your email list will be at a different stage in their customer journey. Some will need to be nurtured for a few months before taking action, and others will be ready to make a purchase after a handful of emails.
In the last section, we looked at ways you can drastically grow your list with OptinMonster.
But now, let’s kick things up a notch.
Because with OptinMonster’s advanced targeting rules, you won’t just be adding new people to your list. Instead, you’ll be adding highly qualified leads who are ready to buy your products or services.
Here’s what we mean:
Yes, OptinMonster gives anyone the ability to drastically grow their list from DAY ONE.
But as you continue to scale your business and increase your site’s traffic, you’ll want to refine your lead generation strategy to target people closer to the “bottom of the funnel.”
This is simply a term people use to refer to leads who are closer to pulling out their credit cards and making a purchase.
In other words, people at the “bottom of the funnel” are SUPER warm leads.
With OptinMonster’s intuitive targeting rules, you’ll control exactly who sees your campaign, where they see them, and at what point in their customer journey.
This allows you to attract the highest quality leads to your email list so you can drive even more revenue with email marketing best practices.
Here are the two ways OptinMonster helps you do that.
a) Target the Right People Every Time
OptinMonster has a large list of targeting rules to get your campaigns in front of the right people.
In fact, OptinMonster offers more of these targeting rules than any other lead generation software on the market.
OptinMonster comes with all the standard targeting rules you might expect, such as:
- Page-level targeting: Display campaigns depending on which URL your visitor is on.
- Device-based targeting: Show campaigns to users on various devices, such as mobile, tablet, or desktop.
- Scroll triggers: Present offers to users once they’ve scrolled through a pre-determined percentage of the page.
While we already covered a few of OptinMonster’s targeting rules above, here are a few others that let you target higher quality leads for your site:
- OnSite Follow-Up Campaign®: Create “drip” campaigns to target users based on how they interacted with past campaigns.
- Cookie Retargeting: Fine-tune your personalization by targeting users based on their browser cookies.
- AdBlock Detection: Show campaigns to users with AdBlock technology to reach a larger portion of your audience.
- Custom Domains: Totally get around AdBlocking technology by replacing all OptinMonster URLs in your site’s code with your own custom domain. This exclusive feature is ONLY offered by OptinMonster.
- HTML Elements & JavaScript Variables: Advanced targeting rules to give you 100% control over when and where your popup displays.
And much more!
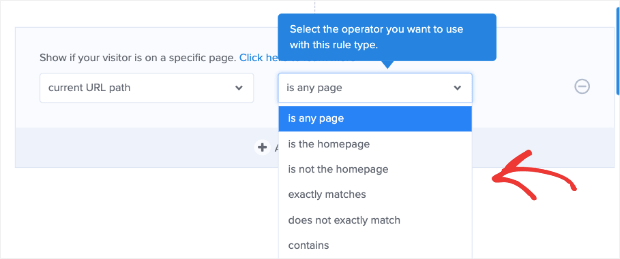
The best part is that these rules don’t require coding experience to set up. Instead, everything can be done with drop-down menus and simple text input fields:
That means literally anyone can start targeting and attracting higher quality leads in no time.
But what happens when these users sign up for your offer? How can you make sure to personalize the user journey through your ESP?
That brings us to a term called “audience segmentation.”
b) Segment Your Audience from Your Optin Form
“Audience segmentation” is a term that refers to organizing your email list in smaller groups to keep the user journey as personalized as possible.
This is usually done through “tags,” which are small labels you can use with your email provider to organize your lists.
Then with OptinMonster, you can assign these tags to your new subscribers directly from the optin form.
Imagine, for example, you have 2 products you sell through your website.
One is for a digital marketing course. The other is for a white-glove service where you run marketing campaigns for other businesses.
On your website, you’ve set up various campaigns to target users based on which product they’d be more interested in.
But since they’re attracted to different products, you don’t want to send them the same follow-up email campaigns through your email provider.
Instead, you can quickly add “tags” to each campaign.
When people opt into your offer for a digital marketing course, you can tag them “marketing course.” And when they subscribe to your white-glove services, you can tag them with “white-glove.”
Obviously, you can change the names of these tags depending on your offers and your lead magnets.
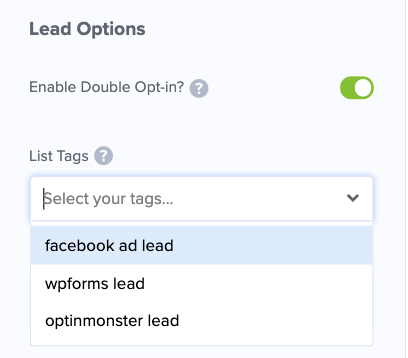
But when it comes time for your new leads to sign up with your OptinMonster campaigns, you can configure which tags you’d like to apply to new subscribers:
Now that your new leads are properly organized and segmented, you’ll be able to further personalize their user journey.
As a result, you can expect to drive more revenue from your email marketing campaigns.
And all of that new revenue will be a direct result of taking a few minutes to target and organize new leads with OptinMonster.
In fact, these are the same tactics used by the following companies to drastically increase their profits:
- Cosmetic Capital saw a 300% increase in leads
- Snack Nation added 1200 segmented leads and 15-20 sales per day
- Bulkly increased free trial signups by 134%
These new leads led to generating more profits and allowed the company to grow much faster than it had been before using OptinMonster.
Finally, let’s turn our attention to how you can make money with OptinMonster via direct sales.
3. Make Money by Boosting Sales
If you’re working in the world of eCommerce, there are 2 primary ways that OptinMonster directly helps you drive more sales:
- Upsell/Cross-sell/Downselling campaigns
- Cart abandonment campaigns
a) Upsell/Cross-sell/Downselling Campaigns
First, many eCommerce owners are missing TONS of opportunities to increase the average order value (AOV) of their customers.
Rather than increasing each customer’s AOV, online business owners focus on getting a sale and adding customers to generic email newsletters.
But there’s a much better way.
OptinMonster allows you to create targeted upsell, cross-sell, and downselling campaigns. These can be triggered based on what your audience already has in their cart or based on purchases the customer has made in the past.
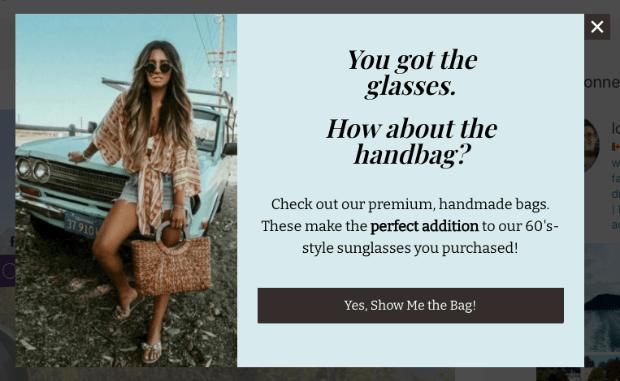
When someone buys a pair of glasses from your eCommerce store, for example, you could follow up with them using a campaign like this:
This popup was made in under 5 minutes and could increase the AOV of your customers for months (or years) to come.
Plus, it targets users based on what they’ve already purchased in the past, so you know they’re an incredibly good candidate to see the campaign.
But what if you want to use actual products like a lead magnet before users make their first purchase? You could easily do that with a campaign like this:
This popup is triggered when someone adds a pair of jeans or a t-shirt to their cart.
As a result, the user would get 30% off a related item and is more likely to add the product to their cart.
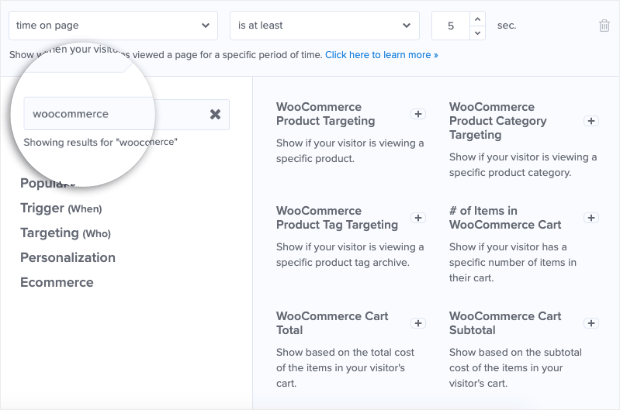
And if you’re using a platform like WooCommerce, Shopify, or BigCommerce, setting up these campaigns is incredibly easy.
That’s because OptinMonster has eCommerce-specific targeting rules to save you tons of time and energy, and they don’t require any “tech skills” to set up:
This makes it easy to create highly targeted upsell, cross-sell, and downsell campaigns that bring more direct sales to your online store.
But there’s another way that you can make more money with OptinMonster: reducing cart abandonment across your site.
b) Cart abandonment campaigns
One of the biggest problems eCommerce owners face is cart abandonment.
This occurs when someone visits your online store, places an item in their cart, and doesn’t complete the checkout process.
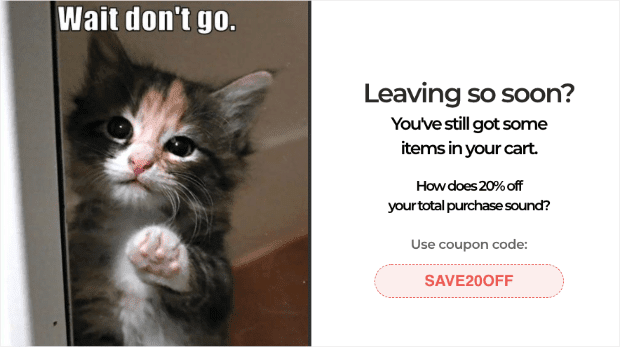
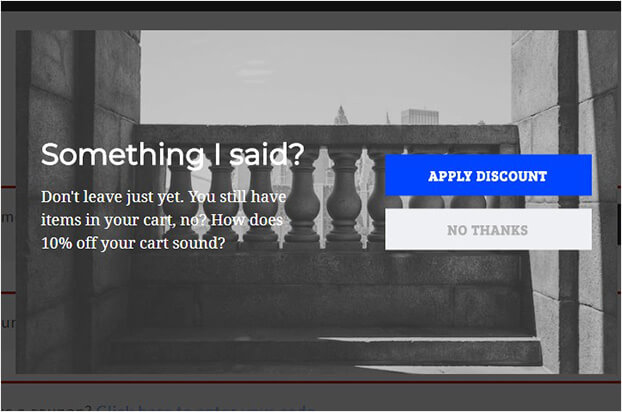
How can OptinMonster help with that? By helping you create cart abandonment campaigns that look something like this:
In the example above, you’d offer a special discount to abandoning users with OptinMonster’s Exit-Intent® Technology.
As a user begins to leave the page, you present them with a special offer to get 20% off if they continue to checkout.
This is often just the nudge your customers need to complete their orders. And in the end, that means more sales for you.
In fact, this is the campaign Scott Wyden used to recover 21% of his abandoning visitors while simultaneously growing his email list 3x:
It’s a stripped-down campaign that yielded massive results by offering just 10% off the customer’s order.
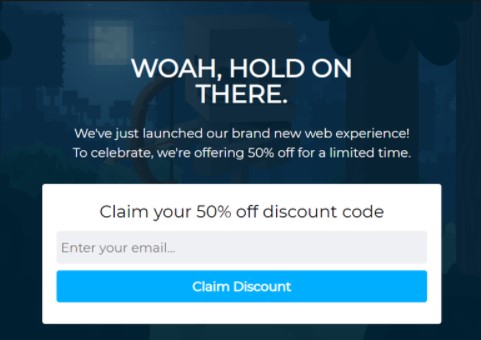
Another option is to create the same type of campaign (an exit-intent popup) that offers a lead magnet for users to sign up to your email list.
That campaign might look something like this:
In this scenario, the user can get 50% off their total order but need to enter their email address to receive the coupon.
But the end result is still the same: you reduce cart abandonment and drive more sales with these easy-to-make campaigns.
Still not totally sure OptinMonster can help you make more money? Just check out the results OptinMonster got for the following businesses:
- How Woodside Communities Made $294,435 in Less Than 2 Months
- Click Bank University Increased Sales by 100%
- How Win in Health Increased Revenue by 300%
Again, you can achieve similar results by clicking below and starting your 100% risk-free OptinMonster account today:
And that’s all for today! We hope this article has made it clear how ANYONE can make money with OptinMonster.
These principles are the same whether you’re an affiliate marketer, solo blogger, or run a business of any size.
As you use OptinMonster to grow and organize your email list, you’ll be able to drive more profits and scale your business faster.
If you enjoyed this post, we highly recommend you check out the following resources:
- How to Make Money While You Sleep With Affiliate Marketing
- Making Money on Instagram (Without 10k Subscribers)
- 30 Easy Ways to Make Money With OptinMonster
- Is OptinMonster Worth It
These articles will have everything you need to drive even more revenue for your business with OptinMonster.





Add a Comment