
How to Create a Woocommerce Login Popup Form (Step by Step)
Last updated on
by

Do you want a WooCommerce login page to improve your users’ experience and reduce shopping cart abandonment?
With a WooCommerce popup, you can help users seamlessly log in to their accounts within your eCommerce store.
That’s why, today, we’ll show you how to create a login popup for your online store. For this tutorial, we’ll be using 2 powerful tools:
By combining WPForms with OptinMonster, you’ll be able to create a highly converting login form in a matter of minutes.
Besides the 2 tools, we’ll also walk you through steps to create login popup pages for 3 scenarios that are common across many eCommerce websites.
But first, let’s look at what a login popup is and why you need it in the first place.
What Is a WooCommerce Login Page?
A WooCommerce login page is a login form that requires users to enter a username (or email address) and password to access certain content on your WooCommerce site.
A WooCommerce login page helps you authenticate user credentials and ensure website security. Including a login popup on your website allows only registered users to access specific features or pages on your WooCommerce store.
Creating a WooCommerce login popup also allows you to prompt personalized campaigns to your users based on their login data, such as their name, date of birth, gender, purchase history, location, and other demographic details.
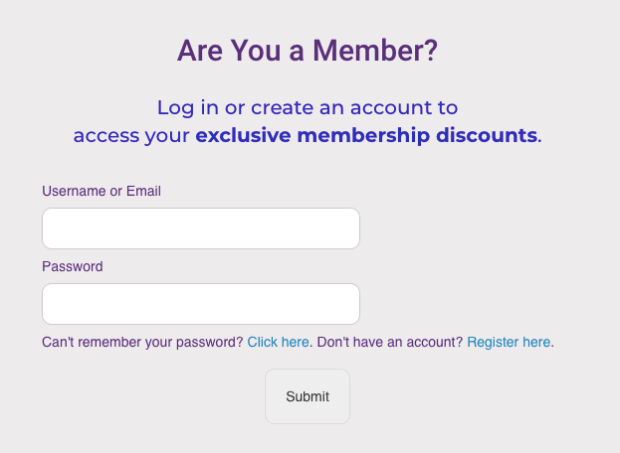
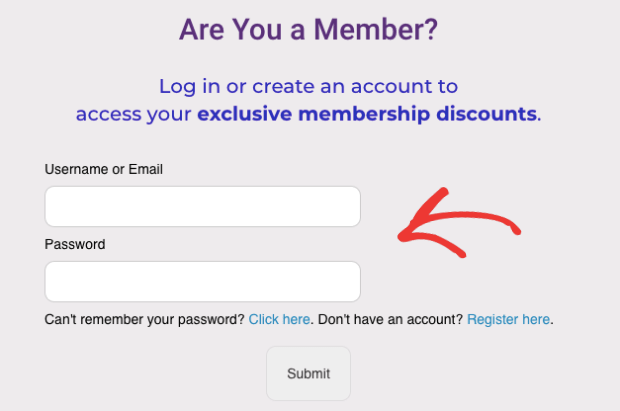
Here’s a quick look at the login popup form we’ll build today:
Why Do You Need a WooCommerce Login Page?
There are several use cases for WooCommerce stores to use a login popup form:
- Making a clickable login button that triggers a popup for customers to sign in to their account.
- Making customers sign up with your store or log in to their account to complete a checkout.
- Asking customers to sign up or log in to your website as soon as they land on your site.
- Making specific product pages or exclusive content accessible only to registered users.
- Making your entire WooCommerce site accessible only to registered users.
- Letting users log in to their personal account pages to access information related to rewards points, shipment tracking, or order history.
Let’s look more closely at the first 3 of these use cases. These are scenarios that most eCommerce stores offer to their users.
1. Making a Clickable Login Button
With a clickable login option in the navigational menu, users can log in at any time without being redirected to a new page. They can simply click Log in or Sign in through your custom login popup and key in their credentials to access their user account.
2. Making Customers Sign up or Log in to Complete a Checkout
Most WooCommerce stores allow everyone visiting their eCommerce website to check out their products. These stores also have popups to entice buyers with special offers or have stellar copywriting that makes them want to buy from the store.
But when it’s time for those buyers to purchase a product, some WooCommerce stores require users to log in to their account to complete a checkout.
If you want users to log in before they can checkout, you can create a custom login popup that prompts buyers to sign in with your website.
3. Asking Customers to Sign up or Log in as Soon as They Land on the Site
You can also display a popup to returning members as soon as they land on your WooCommerce site. This helps them access their account details, billing history, and shipping information before checkout.
It allows you to increase your website sign-ups or show personalized campaigns to buyers based on their purchase history or user behavior. For instance, you can send them reminders about unpurchased items left in their shopping carts to reduce cart abandonment.
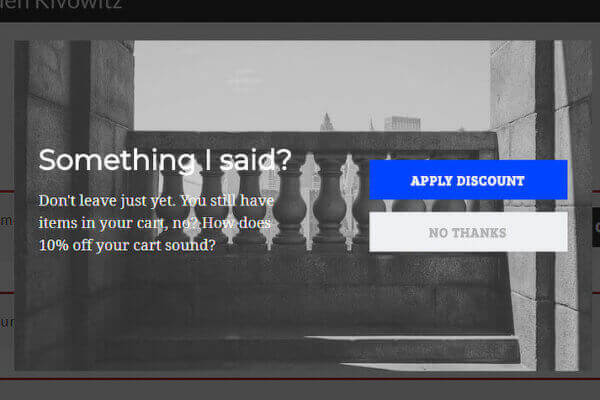
Here’s an example from Scott Wyden Kivowitz’s website. Scott used OptinMonster to build the exit intent popup shown below and recovered 21% of abandoned carts:
Or, you can automate follow-up emails to customers recommending them products similar to the ones they bought in the past.
Related ContentAre you getting the most revenue from your email campaigns? If not, learn how to master email marketing with this in-depth resource: Email Marketing Made Simple: A Step-by-Step Guide.
The way you use your WooCommerce customer login page depends on your needs and marketing strategy. Before we cover the specific use cases, let’s go over the 2 tools that we’ll use to create the custom login page.
How to Create a WooCommerce Login Page
Both the tools we’ll use today are easy to use and great for generating leads.
- WPForms: The best form builder on WordPress that helps you create custom forms with just a drag and a drop. It’s used by 6,000,000+ business owners and comes with over 100 form templates to save you time.
- OptinMonster: The world’s #1 conversion optimization software that gives you all the tools you need to increase your conversion rates. OptinMonster is the best software to help you drive traffic, boost conversions, and get more sales.
Don't Have These Tools Yet?Get started with both WPForms and OptinMonster risk-free! Click here to sign up for WPForms and click here to join OptinMonster today!
Step 1: Create a User Login Form with WPForms
First, you need to install and activate the WPForms plugin.
WPForms is one of the most popular form widgets for WordPress sites. It lets you create any type of WordPress form, including a default WooCommerce login form, WooCommerce registration page, payment form, and contact form.
If you’ve never installed a WordPress plugin before or you’re not sure how, no worries. Check out this beginner’s guide on how to install a WordPress plugin for a step-by-step tutorial.
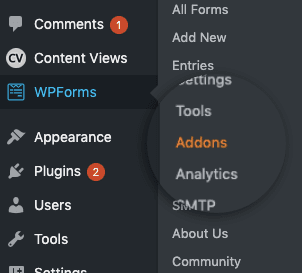
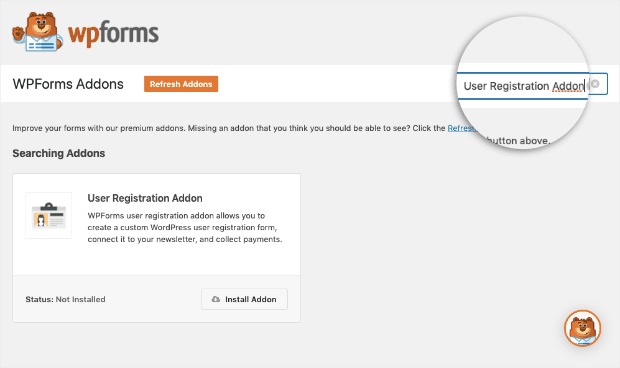
Next, hover over WPForms in your WordPress dashboard menu, and select Addons from the sub-menu:
Use the search bar on your Addons page to search for and activate the User Registration Addon:
Alternatively, you can also scroll down through the addon options to locate the User Registration Addon:
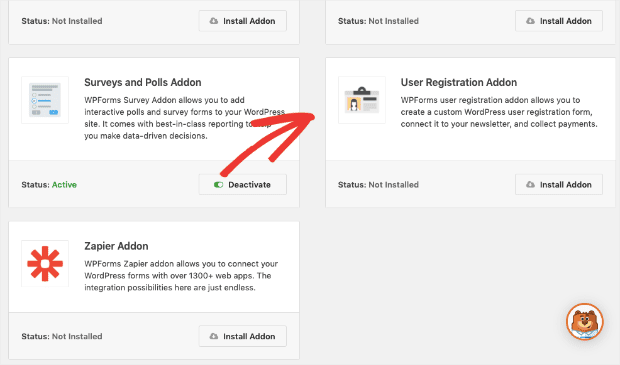
Click Install Addon:

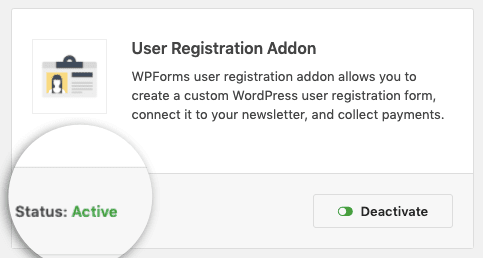
Once installed, your User Registration Addon will automatically be activated. You’ll see the status set to Active in the lower-left corner of the addon box:
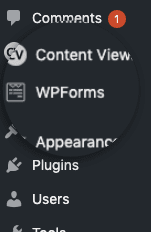
Go back to the left-hand side menu of your WordPress dashboard and click on WPForms:
Create a new form by clicking Add New:

Search for the pre-built User Login Form template to get started:
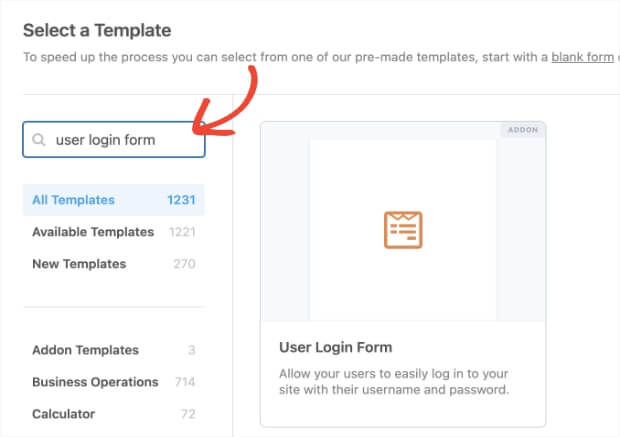
Click Use Template:

The default template will ask for a user’s name or email address and password. In most cases, the default template will be exactly what you need:
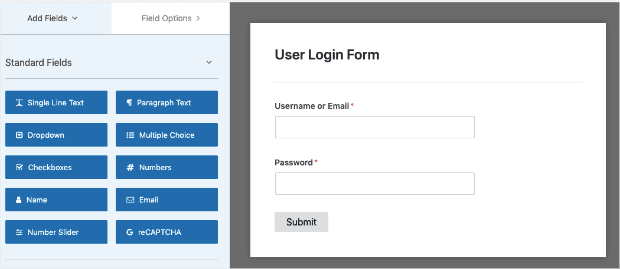
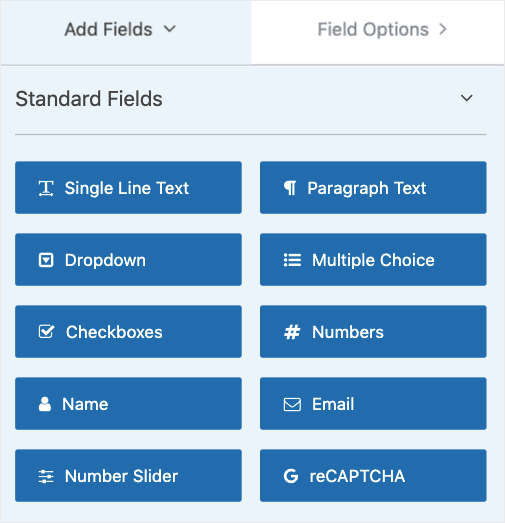
But if you need other fields, you can add them from the options on the left-hand side:
To make sure your login form is useful, you can also create an option to help existing users recover their forgotten passwords. Similarly, you can add a link for first-time visitors to create an account with your store.
To do that, click on the Password field in your template to bring up the editing options in the left-hand side menu:
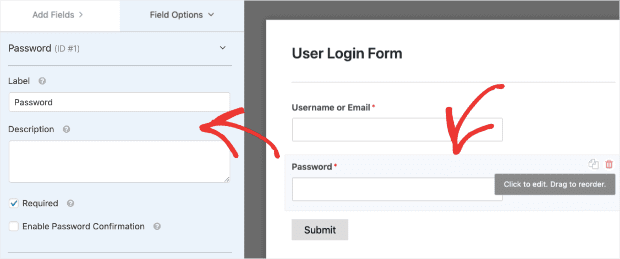
In the Description field, enter the following code:
Your Description field should now look like this:
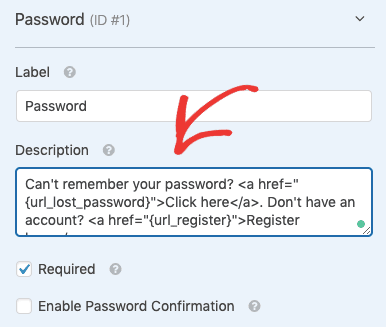
These links give users the option to recover their forgotten passwords or register for a new account:

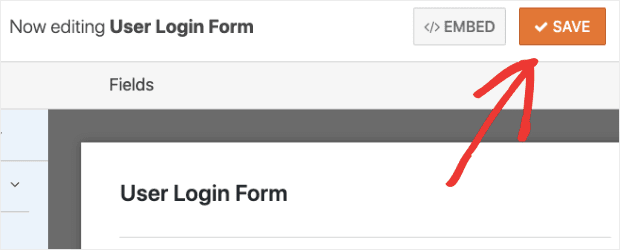
Now we’re almost done with WPForms. We just need to hit SAVE in the upper right-hand corner of your WPForms editor:
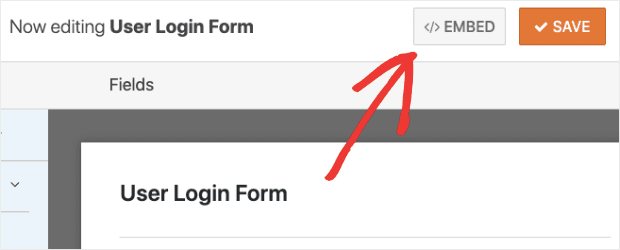
Click EMBED to get the shortcode for our OptinMonster popup:
You’ll see the following popup. Click on use a shortcode link to copy the shortcode that appears at the bottom of the popup:
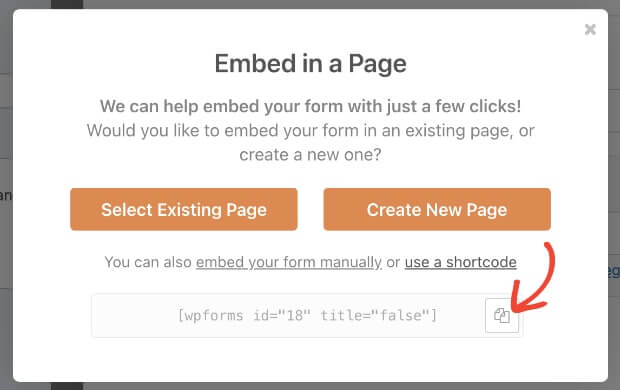
Save the popup shortcode in your note-taking app for later use. You’ll need it when you’re creating a custom login page in WooCommerce with OptinMonster.
Step 2: Create Your WooCommerce Login Popup
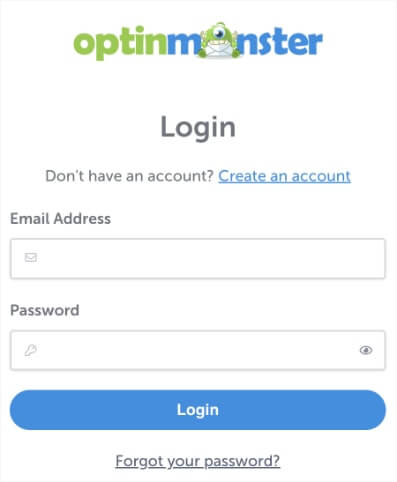
To create your WooCommerce form, sign in to your OptinMonster account:

Don't Have an Account?Get started with OptinMonster today, risk-free with our 14-day money-back guarantee!
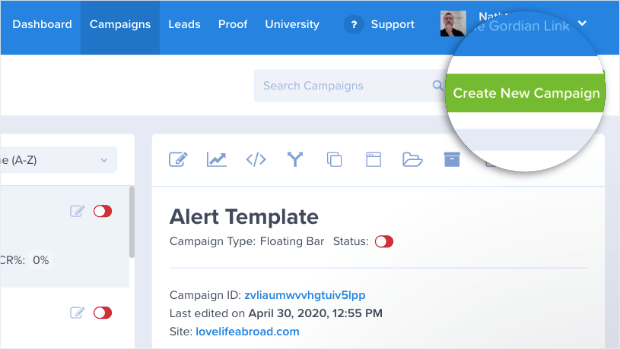
In the upper right-hand corner of your dashboard, click Create New Campaign:
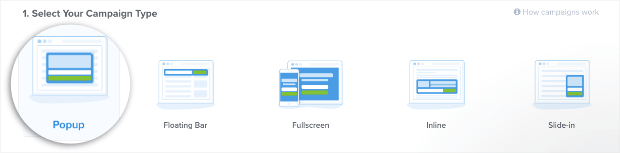
Then choose your campaign type. For our WooCommcer login, we’ll choose Popup:
Now it’s time to choose your template. Since you’ll be embedding a custom shortcode from WPForms, choose Canvas:
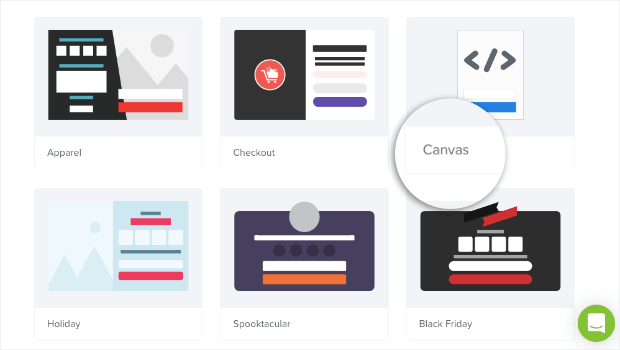
This is our blank template that allows you to start from scratch.
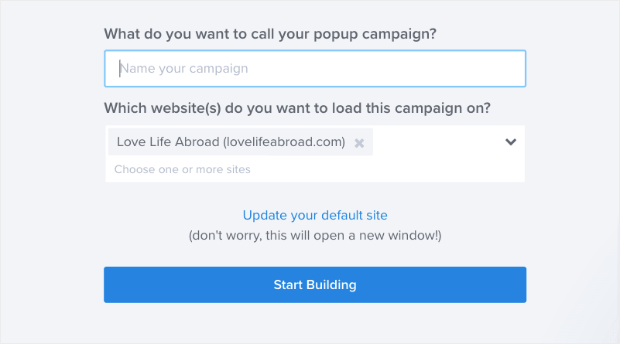
Name your campaign and assign it to your WooCommerce store site:
With this, your blank template is ready to be customized in the OptinMonster editor. For this popup, delete the image that comes with the Canvas template.
Locate the trashcan icon on the upper left-hand corner of the image block and click delete:
![]()
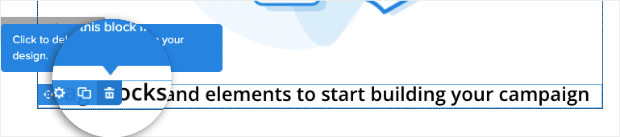
Do the same to Drag block and elements to start building your campaign:
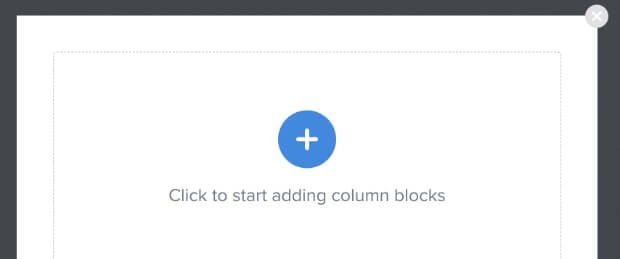
You now have a completely blank canvas to work from. In your editor, click on Click to start adding column blocks:
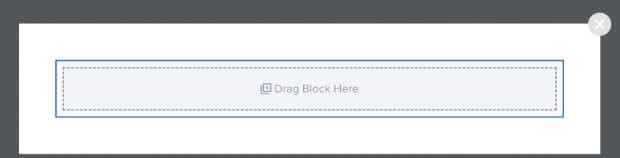
The editor will now appear like this:
Scroll down on the left-hand menu panel until you see the HTML block:
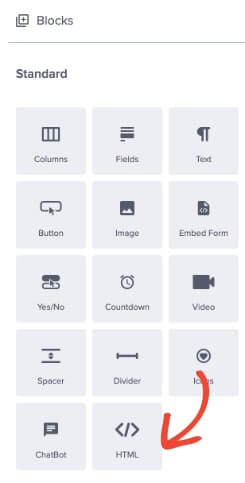
Drag and drop the HTML element block into your editor:
In the left-hand side menu, insert your shortcode from WPForms in the HTML field block:
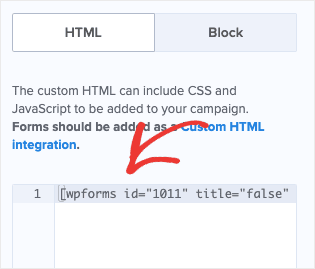
Keep in mind that your editor will just show this shortcode at this point. It won’t display the form fields visually.
The form will appear as you designed it in WPForms when you publish your campaign live on your WooCommerce store.
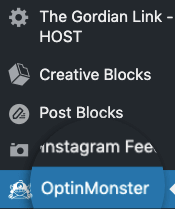
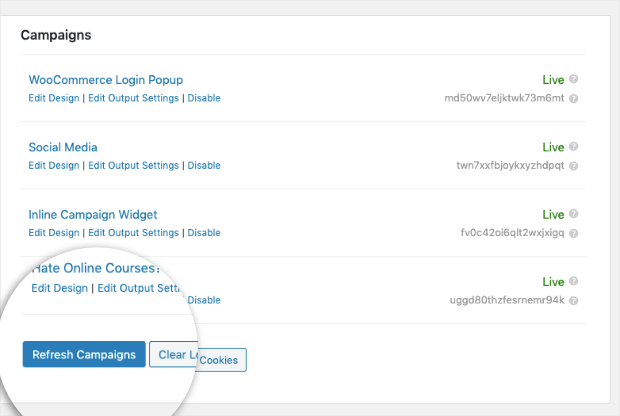
Any time you add or change custom HTML after your campaign has gone live, remember to go to the OptinMonster plugin through your WordPress dashboard:
Click Refresh Campaigns at the bottom of the page:
Before going live, you can further customize the customer login form by adding a logo, images, checkbox, or custom text.
We won’t get into detail on how to edit the WooCommerce login campaign in this tutorial. If you want to learn about customizing your campaign designs in OptinMonster, check out our guide on how to create custom designs.
One thing we can’t skip, however, is adding some custom CSS to make sure your login form looks great!
Step 3: Adding CSS to Your Login Form
To make sure that your WooCommerce login form comes out looking like you want it, we’re going to add a little custom CSS to your OptinMonster campaign.
CSS or Cascading Style Sheets is a style sheet language used to define the visual appearance and formatting of HTML elements. It’s a powerful tool to give your HTML elements a unique, individual style that matches your brand style.
If you’ve never worked with CSS before, don’t worry! What we’re doing today is super easy.
Go to the main menu in your OptinMonster campaign editor and click on Display Settings:
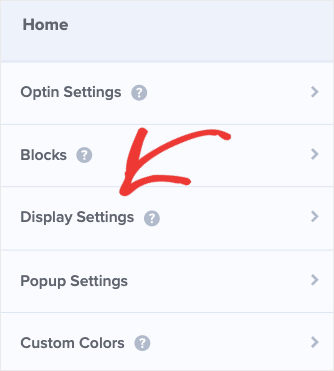
Then scroll down to where you see the field box where you can enter custom CSS:
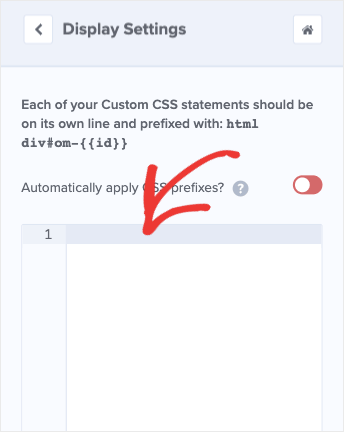
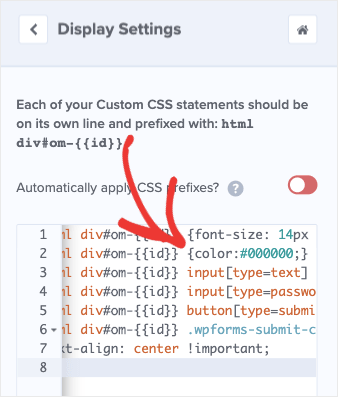
Enter this code in the field box:
This will make your register form look much nicer:
If you have experience using CSS, you can customize the form even further. For beginners, don’t worry about using the advanced CSS functionalities. Just change the text size and color in the inline CSS code:
If you don’t want to make any changes to it, the default CSS code we’re using in this tutorial will work just fine.
And that’s it!
Once you’ve configured your login page in WooCommerce to make it look the way you want, hit Save at the top of your OptinMonster editor:

If you’re using the OptinMonster plugin, don’t forget to refresh your campaign in your WordPress dashboard like you did earlier:
With this, we’ve reached the last step of creating a WooCommerce login page. This step involves deciding when and where on your site you want users to log in.
Step 4: Set Up Your Login Popup Display Rules
Next up, let’s create WooCommerce login popups for the 3 common use cases we discussed earlier:
- Making a clickable login button.
- Making customers sign up or log in to complete a checkout.
- Asking customers to sign up or log in as soon as they land on your site.
Let’s look at how to set up each and their benefits.
Use Case #1: Making a Clickable Login Button
Placing a WooCommerce custom registration popup at the top navigation menu is one of the most common use cases for eCommerce websites. This allows users to click the login button on the navigation menu or anywhere else on your website and access their account with ease.
When users click the said link or button, a separate popup appears, asking them to log in or access their account. This is easy to set up and great for enhancing your users’ experience.
OptinMonster makes it easy for you to offer this login experience to your website users. First, log in to your OptinMonster account.
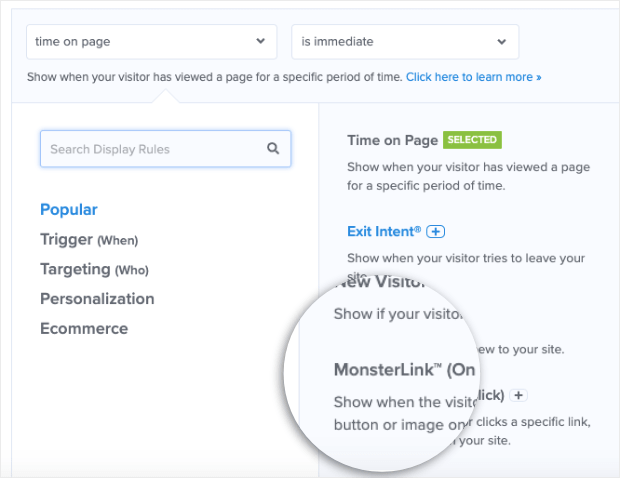
Head over to Display Rules at the top of your editor. You can find this at the top of your OptinMonster editor:

Change time on page to visitor clicked a MonsterLink™:
Copy the shareable MonsterLink™ code:

You now have an embeddable link that you can link to the login button and insert into your site’s navigation menu.
Never made a custom header navigational menu? No worries! Check out our tutorial on how to add a navigation menu in WordPress.
Use Case #2: Making Customers Sign up or Log in to Complete a Checkout
This scenario is useful when you want customers to create an account with your WooCommerce store or log in to the site before they can checkout.
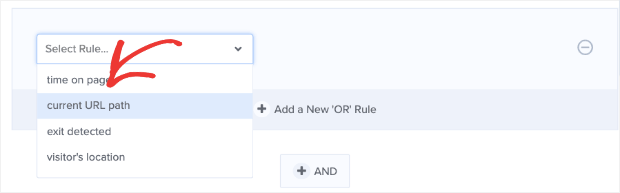
To enable this, go to Display Rules of your login popup campaign.
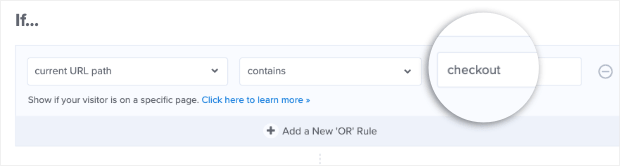
Change the first condition from time on page to current URL path:
In the next dropdown, change is any page to contains:
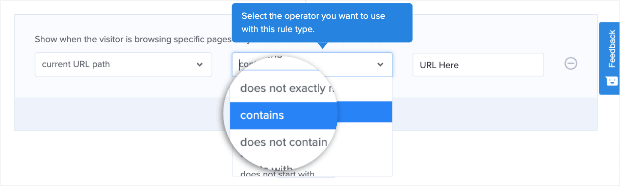
Finally, in the field box next to that, enter the word checkout:
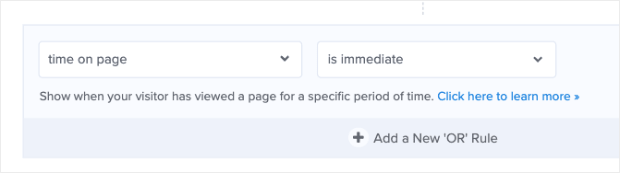
Next up, click Add a New Rule:

Configure the following condition: time on page + is immediate:
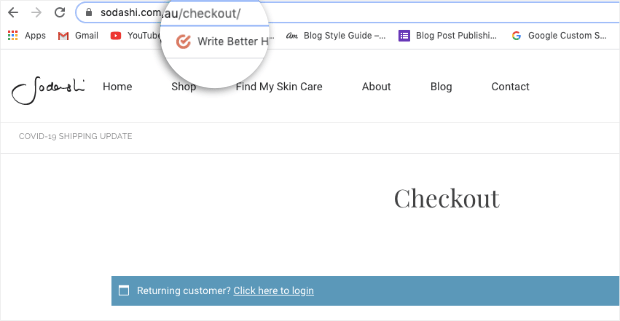
You’re doing this because WooCommerce checkout URLs follow the same structure. Whenever a buyer wants to check out on a WooCommerce site, the URL has the following syntax:
www.myonlinestore.com/checkout
The domain name will change depending on the WooCommerce store. But the URL slug always ends in checkout unless you customize it. Here’s an example:
With the display rule you’ve just set for your WooCommerce login redirect popup, customers will see a prompt to log into their account when they navigate to the checkout page.
This is a great way to improve user experience on your website.
If the users’ have shopped with you in the past, they can view their past billing and shipping information on the My Account page. This helps you create a smooth checkout experience for your customers and reduce shopping cart abandonment.
Use Case #3: Asking Customers to Sign up or Log in as Soon as They Land on Your Site
In some cases, you may want to give members the option to log into your WooCommerce product site when they land on your store. With OptinMonster, this is easy to set up.
Go to Display Rules and configure your first condition to look like this: current URL path > is any page.
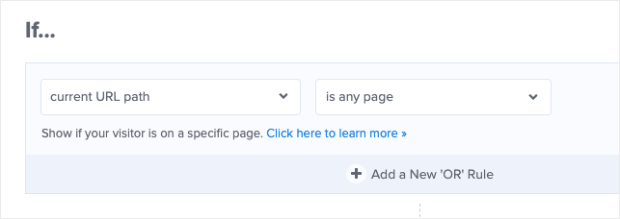
This will display your WooCommerce login popup to everyone who visits your site. New members can use the link on the popup to create a new account, while existing members can either log in or recover their passwords.
There’s one thing to be aware of. Users get annoyed when you repeatedly show them the same popup over and over again. To avoid this, you can set your second condition to visitor has not seen and campaign:
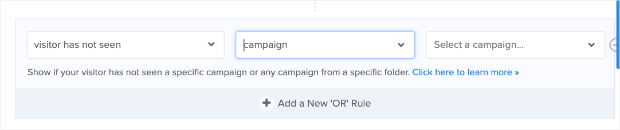
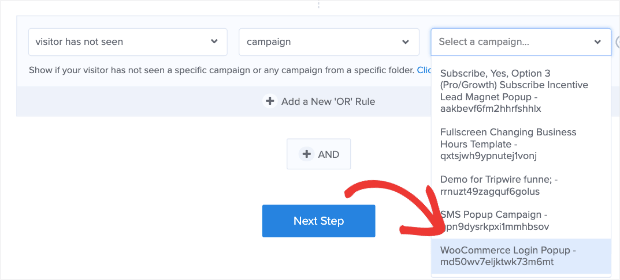
In the Select a campaign dropdown box, make sure you choose the WooCommerce login popup campaign that you’re currently working on:
Now, your WooCommerce users will only see this campaign once.
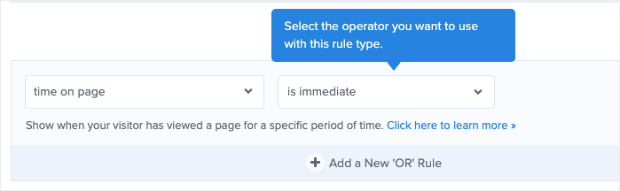
If you want to help customers save time on their checkout journey, create a final rule by clicking + AND:

Set your final rule to time on page + is immediate:
Now, users can log in to your store as soon as they land on your website. With this, they can add items to their shopping cart and move to checkout without having to sign in again.
Plus, everything moves faster when customers have their billing and shipping information already available to them.
There’s just one more thing to do. Go back to Display Rules in the navigation bar:
Under the rulesets, locate and click on the Done? Go to Actions button.

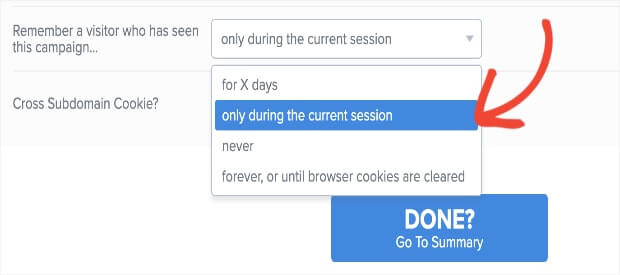
Change your Cookie Settings to on their next visit to the site for both users who have converted and not converted:
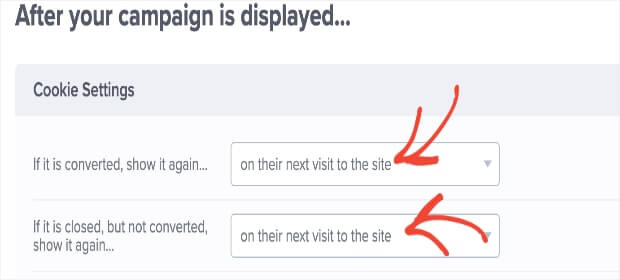
This ensures that your login page appears each time the same user visits your website. Thanks to the display rules we set earlier, they won’t see the same login popup twice during the same session.
However, there’s also a third option in the Cookie Settings: Remember a visitor who has seen this campaign. You can choose the option that you prefer from the dropdown. For this tutorial, we’ll go with only during the current session. This means anyone who visits the website will see the campaign again during their next session.
And that’s it! Well… almost. Now you just need to publish your campaign.
You now have a WooCommerce login page that you can use to enhance your users’ experience and reduce shopping cart abandonment:
Remember, we made a simple WooCommerce login page example today. You can customize these campaigns to reflect your brand’s style.
However, we only covered 3 use cases. You can use OptinMonster’s Display Rules to configure your WooCommerce signup popup to cater to multiple other use cases.
Next, Test Your WooCommerce Login Page
WooCommerce offers the functionality for its store owners and account admins to log in to their sites and shop as a customer. With this functionality, you can test the new WooCommerce login page you just created.
Let’s see how that works:
Step 1: Log in to your WooCommerce account.
Step 2: Download the .zip file from your WooCommerce account.

Once you download the plugin, it will generate a My Account page on your store. It will also generate a WooCommerce login shortcode [woocommerce_my_account].
Step 3: From the WordPress Admin dashboard, go to Plugins > Add New.
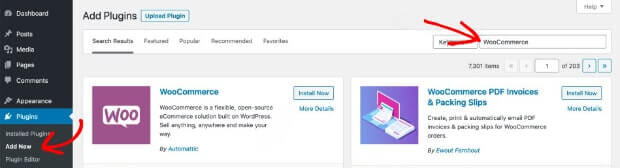
Step 4: Click Install Now and Activate the plugin.
Step 5: Once you finish installing and activating the plugin, you’ll see a new menu item in the WordPress Admin panel: WooCommerce > Settings > Shop as Customer.
Step 5: Check the Enable plugin settings option to finish the setup. You can also:
- Enable login as a customer feature
- Enable login history record
- Customize switch button text
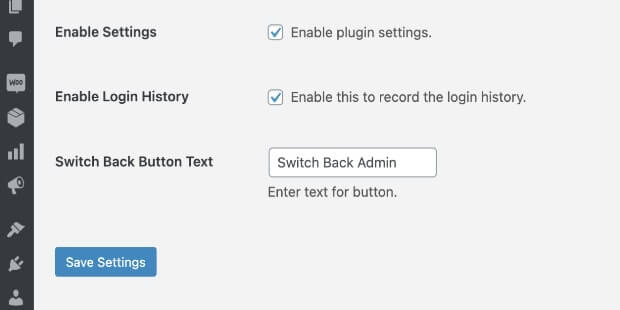
Click on Save Settings.
Step 6: Log out and log in again as an admin and visit your store’s frontend interface.
You should now see a new tab, Switch to Customer, in the admin console right under your profile picture. Click the option to show a popup that will allow you to log in as a customer.
Now you can test your WooCommerce login page and make changes to it for better customer experience!
We hope you enjoyed this article. If you did, you might also want to check out how to make your popup forms responsive.
You might also be interested in reading posts related to improving your WooCommerce store’s performance:
- How to Create a WooCommerce Popup to Cross-Sell
- 7 Ways to Boost Sales With a WooCommerce Popup
- How to Create a Popup Registration Form in WordPress
- 32 Best WooCommerce Plugins for Your Store (Most are FREE)
For more tutorials on the topic, check out our YouTube channel. We’ve got loads of videos that will teach you to drive traffic, boost conversions, and increase sales. Also, follow us on X (formerly Twitter) and Facebook to stay in touch through social media.
Interested in creating more than just a login page in WooCommerce? Join OptinMonster today to see how we can help skyrocket your conversions at every turn of your customers’ journey.
Disclosure: Our content is reader-supported. This means if you click on some of our links, then we may earn a commission. We only recommend products that we believe will add value to our readers.

-01 - OptinMonster")


Add a Comment