Are you getting traffic to your Shopify store that’s not converting well? Adding a countdown timer to your Shopify site can help you solve that problem.
A countdown timer is a clock displayed as a popup or a countdown timer bar to help online stores improve the conversion rate on a landing page. After you set up the countdown timer, the clock starts counting down from a specific date or time.
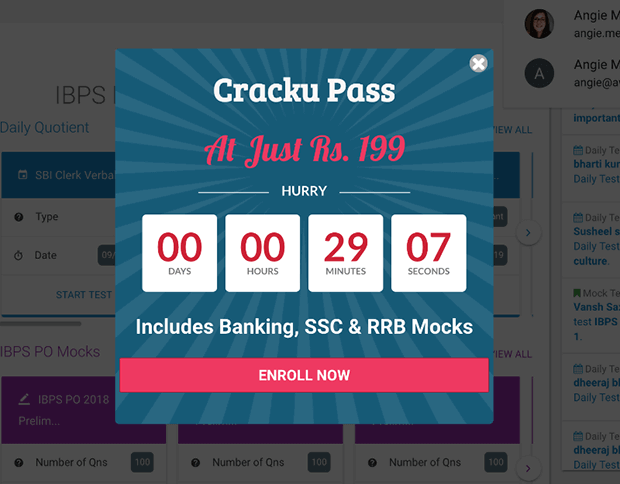
Urgency in marketing works because it evokes fear of missing out (FOMO) or loss aversion. Countdown timers are proven to get results. Cracku, an online coaching website for students, used countdown timers on its website to create limited-time offers and increased conversions by 300%.
Cracku came up with a discount offer and created a lightbox popup along with a countdown timer on their most popular course pages.
If you’re struggling to convert your website traffic into sales, placing a countdown timer on your site can help you optimize your eCommerce website for higher conversion.
In this article, we’re going to show you step-by-step how to add a countdown timer to Shopify websites to improve urgency-based conversions and boost sales. There are multiple ways for you to create countdown timers.
You can either install and use one of the many countdown timer apps available in the Shopify app store. Or you can use OptinMonster to easily create a countdown timer and get access to other powerful features such as:
- 100+ campaign templates
- Geo-Location Targeting
- Exit Intent® Technology
- Integrations with all major email marketing platforms
- A/B Testing
- Advanced campaign analytics
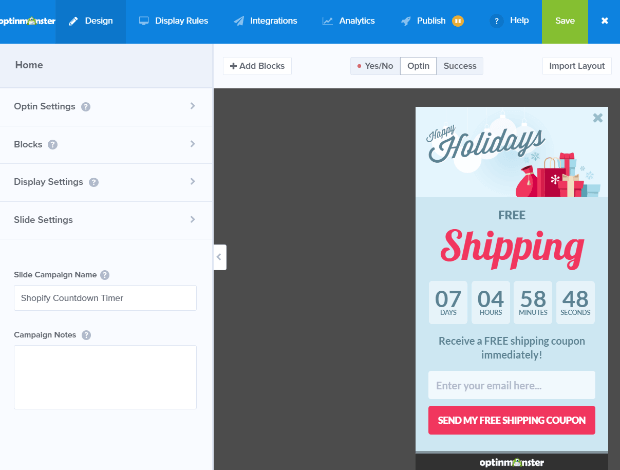
…and much more! For our tutorial today, we’ll focus on using OptinMonster to create a sample countdown timer campaign. Here’s how the countdown timer we’ll create today will look like:
How to Add Sales Countdown Timer to Your Shopify Store
For beginners, you’ll need to get OptinMonster so you can easily create this effective slide-in campaign. Make sure you sign up for the Pro Plan so that you can access the Countdown Timers from the Pro features.
Step 1: Create a New Campaign
Login to the OptinMonster dashboard and click on Create Campaign. This will start a new campaign for you.
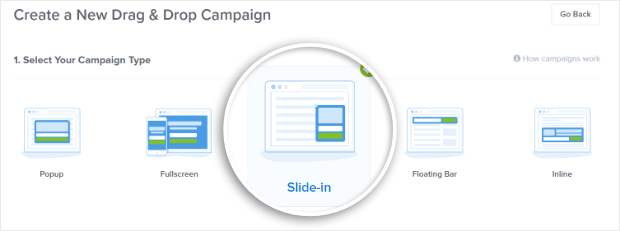
Step 2: Choose a Campaign Type
We’ll go with the Slide-in campaign because it will stay on your Shopify product page without interrupting your visitors.
It looks great on mobile devices too. For instance, if you want to display the countdown timer on your Shopify app, the Slide-in campaign is a great fit.
Step 3: Choose a Template
We’ll use the Holiday template since it has a built-in countdown timer. You can also go with Prime Day, Cyber Monday, Christmas Day, or Black Friday templates since they also have countdown timers built into them.
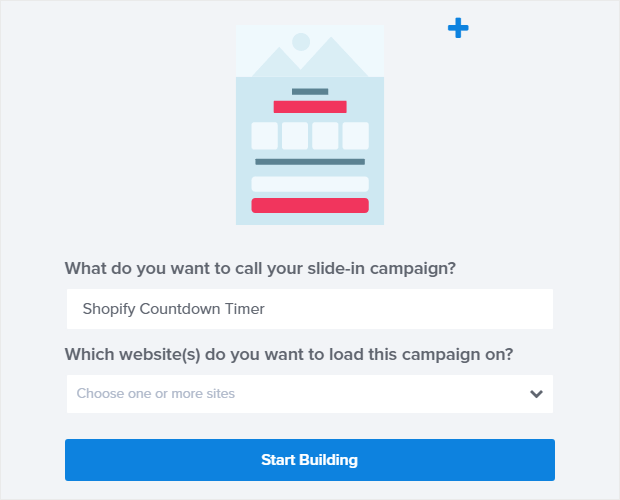
Step 4: Name Your Campaign
Add the website where you want to display the campaign. We’ll leave it blank for now. Don’t worry, we’ll show you how to publish your campaign to your Shopify homepage later in this tutorial.
Click on Start Building.
This will take you to the OptinMonster campaign builder where you’ll see the Holiday campaign template ready to be edited.
Step 5: Edit the Campaign
Start by changing the header to let you know the visitors about your offer. This can be a limited-time drop in pricing, free shipping during flash sales, or a special offer on a new product launch.
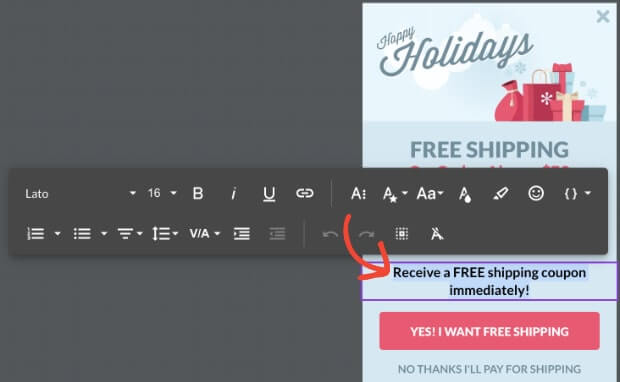
Click on the text you want to edit and write the new copy.
Double-click the desired text to change the font, size, and color, or to apply other formatting styles.
Edit the body text in the same way.
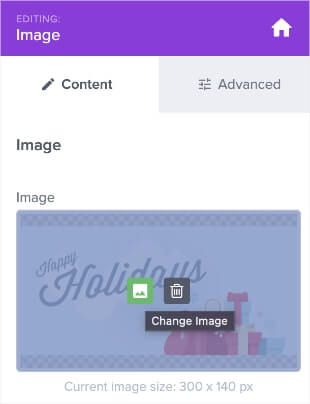
Click on the image area to replace the image with something suitable for your Shopify sale.
You can find suitable images by visiting one of the free image hosting sites. In our case, we’ll choose a stock image with gift boxes because it matches the free shipping message we have in the offer.
Save your campaign at regular intervals throughout this tutorial to make sure you don’t lose the edits you have made so far.
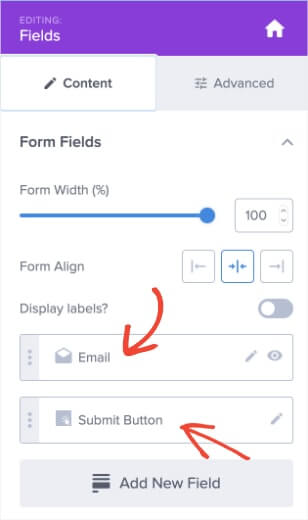
Back in the campaign editor, click on the email field. This will take you to the email Forms Fields section on the left.
You can edit the placeholder text here. For this tutorial, we’ll go with the default text.
You can do the same to edit the copy in your submit button.
Step 6: Set the Countdown Timing
Now it’s time to choose the timing for your sales countdown timer. Click on the countdown timer in the preview to bring up the editing tools.
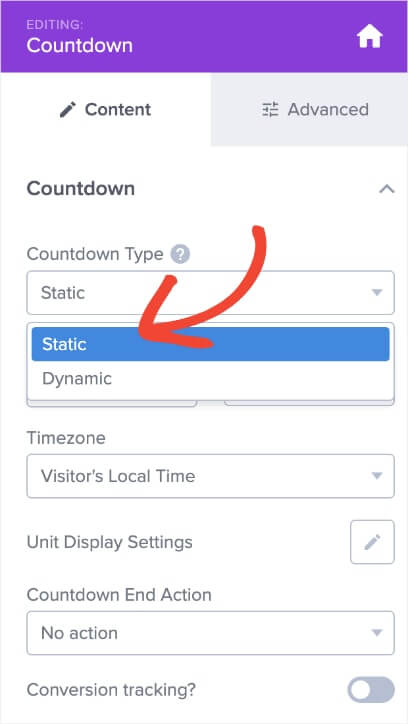
OptinMonster offers both a static and a dynamic timer. The static timer shows the same countdown for all visitors. The dynamic timer shows a customized countdown for each visitor, depending on their behavior on your site.
Since we want to show the same offer to all visitors, we’re going to use a static timer. To select the type of countdown type you want, click on the dropdown below Countdown Type.
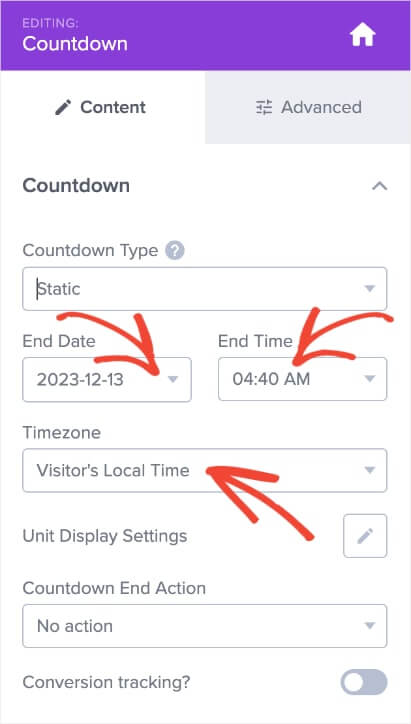
Set your countdown timer’s End Date by clicking the date to bring up a calendar. Do the same for the time. Then select the timezone and how you want the countdown time to display the remaining time.
Step 8: Set the Display Rules
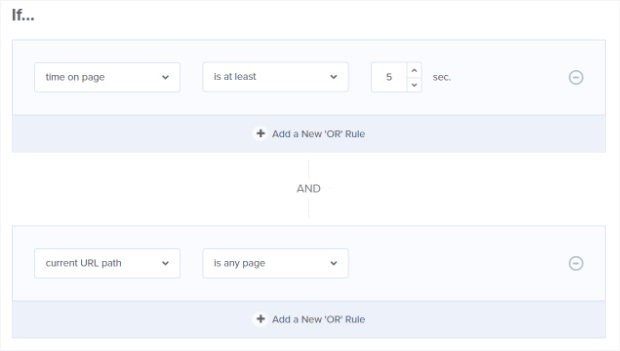
The next step is to choose when your sales countdown timer will appear. To do this, go to the Display Rules section of the OptinMonster campaign builder.
By default, the time on page condition is set to is at least 5 seconds and current URL path condition is set to is any page.
This means that all visitors will see your Shopify countdown timer after they’ve been on your eCommerce site for at least 5 seconds.
If you want the timer to display right away, you can set that timing to 0.
We’ll look at other display rules you can use later in this tutorial.
Step 9: Add Your Email Integration
This is important because getting your customers’ email addresses allows you to send them more offers in the future. To do this, you’ll need to integrate your email service provider with OptinMonster.
First, go to the Integrations tab on the top menu.
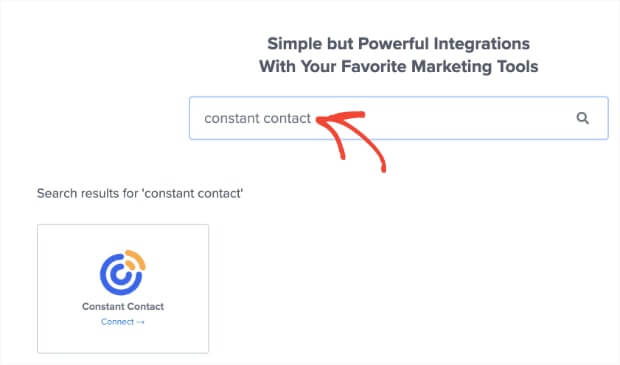
Type in the email marketing software you want to integrate with in the search box. For this tutorial, we’ll go with Constant Contact.
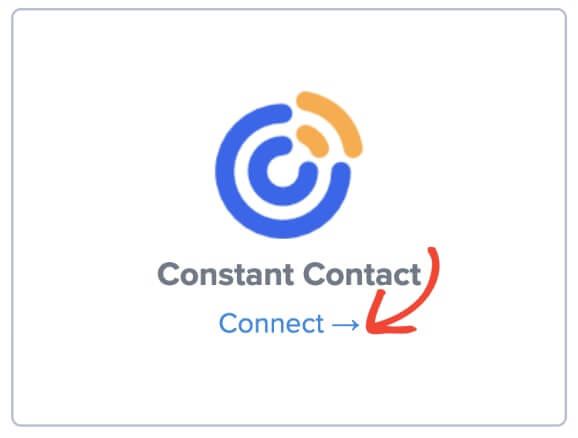
Click on the Connect link.
Click on Register Constant Contact to authorize your account.
We recommend you also fill in the Constant Contact Account Name field to give your integration a unique name. Example: Constant Contact Shopify Integration for Black Friday.
This helps you organize your integrations, especially when you register more than 1 account with the same email provider.
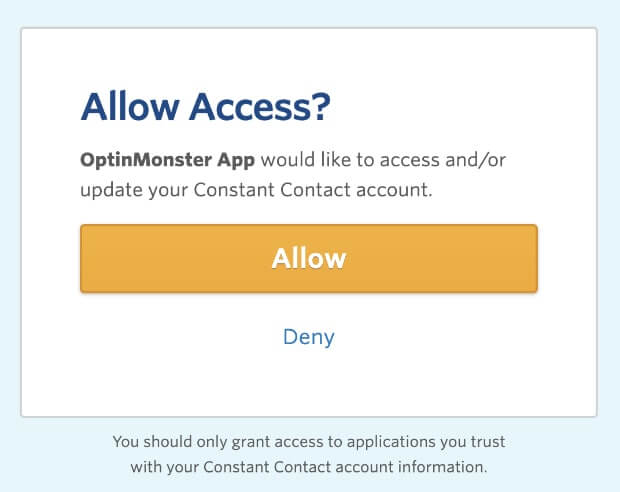
After you log in successfully, you’ll be asked to allow OptinMonster permission to connect to your Constant Contact account. Select Allow to grant permission.
With this, you’ll be able to send emails to visitors who submit their email addresses to your countdown timer campaign.
Need more guidance with Constant Contact integration? Here’s the full Constant Contact documentation. Connecting a different email service provider? Don’t worry, we integrate with all of them.
Step 10: Configure How You Want to Send the Offer
With OptinMonster, you have a couple of options for letting visitors to your eCommerce store take advantage of your sale.
Option 1: You can send your coupon by email as described above.
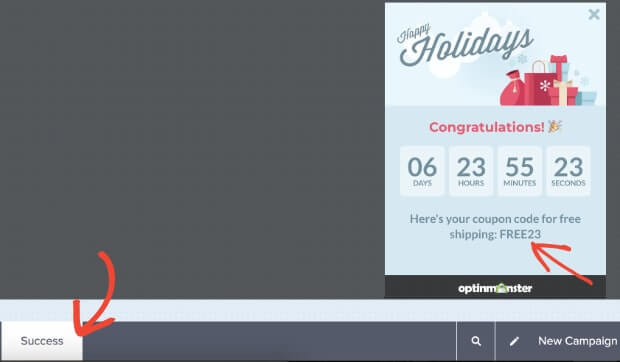
Option 2: You can go back to the Design tab to open the campaign editor. Click on the Success tab at the bottom of the page. Edit code to display the coupon code right after a visitor submits their email address.
You can learn more about improving sales with the right kind of coupon delivery in our Shopify email popup tutorial.
Step 11: Publish Your Campaign on Shopify
When you’re happy with your campaign, save it again and get ready to publish it on your Shopify store. You’ll need to link OptinMonster and Shopify first, as shown in the video below.
If you prefer written instructions, see our guide on how to integrate Shopify with OptinMonster.
Next, go to the Publish tab at the top navigation bar and choose the website you want to use your campaign on.
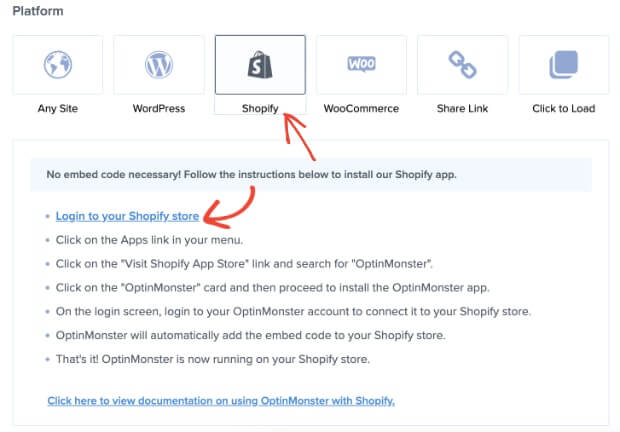
Alternatively, you can also log in to your Shopify website from the choices below to publish your campaign live.
In the Platform section, you’ll see a range of publishing options, including Shopify.
Other Ways to Get More Sales With OptinMonster
There are also other ways to do even more with OptinMonster and Shopify.
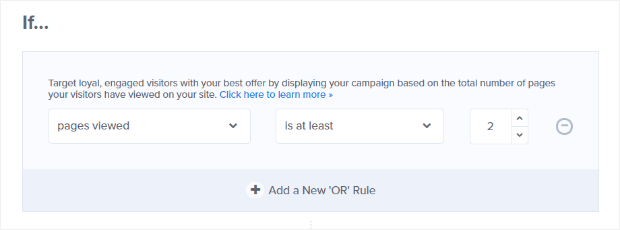
For example, since engaged visitors are more likely to buy, you can also make sure that only engaged visitors see your sales countdown timer. To that, go to Display Rules and set the condition pages viewed to is at least 2.
If you run a dropshipping eCommerce website that sells to different geographical markets, you can use geo-location targeting to show different offers to visitors in different regions. That’ll let you run more targeted campaigns that are even more likely to get the sales you want.
To enable this, go to Display Rules » If visitor’s location » select the operator you want from the dropdown, and then type the location you want to target in the box. Go through the validation process, then save and publish your campaign.
Learn more in our geo-marketing guide.
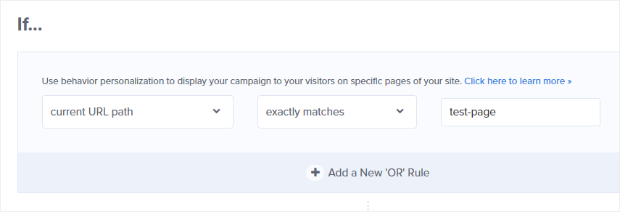
And you can use OptinMonster’s page-level targeting to show your offer only on your highest-converting pages. This makes it even more likely that visitors will buy.
To enable this, go to Display Rules » current URL path and select your operator. Then, enter your criteria in the text field.
You can also create campaigns that only appear during checkout so you can reduce abandoned carts in your Shopify store.
That’s it! Now you know how to add a Shopify countdown timer with OptinMonster.
To kick your Shopify sales into high gear, check out TrustPulse. With TrustPulse, you can leverage the power of social proof, which works really well next to the urgency of a countdown timer.
Adding TrustPulse to your site gives you an instant lift in site conversions by up to 15%.
Want even more? Learn how to create a Shopify announcement bar or boost your email list with a Shopify MailChimp signup form. You can also boost your website traffic with our guide to Shopify SEO.
Or, if you want to keep learning about countdown timers, you should check out the 8 best countdown timers for WordPress.
Not using OptinMonster yet? Get started so you can improve your Shopify sales today.
And follow us on YouTube, X, and Facebook for more Shopify tutorials and guides.












Add a Comment