When it comes to your Shopify store, are you actively strategizing to get the most revenue possible? Or are you like most people and blindly hoping your customers click through to checkout?
Unfortunately, we see people going the latter route all too often.
That’s why today, we want to teach you one specific strategy that boosts sales and will get your more revenue:
Using lightbox popups for Shopify to get more sales.
In this tutorial, we’ll be covering:
- What lightbox popups are and why you need to use them
- Why you should use OptinMonster to build your lightbox popup
- How to create a lightbox popup for Shopify
By the end of this article, you’ll have a new ace up your sleeve to get more leads, conversions, and sales.
Ok. Let’s do this thing…
What Are Lightbox Popups and Why You Should Use Them
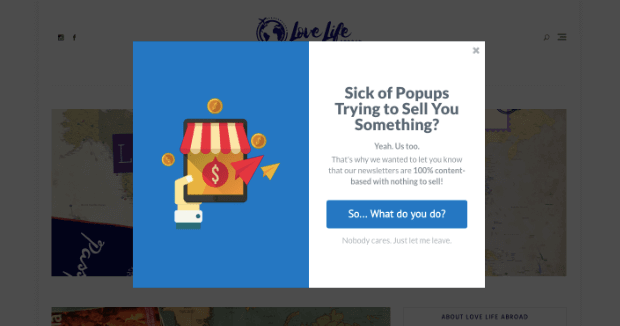
Lightbox popups are a specific type of popup that dim your site’s content to draw complete attention to your optin, campaign, or promotion.
Look at the following example:
The site’s content is still in the background so users don’t feel like they’ve been redirected to another site. However, the campaign is clearly at the forefront of their attention.
One powerful strategy is to combine lightbox popups with Exit-Intent® technology. That means that as users try to leave your site, they’ll get some kind of deal or promotion popup to keep them a little longer.
And if your value proposition is good enough, you may just get them to stay a lot longer.
Medstar Media started implementing exit-intent lightbox popups and watched their conversion rate increase by 500%.
The truth is that if you’re not using an exit popup on Shopify with Exit-Intent® technology, you’re missing out on one of your best chances to convert your store’s visitors into customers.
Because if there’s one thing we know for sure at OptinMonster, it’s that lightbox popups work when it comes to preventing people from leaving. Our customers have used our signature Exit-Intent® technology to:
Now, there are a lot of strategies to capture the attention of exiting visitors. But the best way is with a coupon.
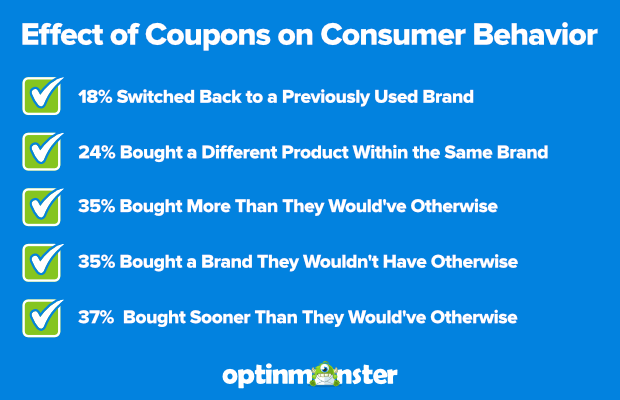
In fact, just last year, about 80% of consumers said that a coupon changes their shopping behavior in some way:
So, what does this mean for you? All good things.
It means that most shoppers will be willing to join your email list if there’s a discount waiting for them on the other side. And once they’ve subscribed, you’ll have more chances to work your magic on them with new email marketing campaigns.
But what’s more? You can put together your Shopify lightbox popup right now with OptinMonster in a matter of minutes.
Related ContentHow to Create a Popup Coupon that Boosts Sales (With OptinMonster!)
Why Use OptinMonster for an Exit Popup on Shopify
One good reason to use OptinMonster for your Shopify lightbox popup is that our advanced Exit-Intent® Technology will ensure visitors see your coupon just before they leave your site.
It’s the perfect time to grab their attention and persuade them to buy products they’ve already been browsing.
Related ContentIf you’re new to lightbox popups (or popups in general), you may want to read 40 Exit Popup Hacks That Will Grow Your Subscribers and Revenue.
OptinMonster can also help you:
- Target different coupons to different pages with Shopify-specific display rules, increasing the relevance of your offers and making sales more likely
- Stop annoying your visitors by making your Shopify email popups less intrusive with our timed display control and scroll trigger functions
- Create follow up campaigns with onsite retargeting to get more business from visitors
But here’s the best part: you don’t need any additional Shopify apps for popups, because OptinMonster already has a Shopify integration.
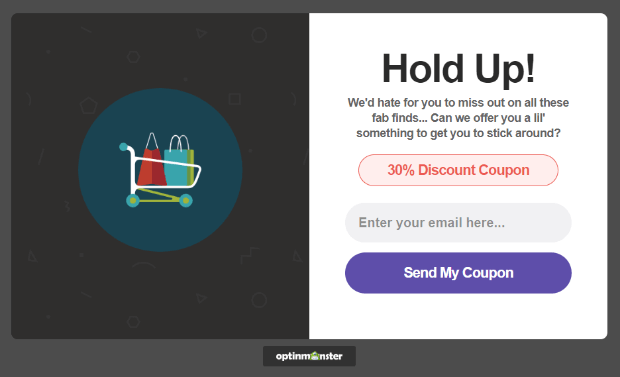
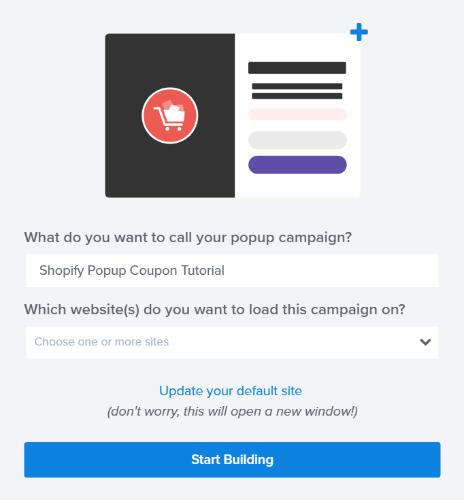
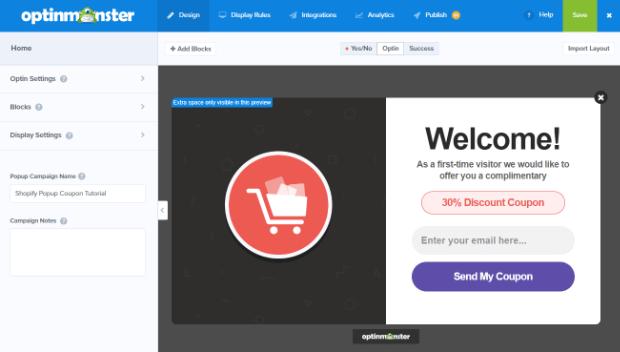
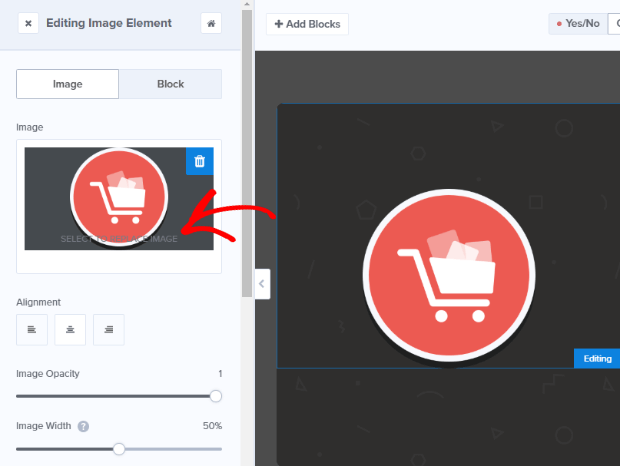
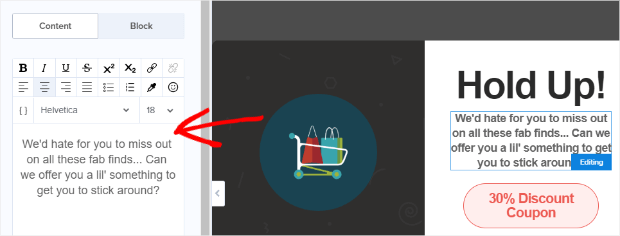
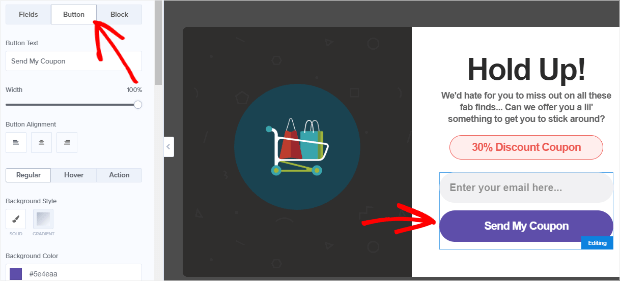
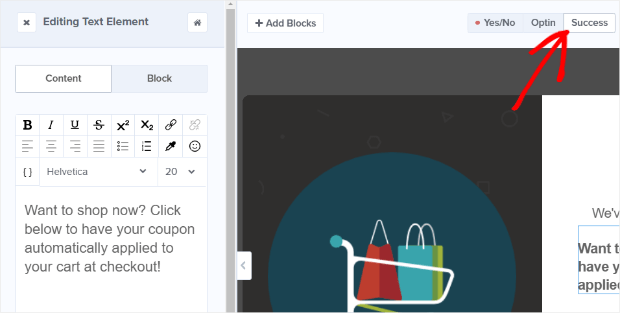
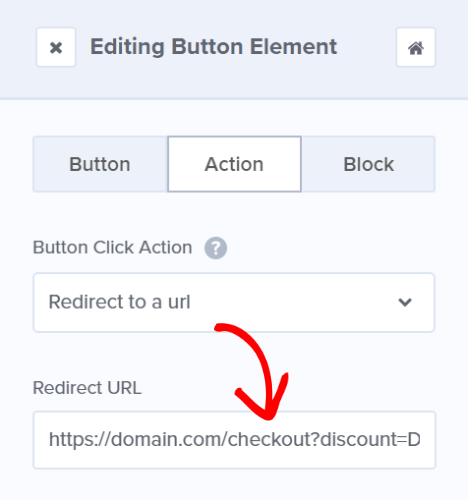
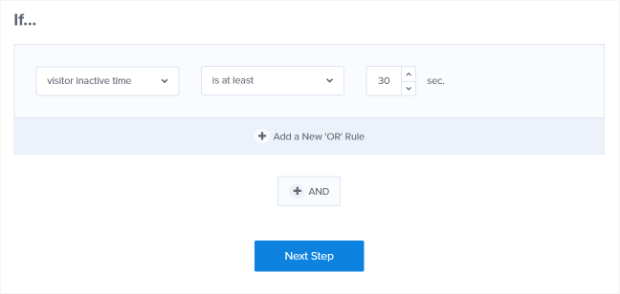
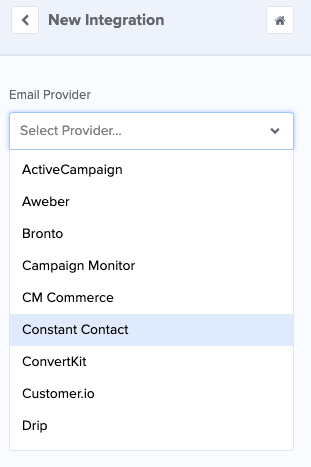
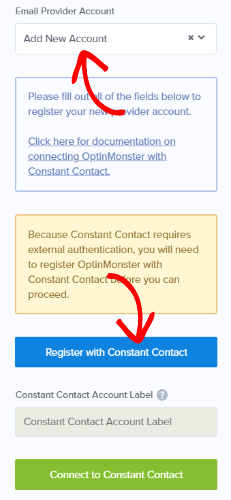
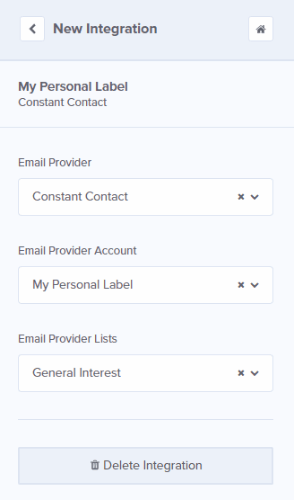
In this tutorial, we’ll show you how to create a lightbox popup for Shopify to offer a coupon that accomplishes two goals at once: Here’s how the final coupon will look: Let’s get building! Step 1. Create a Campaign First, you’ll need to get an OptinMonster Pro account if you don’t have one already. It has to be a Pro level account (or higher) if you want to use Exit-Intent®. And let’s be honest… you definitely want that. To get started creating your lightbox popup for Shopify, login to your OptinMonster dashboard and press the Create Campaign button: Choose a campaign type. We’ll use the Popup which, as you’ve seen from our case studies, has achieved high conversions for OptinMonster customers: Choose from one of our many pre-built templates. For this tutorial, we’ll use Checkout: Name your campaign, then press Start Building. You can select the website you’re going to use your coupon now, or add it later: Once you’ve named your campaign, you’ll be taken into OptinMonster’s drag and drop builder and see the default, professionally-designed campaign. Step 2. Edit the Campaign Now for the really fun part: it’s time to edit the campaign and make it your own. ? As you can see, the campaign could be used with very few changes as it is. What we’re going to do in this tutorial is to show you how to do basic edits to the campaign. But feel free to experiment on your own. As the youth say, you do you! First, we’re going to add some color to the image on the left of the popup. To do that, click directly on the image in the live preview to bring up the editing tools. If you need to find affordable images, check out our list of free image sites. Then, you can use a product image from your library or upload a new one: The default campaign includes a headline and body text. You’ll want to edit that to make it right for your store. You can edit text the same way you changed the image: simply click on the text you want to change on the live preview to bring up the editing tools on the left. Then, edit your text to your heart’s content! Make sure to regularly save your lightbox popup campaign by clicking on the Save button in the top right corner of the builder: If you want to change the look or wording on the submit button, click the button element on the live preview to bring up the editing tools. Then select the Button tab at the top of the left-hand side menu: Step 3. Set Up Coupon Delivery Once you have your optin set up the way you want it, you’ll head over to the Success view to set up coupon delivery. We recommend giving subscribers immediate access to the coupon code on the success view, as well as sending the coupon by email (in case they don’t purchase right away). You can edit and customize the success view the same way you did with the optin view, so go ahead and do that now. We’re also going to change the Button Click Action to Redirect to a url and add your Shopify coupon URL so it’s automatically applied when new subscribers go to your store. Step 4. Choose Display Rules Since we’re creating an Exit-Intent® lightbox popup for Shopify, we’re going to go to Display Rules and set a condition to If exit detected. Then select the level of sensitivity you want: Low, Medium or High. Most of our users simply keep the default Medium exit-intent® intensity. But you can play around with it to choose if you’d like to be more or less aggressive. You may also want to offer this coupon to engage visitors who haven’t interacted with your site but have left the window open. In that case, you can use the InactivitySensor™ (Seconds of Inactivity) rule in the same section: Step 5. Choose Your Email List As we mentioned, one of the benefits of creating a lightbox popup for Shopify is that you can collect emails and save them in OptinMonster using Monster Leads. That’s why we also recommend that you connect OptinMonster to your email service provider. For example, here’s how you integrate Constant Contact. Go to your OptinMonster campaign editor and click Integrations » Add New Integration: Then choose an Email Provider from the dropdown list. For this tutorial, we’ll choose Constant Contact: If this is your first time using Constant Contact, you’ll need to select Add New Account from the new Email Provider Account dropdown that appears. Then, click Register with Constant Contact: Otherwise, choose the account you want and click Connect to Constant Contact then select the list you want to use: Step 6. Publish the Campaign to Shopify You’ll publish your campaign from the Publish tab, but you’ll first need to link OptinMonster and Shopify using our easy-to-follow Shopify integration instructions. For a more detailed tutorial, check out the video below. Now, change the Status of your lightbox popup for Shopify from Paused to Live and save your campaign: That’s it! Now you have a lightbox popup for Shopify that can: Pretty cool, right? Once you master the lightbox popup for Shopify, you may want to expand your knowledge even more. We suggest you learn how to boost your revenue with an in-cart upsell popup or skyrocket traffic to your store with key Shopify SEO techniques. These strategies have been super helpful for our clients who use Shopify. Also, if you’re really looking to increase trust, conversion rates, and sales, check out TrustPulse. TrustPulse leverages the power of social proof so you see an immediate boost of up to 15% in every conversion behavior on your site! And don’t forget to follow us on YouTube, Twitter, and Facebook for more killer tutorials and in-depth guides. But wait… did you read this entire post without signing up for OptinMonster? How silly. Don’t wait, and join the OptinMonster family today!How to Create a Lightbox Popup for Shopify








Add a Comment