Are you looking to show or hide campaigns to visitors in specific physical locations? OptinMonster makes it easy to target campaigns to visitors who are physically located in a specific region, from as big as a country to as small as a particular city. Highly targeted campaigns yield higher conversions over non-targeted, general campaigns.
In this article, you’ll learn how to target campaigns to a location using the Geo-Location rule.
Before you start, this feature requires a Growth subscription.
The Geo-Location Display Rule determines the visitor’s physical location based on their device’s IP Address.
Configure Geo-Location Rule
Geo-Location Targeting allows you to personalize your campaigns based on your visitor’s location.
To add Geo-Location Targeting to any campaign, follow these steps:
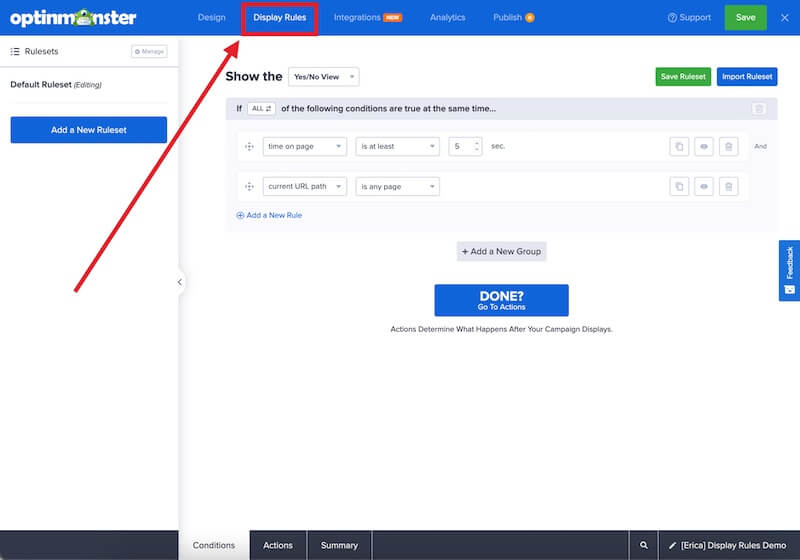
- Navigate to the Display Rules view in the campaign builder.
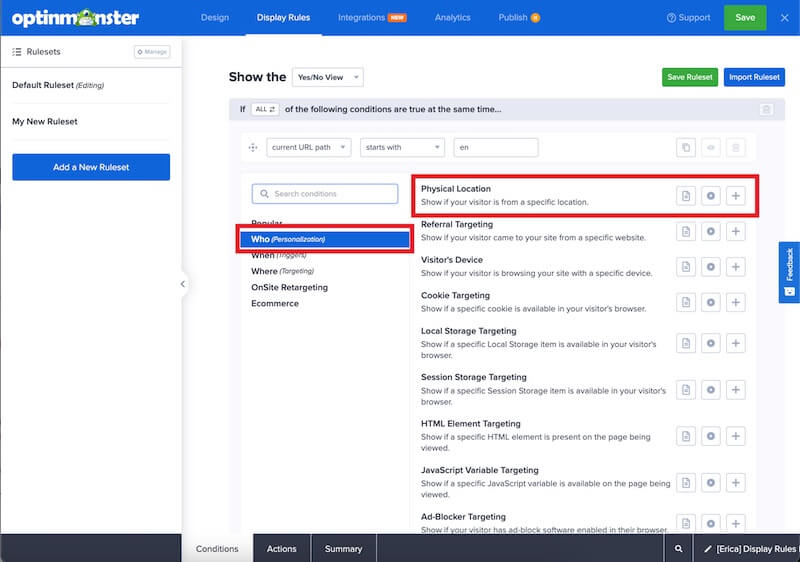
- Next, when adding or editing a rule select Who (Personalization) from the left-hand list and select the Physical Location option.
- You’ll be provided a dropdown operator field, and a text field to enter the name of the location you wish to target.
The following options are available for Physical Location:- is
- is not
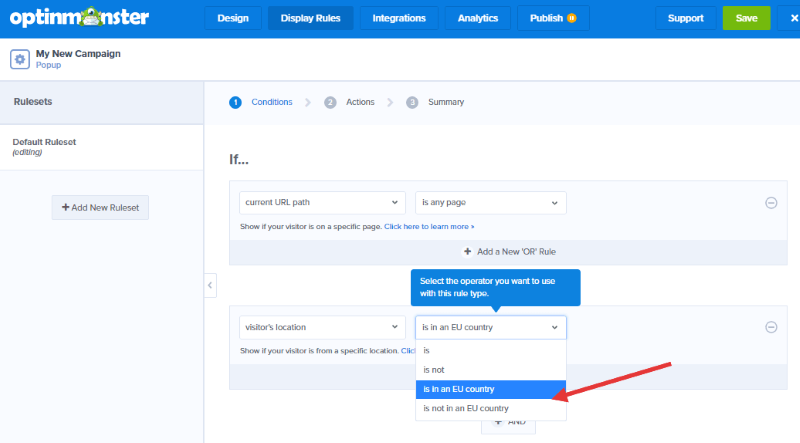
- is in the European Union
- is not in the European Union
- Type the name of the location you want to target and select the Validate button.
- A popup modal will appear on the screen providing possible matches to the name of the location you entered. Select the [+] icon for the location you wish to confirm.
- Confirmed locations can be easily identified by the blue check icon to the right.
- When you are finished, Save the campaign.
Testing
Once you’ve configured Geo-Location you’ll want to test the appearance of your campaign.
If you are not physically located where your campaign is configured to appear, you can fake the location by modifying the URL of the page you visit on your site.
To do this, add the following query argument to the end of the URL you are testing: ?omip=IP_ADDRESS
Replace IP_ADDRESS with an IP Address that matches the physical location you want to test.
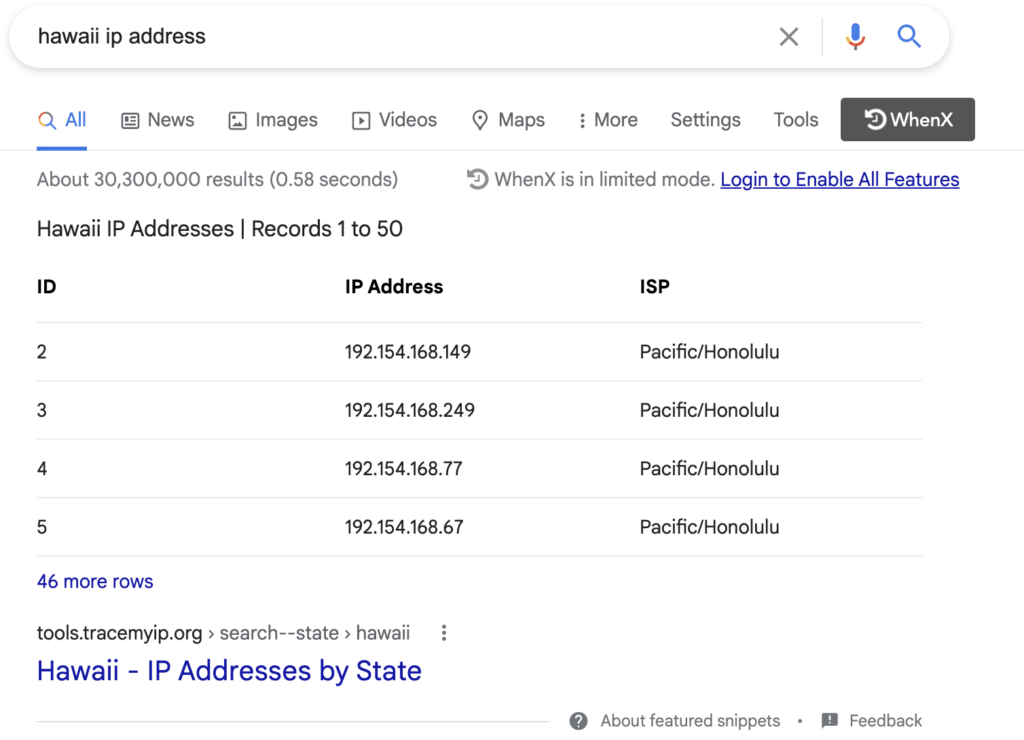
For example, if I wanted to test the appearance of a campaign for visitors physically located in Hawaii, the URL modification might look like this:
https://optinmonster.com?omip=192.154.168.149
If the URL you are testing already contains query arguments, you’ll append this argument using an ampersand. For example, https://optinmonster.com?utm_source=email&omip=IP_ADDRESS
How can I find an IP Address for the physical location I want to test?
Using your preferred search engine, use the term “LOCATION ip address” replacing ‘LOCATION’ with the name of the physical location you are testing.

Can I target only EU countries (GDPR)?
Yes, you can include or exclude a campaign from appearing to visitors located in countries that are members of the EU (those who are protected by GDPR).
If you’re serious about jumpstarting your website business growth, then get started with OptinMonster today!
Get Started With OptinMonster Today!BONUS: Done-For-You Campaign Setup ($297 value)
Our conversion experts will design 1 free campaign for you to get maximum results – absolutely FREE!
Click here to get started →
Troubleshooting
Why aren’t my location rules working as expected?
Be certain each Physical Location rule you’ve added to the campaign has been validated. You can quickly identify any rule which has not been validated by the missing blue check icon:


