
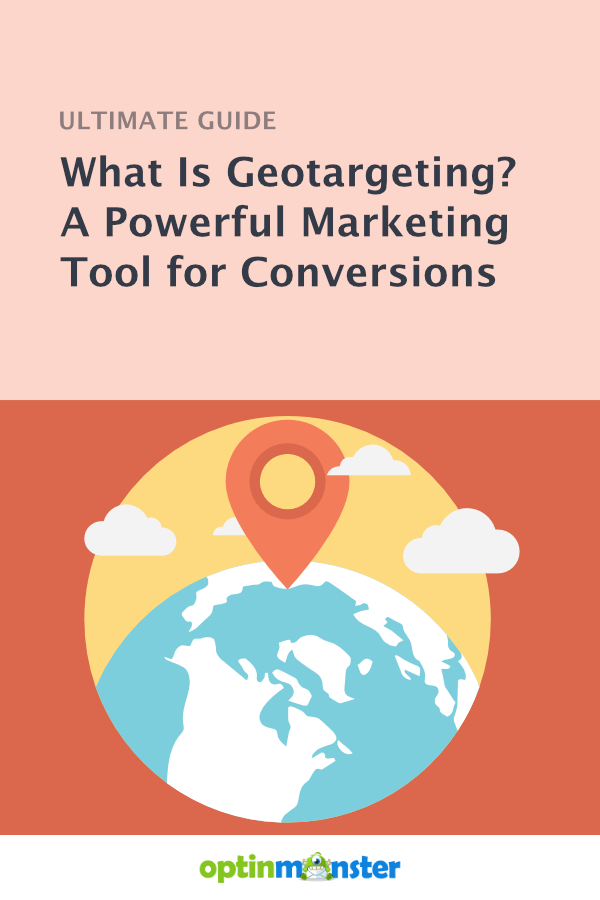
What Is Geotargeting? A Powerful Marketing Tool for Conversions
Last updated on
by

Do you know you can increase your conversions by up to 400% with geotargeting?
Geolocation targeting is an incredibly effective way to reach the right people at the right time with the right message. In fact, 9 out of 10 marketers see higher sales when they customize their marketing based on users’ specific location.
In this article, we’ll explain what geotargeting is and explore how you can increase conversions with geolocation marketing.
What Is Geotargeting and How Does It Work?
Geotargeting is a marketing tool that lets you personalize your ads, popups, and content based on the user’s geographic location.
Geotargeting works by using IP addresses, GPS, Wi-Fi, and other data to display your content in the specific locations you have chosen.
For instance, you can show an advertisement only to people living in a particular country, state, or city. Alternatively, you can exclude certain locations from your marketing campaign.
Think about the experience of visiting a new city. As you use your mobile device to search for nearby restaurants and businesses, your phone may prompt you to turn on location services.

Once you give Google, or whatever site or app you’re using, access to your precise location, your search engine results and ads immediately become customized to your current location. This lets you quickly find stores and businesses to visit on your trip.
Geotargeting makes that possible.
Here are a few examples of geo-targeting marketing strategies that you probably see regularly:
- Google Ads that display only to users near a business’s physical location.
- Facebook ads that target social media users within a physical radius of a concert or event.
- Job postings on sites like Indeed that target candidates in certain states.
- Real estate emails that notify subscribers of the latest listings in their area.
- eCommerce popups that are personalized based on the climates of different regions.
Now, let’s dive into an overview of all the fantastic benefits of geolocation marketing.
5 Amazing Benefits of Geotargeting
Location-based digital marketing is pivotal for generating leads and converting them into sales. Why? Because the best marketing is personalized marketing.
That’s why geotargeting’s primary advantage is its ability to personalize the user experience. Each of us sees dozens, if not hundreds, of websites and ads daily. Location-based marketing allows you to catch users’ attention with targeted messages.
Here are a few of the top benefits of using geotargeting in your marketing efforts.
1. Give Customers the Personalization They Want
Whether it’s a Facebook ad or an email signup form on your website, users are more likely to click on content that’s relevant to them.
In fact, targeted marketing is what users want and expect!
71% of consumers expect personalization in the communications and product offers they receive from brands.
And in a survey of U.S. adults, 79% said they have location sharing activated on their mobile devices at least some of the time. Whether a user is browsing the internet from home or on the go, geo-location lets them find what they’re looking for.
Let’s look at an example of how you can geotarget your eCommerce popups based on climate.
For instance, the Northern and Southern hemispheres have reversed seasons. A January campaign in Australia might look like this:

But for your customers in Canada, January is the middle of winter. They would have very different clothing needs. So you’d want to show them a popup that looks like this instead:

With geotargeting, you can create both of these popups but only show the relevant one to your customers.
2. Increase Your Conversion Rates (61% are More Likely to Buy!)
Geotargeted marketing converts more users into new customers. It helps you reach your target audience and show them the offers they’re most interested in.
For instance, 61% of smartphone users report that they’re more likely to buy from eCommerce sites and apps if the content is customized to their geolocation.
When you use location data to make the best offer to your customers, your conversion rates will soar.
3. Get More Foot Traffic and Sales at Your Physical Business
74% of consumers regularly use Google Search and Google Maps to find nearby businesses. Over half of those users plan to make a purchase within 72 hours of completing that local search.
Geotargeting ensures that your ads appear on these highly-motivated users’ screens.
You can also use your own website to drive in-person sales at your local business. For businesses with multiple storefronts, you can use location data to notify website visitors about special deals near them.
The popup example below informs users about a discount available at locations in Northern California. You would geotarget this message only to users in that region.

4. Get Higher ROI on Your Marketing Budget
Google Ads and other pay-per-click (PPC) marketing campaigns are a wise investment. You can optimize their effectiveness further by targeting your ads to the right location demographics.
Earlier, we discussed customizing your on-site offers based on the user’s climate. The same idea is even more important for your paid ads.
You wouldn’t want to waste money by showing an ad for winter coats to people in tropical climates. Instead, you should show those users an ad for sunglasses, perhaps. Your geotargeted ads for winter coats should display in locations currently experiencing cold weather.
Geotargeting gives you greater control to filter out users who might not be the right fit for your ads. Doing so improves your customer acquisition cost (CAC) and the overall return on investment (ROI) for your ad spend.
5. Improve Your Email Marketing with Location-Segmented Lists
Geotargeting is also essential to your email marketing strategy. No one wants their inbox to be full of irrelevant messages. Location targeting lets you send subscribers only the offers available in their area.
If that sounds difficult, it doesn’t have to be! When you use OptinMonster’s email signup forms, we collect that vital location data from all your new subscribers.
Using this data, you can segment your email lists based on users’ location. Then, you can customize your email marketing campaigns based on where each subscriber lives. This allows you to send users the most relevant offers and information.
Now that you have an overview of the benefits of geotargeting, we’ll show you the basic steps for getting started.
How to Get Started with Geotargeting (With or Without an Ad Budget!)
As you’ve seen, geotargeting can transform your digital marketing. You can take advantage of these benefits regardless of your marketing budget.
Are you a large company with a significant budget for digital advertising? If so, you can use geolocation to make the most of your ad spend.
Small and mid-sized businesses often spend anywhere between $12,000 to $120,000 on Google ads per year.
However, if you’re a small business or nonprofit, you may not have this kind of money to run multiple ad campaigns geotargeted to different locations. That’s okay, too! You can still use geotargeting to increase conversations and revenue.
For a fraction of the cost, you can sign up for OptinMonster’s Growth plan. Our lead generation software lets you apply geotargeting throughout your website, ensuring your messages reach the right people.
Regardless of your advertising budget, we’re here to help.
Below, you’ll find step-by-step instructions on how you can start using geolocation marketing.
We’ll share steps for 2 types of location-based marketing: paid advertising through Google Ads and onsite popup offers with OptinMonster.
Create Sales-Driving Google Ad Campaigns Using Geolocation (in 3 Easy Steps)
Google Ads is one of the best advertising platforms for geotargeting. These PPC ads display on search results pages and the millions of websites that use Google AdSense for revenue.
Below is an example of a Google search for “hiking boots.” There are 2 sponsored ads listed above the organic search results.

Additionally, Google Display Ads are the banner and sidebar ads you see on websites as you browse online. Below is an example of a Google Display Ad on a blog post.

These ads can be displayed to anyone using the internet around the world. Therefore, geotargeting is essential for narrowing the audience for these PPC campaigns.
Here are the 3 basic steps to targeting your Google Ads to a specific location.
Step 1: Navigate to Location Signals Settings
As you create your Google Ad campaign, you can choose the location targeting for your ad.
When you reach the Select Signals part of the campaign creation process, you’ll see the geotargeting options.

Near the bottom of this page, Locations will be listed. Click the pencil icon to the right to edit your locations for geotargeting.

Step 2: Choose Your Location
After you have clicked the pencil icon, select the Enter another location option. Start typing in a city, state, country, or other specific location.

Beside the locations in the search matches, you’ll see the potential Reach, as well as 3 options:
- Target: Choose this to use the location for your geotargeting advertising.
- Exclude: Choose this to ensure your ad does not display in this location.
- Nearby: Choose this to see more nearby location options.
Select the option that works best for your geotargeting campaign.
Step 3: Finalize Your Geotargeting Choices
Repeat step 2 until you have included and excluded all target locations. Once you’ve finished, you’re ready to finish creating and confirming your Google Ad.
And it’s as simple as that! Using these easy steps, you can geotarget your Google Ads so they display in the correct specific locations. Here are a few questions to consider when choosing your targeted areas:
- Where are your brick-and-mortar stores located?
- If you’re in a travel destination, where might visitors travel from?
- Are there regions where you want to build brand awareness?
- Are there locations you don’t ship to and should exclude from your ads?
Of course, Google Ads are just 1 way to use geotargeting in your advertising strategy. Regardless of whether you run paid ad campaigns, you can still use geolocation for your website popups.
Create Geotargeted Popups to Boost Conversions (in 3 Easy Steps)
Once you’ve attracted potential customers to your website, what’s next? For users already on your site, you should focus on improving conversions, sales, and subscribers. You can accomplish these goals by showing users personalized popups based on location.
Here are a few ways that popups can help your business reach its goals:
- They reduce cart abandonment.
- They help build your email list.
- They suggest upgrades and similar products.
- They show relevant content to keep people on your site.
No matter your goal, location targeting can improve the effectiveness of your popup campaigns.
For instance, the popup example below is from the Jewish content website Aish.com. This message was about an initiative in New Jersey, so Aish used geotargeting to display this message only to website visitors in that state.

Because of its precise targeting, the campaign had a strong conversion rate of 5.15%.
This popup is just 1 example of how websites can use geotargeting to display their messages to the right people.
Thankfully, OptinMonster makes it easy to create great-looking popups. And it lets you target your campaigns to the people most interested in your offers.
Here’s how to get started with geo-targeting a website popup with OptinMonster.
Step 1. Create a Campaign
Once you have signed up for OptinMonster, you’ll be ready to create a campaign. A campaign is any popup that displays on your website under certain conditions.
In your Account Dashboard, click Create a New Campaign in the top right corner.

For step-by-step instructions, check out our guide to creating your first campaign.
There, you’ll learn how to create these types of campaigns:
- Lightbox Popup
- Fullscreen
- Floating Bar
- Inline
- Slide-In
- Gamified
Our pre-made templates and drag-and-drop builder make it easy to design a beautiful popup.
Once you have designed your campaign, you’ll be ready to choose your geolocation targeting in the Display Rules.
Step 2. Navigate to Physical Location Display Rules
After designing your campaign, choose the Display Rules tab in the top navigation bar.

Under Display Rules, you’ll select the trigger conditions that will cause your campaign to display to a website visitor. OptinMonster offers dozens of condition options that include:
- Exit-Intent®
- Time spent on a page
- Percentage of the page scrolled
- How the visitor navigated to your site
- Whether the user is a first-time visitor
But for today, we’ll focus on the Physical Location condition.
To find this condition option, simply type location into the search bar. Then, choose the Physical Location option to the right.

Step 3: Choose Your Locations for Geotargeting
After you have selected Physical Location as your trigger condition, you’ll see Visitor’s Location listed as your chosen condition. To the right, click the drop-down menu to select is or is not.
If you choose is, your campaign will display only to users in that location. If you choose is not, users in that location will be excluded from your campaign.

In the Enter a location text box, type in the city, state, or country you want to target or exclude. Then click the Validate button.

When you click Validate, you’ll see a popup labeled Select a Location. Click the plus sign to add the desired location to your campaign.

And that’s it! You’ve now placed your first geotargeting condition on your campaign. You can add more rules that target or exclude more locations, or you can add OptinMonster’s other targeting options.
Once you’re happy with your campaign’s design and display rules, click the Publish tab in the top navigation bar to go live with your popup campaign!

2 Real-Life Examples of Successful Geotargeting
Now that you know how to start using geotargeting, we’ll share some success stories to give you even more inspiration.
These case studies show how smart geolocation marketing can transform a business. We’ll focus on 2 areas of growth: email subscribers and sales conversions.
Libratone Increased New Email Signups by 400%

Who is Libratone? Libratone is a multilingual eCommerce company that sells high-quality wireless speakers.
What Was Libratone’s Goal? The company wanted to find a flexible and robust popup tool to improve lead generation. They needed to customize their popups for users in the 27 countries who visit their site.
How Did They Use Geotargeting? Libratone chose OptinMonster because of our unparalleled targeting features. Using OptinMonster’s geolocation tools, they created email signup popups that display in the language of each user’s country.
For each of the 27 countries bringing traffic to their site, they created 3 types of campaigns:
- Lightbox popup
- Slide-in popup
- Mobile-only popup
Using OptinMonster, Libratone easily created 81 different email signup campaigns. Geotargeting ensures that each website visitor sees the company’s popups in their own language.
What Were the Results? Libratone’s rate of new email subscribers grew by 400%. The company went from gaining 20 new subscribers each week to adding 100 each week.
Read the full case study to learn more about how Libratone grew their email list using OptinMonster.
Skates.co.uk Gained £2000 in Daily Sales

Who Is Skates.co.uk? Skates.co.uk is a family-owned eCommerce site based in England. They focus on all types of skating: skateboarding, roller skating, ice skating, and more.
What Was Skates.co.uk’s Goal? The company wanted to reduce cart abandonment. They also wanted to lower the overall percentage of users who left their site without making a purchase.
How Did They Use Geotargeting? As a company based in England, Skates.co.uk offers fast shipping to certain countries. Using OptinMonster’s geotargeting features, the company created a popup for each country they could quickly ship to.
Each popup offered a coupon code for 5% off. However, the company customized each popup campaign to show the average shipping time for that country.
What Were the Results? Shipping times are always important to consumers and are particularly vital during the holidays. During that holiday season, Skates.co.uk’s daily sales increased by £2000. They also converted as many as 39% of geo-targeted visitors.
Amazingly, they accomplished all this through geotargeted popups on their own website. These popups let website visitors know their orders would arrive in time for the holidays. This reassurance turned more users into customers.
Read the full case study to learn more about how Skates.co.uk increased their sales using OptinMonster.
Clever Ways to Use Geotargeting That Will Drive Conversions
So far, you’ve learned the meaning of geotargeting and its benefits. You’ve also read step-by-step tutorials and success stories. Before you get started using this tool for your business, let’s review a few of the many ways you can use online geotargeting to boost conversions:
- Skyrocket your email list with location-specific offers.
- Show international customers content in their preferred language and currency.
- Display deals for country-specific holidays.
- Test a new product or service locally before making a larger launch.
- Increase foot traffic by showing in-store offers to users near your physical stores.
- Offer same-day delivery or fast shipping for people in different locations, like the example below.

In the above example, sportswear brand Sportique used geotargeting to offer same-day delivery. This popup displayed only to customers in the San Francisco Bay Area, where the company offered delivery through UberRUSH.
Using geolocation data, Sportique notified local customers about this exciting delivery option. And by excluding users in other locations, they avoided frustrating users by showing an offer they couldn’t use.
These are just a few examples of using location data in your marketing. No matter what type of business you run, geotargeting is a powerful tool to help you boost your conversions.
FAQs
What Is the Difference between Geofencing and Geotargeting?
If you’re researching geolocation marketing, you may have also seen the term geofencing.
With geofencing, your marketing displays to anyone within a virtual barrier. All users with an IP address within that barrier will see your ads.
Geotargeting allows for more precision. You can choose multiple specific areas to include in your marketing and exclude any locations you’d like.
How Can I Use Geotargeting for GDPR Compliance?
If you serve users in the European Union, geotargeting can keep your site GDPR compliant. OptinMonster offers an easy EU targeting option to show your data consent boxes to all EU users.

Can I Use Location Targeting to Get More Reviews for My Business?
Do you run a physical store or restaurant? If so, getting positive reviews on 3rd-party platforms like Google My Business or Yelp is vital.
With OptinMonster, you can create campaigns to invite people in your area to leave you positive reviews on these 3rd-party sites. To sweeten the deal, offer a free coupon or discount for your products and services.

Can I Combine Geolocation with Other Targeting Strategies?
Location is important, but it isn’t everything. Thousands or millions of people live in any given city, state, or country. Therefore, you should consider visitors’ other behaviors and attributes, so you can craft truly personalized content.
With OptinMonster, you can combine geotargeting with other advanced targeting rules like page-level targeting, exit-intent technology®, and device-based targeting. When you combine these tools, your marketing will become even more precise and effective.
Are There Other Ways to Geotarget My Website Popups?
Yes! You can use OptinMonster’s Smart Tags to personalize your popups based on geographic location. With Smart Tags, you can create 1 campaign with a broad audience and use tags to customize your message for different areas.

In the example above, this popup could display to all users within the United States. However, the state name will change based on the user’s location.
Learn how to use this geotargeting tool in our how-to guide for OptinMonster Smart Tags.
Watch Your Sales Soar with Geotargeting!
Geotargeting is one of the most powerful tools for increasing your sales, conversions, and email subscribers. By targeting the right people, you can get a higher return on your company’s time and money.
The benefits of geotargeting are practically endless, and you can use OptinMonster to apply geolocation targeting throughout your website.
Use our guide to email popup best practices to learn more ways to generate leads.
Want to learn more about OptinMonster? Check out our Features Page to explore how our premium lead generation software can help your business grow.
And if you’re ready to start geotargeting, sign up for OptinMonster today at the Growth level to unlock our geolocation targeting features.
Disclosure: Our content is reader-supported. This means if you click on some of our links, then we may earn a commission. We only recommend products that we believe will add value to our readers.

-01 - OptinMonster")


Add a Comment