Are you trying to figure out how to trigger a popup form on a button click but not sure the best way to do it?
Making a popup that appears on the click of a button can be a powerful way to boost conversions. But if you’re not a professional coder, it can be complicated to set this trigger up.
That’s why, in today’s tutorial, we’re excited to show you how to create a popup that appears when your users click a button. The tips in this tutorial can be used for any website and set up in a matter of minutes.
Before we dive into the tutorial, let’s clarify why creating a clickable popup trigger can be such a valuable addition to your website (not to mention your bottom line).
Why Open a Popup on a Button Click
You’re probably familiar with traditional popups from your web browsing experience. You visit a site, and, at some point, a popup appears on your screen to capture your attention.
When set up correctly, these kinds of popups are an awesome way to get more page views, grow your email list, and boost sales.
But there’s one type of trigger that business owners and marketers don’t use often enough: clickable buttons that trigger a popup.
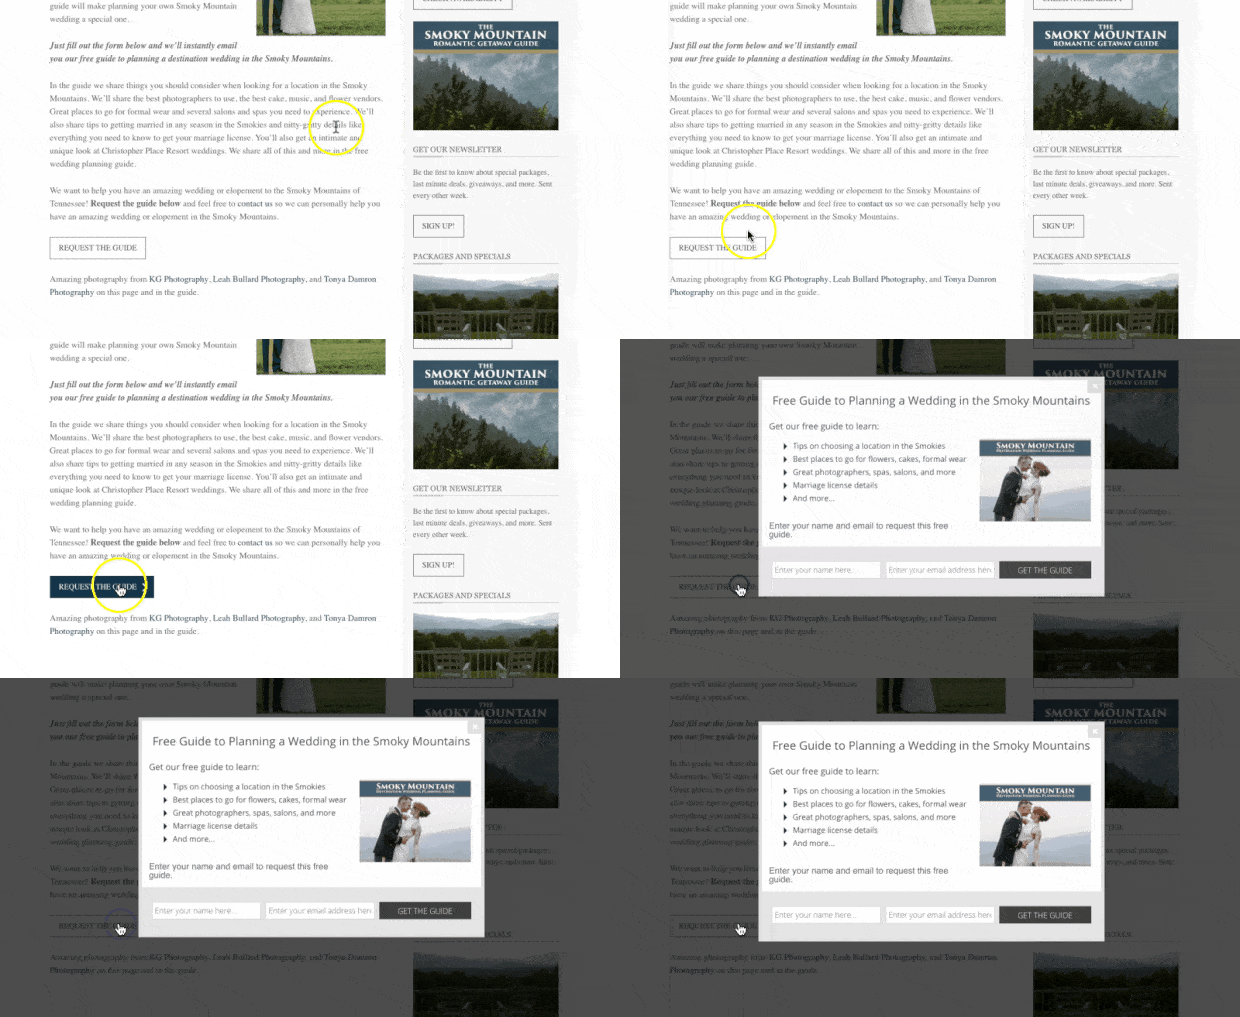
These popups are incredibly effective. That’s because this 2-step optin process uses something called the Zeigarnik effect.
This is a psychological trigger that means people are more likely to finish an action once they’ve started. And it’s the Zeigarnik effect that gives clickable popups an advantage over the traditional kind.
Think about it. When users see a traditional popup on your website, you’ve captured their attention but haven’t necessarily engaged them.
Clickable popup buttons, on the other hand, are different. Your users have already shown interest in the popup’s content simply by the fact that they’ve clicked the link.
In other words, your visitors are starting the process of opting into your campaign before they even see it! As a result of starting the process, they’re much more likely to finish by signing up for your offer.
But now for the real question: how do you create a popup and embed it into a clickable button if you don’t have any coding experience?
That’s the question we’re going to answer in this tutorial. And, by the end, you’ll know exactly how to trigger a popup form on a button click.
Plus, you’ll be able to do everything in under 5 minutes with zero coding required, regardless of which website builder you’re using.
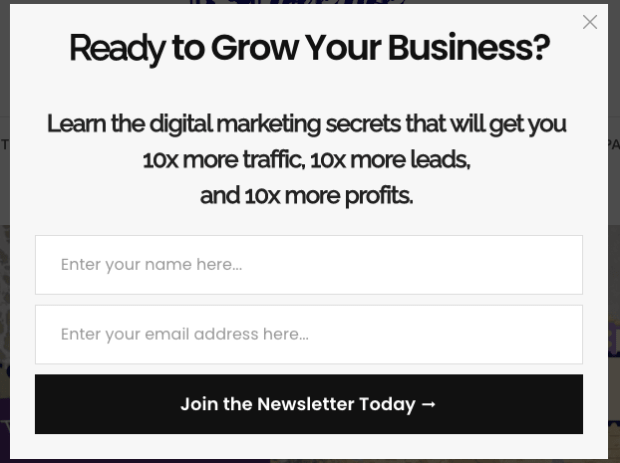
Here’s the clickable popup we built for today’s demo in around 3 minutes:
Let’s get started.
How to Trigger a Popup on a Button Click
For today’s tutorial, we’ll be using OptinMonster:
OptinMonster is the world’s #1 lead generation software. That means we’re the best at helping you get your audience to take the actions you want them to.
How do we do that? By empowering you to create high-converting “optin campaigns.”
Optin campaigns are messages that you show to your audience containing a call to action (CTA). These campaigns can come in the form of popups, floating bars, slide-in scroll boxes, and much more.
And, of course, OptinMonster includes campaigns that can appear on the click of a button. These are called MonsterLinks™, and they’re incredibly easy to use.
In fact, MonsterLinks™ are how Snack Nation was able to add 1200 segmented leads to their list each week.
MonsterLinks™ are also how Bulky, a social media tool for Buffer, increased their free trial signups by 134%.
At the end of the day, popups triggered by a button click are a powerful way of increasing conversions on your site. And with OptinMonster, creating these campaigns couldn’t be more simple.
Want to learn more about how OptinMonster can help your business grow? Check out this article: Is OptinMonster Worth It? An Extensive Review.
We also understand that not everyone learns in the same way. That’s why we added this video tutorial for our visual learners:
Otherwise, feel free to continue reading through our in-depth tutorial.
Step 1: Select Your Campaign and Template
Creating a popup triggered by a button click starts the same way as any other campaign you’d build with OptinMonster.
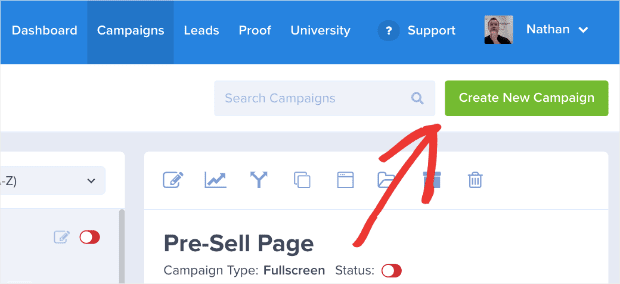
Once you’ve logged into your OptinMonster account, click Create New Campaign in the upper right-hand corner of the screen:
Next, you’ll need to select your campaign type. We have many different types of campaigns you can create, including:
- Lightbox popup
- Fullscreen welcome mat
- Slide-in scroll box
- Floating bar
- And more
For today’s tutorial, we’ll go with a Popup campaign:

Now it’s time to select the template for your clickable popup campaign:
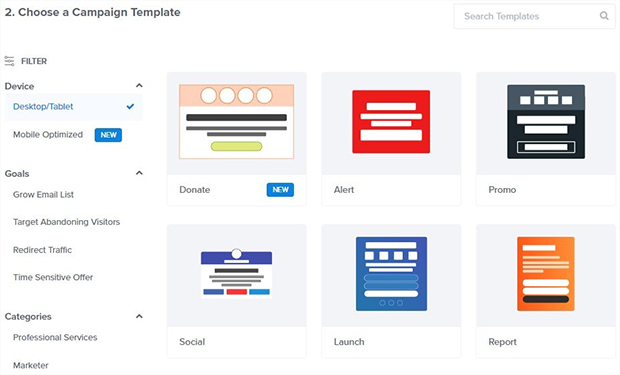
OptinMonster has over 700 pre-built templates to choose from. These make sure that you can create stunning campaigns in a matter of minutes rather than days.
That way, you can focus your time and energy on other parts of your business.
Plus, all of our templates work great across devices and are easy to customize. As you’ll see, everything about your campaign’s design can be changed with a drag and a drop.
But if you want to build a campaign 100% from scratch, that’s no problem. You can use our Canvas template:
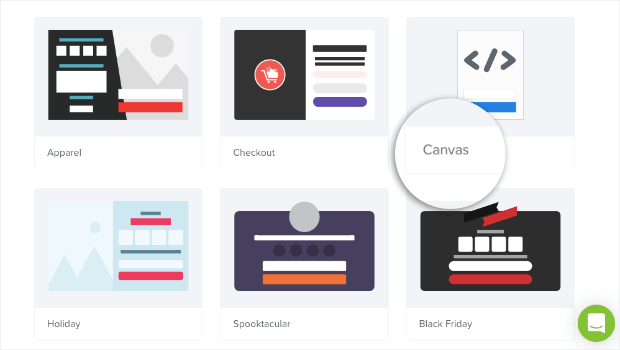
This allows you to create your campaign from a blank template. The good news is that it’s just as easy to customize as any of our other templates.
Everything can still be done with a drag and a drop. There are zero coding skills required.
That means you can create a clickable popup that perfectly matches your brand’s voice, style, and message in a matter of minutes.
Today, we’ll choose the Win template:
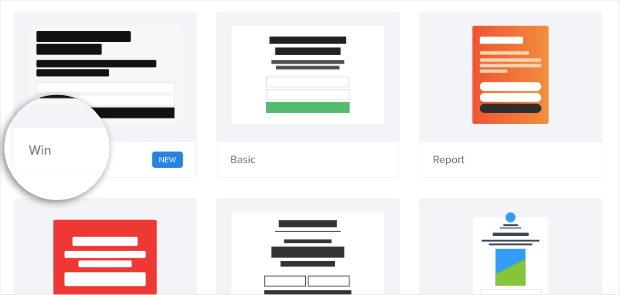
This is an excellent template for beginners looking to trigger their popup on a button click. It’s minimalistic in design and has a sleek sign up form for collecting emails.
Once you’ve chosen your popup template, you’ll be ready to customize the design.
Step 2: Design Your Click-Triggered Popup
Now your popup should be in your OptinMonster editor. From here, you simply need to customize the popup to fit your campaign’s goals.
We won’t be able to get into all of your customization options in this post. Frankly, there are too many to cover in one tutorial.
If you are just getting started or need a little refresher, check out this resource on how to create your first OptinMonster campaign.
For today, there are a few things you need to know. All of our campaigns are built with “element blocks” (or “blocks” for short). These include things like text blocks, video blocks, image blocks, and so on.
To change your text block, you can use our inline editor. That means you simply click on the text you want to change and start editing:
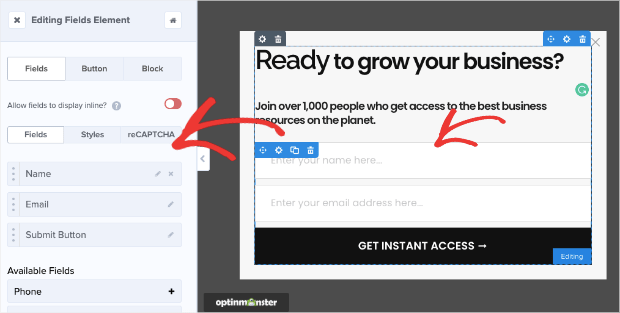
To change other blocks, such as your popup’s signup form, just click on it in your editor, and the editing tools will appear in the left-hand side menu:
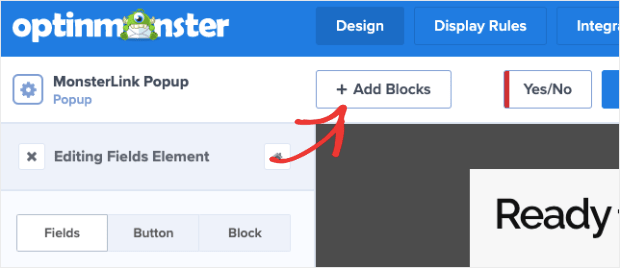
And if you want to add a block, that’s no problem either. Click on + Add Blocks at the top of your editor menu:
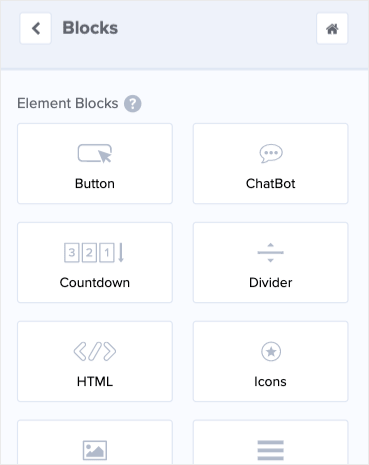
Then you’ll see your block options on the left-hand side. You can add many new blocks, such as:
- Text
- Chatbot
- Countdown timer
- Divider
- Image
- Video
- And more
When you’ve found the block you want to add, drag and drop it into place:
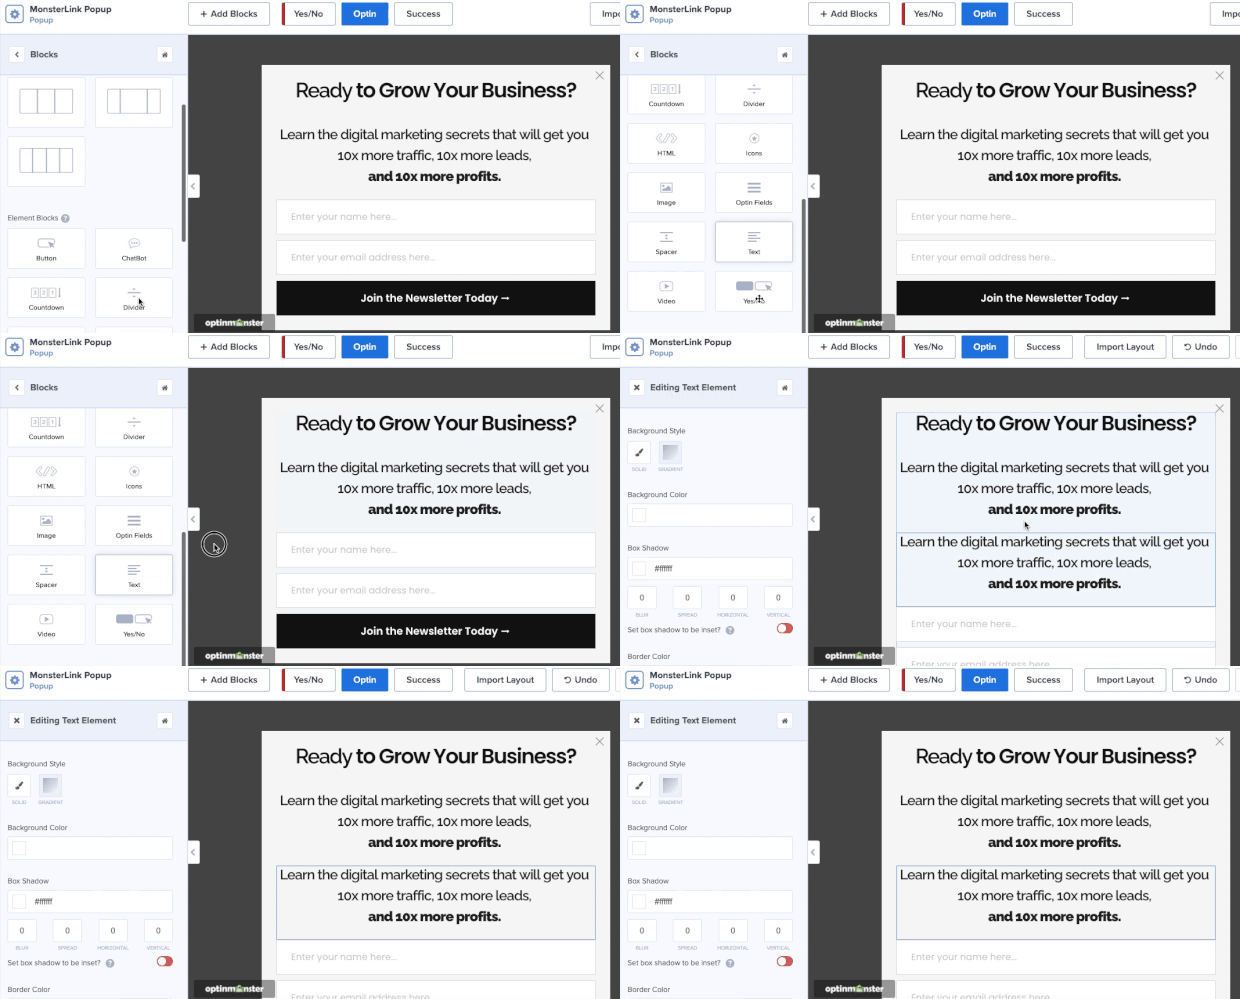
Again, designing your campaign is super easy with OptinMonster. Here’s the campaign we built for today’s tutorial, which took around 3 minutes to create:

When you’re done customizing your campaign, click on Display Rules at the top of your OptinMonster editor:

This will allow you to create your MonsterLink™.
Step 3: Create and Embed Your MonsterLink™
By default, each of your OptinMonster campaigns comes with two display rules:
- Time on page is 5 seconds
- Will appear on any page
And while OptinMonster has loads of targeting rules and triggers to help you personalize your messaging, today we want to make a MonsterLink™.
This will create a trigger for a popup form on a button click. In your display rules search bar, type MonsterLink™, and click the trigger in the menu:
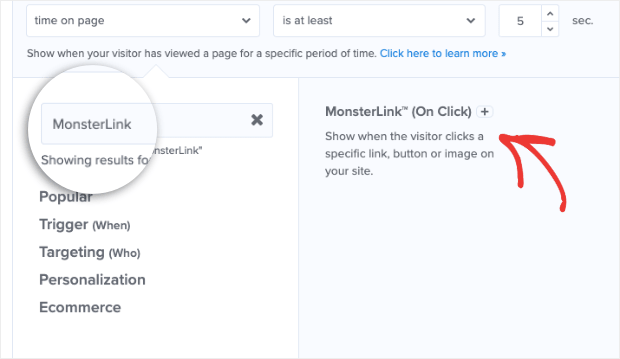
Next, click Copy MonsterLink™ Code:

This gives you a code in the HTML form, which looks something like this:
<a href=”https://app.monstercampaigns.com/c/xzzxzczwsluoshmlnitl/” target=”_blank” rel=”noopener noreferrer”>Subscribe Now!</a>
You can embed this code on any button on your website. But since many web page builders don’t require the entire HTML, you can extract the URL link from the snippet above:
This all depends on how you normally embed links on your site’s buttons.
Once you’ve set this display rule and have your MonsterLink™ code, click Integrations at the top of your OptinMonster editor menu:

This will allow you to sync your popup form with your email service provider.
Step 4: Integrate With Your Email Service Provider
If you aren’t using your clickable popup to capture new email leads, you can skip to step 5. But, in many cases, popups are a great way to grow your contact list.
And OptinMonster syncs seamlessly with every email service provider (ESP) on the market. In fact, we integrate natively with over 30 ESPs.
In the left-hand side menu, click + Add New Integration:
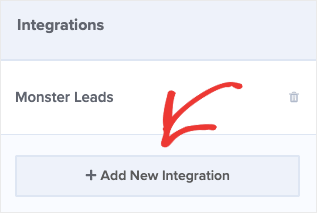
Then select your ESP from the drop-down menu:
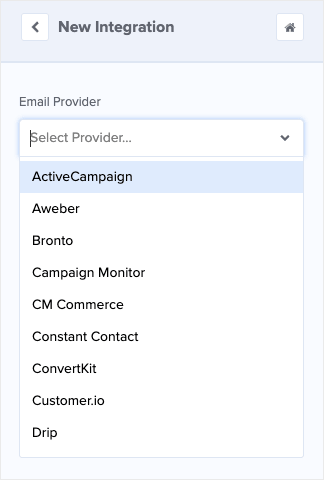
And if you don’t see your email service provider on that list, not a problem. Read this article to learn how to integrate OptinMonster with any ESP on the market.
That article gives more detail on connecting OptinMonster with your ESP, how to connect OptinMonster with any custom HTML form, and how to use Zapier integrations.
If you’re using a popup form on a button click to grow your contact list, OptinMonster makes the process as simple as possible.
When your popup campaign is integrated with your ESP, you’re ready to launch your campaign. Just click Publish at the top of your OptinMonster editor:

Step 5: Publish Your Campaign
Now you’re nearly finished. You need to click Save in the upper right-hand corner of your OptinMonster dashboard and click the toggle switch to Live:
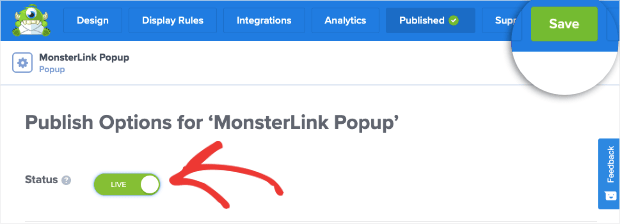
Then scroll down the page to find your campaign’s embed code:

You’ll need to embed this code just before the closing </body> tag of your website’s template file.
Doing so will depend on which platform you used to build your website. If you’ve never modified your website’s template file before, no problem. Check out this resource on how to embed OptinMonster on your website.
But if you’re using WordPress, things are even simpler. You can download the plugin and manage your campaigns directly from your WordPress dashboard.
Here’s an in-depth guide to installing the OptinMonster plugin.
And that’s it! You’ve now created a trigger popup form on a button click using MonsterLinks™.
We hope you found this post helpful. If you’re using your popup to grow your email list, you may be interested in checking out the following articles:
- Email Marketing Made Simple: A Step by Step Guide
- How to Run a Successful Email Marketing Campaign
- How to Create an Effective Autoresponder Email Series
These resources will have everything you need to take your email marketing plan to the next level.
Ready to get started? Sign up for OptinMonster today!



Add a Comment