Are you looking for an easy way to learn how to show a newsletter popup in Magento?
Magento, owned by Adobe, is a popular open-source eCommerce platform that helps you build and launch your own online store.
One of the most common ways shop owners like yourself market with Magento is through a newsletter popup. However, despite its popularity with shop owners, creating newsletter popups is not a built-in function of Magento.
How can you easily show a newsletter popup in Magento without having to search an endless list of extensions?
You’re in luck since we have a step-by-step guide to show you the BEST way to show newsletter popups in both Magento 1 and Magento 2 in today’s post.
Let’s get started!
What is Magento?
Essentially, Magento is a platform that you can use to develop your own eCommerce website.

This platform offers merchants the flexibility and control to make their stores work and look exactly how they want. No more cookie-cutter online stores. With Magento, you have the power to attract more of your target customers.
Also, Magento has a host of marketing and management tools and extensions to help you grow your business.
Notice how we mentioned the word “extensions.”
Not everything you need to really maximize traffic, conversions, leads, and sales comes with Magento. Many times, you’ll need to find and install a separate extension.
Finding and installing Magento extensions takes time, something we’re all short on. And how do you know that you can trust the extension?
Plus, how do you know if the extension works with Magento 1 and Magento 2?
Well, in a moment, we’ll show you how to add a Newsletter Popup to both versions. But first, let’s talk about why you need a Newsletter Popup in the first place.
Getting traffic to your Magento storefront is only part of the battle. Once you have a visitor on your site, you need to convert them to paying customers. Then, you need to keep them coming back.
And if they aren’t ready to buy just yet, how can you keep in touch?
Create a Newsletter Popup.
When you use newsletter popups, you can convert your store’s visitors into leads by having them give you their email addresses.
Sure, there are plenty of Magento extensions to help you create newsletter popups. But you need the perfect tool that allows you to easily create beautiful popups proven to target and convert your target audience.
Create Newsletter Popups with OptinMonster
There’s one tool that stands above the rest when targeting audiences and converting them to paying customers.
And only one tool that helps you get the most out of your newsletter popup campaigns.
That tool is OptinMonster:
OptinMonster is a premium tool that helps you unlock the power of Magento to help grow your online shop’s marketing abilities.
With 700+ templates and a user-friendly drag and drop builder, you can easily create stunning campaigns like popups, floating bars, gamified wheels, and more. If you’re short on time (or design skills), OptinMonster has the perfect pre-made design for every occasion waiting for you!
OptinMonster also has powerful targeting rules to ensure that your newsletter popup shows up at the right time at the right place to the right people. These targeting rules can target users who:
- Are actively leaving your store with Exit-Intent® Technology
- Are return visitors that need a fresh popup through Onsite Retargeting® Technology
- Located in specific areas with Geo-Location Targeting
- And more
This hyper-focused level of personalization benefits everyone. First, you will see dramatically improved sales and conversions. Meanwhile, your customers will enjoy a personalized user experience.
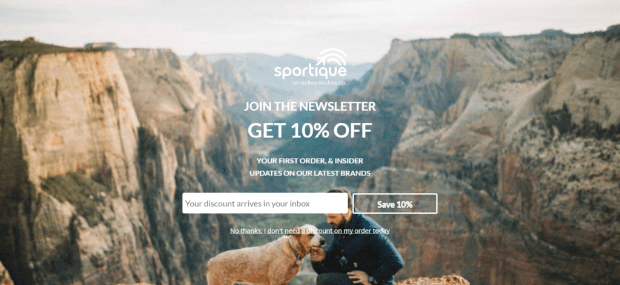
In fact, Sportique used this exact popup they created in OptinMonster paired with Geo-Location Targeting to convert 4.92% of visitors.
The best part is that you only need a few minutes of your time and a handful of clicks to design and launch a newsletter popup through OptinMonster.
Ready to show your own newsletter popups? Click below to start your 100% risk-free OptinMonster account today:
Now, let’s go ahead and jump into our tutorial!
How to Show a Newsletter Popup in Magento
Today’s tutorial will walk you through creating a newsletter popup and showing it in Magento.
Step 1: Create a Newsletter Popup
First, you’ll need to sign up for an OptinMonster account. If you already have an account, sign in on the OptinMonster website.
Click on the green Create New Campaign button:
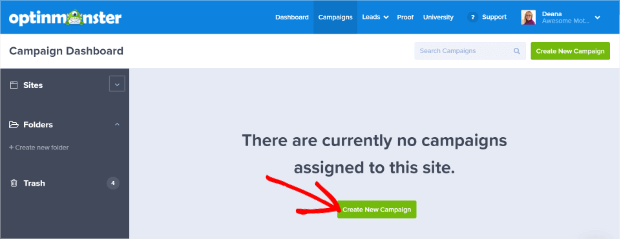
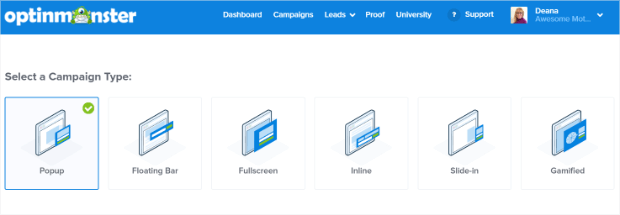
You’ll then have the choice of six different campaign types:
- Popup
- Floating Bar
- Fullscreen
- Inline
- Slide-In
- Gamified
For this tutorial, we’ll select Popup:
Next, choose a design from one of OptinMonster’s 700+ pre-built templates.
The best thing about these templates is there’s a design for almost every holiday or occasion. You’ll save so much time in designing your campaign:
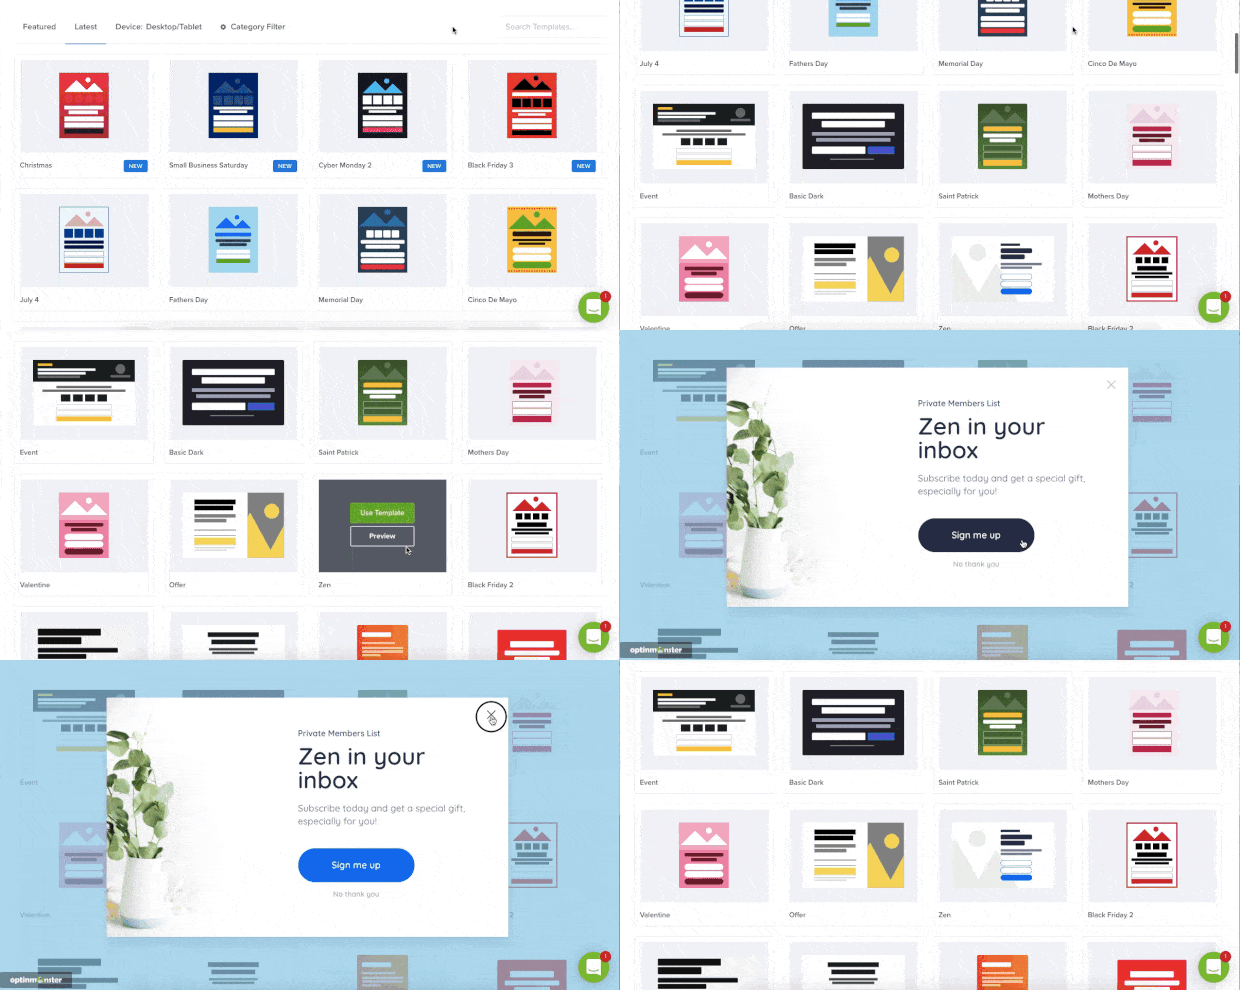
For this tutorial, we’ll work with the Basic template:
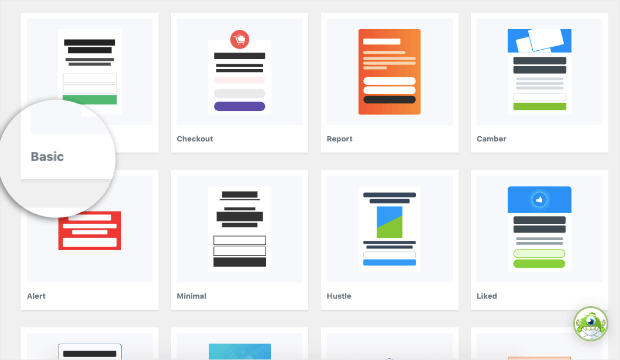
Basic is our go-to template for almost any occasion. If you want a simplistic design, it’s perfect right out of the box. However, if you need space to customize and play, this is absolutely the template for you.
Once you have selected your design, it’s time to name your campaign:

Pro tip: Choose a descriptive name. We recommend a name that describes what your campaign is offering or what it is doing. This makes it easier to find later on.
Then, click Start Building. This will take you to the OptinMonster campaign builder screen. Here is where you’ll design the visual part of your newsletter popup.
Step 2: Customize Your Newsletter Popup
If you want to make any changes, just click on the section that needs to be modified. Then, you can make edits directly in the builder. You’re free to change up pretty much anything. The only limitation is your imagination:
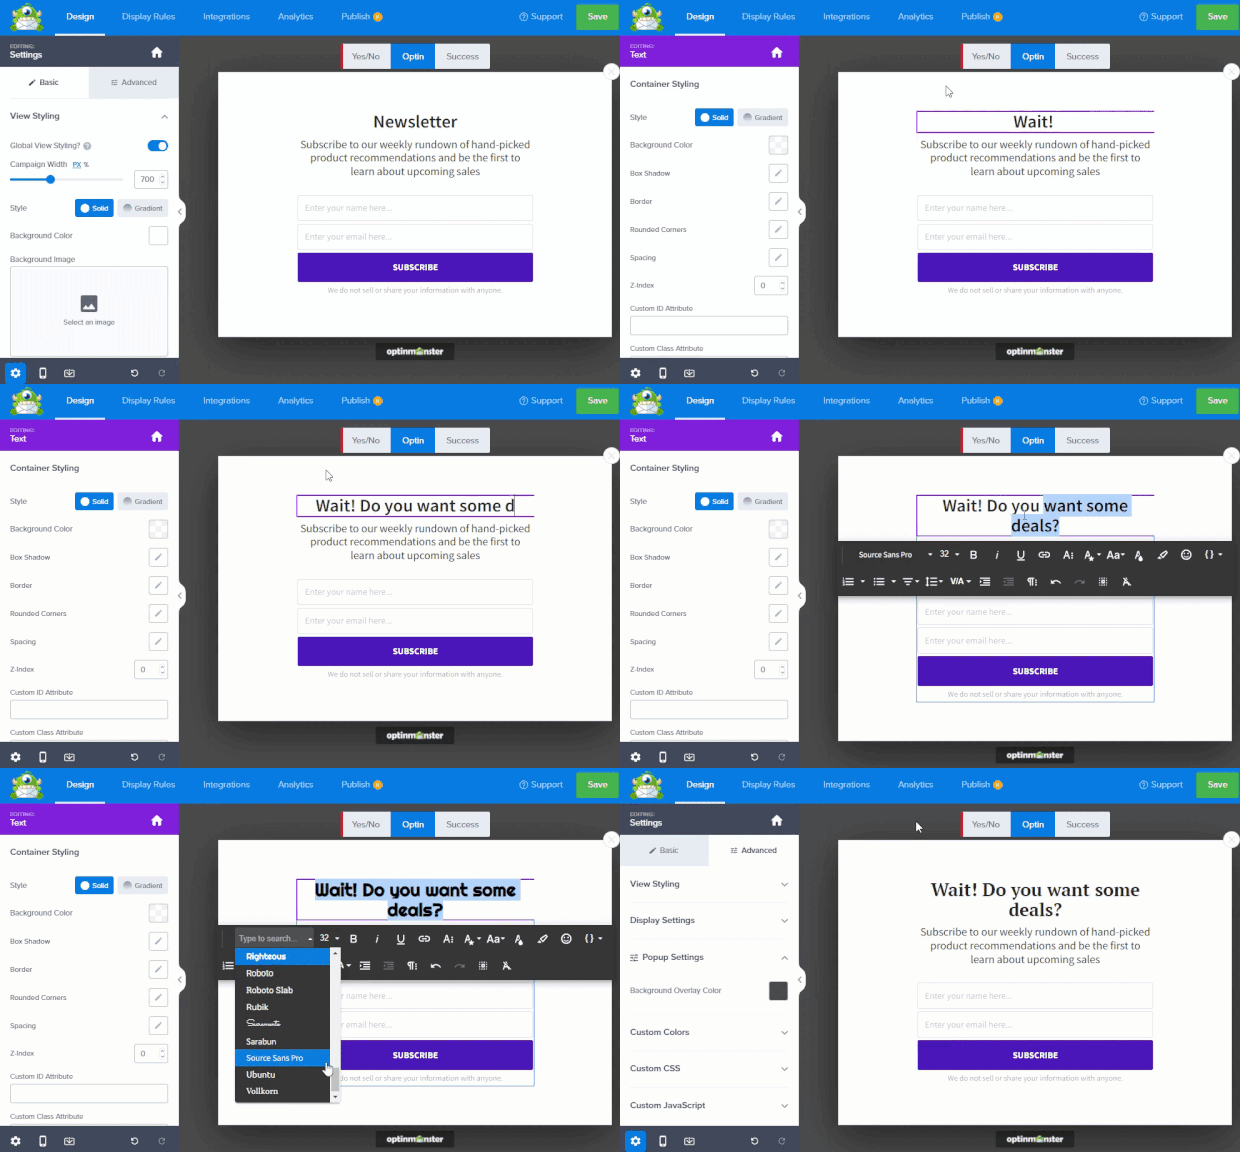
If you want to add any other elements to your popup, you can do that here too.
To do this, click on + Add Blocks on the left side of your screen.
Then, scroll down and find the element you want. Next, drag it to where you want it in your campaign:
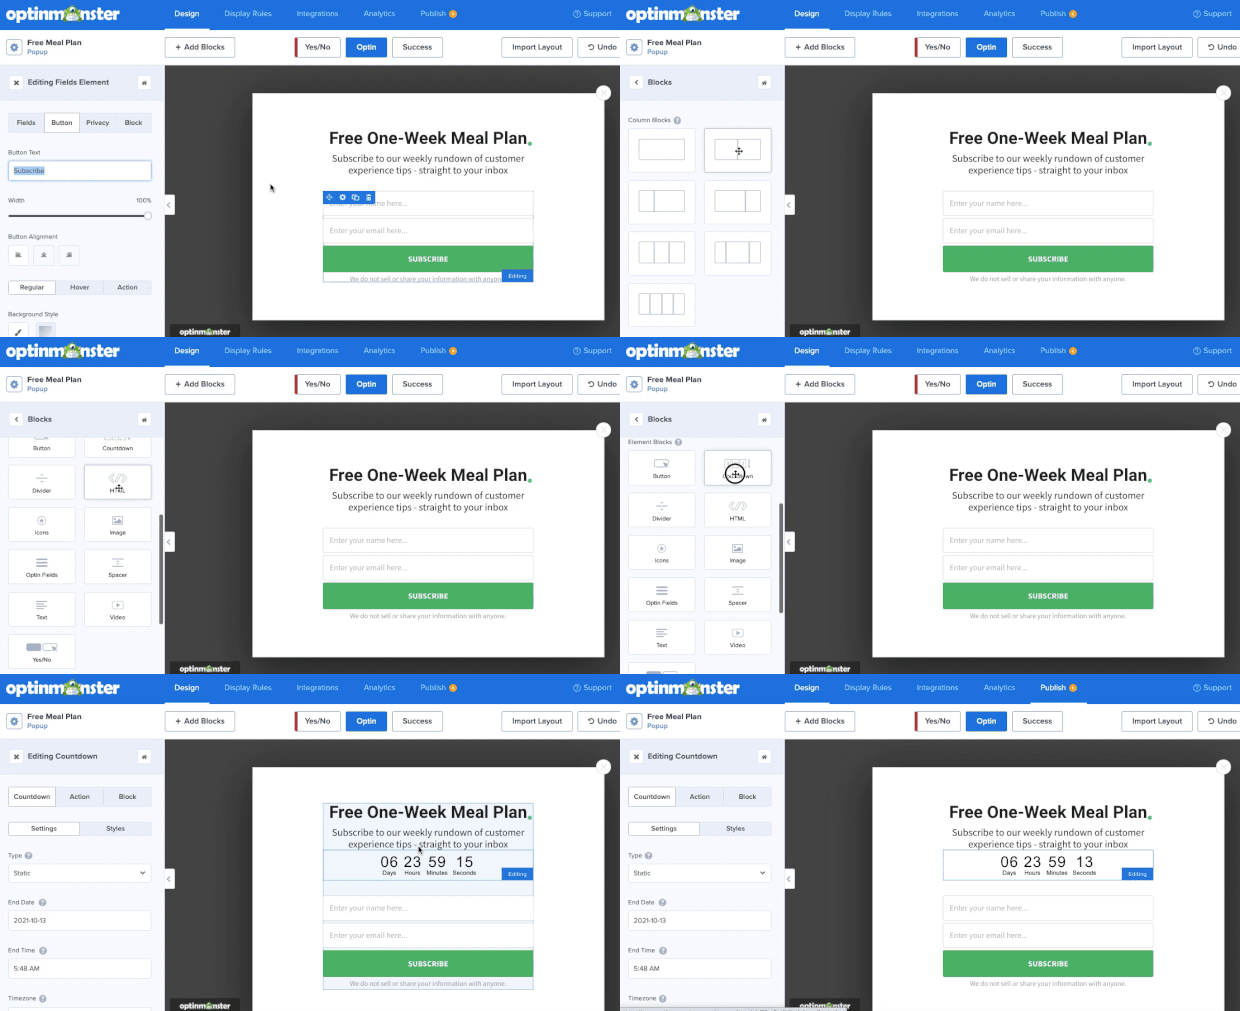
These elements come in something called a Block.
Block are preconfigured content areas that fit neatly into any campaign template.
If you’d like to explore more about the visual builder, check out our guide on creating your first OptinMonster campaign.
When you finish this step, it’s time to target your newly built newsletter campaign to your target audience.
Step 4: Target Your Audience
One of the most powerful parts of OptinMonster is all the ways you can target the exact audience you want.
So, how do you target your audience?
Simply by telling OptinMonster exactly when, where, and to whom your newsletter popup will appear.
To set these rules and triggers, click on the Display Rules tab.
By default, OptinMonster has two display trigger rules in place:
- Time on page is 5 seconds
- Current URL path is any page
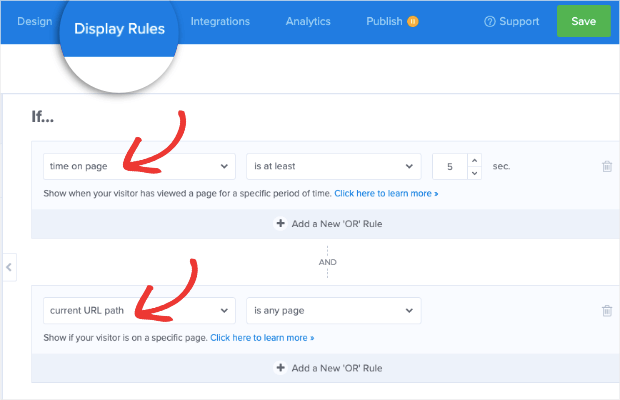
If you are getting started and want to get your campaign in front of the most eyes possible, then these rules are perfect.
But, there are other remarkable rules and triggers that you can use.
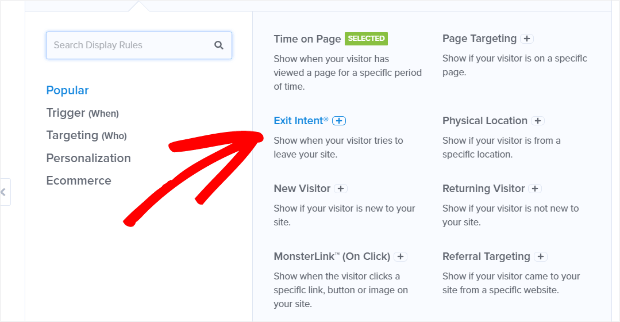
Today, we’ll use one of the most popular targeting rules, Exit Intent®, which targets anyone actively leaving your store.
Click where it says “time on page” on the page. You’ll see a menu where you can select from all of OptinMonster’s display and targeting rules.
Exit Intent® is right on the popular tab, so click on that rule to activate it.:
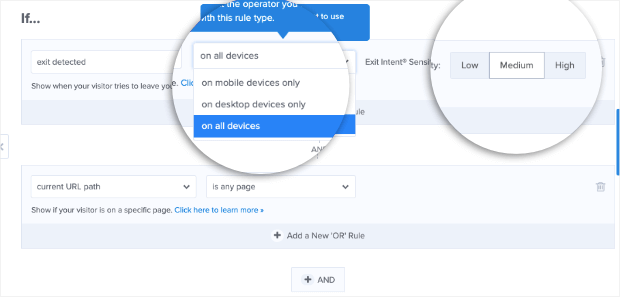
If you’d like, you can change the settings to target specific devices and the sensitivity of the Exit Intent® targeting.
Now that your campaign is designed and the rules and triggers are set, it’s time to show your newsletter popup in Magneto.
Depending on whether you use Magneto 1 or Magneto 2, the steps are slightly different. So, we’ll break it down for you.
Method 1: How to Show a Newsletter Popup in Magento 1
After you’ve created your newsletter popup, you’ll need to embed it on your Magento 1 site.
Note: Support for Magento 1 ended June 30, 2020. We are including these instructions only for those who are still on the platform. If you are new to Magento, scroll down to the Magento 2 directions.
First, go to the Publish tab in the OptinMonster campaign builder. Then, click on the Publish button to make sure your campaign is live.
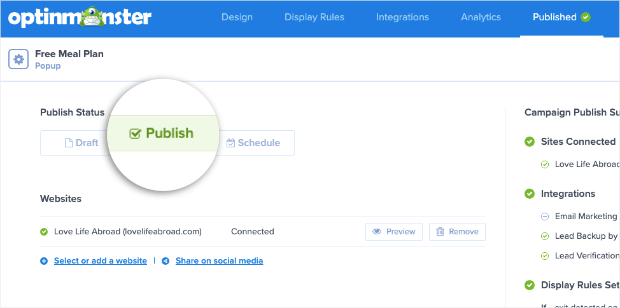
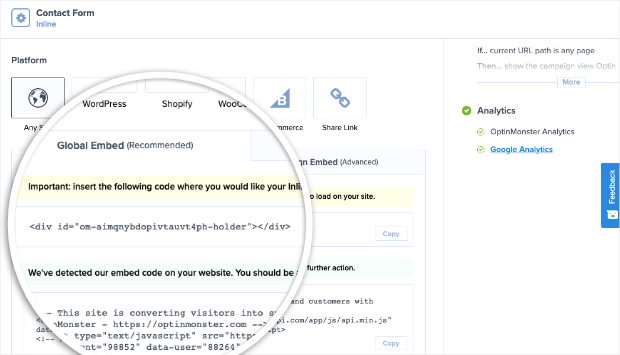
Now, scroll down until you see the section labeled Platform. Copy the Global or Campaign Embed code:
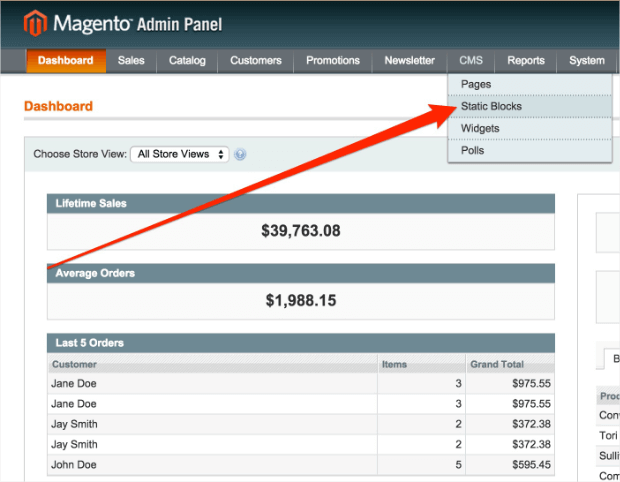
Next, log into your Magneto site and go to CMS » Static Blocks.
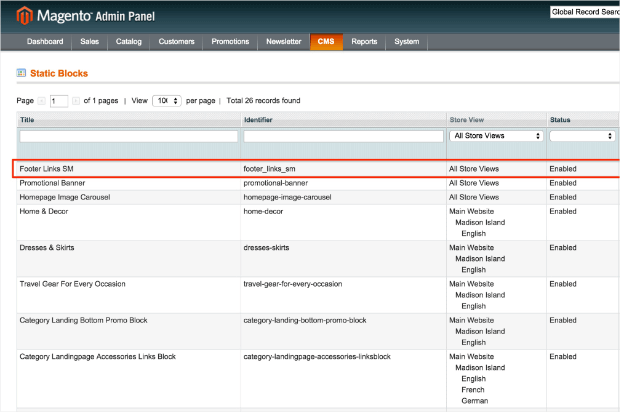
From that screen, select an existing block near the foot of the page. For example, we’ve picked the Footer Links SM block to edit.
Since this block is already configured, the only thing left to do is just paste the embed code we’ve already copied. Go ahead and copy this in the Content field below the existing HTML.
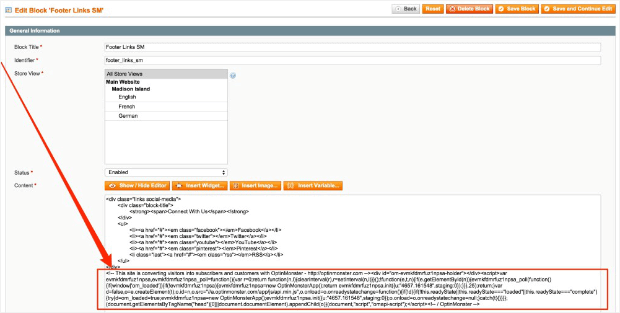
When you are finished, click Save.
Go back to your OptinMonster dashboard and make sure that your newsletter is set to Publish so it will launch on your Magento 1 site.
Method 2: How to Show a Newsletter Popup in Magento 2
First, go to the Publish tab in the OptinMonster campaign builder. Then, click on the Publish button to make sure your campaign is live:

Now, scroll down until you see the section labeled Platform. Copy the Global or Campaign Embed code:

Next, sign in to your Magento site. Then, go to Content » Design » Configuration.
Here, select the active theme for your Magento 2 store to edit it.
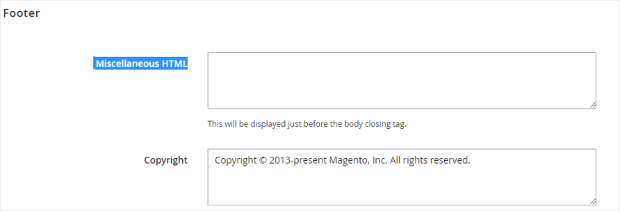
Locate the Footer section and paste the OptinMonster embed code where you see the Miscellaneous HTML field:
When you are finished, click Save.
Go back to your OptinMonster dashboard and make sure that your newsletter is set to Publish so it will launch on your Magento 2 site.
Finally, be sure to flush the cache of your Magento 2 site to see the newsletter popup.
And that’s all we have for you today!
We hope that this tutorial was helpful. If so, you’ll definitely want to check out the following resources:
- 7 Best Magento Extensions to Skyrocket Conversions and Sales
- 13 eCommerce Personalization Examples (+5 Strategies for YOUR Store)
- The Ultimate eCommerce Optimization Guide: 13 Steps to Instantly Boost Revenue
These articles will have more tips and tricks to make your Magento store work better while driving more leads, conversions, and sales.





Add a Comment