Do you want to learn how to create a WordPress sidebar contact form in under 5 minutes?
Contact forms are an excellent way to encourage your site’s visitors to reach out to you. And adding that contact form to the sidebar of your website makes your offer even more accessible.
But let’s be honest: you’re juggling a million tasks and can barely find the time for lunch.
You need to learn how to add a contact form to your site’s sidebar in a way that’s quick, easy, and (ideally) free.
That’s exactly what we’ll be showing you how to do today. Because, in this post, we’re going to teach you how to add a WordPress sidebar contact form in minutes.
First, though, let’s clarify why you’d want to add a sidebar contact form at all.
What Is a Sidebar Contact Form (& Do You Need One)?
A sidebar contact form is a simple form that rests on the side of your WordPress page or post.
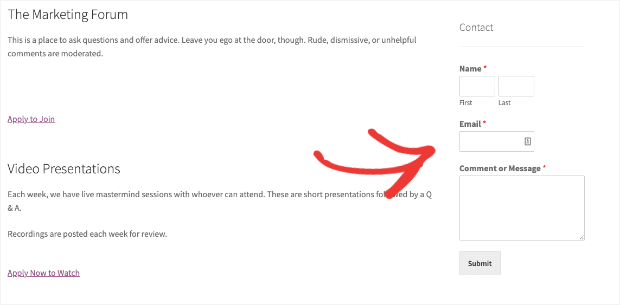
You’ve likely seen one before. Here’s a basic example of the sidebar form we’ll be adding to a site today:
But don’t let the form’s simplicity fool you. Adding a contact form to your sidebar comes with tons of advantages.
Here are just a few benefits of creating a WordPress sidebar contact form:
- Improve UX: Adding a contact form to your sidebar means that customers can reach out to you instantly if they have any questions or run into problems on your site.
- Generate Leads: When people contact you, it’s a good sign they’re interested in your niche, product, or services. You can nurture this conversation to transform your potential lead into a loyal (and paying) customer.
- Troubleshoot Problems: If there’s a problem with your site, your users will likely be the first to know. A contact form lets your site’s visitors get your attention if there’s an issue on your site that needs to be fixed.
These are just a few of the reasons why you might want to add a sidebar contact form to your site, though there are many others.
And now that you know the benefits of a sidebar contact form, let’s dive into our tutorial. We’ll walk you step by step on exactly how to create a WordPress sidebar contact form in under 5 minutes.
Creating a WordPress Sidebar Contact Form
In this tutorial, we’ll be using WPForms:
WPForms is the best form building plugin on the market. With WPForms, you can quickly and easily create all kinds of forms for your WordPress site, including:
- Contact
- Payment
- Survey
- Newsletter
- Registration
- And more…
Plus, WPForms has a super low learning curve. That’s because each form has pre-built templates that you can use to get started.
These templates save you time, energy, and headaches in the form creation process.
And customizing your form doesn’t require any coding skills or technical experience. That’s because WPForms uses a drag and drop form builder, so you can add new features to your forms in seconds.
But the best part is that you can get started with WPForms TOTALLY FREE–even if you’re creating a contact form for your WordPress site’s sidebar menu.
Click here to learn more about WPForms today!
Now let’s dive into our tutorial.
Step 1) Download and Install WPForms
The first thing you need to do is install and activate the WPForms plugin. Doing so is easy.
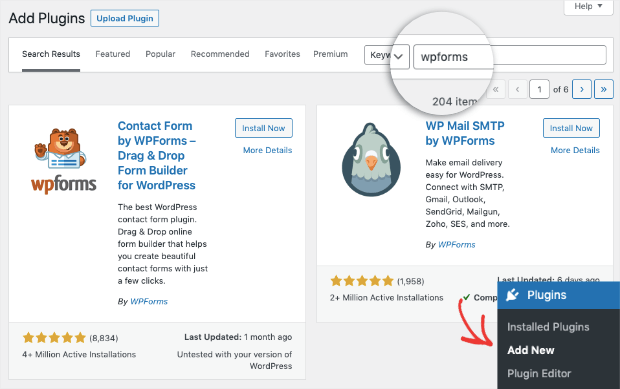
First, go to your WordPress admin dashboard and click Plugins » Add New from the side menu.
Then type WPForms in the plugin directory’s search bar:
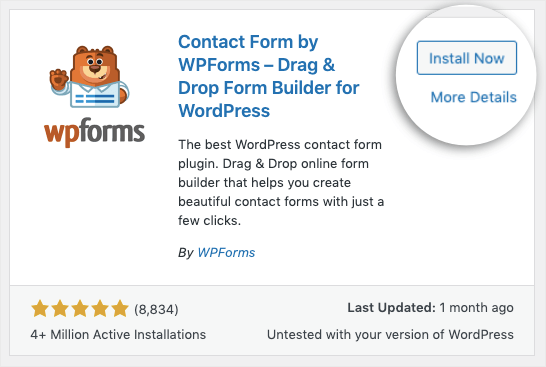
Once you’ve found the WPForms plugin, click Install Now:
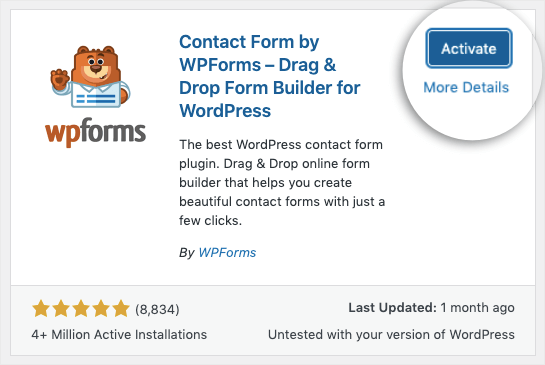
Finally, click Activate (it will be in the same position the Install Now button just was):
And now you have the free version of WPForms up and running on your site. That means it’s time to create your contact form.
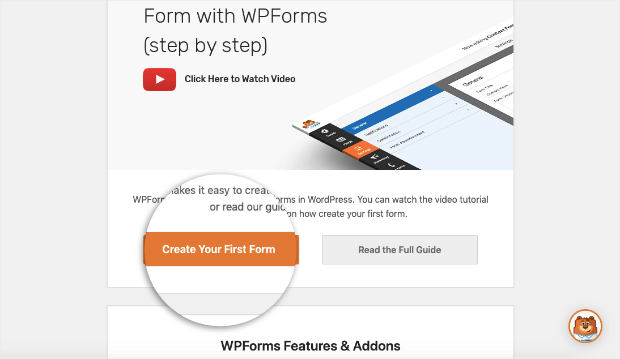
When you click Activate in the step above, a new page will appear in your WordPress admin dashboard welcoming you to the plugin. Scroll down and click Create Your First Form:
Now you’re ready to build your contact form.
Step 2) Create a Contact Form
One of the best parts about using WPForms is how easy it is.
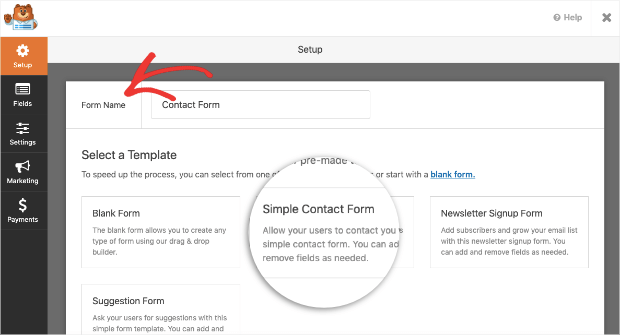
As soon as you’re ready to create a new contact form, all you need to do is enter your form’s name and click Simple Contact Form from the template options:
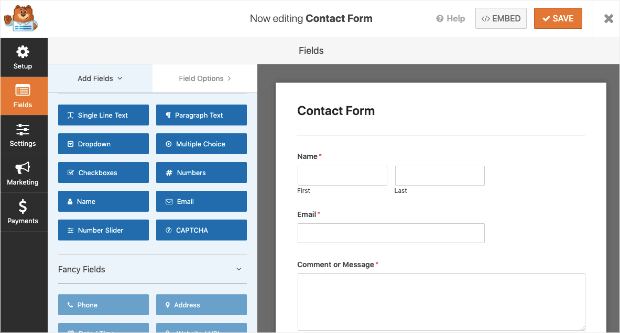
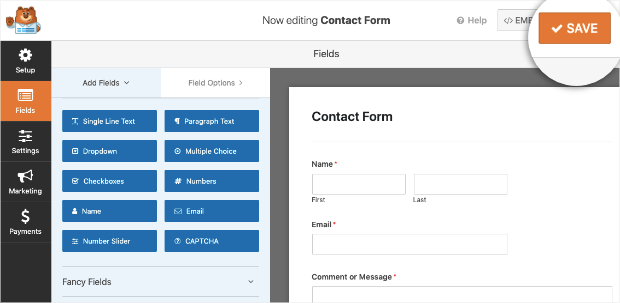
Then your Simple Contact Form template will appear in your WPForms editor:
Your form consists of 4 fields:
- First name
- Last name
- Email address
- Comment or message
You’ll notice that you can add other features from the lefthand side menu. And while these options are easily added to your form with a drag and a drop, we won’t be using them in today’s tutorial.
That’s because your WordPress sidebar form won’t allow for too much space, and you don’t want your form to be cluttered.
Instead, you’ll simply want this out-of-the-box contact form to stay as it is.
All that’s left to do now is Save your form:
Now you’ll need to add this contact form to your WordPress sidebar menu.
Step 3) Add It to Your Sidebar
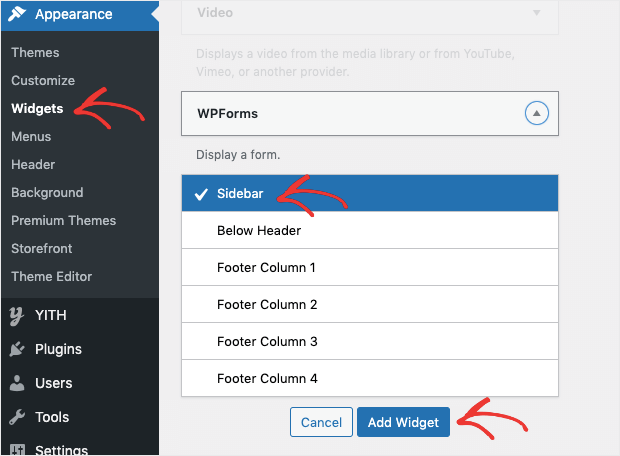
In your WordPress navigational menu, click Appearance » Widgets. Then scroll down to WPForms and select Sidebar from the drop-down menu.
Don’t forget to click Add Widget just beneath the drop-down menu.
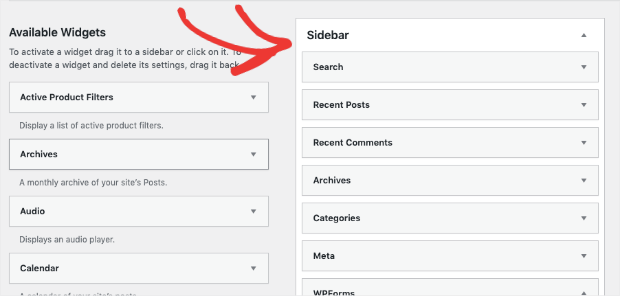
Scroll back up, and you’ll see a list of the sidebar menu items in your WordPress site:
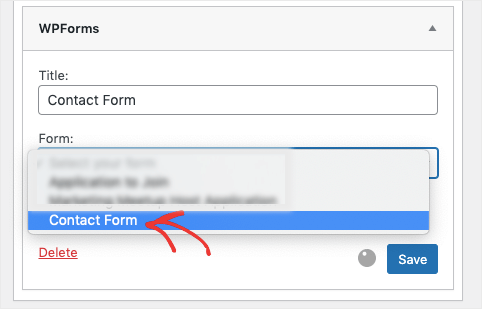
Find and expand WPForms. Add a title for your form and select the contact form we created in Step 2 from the drop-down list:
Don’t forget to click Save.
And that’s it! Your WordPress contact form sidebar widget is now working on your site:
Now that you know how to add a WordPress contact form to your site’s sidebar, let’s briefly look at how you can take things to the next level.
Combining WPForms With OptinMonster
Contact forms are a great way to improve UX across your site. That’s because it quickly gives your visitors a way to ask questions or troubleshoot their problems.
But there’s just one problem: not everyone sees or thinks to use contact forms resting on your page.
To solve that problem, you might want to consider adding your contact forms to an OptinMonster campaign:
OptinMonster is the world’s #1 lead generation plugin for WordPress. That means it’s the best at getting your site’s visitors to take the actions you want them to.
How? By providing you with the tools you need to create stunning optin campaigns like popups, floating bars, fullscreen campaigns, and more.
These are designed to put your calls to action (CTA) directly in front of your target audience.
But what does this have to do with a contact form?
In some cases, you might want to make your WordPress contact form stand out to get more users to engage with you.
You could, for example, create a popup to present your contact form to inactive users with OptinMonster’s Inactivity Sensor targeting rule.
When a visitor stops interacting with your website, that’s an indication that something else has taken their attention or they’ve run into a problem.
Or you can use OptinMonster’s Exit-Intent® Technology to create an exit-intent popup.
This targets users who are actively leaving your website. By presenting a contact form popup, you can recover abandoning visitors and make sure you don’t lose any potential leads.
In fact, exit-intent popups are how Fastrack recovers 53% of its abandoning visitors.
And the best part is that you can set this up in minutes regardless of how you want to present this popup to your audience.
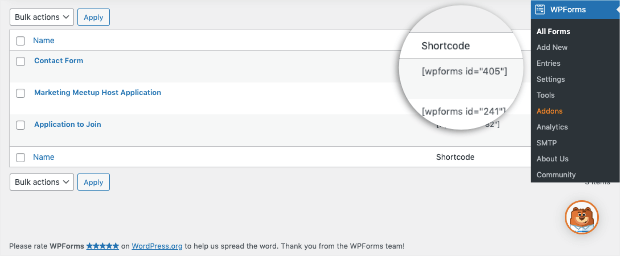
All you need to do is grab the shortcode from your WPForms campaign. You can find that by clicking WPForms » All Forms to pull up the forms you’ve created.
Your contact form’s shortcode is located on the righthand side of your forms list:
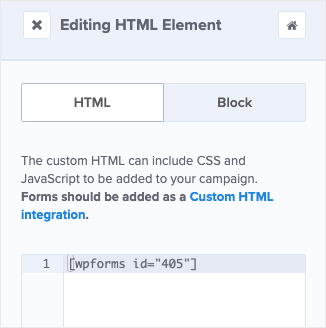
Then you can add this shortcode to the HTML block of any OptinMonster campaign:
Note: Anytime you use shortcode with an OptinMonster campaign, the CSS (or styling of your form) will be affected.
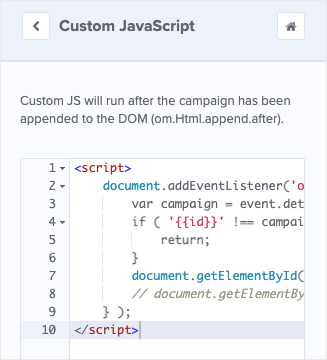
To fix that, copy and paste the following code:
Then add it to your OptinMonster campaign’s custom JavaScript form:
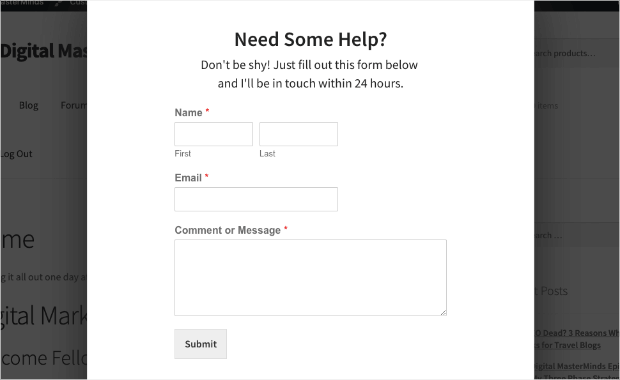
And just like that, your WPForms will be embedded in your popup campaign:
For a bit more help, check out the following resources on how to create an inactivity sensor campaign or an exit-intent popup:
These articles will show you how to add 2 of the most popular targeting rules for showing your WordPress contact form to your audience.
Want to dive in and try it for yourself? Click below to sign up for your 100% risk-free OptinMonster account today:
And that’s all for today! In this article, we taught you how to add a WordPress contact form sidebar to your website.
Then we showed you how to kick things up a notch by embedding that form into an OptinMonster campaign for more advanced targeting rules.
We hope you enjoyed this post and that it helped you create the perfect sidebar contact form for your WordPress site.
If you did enjoy the read, you might want to check out the following resources:
- How to Add a Custom HTML Popup to Your Site
- 11 Best WordPress Contact Form Plugins
- How to Create a Popup With Contact Form 7
These articles have even more information on how you can create the perfect contact form to connect with your site’s traffic.
Disclosure: Our content is reader-supported. This means if you click on some of our links, then we may earn a commission. We only recommend products that we believe will add value to our readers.
