Are you looking for an easy way to connect Klaviyo to your WooCommerce site?
Klaviyo is an advanced marketing automation platform powered by intelligent segmentation that combines behavioral and transactional data of customers. This helps you to send personalized emails or SMS to your customers.
In this article, we’re going to show how you can connect Klaviyo to WooCommerce with just a few clicks.
Let’s get started.
Best Way to Integrate Klaviyo to WooCommerce
You can find the Klaviyo plugin on the WooCommerce repository, and you can easily install it on your WooCommerce site.
Klaviyo will give you a public API key for integration so all your new leads will be sent to the appropriate contact list.
But while Klaviyo is an excellent ESP option, but it might not be your best tool for getting NEW leads.
If you really need to grow your email list, then you need a powerful conversion toolkit that connects Klaviyo to WooCommerce.
This is where OptinMonster comes into the picture.
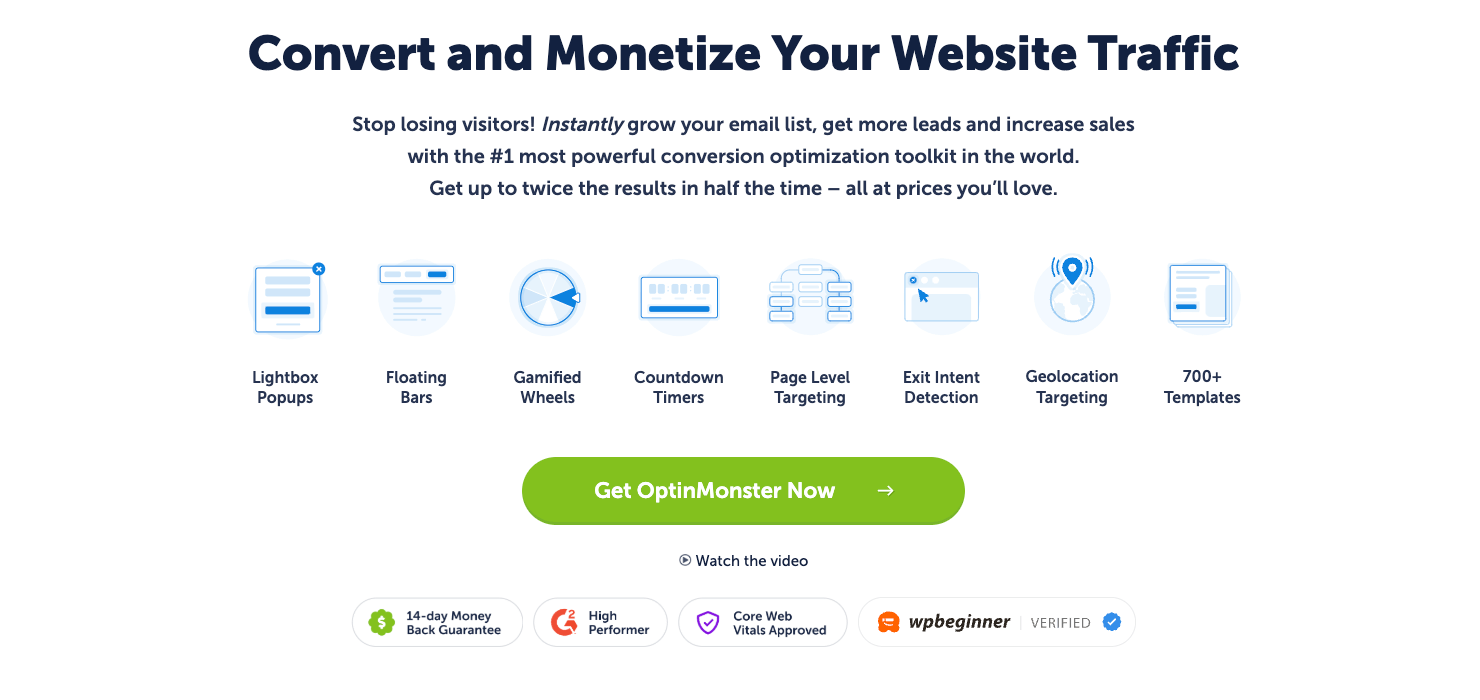
OptinMonster is the world’s most powerful conversion toolkit that lets you maximize leads and grow your email list FAST.
OptinMonster allows you to increase conversions on your site through “optin campaigns.”
By that, we simply mean lead capture forms you’re already familiar with, such as:
- Lightbox popups
- Slide-in scroll boxes
- Floating bars
- Gamified wheels
- And a lot more…
The OptinMonster setup is extremely user-friendly and you don’t need any coding expertise to connect Klaviyo.
Plus, you’ll get 700+ amazing and customizable templates to design your campaigns:
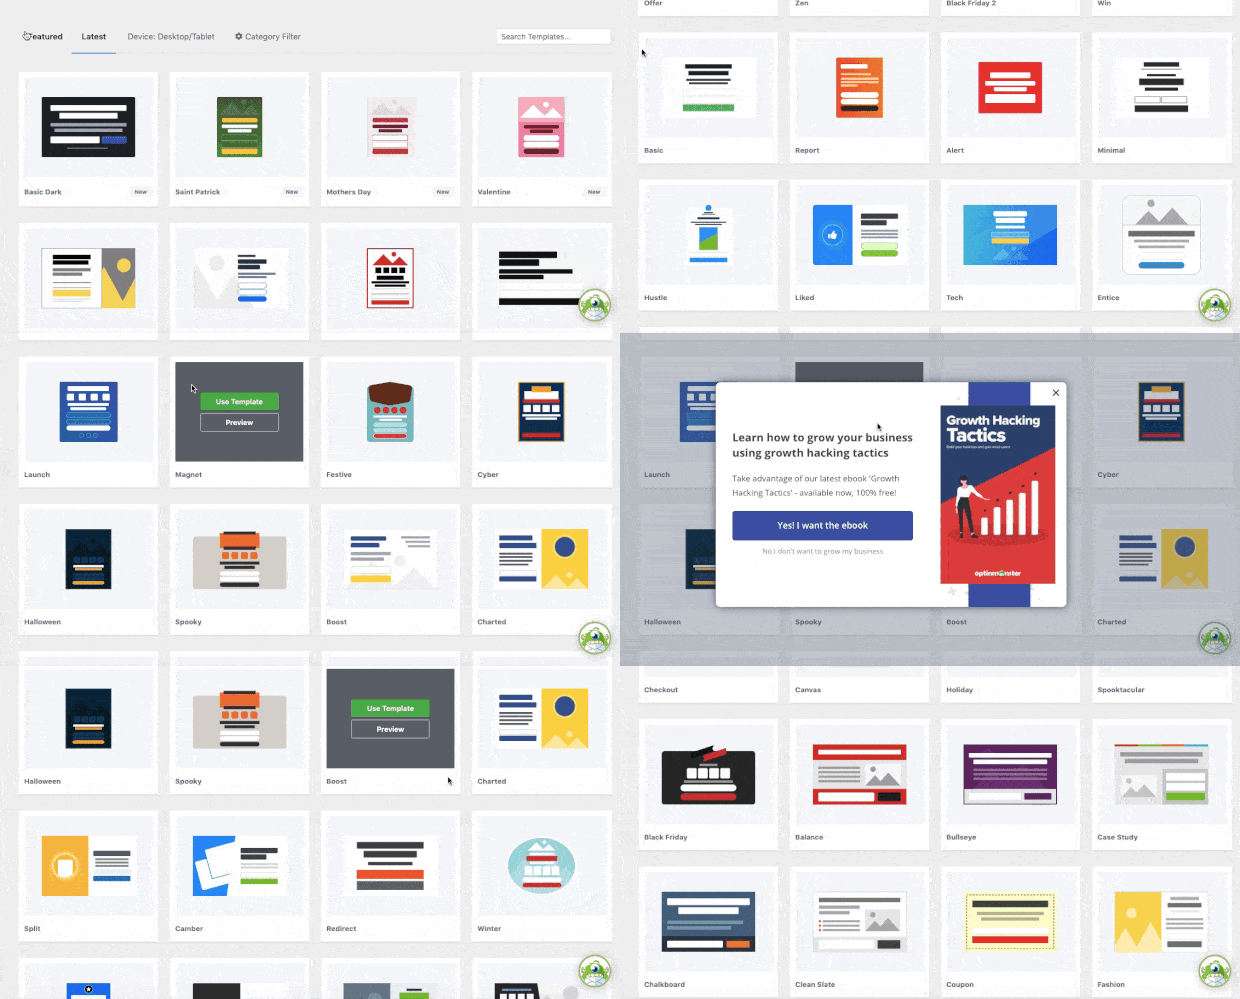
These templates were designed to work “out-of-the-box” so you’ll only need minor modifications.
This saves you time, energy, and headaches in the campaign creation process. And the best part is that customizing these templates is EASY.
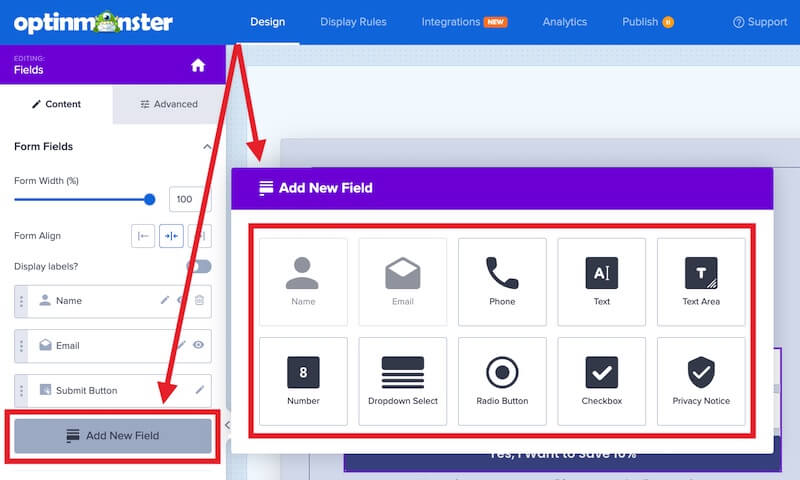
That’s because OptinMonster uses a codeless drag and drop visual builder. That means you can add new features with a single click:

Without any custom coding, you can get detailed lead information by adding extra fields like:
- Text Areas
- Numbers
- Dropdowns
- Radio Buttons
- Checkboxes
- Privacy notice
- And more!
From there, you’ll be able to target these campaigns to the right people, in the right places, and at just the right time in their customer journey.
But you might be wondering, “What does any of this have to do with Klaviyo?”
When OptinMonster is installed on your site, you can easily sync it with your Klaviyo account.
Then, all your leads are automatically sent to your Klaviyo email list.
This allows you to send targeted messages to different portions of your audience depending on their customer journey.
That’s because OptinMonster helps you segment leads depending on what they have signed up for (webinars, demo, offers, newsletters, and so much more).
Think it sounds too good to be true?
Just check out any one of these incredible case studies that show how real business owners like you have seen massive growth:
- How WebMechanix Recovered 1,281 Abandoning Visitors in One Month
- How Paint Your Life Converted 28.57% of Visitors
- How Yoast Added 10,000+ Email Subscribers in a Month
Ready to get started and see similar success? Click below to start your 100% risk-free OptinMonster account today:
Integrating Klaviyo to WooCommerce
Step 1: Install OptinMonster
OptinMonster is really easy to set up no matter what type of website you have. But for WordPress users, it couldn’t be simpler.
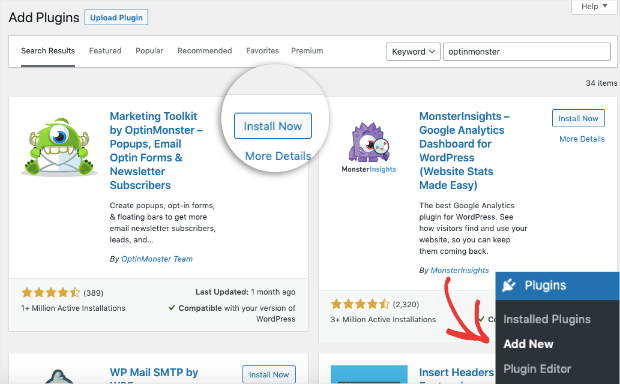
In fact, you’ll download and install OptinMonster the same way you would with any other plugin for your WooCommerce store.
Click on Plugins » Add Plugins and search for OptinMonster. Then click Install Now:
Once the installation process is completed, click Activate:
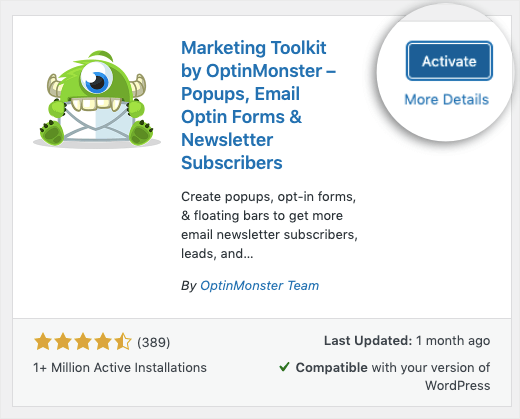
From there, you’ll be automatically taken through the setup wizard to connect your account:
You can now start creating high-converting campaigns with OptinMonster.
Need a little help? Check out this step-by-step guide on How to Integrate OptinMonster to WooCommerce.
Now, though, let’s turn our attention to what we’ve all been waiting for: designing a campaign that generates MORE leads.
Step 2: Create a New Campaign
Creating a new campaign is as easy as setting up OptinMonster. That’s because there’s no coding necessary.
From your OptinMonster dashboard, you’ll first start by selecting the type of campaign you want to create. For this tutorial, we’ll use a popup campaign.
From there, you need to choose a campaign template.
OptinMonster comes with 700+ pre-built templates that are fully responsive, mobile-friendly, and look great as they are.
You can even preview the templates to find the one that matches your marketing ambitions.
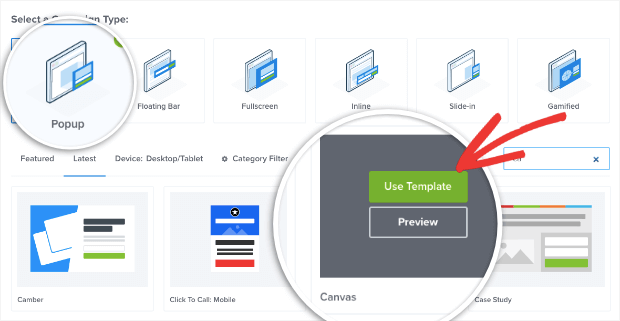
You can now customize your campaign’s template.
From there, you’ll simply name your campaign (to stay organized) and move to OptinMonster’s feature-rich builder.
Step 3: Customize Your Campaign
OptinMonster’s campaign builder is by far one of the easiest on the market to use.
Everything can be done directly on the editor and, again, there’s no coding necessary.
If you want to change any text in your campaign, just click on it and make the modifications you need:
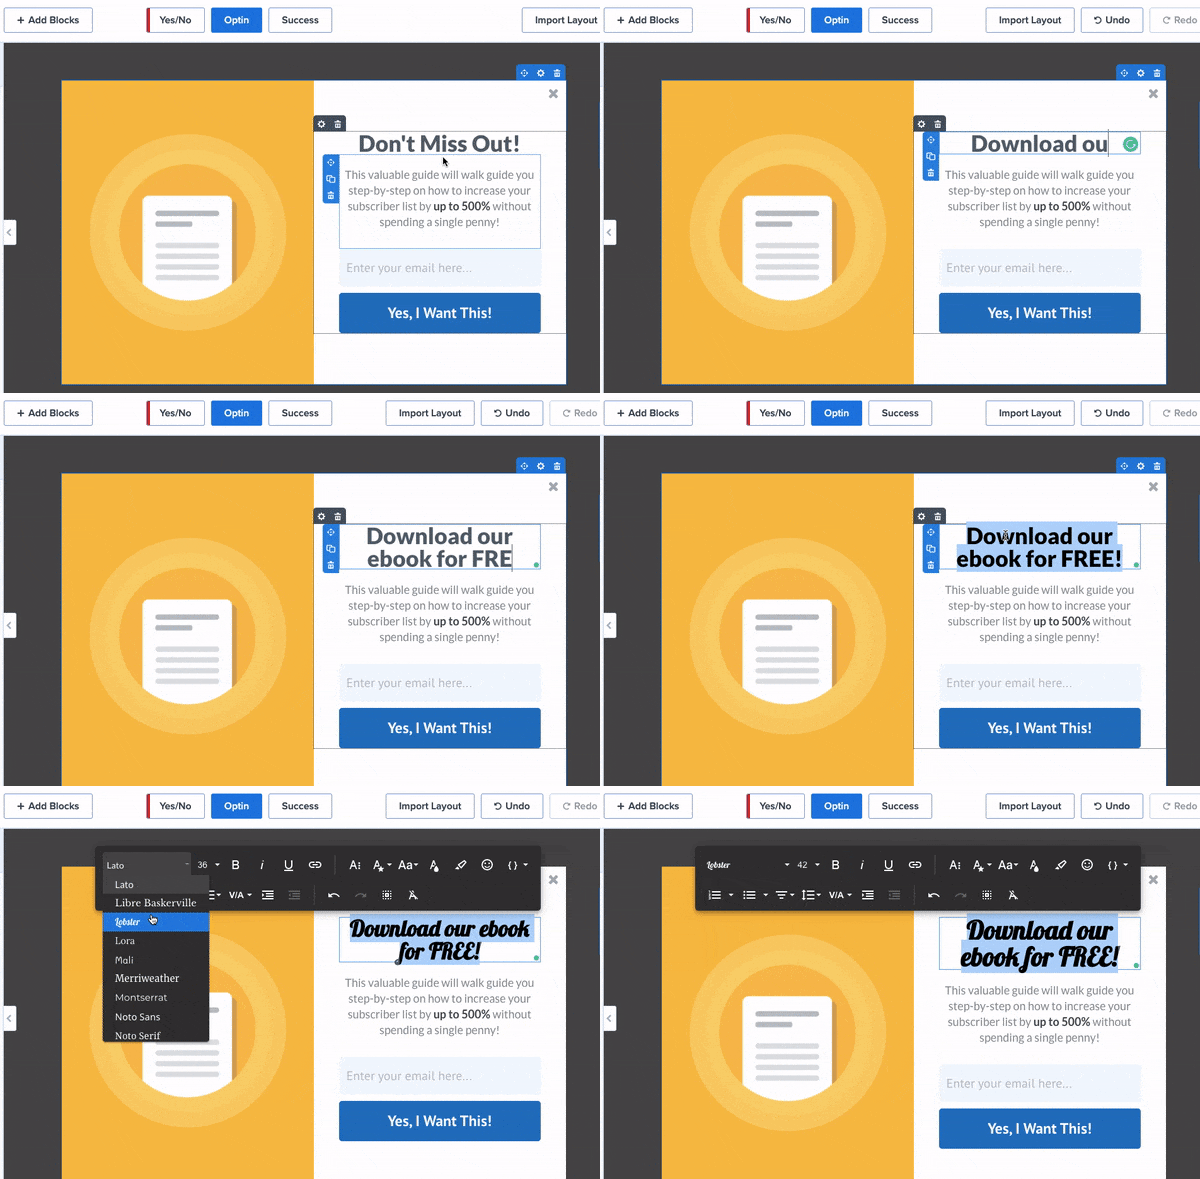
When you’re using OptinMonster, you have endless opportunities to make your campaign stand apart from the rest.
That’s because you can add more elements to your campaigns like:
- Images
- Videos
- Buttons
- Countdown timers
- And a lot more…
Once you identify which feature would ass the most value to your campaign goals, all you need to do is drag and drop them into place:
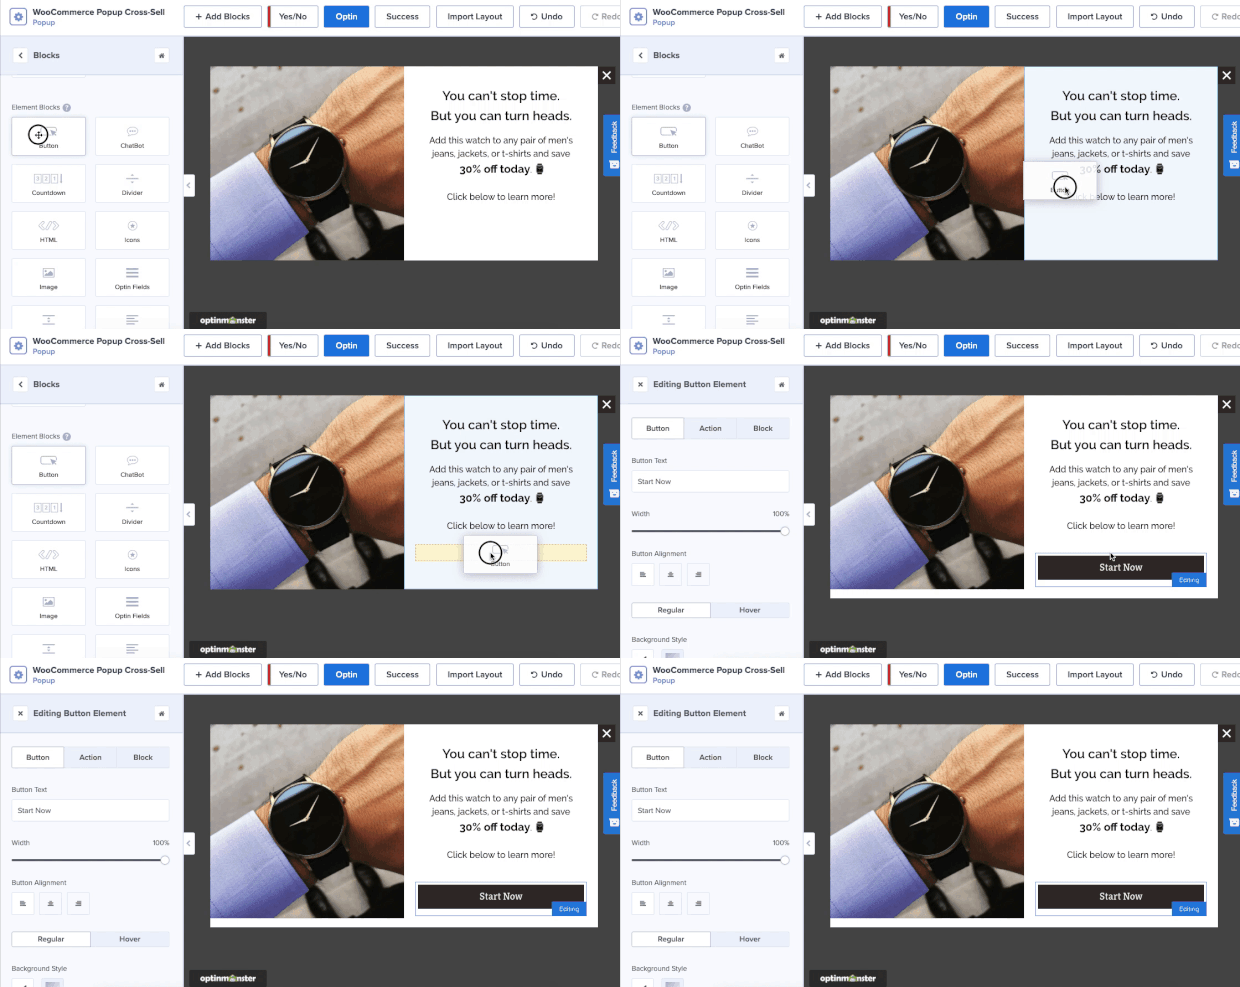
Need a bit more help to design your first campaign with OptinMonster?
Check out this detailed guide on How to Create Your First OptinMonster Campaign
The next step is to set up display rules, which is just as easy as the previous steps.
Step 4: Set up Display Rules
OptinMonster’s display rules are the secret to getting higher conversions.
With advanced display rules, you can show the right message to the ideal audience and at the most appropriate time.
This leads to higher conversion rates and, ultimately, more sales from your WooCommerce store.
Head to the Display Rules tab to set targeting rules.
You’ll see a default rule where OptinMonster shows your campaign to the visitors after they spend at least 5 seconds on your site:
You can change this by clicking on the targeting rule you want from the menu:
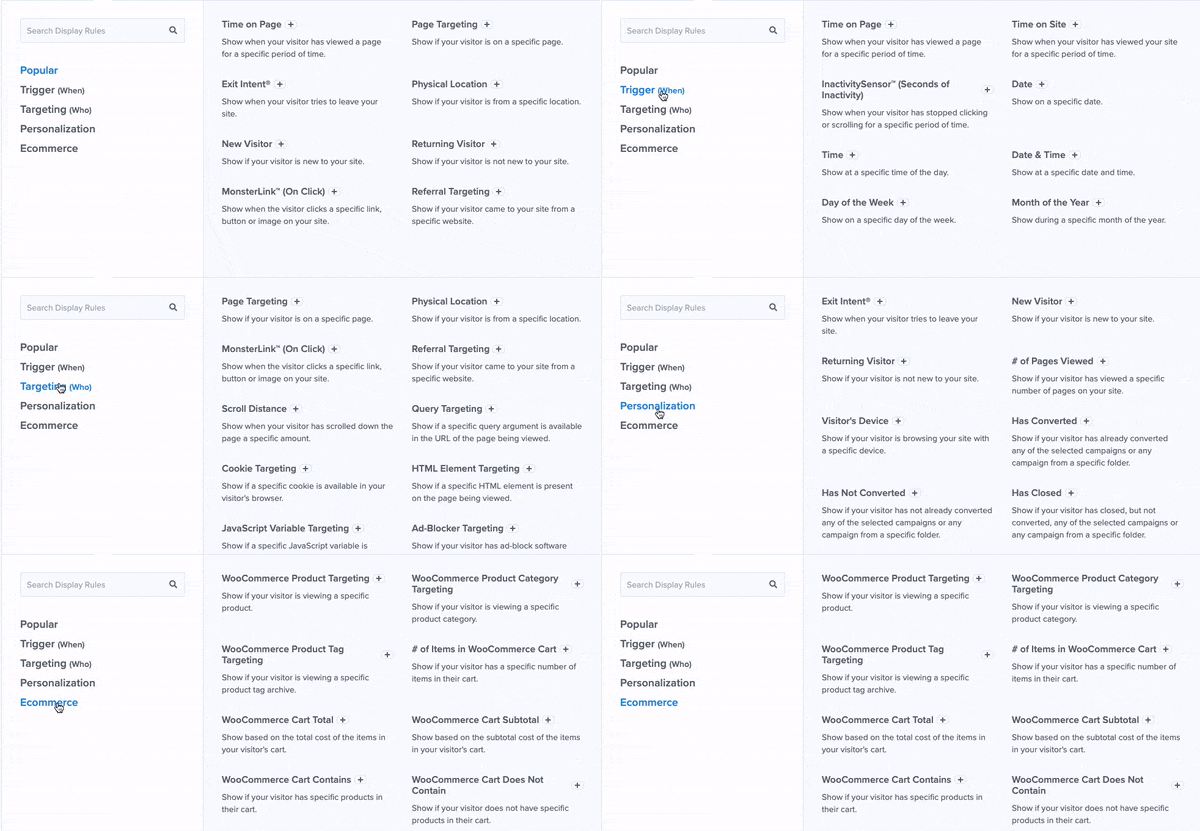
Here are some of OptinMonster’s best targeting rules:
- Geolocation Targeting: Personalize your offer to users based on their physical locations.
- Exit Intent® Technology: Capture abandoning visitors as they’re actively leaving your site.
- OnSite Retargeting®: Engage returning visitors by showing fresh campaigns every time.
These are just a few of the targeting rules OptinMonste rhas to offer, though there are MANY more.
Plus, OptinMonster has a ton of customized display rules specifically built for WooCommerce. This lets you show popups depending on things like:
- Items in your customer’s cart
- Products your customer is browsing
- Cart totals or sub-totals
- Product tags
- And more…
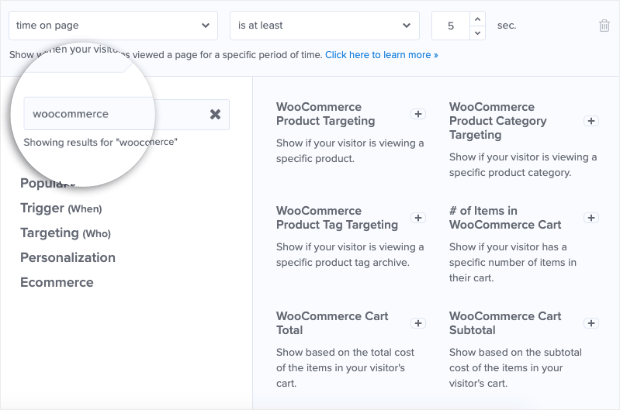
These rules will help you instantly boose more revenue from your WooCommerce store.
Now all that’s left is to make sure your new leads go to your Klaviyo account.
Step 5: Integrate Klaviyo
OptinMonster offers seamless integration with popular email service providers such as Klaviyo.
That means you can easily send your leads to Klaviyo from OptinMonster by following these simple steps:
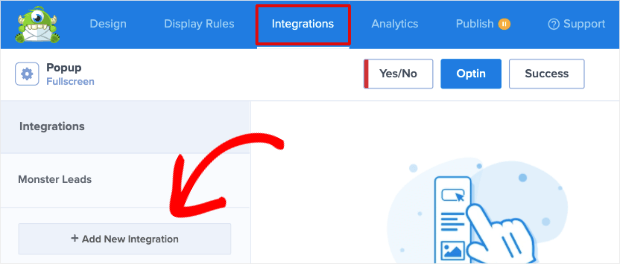
Select the Navigation tab on the campaign builder and click Add New Integration:
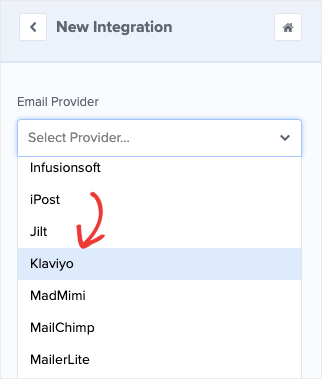
In the drop-down field, you’ll come across the names of different email service providers in alphabetical order.
Scroll down and select Klaviyo:
Login to your Klaviyo Account to create API key:
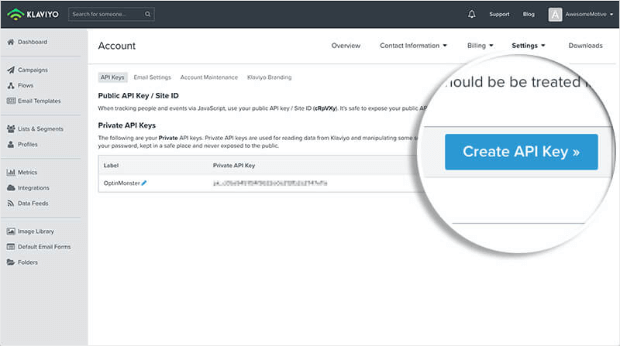
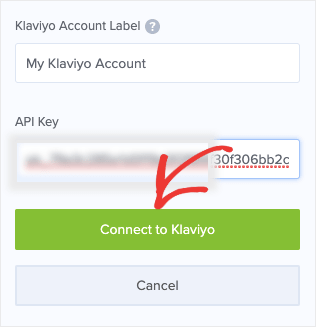
Copy the API key and paste it on the correct field in OptinMonster and then select Connect to Klaviyo:
Now you can determine which segment of your email list you want new leads to go to.
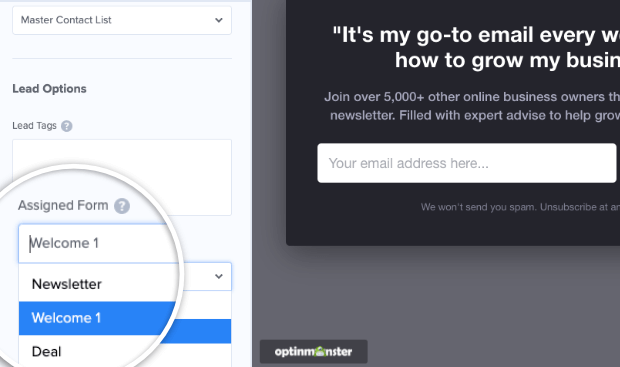
This allows you to personalize your offers to get the most leads possible.
Click Save and you’re ready to publish your campaign.
Step 6: Publish Your Campaign
Switch to the Publish tab to make your campaign live.
You’ll get a complete preview of the campaign schedule where you can adjust the date and time.
If you need more help with scheduling your popup campaign, we have got you covered. Check this step-by-step guide on How to Schedule a Popup in WordPress.
Once you have scheduled your campaign, click Publish. You can also Preview the campaign just to be sure it looks exactly how you want it to:
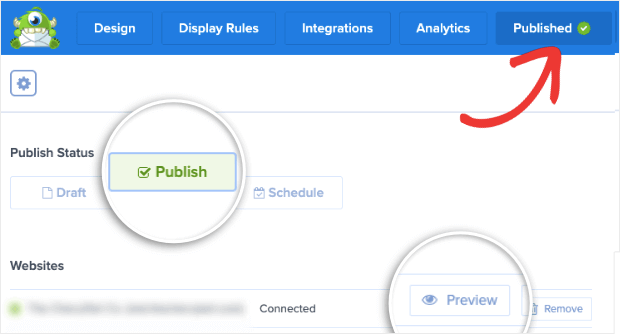
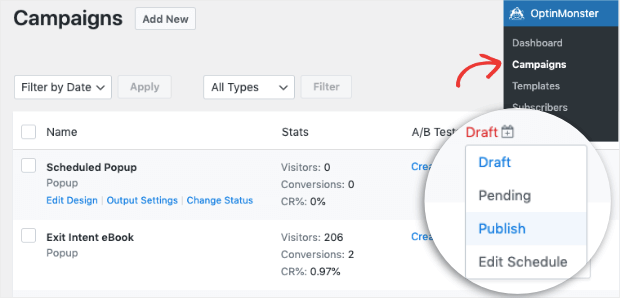
And to make sure it’s published, you can always visit your campaign’s list in your WordPress dashboard.
Select OptinMonster » Campaigns and make sure your campaign has changed from Draft to Publish:
And that’s all for today! This has been a small tutorial on the best way to add an email signup to Shopify.
We hope you enjoyed this post on how to connect Klaviyo to WooCommerce.
If you did, you’ll definitely want to check out these amazing resources on email marketing to get even more subscribers:
- 9 Promotional Email Examples (And How to Write Your Own)
- 25 Email Popups Examples & Best Practices to Explode Your List
- The Best Time to Send Emails to Boost Opens, Clicks, and Sales
These posts contain a lot of hacks and tips that help you to get crazy results with email marketing.



Add a Comment