Are you using Tumblr to grow your customer base or attract more warm leads?
TL;DR:
Steps to Follow:
- Select Your Campaign Type: Choose from templates or create a custom popup with OptinMonster’s drag-and-drop builder.
- Design Your Popup: Add compelling copy, images, and elements like countdown timers or buttons.
- Set Display Rules: Use triggers like inactivity or Exit-Intent® to show popups at the right time.
- Integrate Your ESP: Connect with email service providers like Constant Contact or Brevo (formerly Sendinblue).
- Embed on Tumblr: Copy the embed code from OptinMonster and paste it into your Tumblr theme’s HTML before the
</body>tag.
By following this tutorial, you’ll turn Tumblr visitors into leads with engaging, high-converting popups. Ready to get started? Sign up for OptinMonster today!
Tumblr is a popular platform for sharing your stories, ideas, and creativity with others. But if you’re using Tumblr to generate leads, you need something more than just new followers:
You need to grow your email list.
That’s why, in this tutorial, we’re going to teach you how to add a lead capture popup to your Tumblr site.
Before we do, though, let’s look at what Tumblr is and how it works with OptinMonster to level-up your lead generating strategy.
What Is Tumblr?
Tumblr is a free blogging and social media platform that allows users to share short-form blog posts:

Tumblr is an excellent tool for businesses of any size. It currently hosts over 475 million blogs and has become more popular than Facebook for people aged 18-25.
Not only can you easily create a blog, but Tumblr allows you to customize your profile’s pages. This makes using a Tumblr account a bit like having your own website.
You won’t have as much functionality as if you’d built a site with WordPress, for example, but you don’t need to pay for a domain, SSL certificates, web hosting, or any other fees that self-hosting sites incur.
Instead, you just need to create a free Tumblr account, and you can start blogging immediately. But if you’re using your Tumblr account for business, you still have a major problem:
How do you get your readers’ contact information so you can keep in touch with them for future promotions, sales, or general company updates?
That’s where OptinMonster steps on the scene:
OptinMonster is the world’s #1 lead generation software. That means we’re the best at getting you higher conversions for your site’s goals.
This includes gathering email addresses from your Tumblr site.
We help you get your site’s visitors to take action through multiple optin campaigns. “Optin campaigns” are simply small messages that you show to your visitors with a call to action (CTA).
These campaigns can be in the form of a popup, floating bar, inline campaign, sidebar widget, and more. Here’s the Tumblr popup demo campaign we built for today’s tutorial:
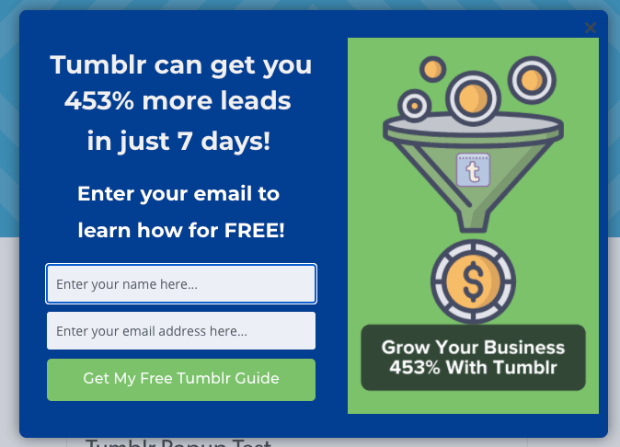
But creating the campaign is only half the battle. The other half is showing it to the right people at the right time in their customer journey. That’s why OptinMonster offers tons of targeting rules and triggers to help you personalize your campaigns and boost conversions.
We’ll get into more detail on that later.
If you want to know more about how OptinMonster works, check out this article: How Does OptinMonster Work? 8 Benefits + 12 Case Studies.
Otherwise, sign up for your risk-free OptinMonster account today!
Now that we know what Tumblr is and how you can use OptinMonster to grow your contact list, let’s dive into the tutorial.
How to Add a Lead Capture Popup to Tumblr
This tutorial will be using OptinMonster to hook up your lead capture popup to Tumblr. When you sign up, make sure to create your OptinMonster account with your Tumblr website’s URL.
Then, you’re ready to start building your campaign.
Step 1: Select Your Campaign Type
The first thing you need to do is log into your OptinMonster account:

Then, in the upper right-hand corner of your dashboard, click Create New Campaign:
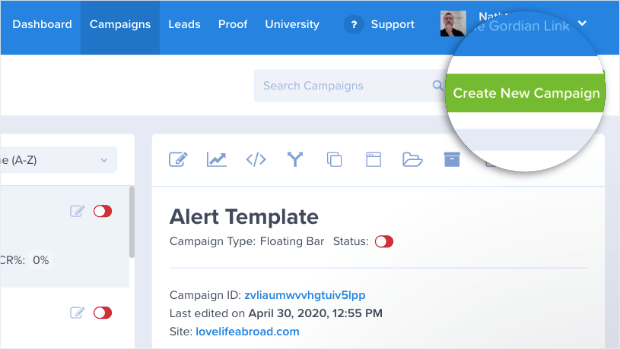
Now you need to choose your campaign type. For today’s tutorial, we’ll select a Popup:

Next, choose your template:
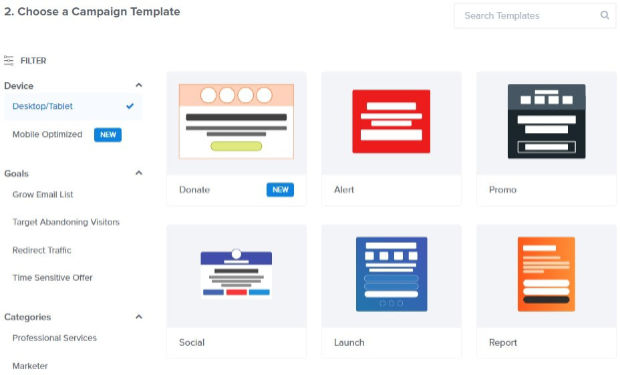
OptinMonster has over 50 pre-built templates you can choose from. These look great across most popular devices, and you can even filter your templates to be Mobile Optimized:
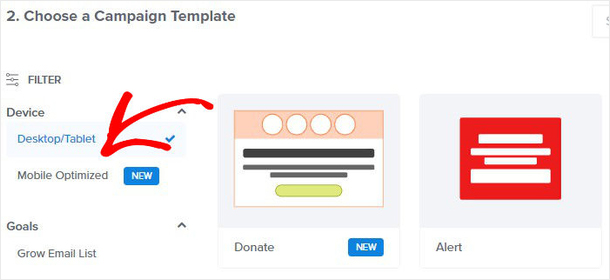
And if you want to create a popup that’s 100% unique to your business or brand, you can use our Canvas template:
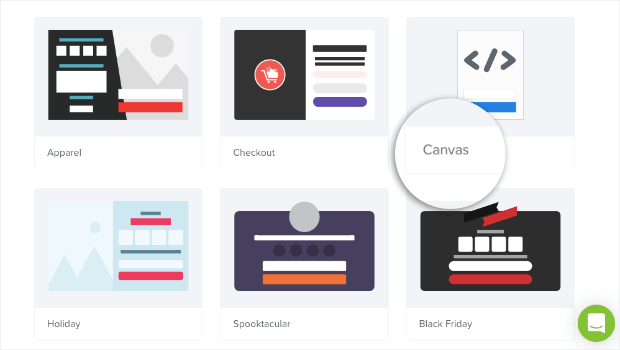
This template is blank, so you can build your Tumblr popup from scratch.
The best part is that you don’t need any coding or design experience to do so. As you’ll see in a moment, everything can be done with just a few clicks or a drag and a drop.
Our goal is to make these optin campaigns accessible to all of our users, even if they don’t consider themselves “tech-savvy.”
That way, you can build stunning campaigns with a fraction of the time, energy, and money. Then you can devote those resources to other areas of your business.
Today, we’ll choose the Magnet template:

This is great because it gives you a place to add a high-quality image of your lead magnet on the right-hand side. But, you also have plenty of room for compelling copy on the left-hand side.
Never used or a lead magnet or not sure what it is? Check out this helpful post on 69+ lead magnet ideas.
Once you’ve selected the perfect template for your popup campaign, you’ll need to name it, assign it to a site, and click Start Building:
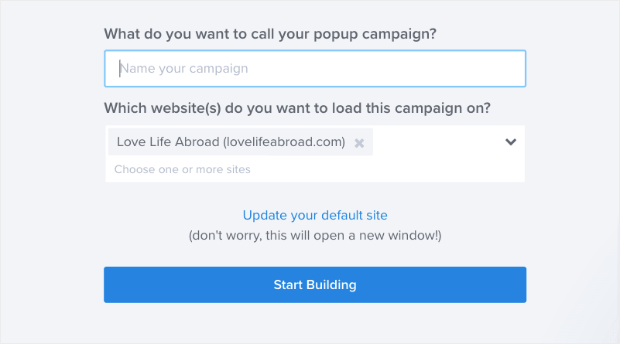
Step 2: Design Your Tumblr Popup
Now your template will be in your OptinMonster editor. As we mentioned earlier, modifying your campaign is super simple.
We won’t go into much detail today on all the ways you can personalize your popup. There are just too many options to cover in one post.
If you need some help, we recommend this helpful resource: How to Create Your First OptinMonster Campaign.
What you need to know for today, however, is that all of our campaigns are made up of element “blocks.” These blocks contain a different part of your campaign.
You can have text blocks, image blocks, video blocks, and more.
To change the text blocks in your campaign, OptinMonster uses inline editing. That means you can modify the text by clicking on it in your editor:
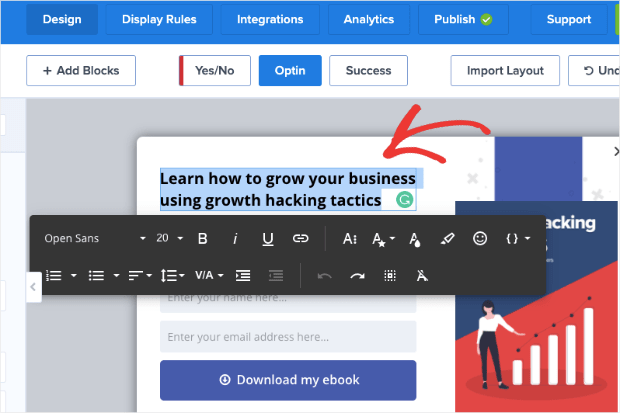
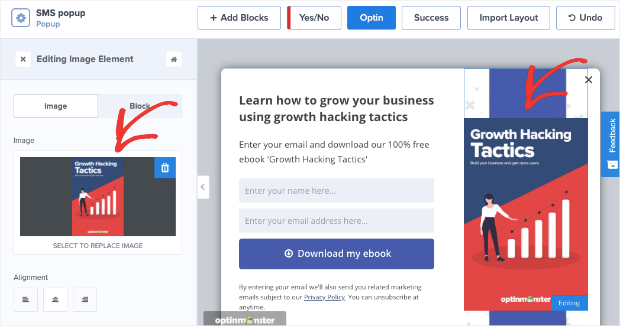
Changing other blocks of your Tumblr popup is easy, too. All you need to do is click on the block you want to modify in the editor. Then the editing tools will appear on the left-hand side.
So, for example, if you wanted to change the image block, you’d simply click on it in the editor. Then the editing tools would appear on the left:
And if you want to add a new block, that’s no problem at all. Simply click on +Add Blocks at the top of your editor:
Then scroll down the left-hand side menu until you see your block options. You have loads of choices, including:
- Button
- ChatBot
- Countdown Timer
- Divider
- Image
- Video
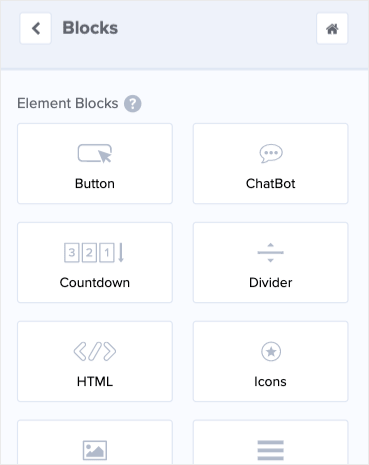
And much more. When you have the block you want to add, simply drag and drop it into place:
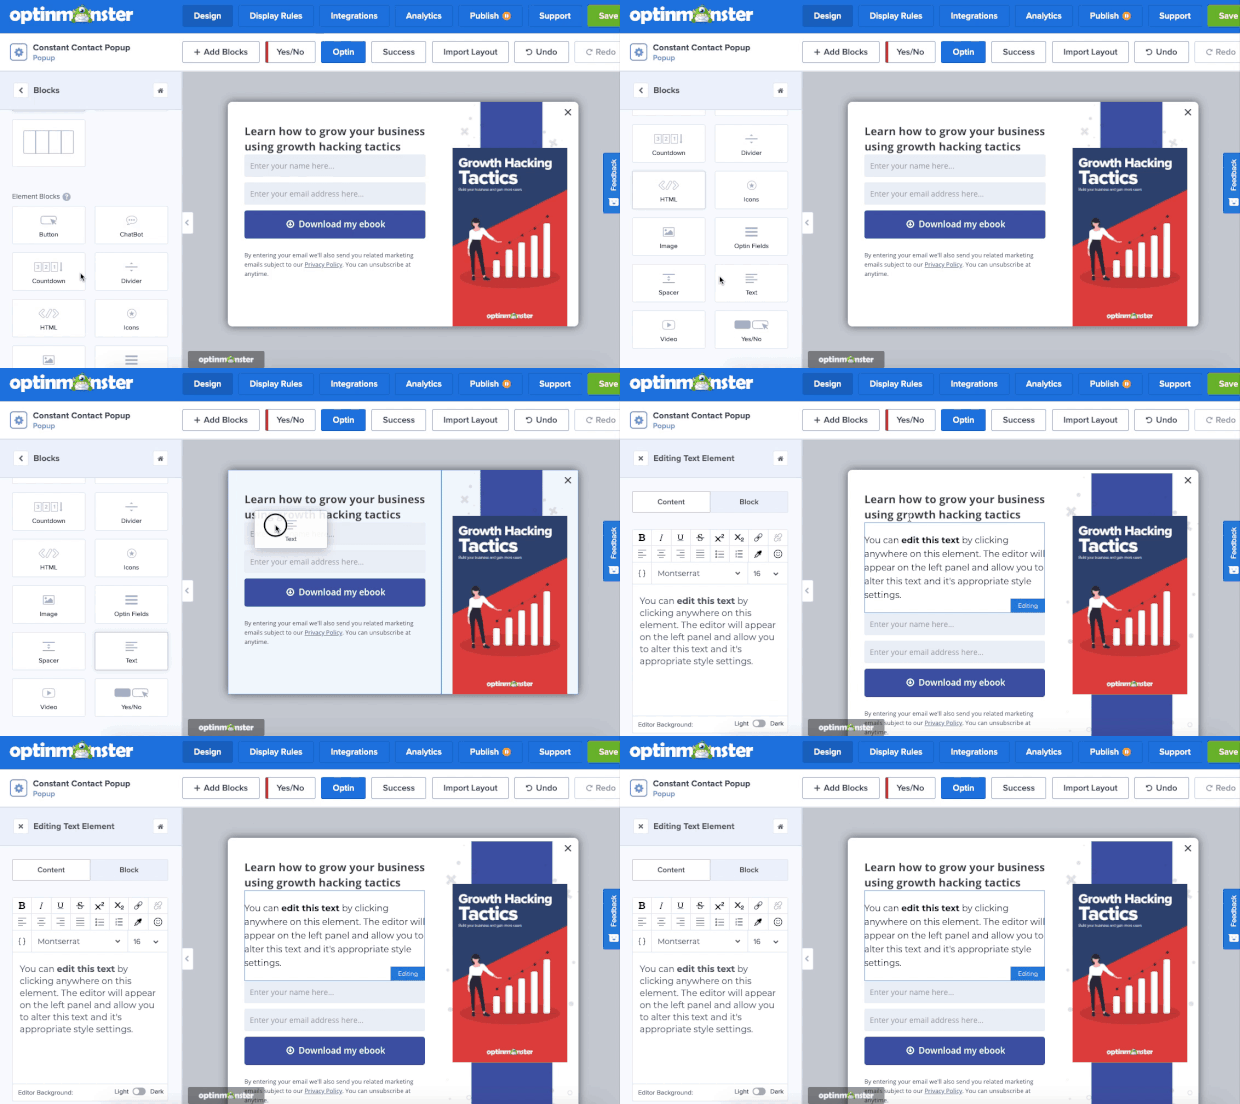
You’ll need to design your campaign in a way that matches your popup’s specific goal. That means adding copy that connects with your audience and showing an image of your lead magnet.
At this point, you should design your campaign however will best meet your goals. Here’s the Tumblr popup we built for today’s demo:

We built this in under 5 minutes. Now that the campaign’s ready, it’s time to set your display rules for the campaign.
Step 3: Customize Your Display Rules
Your campaign’s design is only half of the equation. The other part is making sure that you’re displaying it to the right people and at the right time.
For that, OptinMonster gives you 2 powerful tools:
- Targets
- Triggers
Targets are ways that you can display your Tumblr popup to people who meet certain characteristics. This would be like people searching from a certain device, a particular location, or visiting a specific page.
These are rules that are based more on the user’s demographic profile.
Triggers, on the other hand, rely on a user’s behavior to determine whether or not your popup will appear.
This can be things like if the user is actively leaving the site (Exit-Intent Technology®), scrolled down a certain percentage of the page, or have become inactive for a specific amount of time.
These are just some of the targeting and trigger options you can choose from. At OptinMonster, we have tons of options that are easy to customize. That way, you can rest assured that your popup is seen by exactly who you want and at just the right time in their customer journey.
The more you can personalize your Tumblr popups, the higher conversions you’ll see.
By default, OptinMonster has 2 display rules in place:
- Time on page is 5 seconds
- Will appear on every page
To change those, click Display Rules at the top of your OptinMonster editor:

Then you’ll see the menu of targeting and trigger rules:
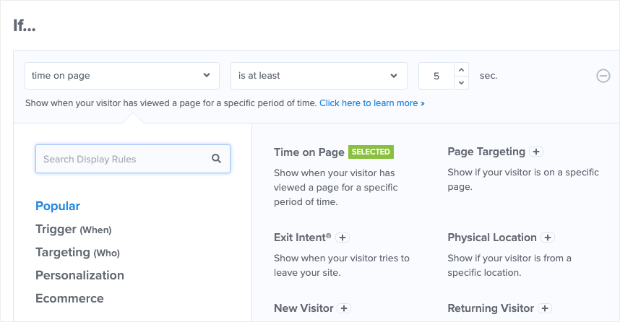
Today, we’re going to create an InactivitySensor™ trigger. For that, type Inactivity into the search bar and click on InactivitySensor™:
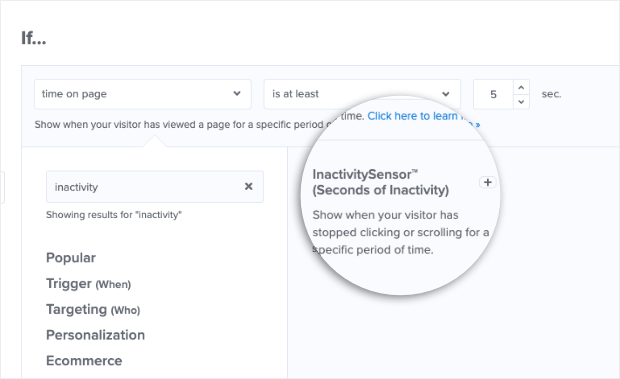
Then you can choose how long your visitor needs to be inactive before displaying your popup:

An inactivity trigger will show your popup when users have stopped engaging with your site for a certain amount of time.
This is a great way of recapturing your audience’s attention and getting them to take action. In fact, Skates.co.uk was able to use a simple inactivity trigger to convert 10.97% of their visitors.
The second default display rule is that the popup will appear on every page of your website. But you can change this by clicking on the rule and selecting a new option from the drop-down menu. You can choose:
- Any page
- Just the homepage
- URL exactly matches
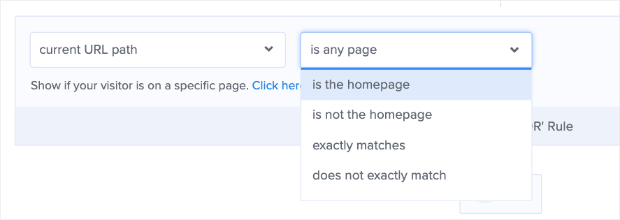
And much more.
For today’s tutorial, we’ll leave the default option to show the Tumblr popup on every page of our Tumblr blog. The important thing is that you can change this to meet your campaign’s specific goals.
Now we need to hook up OptinMonster with your email service provider.
Step 4: Integrating OptinMonster With Your ESP
Even though you’ll be displaying your OptinMonster popup on Tumblr, you’ll still need a place to collect and manage all of your new leads. For this, people typically choose an email service provider (ESP).
If you don’t already have an email service provider, here are 3 that we recommend:
- Constant Contact: an excellent solution for small businesses who value phone/email support
- Brevo (formerly Sendinblue): the perfect choice for businesses on a budget looking for a free option to get started
- Drip: the most advanced option for eCommerce
Regardless of which ESP you choose, integrating with OptinMonster is easy. At the top of your OptinMonster editor, click Integrations:
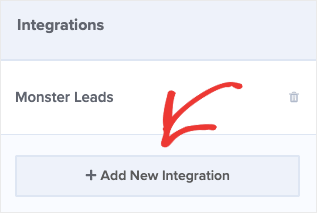
You’ll see a list of integrations you can choose from. Scroll down and select your ESP from the drop-down menu. This is how it would look if you were using Drip, for example:
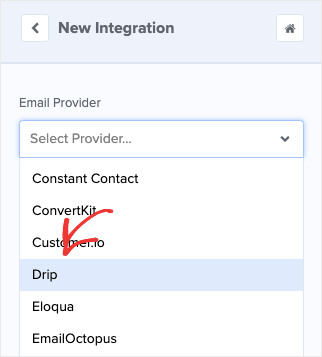
Then you’ll need to follow the instructions for your specific ESP to finish connecting with OptinMonster. In most cases, this is a matter of copy/pasting your API Key from your ESP dashboard to your OptinMonster account.
Don’t see your ESP on the list? No worries. Read this article to learn how to integrate OptinMonster with any ESP via HTML or a Zapier integration.
Once you’ve connected OptinMonster with your email service provider, it’s time to publish your popup and embed it to your Tumblr account.
Step 5: Embed OptinMonster With Tumblr
Now you need to hook up OptinMonster with your Tumblr account. Doing so is easy. Click Publish at the top of your OptinMonster editor:

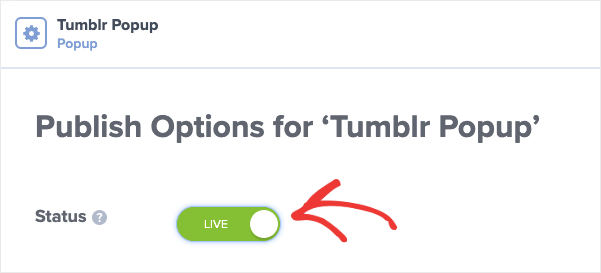
Click the toggle button to change your Tumblr popup’s status to Live:
Then scroll down to find your embed code:

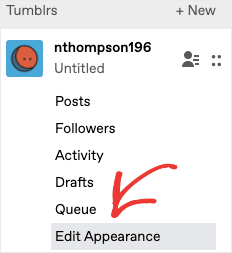
Copy this embed code and head over to your Tumblr account. In your profile menu, click Edit Appearance:
Then click Edit Theme:
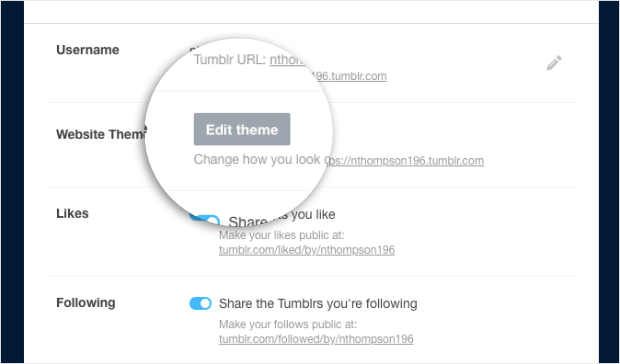
In the upper left-hand corner, select Edit HTML (it’s written in small grey font):

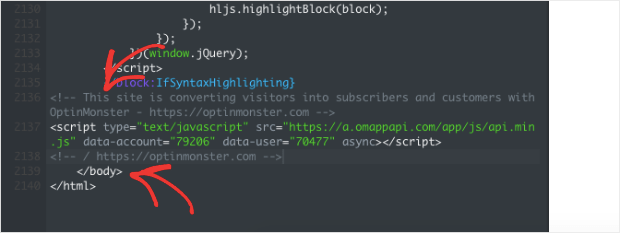
Now paste the OptinMonster embed code just above the </body> tag all the way at the bottom of the HTML code:
And that’s it! You can now go test out your Tumblr popup live on your Tumblr blog.
We hope you found this article helpful. Chances are that you’ll be using this Tumblr popup to grow your email list. If that’s the case, you may want some help with setting up your email marketing strategy.
For that, we suggest checking out the following posts:
- How to Run a Successful Email Marketing Campaign
- Email Marketing for Beginners: A Step by Step Guide
- How to Create an Effective Email Autoresponder Series
These resources will have everything you need to grow and monetize your email list.
Ready to get started? Sign up for your risk-free OptinMonster account today!


Add a Comment