How to Add a Floating Social Bar to WordPress (3 Methods)

Last updated on

by

how to add a floating social bar to wordpress

Do you want to get your website visitors to follow you on social media?

A floating bar is one of the best ways to display your social profiles and prompt a user to follow or subscribe without disturbing their browsing experience.

Floating bars can help you grow your social media following, boost engagement, and increase brand awareness.

Today, we’re going to show you 3 easy ways to add social floating bars to your WordPress site to maximize conversions and revenue.

How Do Floating Social Bars Work?

A floating social bar lets you display your social profiles on the top or bottom of any page of your website.

social bar example

With these bars, you won’t need to manually add social icons to every page. Instead, you can set it up to display across every page on your site, or you could include/exclude specific URLs.

Floating bars can either stick to the top or bottom of the page so they remain visible to users at all times. This means they’ll be more likely to click on it and engage with your social media pages.

When used correctly, floating social bars can do wonders for your business by:

  • Driving traffic to social media handles
  • Building your following and subscriber base
  • Boosting engagement

…and much more!

There are quite a few plugins available to add a floating social bar in WordPress. But most of them are limited to displaying simple social icons.

Plus, there are no targeting options which means the same bar will appear to every visitor even if they’ve already subscribed to your social media pages.

If you really want to engage your audience, grab their attention, and get them to take action, you’ll want to use a powerful tool like OptinMonster.

optinmonster plugin page

OptinMonster is hands down the #1 lead generation tool that lets you create stunning floating social bars. It comes with 50+ attention-grabbing templates designed to convert visitors into followers.

You can also use the codeless drag and drop builder to customize the template and make your floating bar stand out with images, text, and social icons.

floating social bar

OptinMonster has tons of targeting rules to display the floating bar at the right time to the right people. So, for example, you can display our social bar exclusively to new visitors who are reading your blog posts.

optinmonster display rules

You can even make sure the floating bar doesn’t show to users that have already subscribed. Instead, you can show a different follow-up floating bar to draw their attention to popular posts/products, sales, and other offers.

And the best part? You don’t need any coding or design skills to create targeted high-conversion campaigns. You can control every aspect of your campaign with simple button clicks.

OptinMonster also tracks every campaign, so you can see exactly how many people saw your floating bar and how many clicked through to your social media profile.

You’ll instantly know what’s working and where to focus your time and energy.

analytics in optinmonster

Plus, OptinMonster isn’t just a floating bar tool. It lets you create other campaigns as well such as popups, slide-ins, gamified wheels, inline forms, and more.

optinmonster campaign examples

OptinMonster’s floating bar campaigns are flexible, and you can tailor your messages to promote sales, offer discounts, draw attention to a free trial, and more. There’s so much you can do with OptinMonster’s powerful design and targeting features.

Check out how ActiveCampaign adds 800 free trials every month with one floating bar

Ready to create your own floating social bar? Click below to join OptinMonster now:

Get Started With OptinMonster Today!

BONUS: Done-For-You Campaign Setup ($297 value) Our conversion experts will design 1 free campaign for you to get maximum results – absolutely FREE! Click here to get started →

In this tutorial, we’re going to show you how to create a stunning floating social bar using OptinMonster. After that, we’ll also show you 2 more WordPress tools that you can use to create social share bars for your site.

Here’s a table of contents so you can navigate this post easily:

This way you’ll have plenty of options to get the right floating bar for your WordPress site.

Let’s get started with creating a stunning floating social bar like this:

optinmonster floating social bar campaign

This will grab visitors’ attention and get them to engage with your social media channels.

1. Creating a Floating Social Bar with OptinMonster

To follow along in this tutorial, you’ll want to install and activate the OptinMonster plugin from the WordPress repository.

optinmonster plugin page

You can install the OptinMonster plugin just like you’d install any other WordPress plugin for your site. Need a bit more help? Just check out this in-depth guide: How to Install a WordPress Plugin: 3 Easy Methods.

The plugin will then appear in your WordPress menu. From here, you can launch the setup wizard to connect to an existing OptinMonster account or create a new one.

launch setup wizard to start optinmonster

Once you’ve connected your account, you can get started with creating the floating social bar.

Step 1: Creating an OptinMonster Floating Social Bar

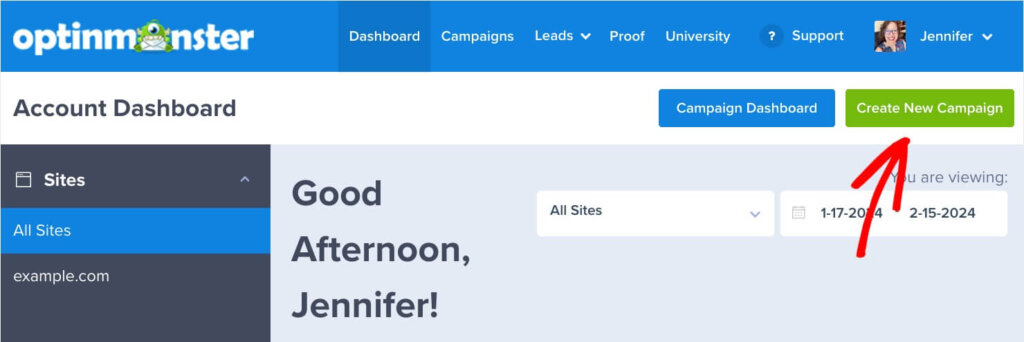
In the OptinMonster dashboard, you’ll see options to create all sorts of lead generation campaigns. To create the social bar, select the Floating Bar campaign option.

floating bar in optinmonster wordpress dashboard

This will open up a page filled with templates to choose from. You can explore the templates by hovering over them and selecting the Preview option.

We’ll be using the Social template that’s designed to promote your social media pages.

social template

When you select the template, you’ll need to give your campaign a name and click the Start Building button:

give your optinmonster campaign a name

This will open up the OptinMonster campaign editor, where you can customize the template.

Step 2: Designing the Floating Social Bar

Customizing your floating bar has never been easier! OptinMonster has a visual drag and drop builder that makes it incredibly easy to add, remove, and edit elements.

Inside the builder, you’ll see a preview of your form template on the right and customization options on the left.

By default, the template has all the fields you need:

  • Image
  • Copy
  • Buttons for all popular social media platforms

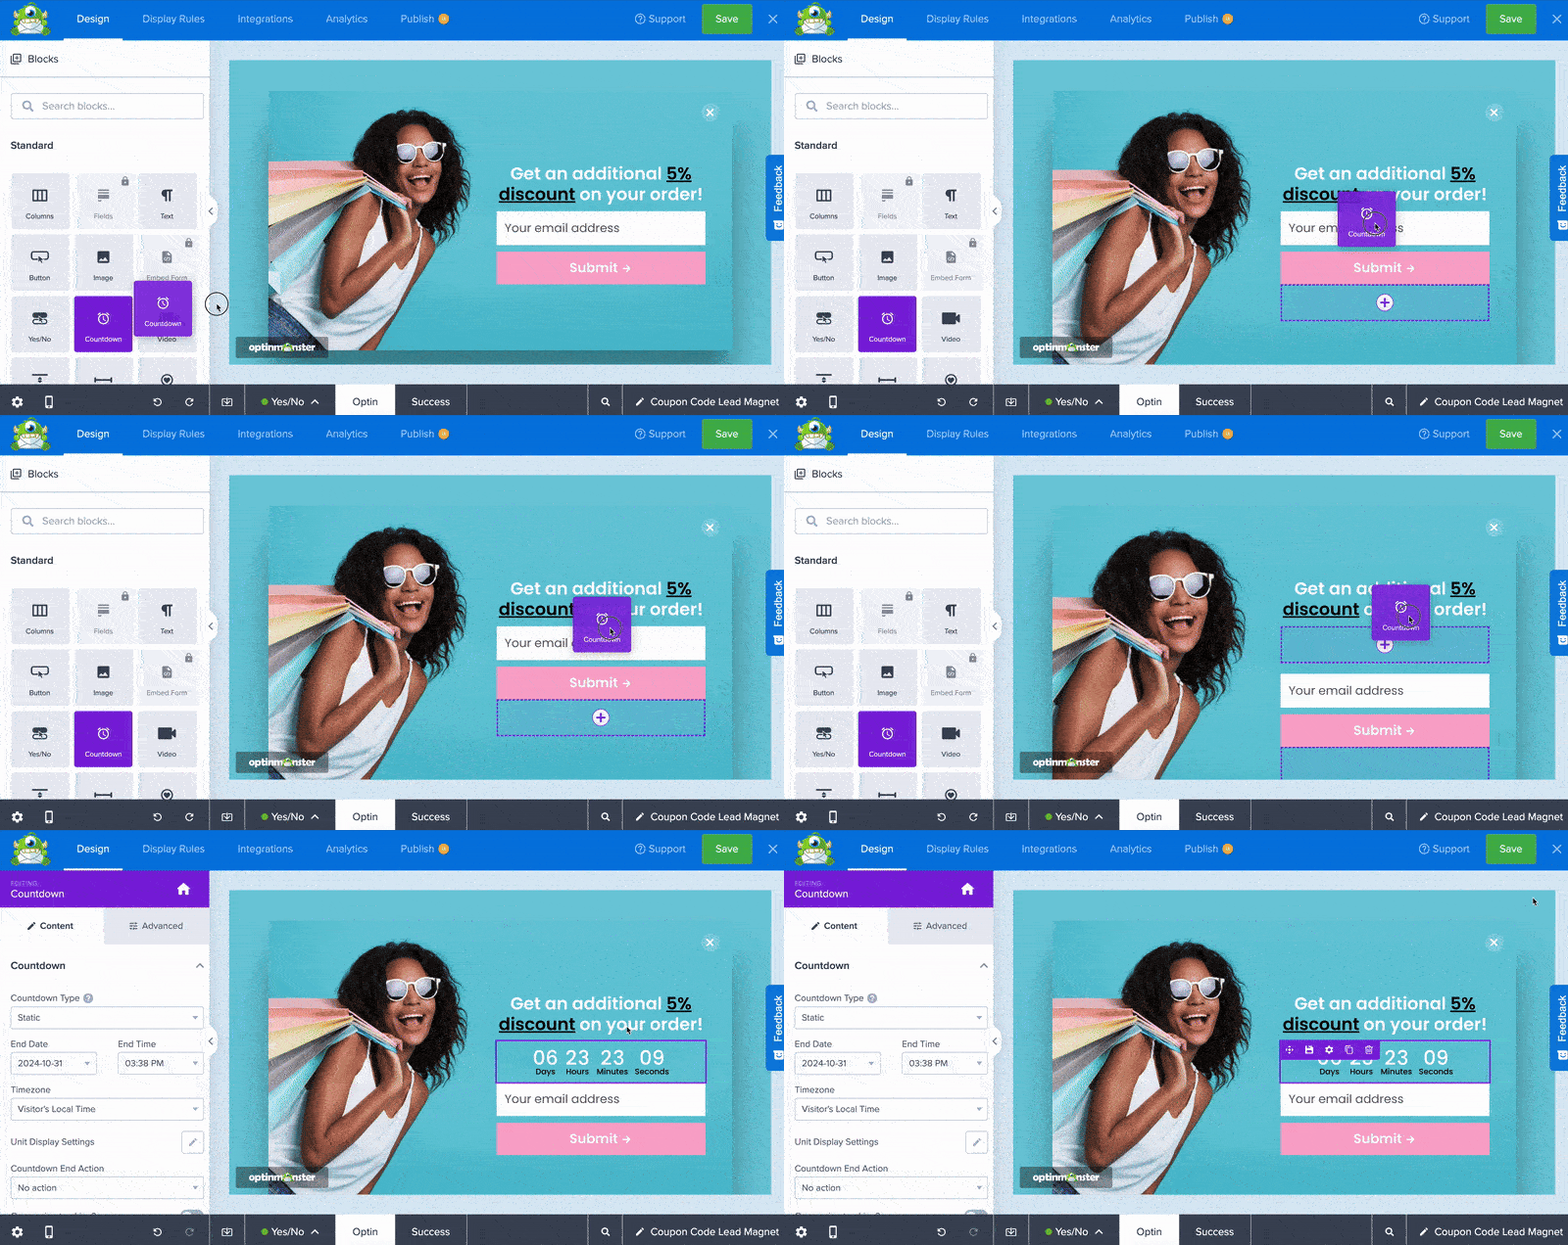
If you want to add more elements, there’s an Add Blocks button which opens up a menu that you can use to add more columns and blocks. Plus, you can reorder them by dragging and dropping blocks where you want them to appear.

editing social bar with drag and drop builder

Next, you can click on any social media button to pull up the settings for it in the left panel. We’re going to change the Facebook button to Pinterest.

First, you can change the social media platform name using the Button Text field. Then, you can change the color to red, Pinterest’s signature brand color.

change button text and background color

Scroll down the same menu, and you’ll see an option to display an icon. You can use the toggle switch to turn off the icon option. Or you can select the Pinterest icon using the Icon Selection menu.

choose social media icon

Now, scroll back up and make sure you add the same settings under the Hover tab. You can even turn off the hover effect if you want.

hover option for button

After that, switch to the Action tab. Here, you can choose what action takes place when a user clicks on the button.

The best option for social media shares is to ‘Open in a new window’. This way, your visitor can follow your social media page in a new tab and come back to your website to continue browsing.

open in a new window button action

In the next field, enter the link to your social media page. You can repeat the same process for all the other social media channels you want to add to the floating bar.

add button link

Next, you can edit the text in the template by selecting it and adding your own.

edit text in floating social bar

And when you select the text, you’ll see a text editor that lets you customize every aspect of your floating bar, including:

  • Font
  • Color
  • Size
  • Alignment
  • Line height
  • And much more…

To change the image in the campaign, select it and upload your own in the left column.

replace image in floating bar

You can also change the purple border at the top of the floating bar to match it to your own branding.

Head over to the home menu in the left taskbar. Then open the Optin Settings » Optin View Styles tab and you’ll see options to change the border here.

change background border color

With that, your campaign design is ready. Next, you can control where the floating social bar appears on your site.

Step 3: Choosing the Floating Social Bar Position

By default, OptinMonster displays the floating bar at the bottom of the page. If you’d like it to appear at the top, from your home menu in the OptinMonster builder, open the Floating Settings tab.

floating settings

Inside this menu, you’ll see a toggle switch that will change the position from the bottom to the top of your page.

load floating bar at the top of the page

Next, we want to show you how to target your visitors to maximize engagement and responses.

Step 4: Targeting Visitors with Display Rules

OptinMonster lets you target your visitors in different ways so you can get more of them to subscribe, follow, like, and share.

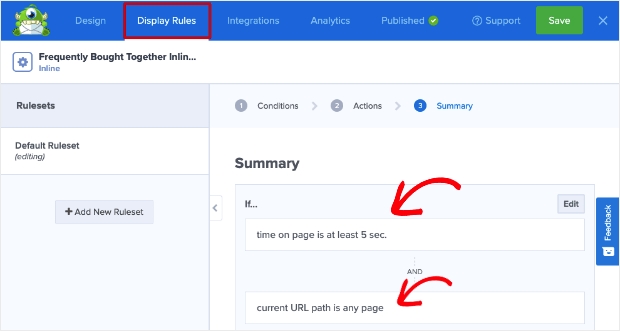
In the OptinMonster campaign builder, open the Display Rules tab. Here, you’ll see that OptinMonster displays the campaign by default after a user spends 5 seconds on any page:
default-display-rules in om

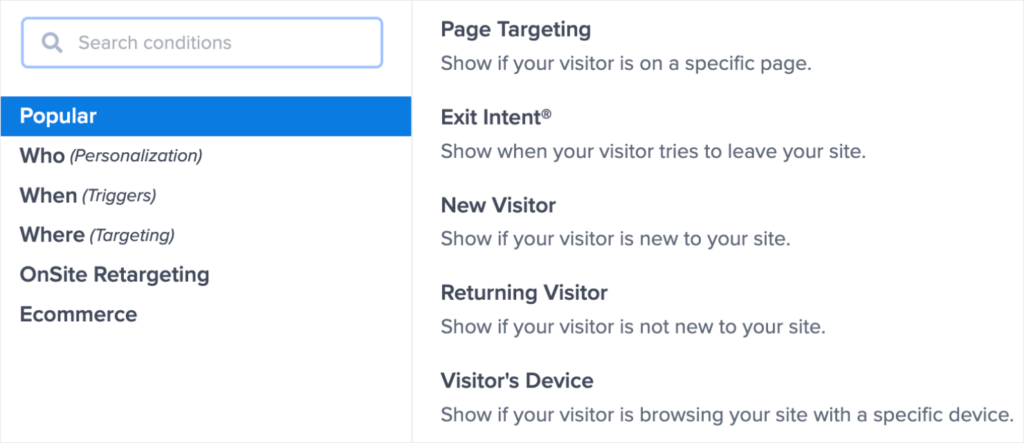
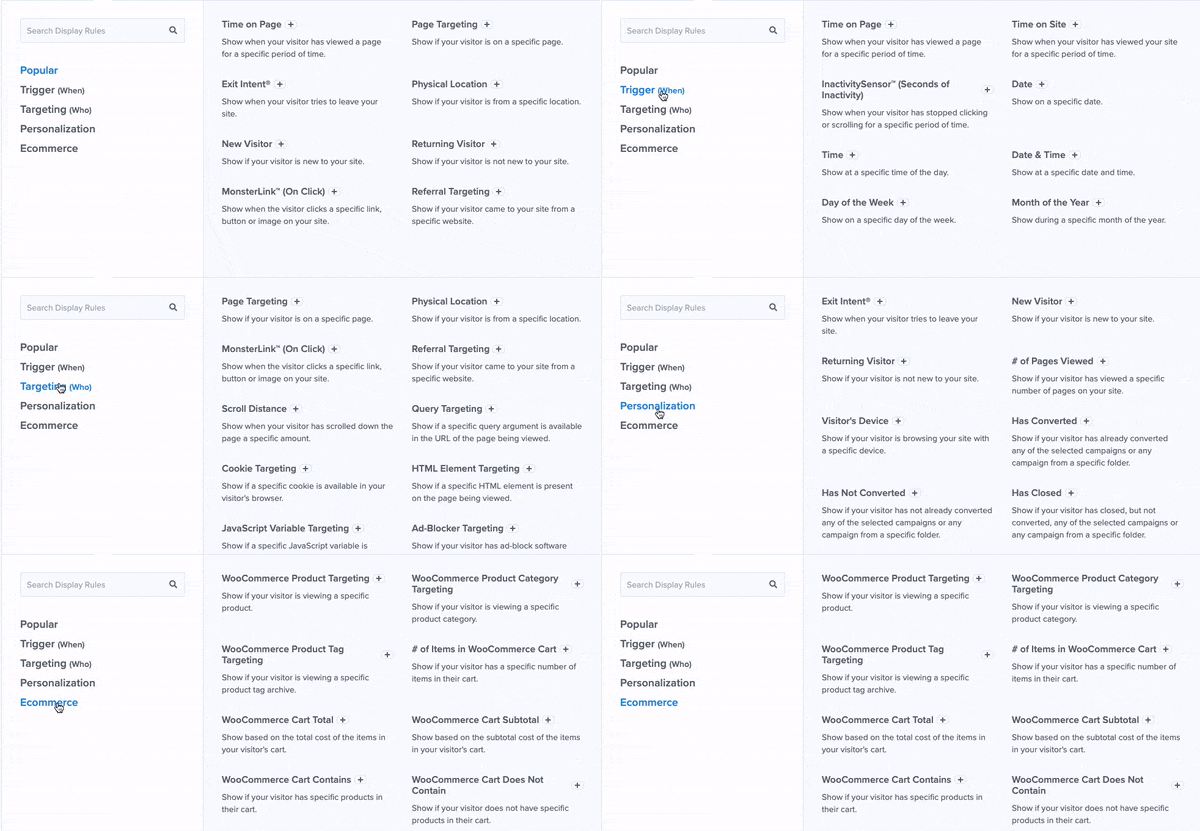
To change this, edit the default options to access all the display rules available. You’ll see a list of rules neatly categorized, so it’s easy to find what you’re looking for.
optinmonster display rules

Here are a few ways you can target visitors:

  • Time-based: Wait till a visitor has spent a certain amount of time on a page or schedule a date and time
  • Page-level: Create targeted campaigns for specific URLs
  • Scroll-depth: After a visitor has scrolled a certain amount of the page
  • Referral source: Show campaigns to visitors coming from a specific website or social media platform
  • Geolocation: Customize the customer experience by targeting users based on their physical location
  • OnSite® Retargeting: Keep users engaged by showing new campaigns to returning visitors

And that’s just to name a few. You simply need to select the rule from the list of options available, and OptinMonster will display the floating bar accordingly.

Usually, the next step is to integrate the campaign with your email service provider. This is a really handy feature if you include an optin form for people to sign up for your marketing emails and newsletters.

OptinMonster integrates with all popular email service providers including Constant Contact, Mailchimp, Drip, and Brevo (formerly Sendinblue).

Since the floating social bar doesn’t have any optin fields, we can skip this step and publish the campaign as it is.

Step 5: Publish Your Campaign

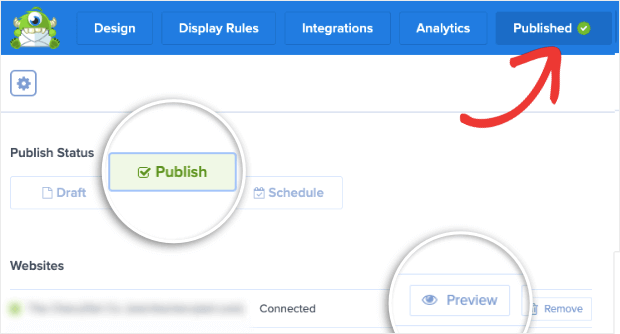
The floating social bar is now ready to go live on your site. To do this, switch to the Publish tab.

You’ll see an option to preview your campaign. Then you can set the status to ‘Publish’ to launch your floating social bar.
preview and publish campaign

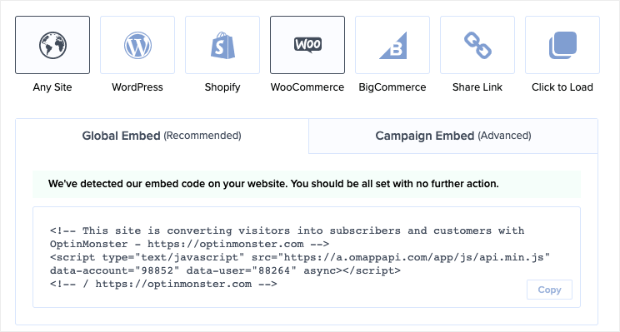
If you haven’t connected your website to OptinMonster yet, you’ll find instructions to do so at the bottom of this page.
global and campaign embed

Next, visit the OptinMonster » Campaigns page in your WordPress admin area. Make sure your campaign is set to ‘Publish‘ here as well.

wordpress publish option for optinmonster

Now you can visit your website, and you’ll see the floating bar appear according to the display rules you’ve set.

If you haven’t signed up for OptinMonster yet, what are you waiting for? Get your 100% risk-free OptinMonster account now by clicking below:

Get Started With OptinMonster Today!

BONUS: Done-For-You Campaign Setup ($297 value) Our conversion experts will design 1 free campaign for you to get maximum results – absolutely FREE! Click here to get started →

Next, we want to show you 2 more tools that let you create social media bars for your site in new and creative ways.

Method 2. Creating Social Bar Popups with TrustPulse

If you’re not using social proof on your website, then you’re missing a big opportunity.

Social proof is one of the best ways to:

  • Build brand authority and trust
  • Increase conversions across your site
  • Boost sales

And when it comes to social proof tools, TrustPulse is by far the best on the market.

trustpulse homepage

TrustPulse lets you display non-intrusive popups with a personalized message from you. So, for example, you could alert users to get more awesome content by following you on Instagram.

TrustPulse even comes with powerful trackers to capture recent activity on your site, such as sales and signups. It then converts this activity into popups to show visitors your site is busy and that other visitors are taking action.

trustpulse facebook social bar

This helps build trust and confidence in visitors, and they’ll be more likely to follow you on social media.

It takes just 5 minutes to set up and TrustPulse will automatically run on its own. You can get started right away following the steps in this guide: How to Use a Recent Sales Popup to Boost Your Revenue.

TrustPulse also lets you collect analytics on visitors and subscribers and display how many people took action within a given period of time:

trustpulse youtube social bar

These popups create a sense of FOMO (fear of missing out) in visitors. When other people see how many people love your social media content, they’ll want a piece of the action too.

Plus, TrustPulse also comes with powerful display rules to control where, when, and how often your popups appear.

The tool is proven to instantly boost conversions by up to 15%! Want to try it yourself? Sign up for your risk-free TrustPulse account now!

3. Adding a Social Share Bar with Shared Counts

Shared Counts is a free social media share buttons plugin for WordPress.

shared counts social media sharing button plugin

Shared Counts lets you create and display social media share bars at the top of blog posts and other pages of your site.

So it isn’t truly a floating bar plugin, but it lets you create social share bars to get more engagement and views for your posts.

Check out how the social share bar looks on the WPBeginner blog.

shared counts example on wpbeginner

We use it at OptinMonster, too, and you’ll see the share buttons at the top of this blog post.

Shared Counts supports all popular social media platforms like Facebook, Twitter, Pinterest, and LinkedIn. It even lets you add an email and print button.

Plus, Shared Counts also comes with different button styles so you can pick the perfect one for your site.

As visitors share your posts or interact with the buttons, the plugin will count the number of times they do and display them inside the bar.

Plus, the plugin is incredibly easy to install and configure. Getting Shared Counts up and running only takes a few minutes, even if you’re not “tech-savvy.”

Sign up for your free account with Shared Counts right away!

And with that, you now have 3 awesome WordPress plugins in your marketing toolkit to drive social media traffic, followers, and engagement.

We hope you found this post helpful, and if so, you may also like our resources on:

In these posts, we’ve detailed more ways to use social media to grow your email list, boost sales, and reach your marketing goals faster.


Disclosure: Our content is reader-supported. This means if you click on some of our links, then we may earn a commission. We only recommend products that we believe will add value to our readers.


Add a Comment

We're glad you have chosen to leave a comment. Please keep in mind that all comments are moderated according to our privacy policy, and all links are nofollow. Do NOT use keywords in the name field. Let's have a personal and meaningful conversation.

Popular Posts

Connect with us:

Start Getting More
Leads & Sales Today
with OptinMonster!

Popups work, and you can get started for a few bucks a month. What are you waiting for?

Create and launch smart capture forms
today in minutes. What are you waiting for?

In only 7 months, we added more than 95,654 names to our email list using OptinMonster’s Exit Intent™ technology. We strongly recommend it!

Michael Stelzner - Best Lead Generation Tool

Michael Stelzner

Founder Social Media Examiner

I hate popups, so I was hesitant to try one on my site. But the results from OptinMonster exit-intent popup speak for themselves. I doubled my subscription rate immediately without annoying my users. I haven’t had a single complaint. My only regret is that I didn’t start using OptinMonster sooner. I can only imagine how many subscribers I could have added to my email list! If you have a blog, then I highly recommend you start using OptinMonster. I’ve researched them all, and it’s the best in market.

Michael Hyatt - WordPress Lead Generation

Michael Hyatt

New York Times Bestselling Author Platform: Get Noticed in a Noisy World

Exit-intent popups have doubled my email opt-in rate. When done right, you can see an instant 12% lift on driving sales. I highly recommend that you use OptinMonster for growing your email list and sales.

Neil Patel - WordPress Popup Plugin

Neil Patel

Founder QuickSprout