Do you want to add a modal popup form to your WordPress site easily? Want to learn how to use Gravity Forms to create custom popup forms?
Modal popups are the best solution if you want your website visitors to engage with an offer before they can go back to browsing your website.
In this article, I’ll show you the best way to create a Gravity Forms popup in a WordPress website so that you can increase your site’s conversion rate.
Here is everything I’ll cover in this post:
- Should You Use a Modal Popup Form?
- The Best Tools to Create a Modal Popup
- How to Create a Modal Popup Form with Gravity Forms
Should You Use a Modal Popup Form?
Popups help draw visitors’ attention to prompt them to take a specific action on your site. This can include things like creating an account, signing up for email alerts, or buying a product.
On average, popups convert anywhere between 1-8%. Some OptinMonster customers have used popups to improve their conversion rate by as much as 600%.
Popups usually have a close button or an ‘X’ icon that allows visitors an option to exit the popup without taking any action.
However, sometimes you might want the users to interact with the popup before letting them proceed further.
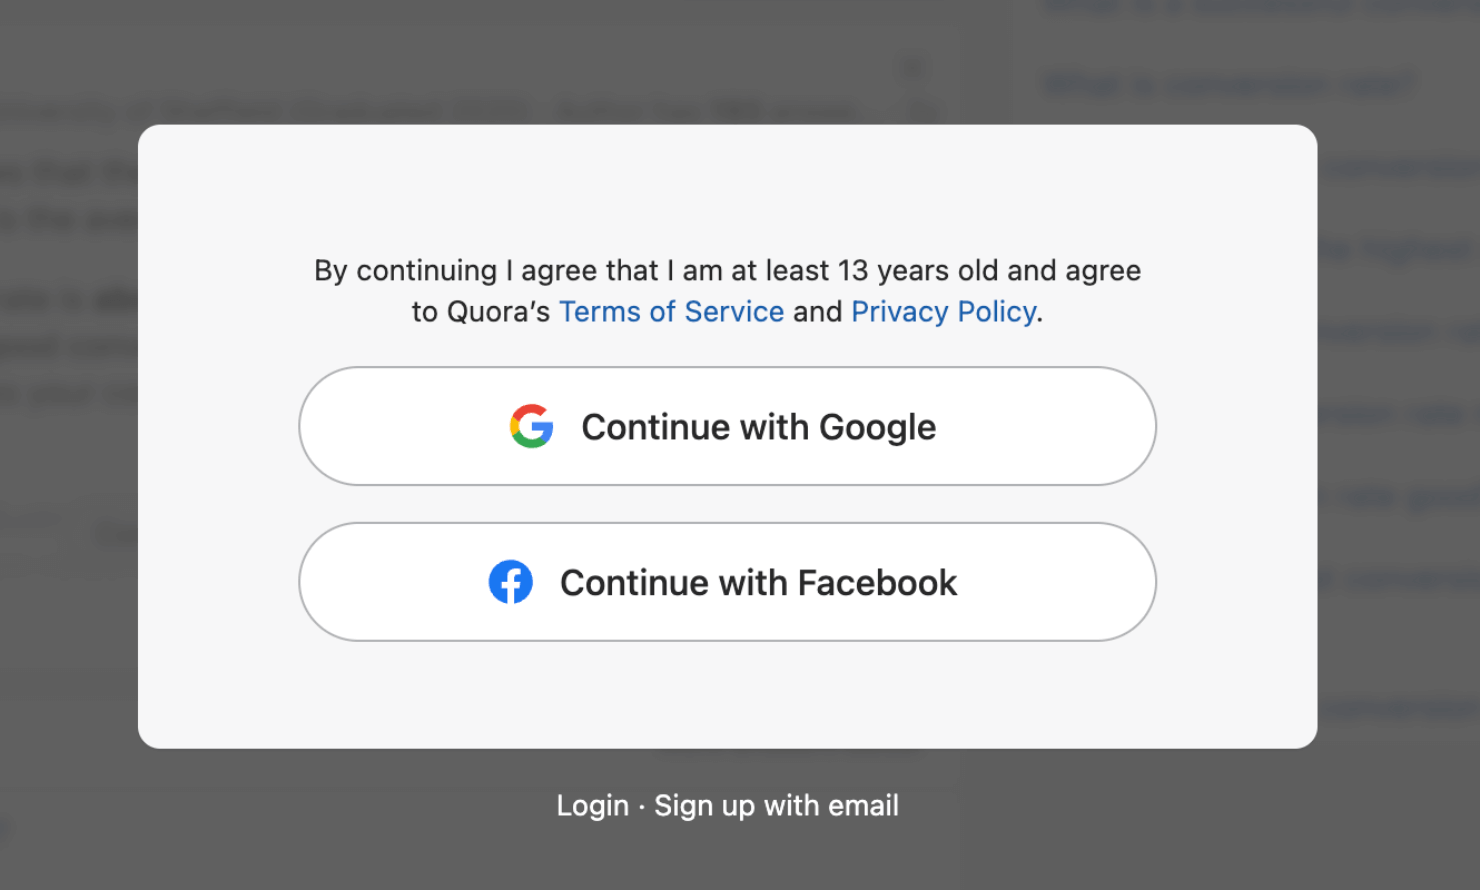
Here’s one such example of a modal popup from Quora. The Q&A website uses a lightbox popup for visitors who want to read, upvote, or reply to threads:
This is exactly what a modal popup form does. It forces site visitors to interact with your offer or a call-to-action (CTA) before proceeding further.
Here are a few things you can achieve with a modal popup form:
- Increase subscriptions: Collect email addresses to grow your email list.
- Run online surveys: Collect customer feedback from your visitors to improve your user experience (UX), product, or service.
- Handle customer complaints: Get details of what the customer needs or any complaints they want to resolve.
- Generate leads: Collect your site visitor’s contact information such as phone or email addresses to market to them later.
The possibilities with a modal popup are plenty!
But because customers can’t close a modal popup form without performing the desired action, you’ll need to use it at the right place and at the right time.
That’s because when a popup interferes with a customer’s browsing experience, they can find it rude and annoying.
Today, I’ll show you how to create a well-thought-out modal popup form that will show only when your visitors click on a text, button, or a website menu.
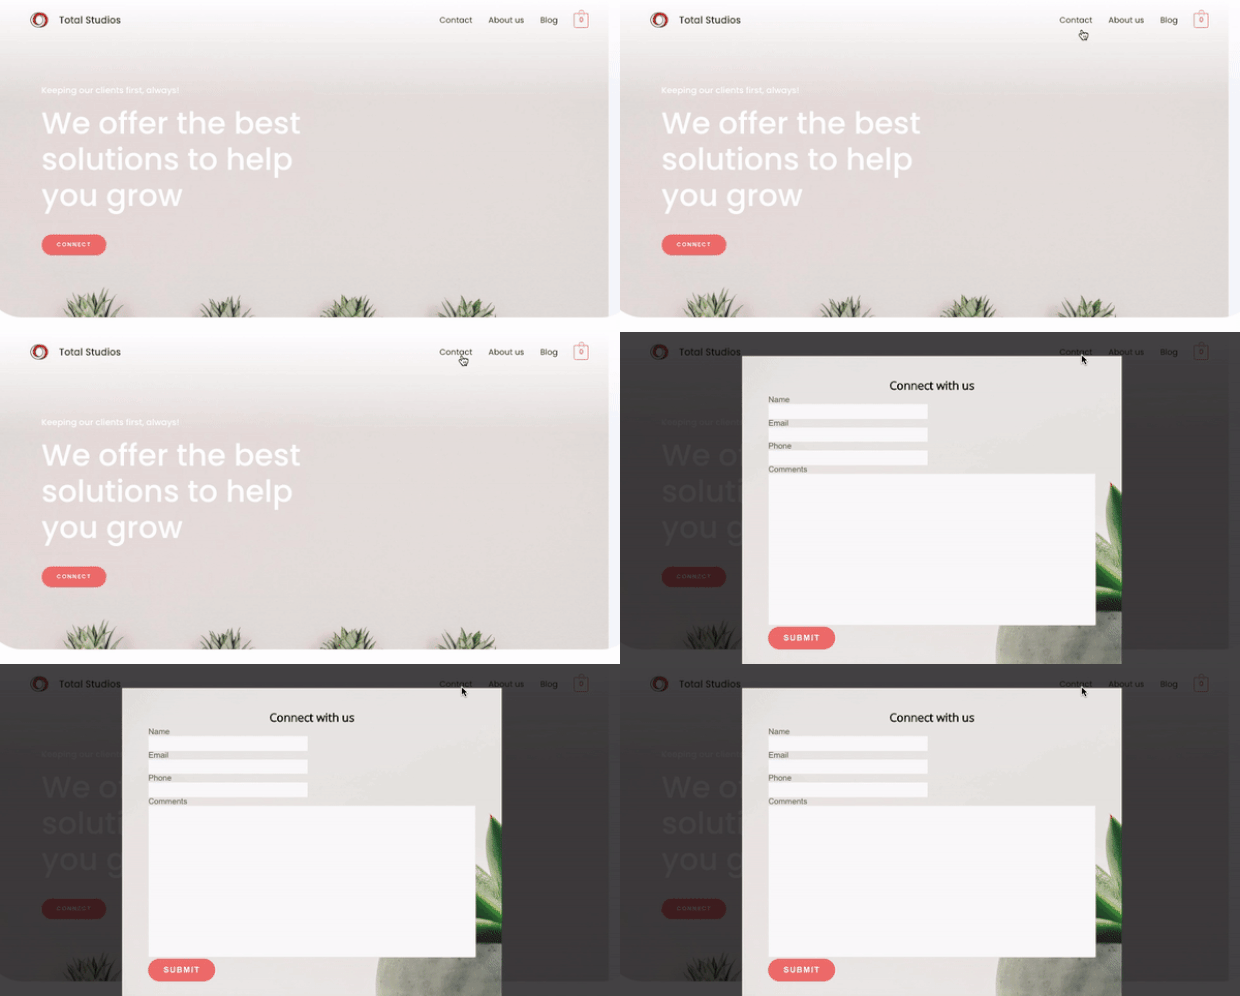
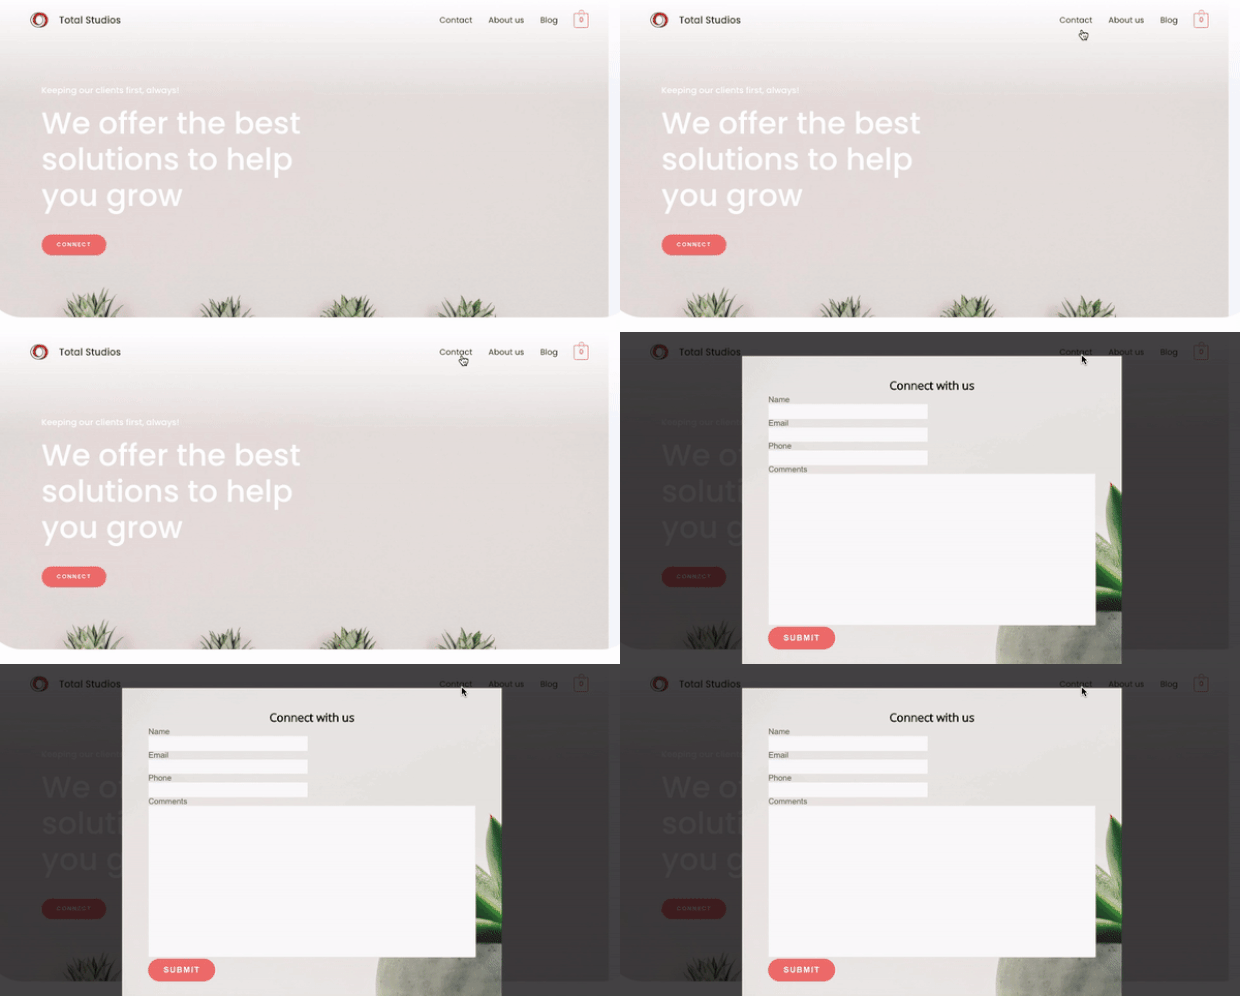
For this tutorial, I’ll use the Gravity Forms popup maker. Here’s a glimpse of how the popup will look like:
The Best Tools to Create a Modal Popup Form for Your Website
There are several ways to create a modal popup form. But today, we’ll cover the easiest way to get it done.
To get started, you’ll need to install and activate 2 WordPress plugins:
Gravity Forms
Gravity Forms is an online form builder that lets you add a user registration form, contact form, survey form, and several different other forms from one of its pre-built templates.
We’ll use the Gravity Forms add-on to first create the form.
Pro-Tip: If you are looking for a more affordable alternative to creating a Gravity Forms modal popup, you can go with WPForms. Here’s a step-by-step tutorial that shows you how to use WPForms to create a WordPress login modal popup just like Quora’s.
OptinMonster
OptinMonster is hands down the world’s most powerful lead generation software and WordPress plugin.
It lets you capture more leads and increase conversions through stunning modal popups, slide-ins, floating bars, fullscreen welcome mats, sidebar contact forms, and inline campaigns.
OptinMonster popup maker plugin comes with 100+ templates that you can use to create a popup without writing a single line of code.
Once you install and activate the 2 plugins on your site, we can get started.
Step-by-Step Tutorial to Create a Modal Popup with Gravity Forms
You can use Gravity Forms popup maker to create a modal box in 6 simple steps:
- Step 1: Create a Form With Gravity Forms
- Step 2: Create a Modal Popup with OptinMonster
- Step 3: Customize the Popup
- Step 4: Set Display Rules
- Step 5: Publish the Modal Popup Form
- Step 6: Add the Popup Form to Your Site
Step 1: Create a Form With Gravity Forms
The first thing you need to do is create the form with the Gravity Forms plugin that you’ll embed in the modal popup.
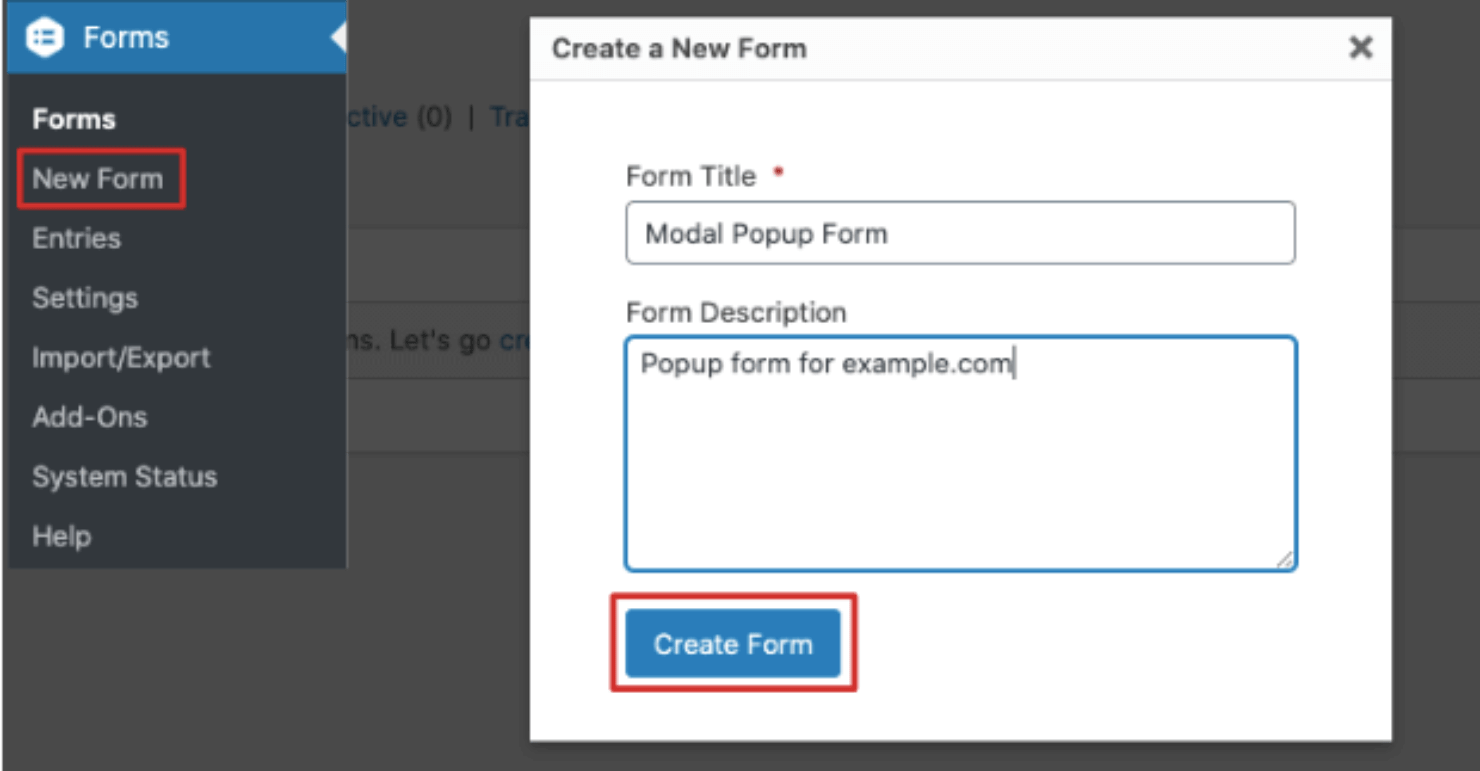
From your WordPress dashboard menu, click on Gravity Forms. Select New Form from within Forms.
You’ll see a popup that prompts you to enter a title and description for your form:
Once you’ve filled in the details, click on the Create Form button to open up the form editor page.
Here, you can customize your form settings by dragging and dropping fields from the menu on the right.
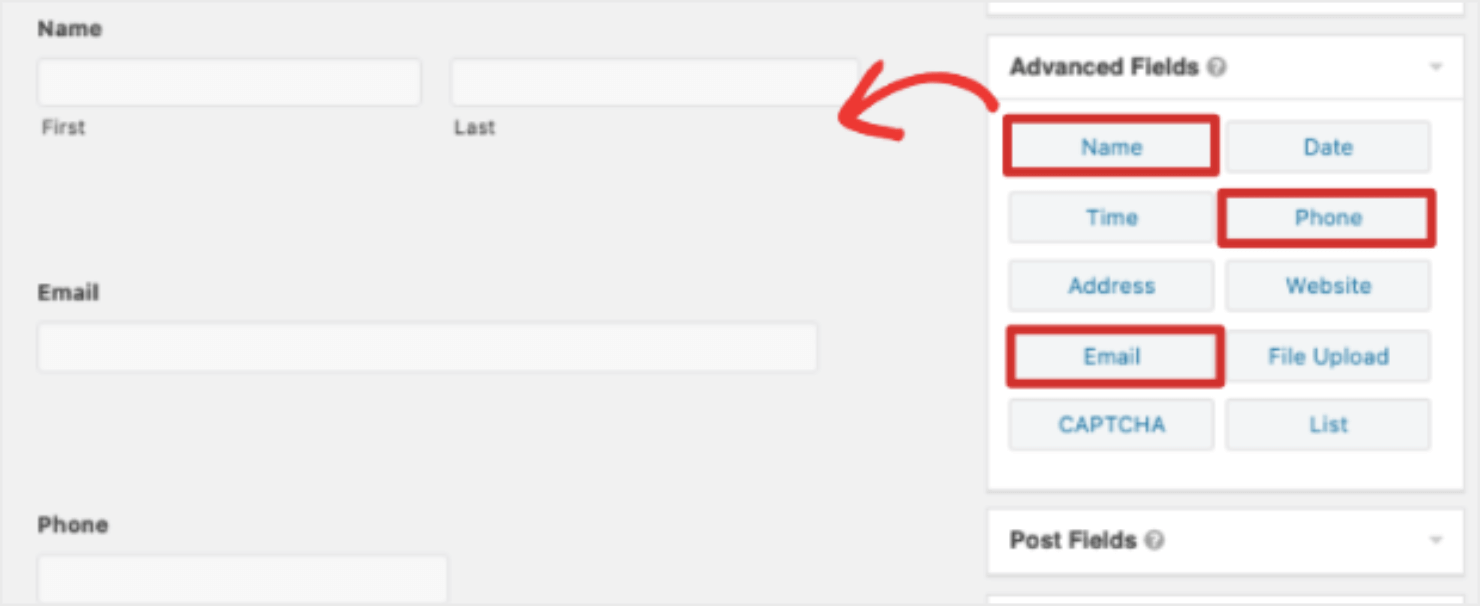
For this tutorial, we’ll create a simple contact form. From the Advanced Fields menu, I’ll add name, email address, and phone fields:
I’ll also add a comments section so that the visitor can enter extra details like what they are looking for.
To do this, drag and drop the Paragraph Text field into your form editor from the Standard Fields menu. This will open a field editor where you can add a title for the field such as Comments:
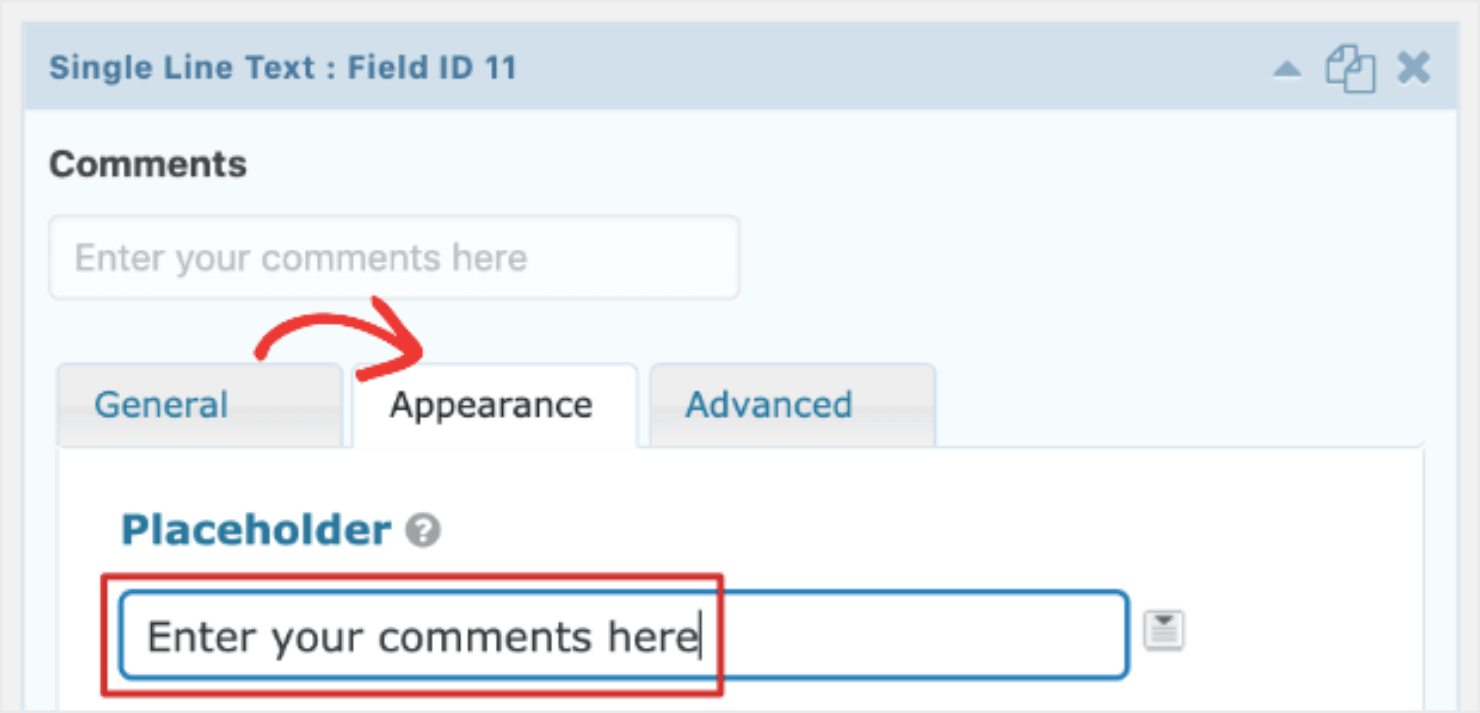
If you want to add placeholder text inside the field such as ‘Enter your comments here’, click on the Appearance tab.
Here, you can enter the placeholder text and also increase or decrease the size of the field’s box:
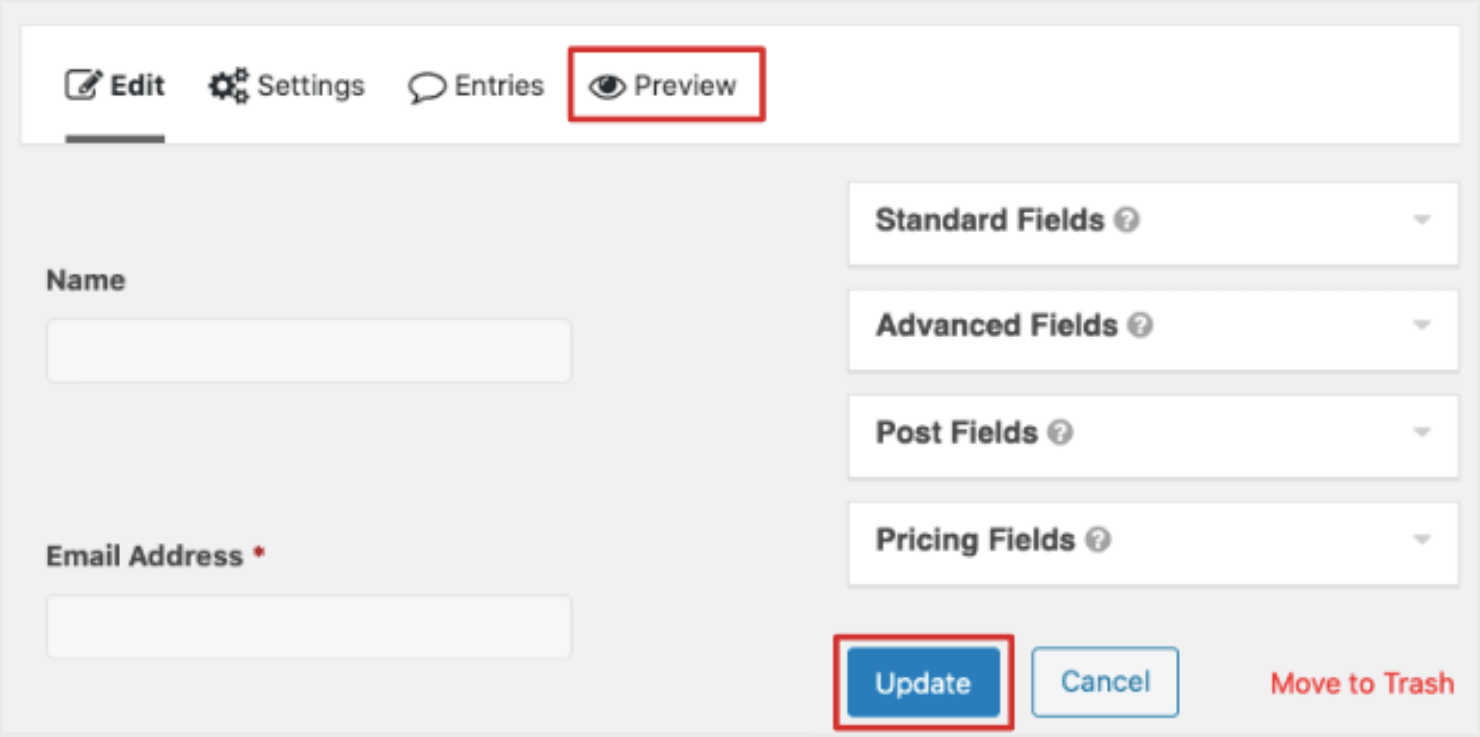
You can add and customize as many fields as you like to create your own form. You can also use the Preview button at the top to see how the form looks when you publish it.
When you’re satisfied with all the form fields you have added, hit the Update button to save your changes:
Besides adding the form fields, there are a few more things you can do to make it better. Let’s go over them in detail:
Set Up the Confirmation Type
Since you’re creating a modal form, you’ll need to set what happens after the user submits the form.
Gravity Forms lets you display a text message, take the user to a new page, or redirect them to a specific URL once people hit the submit button.
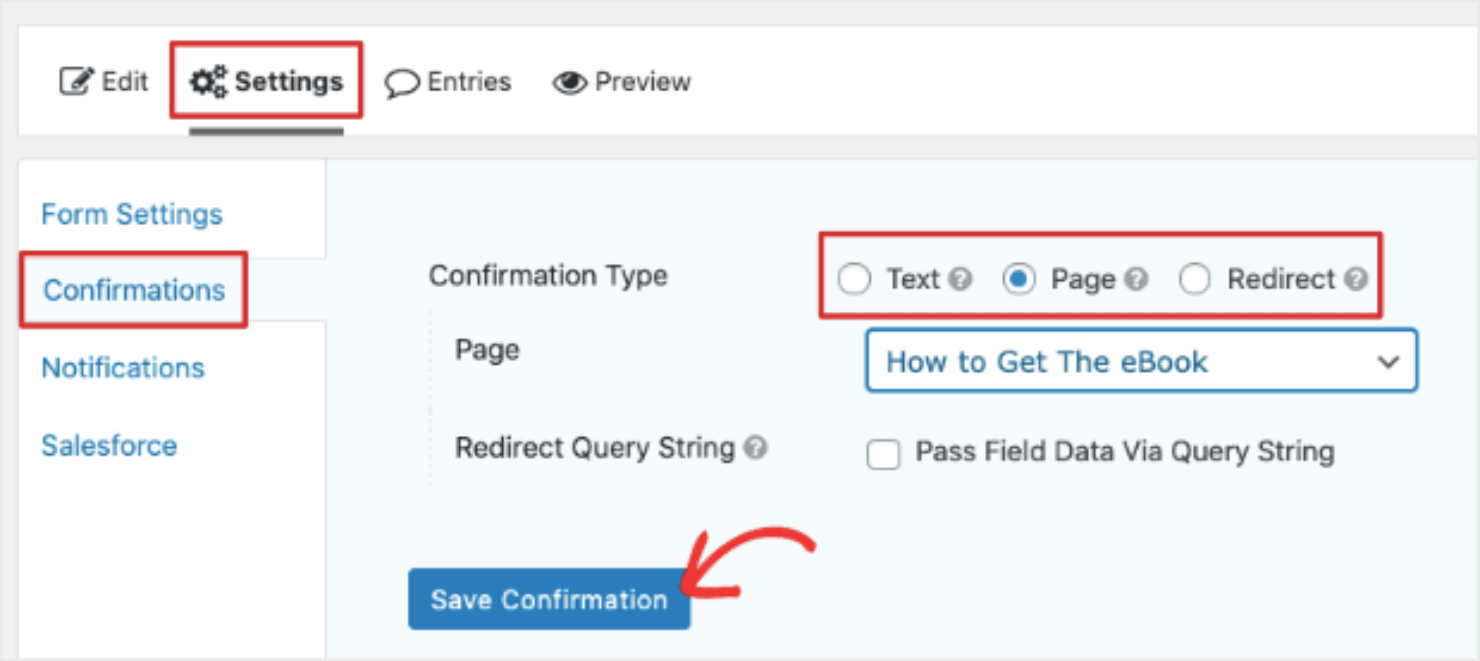
To customize what happens after form submission, you’ll need to go to the Confirmations tab within the Settings menu on the left.
Here, you can choose if you want to add a text message, select a page you want the visitors to see, or enter a specific redirect URL for them:
When you’re done, click on the Save Confirmation button. You can preview the form or test it by submitting demo data on it.
Change Notifications of Form Entries
In Gravity Forms popup maker, you can change how you want to receive the form submissions.
For this, you’ll need to go to Notifications right below the Confirmations tab. Next, click on the Edit option under Admin Notification.
Here, you can change the email address, the subject line, or the email notification message:
This is a helpful functionality when you want the responses to land on a specific person’s or a team’s email address.
Copy Form ID
After you’ve updated the notifications, you’ll need to know the form ID since you’ll need it when you’re embedding it in the popup. In Gravity Forms, the form ID is the shortcode that lets you embed the form in other applications.
We’ll go over the steps to embed the shortcode in a modal popup in the next section.
When you are editing or previewing a form in Gravity Forms, you’ll see the form ID displayed at the top of the page:
You can also locate the ID in the Forms tab within the Forms menu. Here, you’ll see a list of the forms you’ve created using Gravity Forms and their corresponding form IDs:
Copy the form ID and keep it handy for use. We’ll add it to the modal popup after we create it in OptinMonster.
Step 2: Create a Modal Popup With OptinMonster
OptinMonster has a drag-and-drop visual editor that makes it easy for anyone to create a modal popup in just a few minutes.
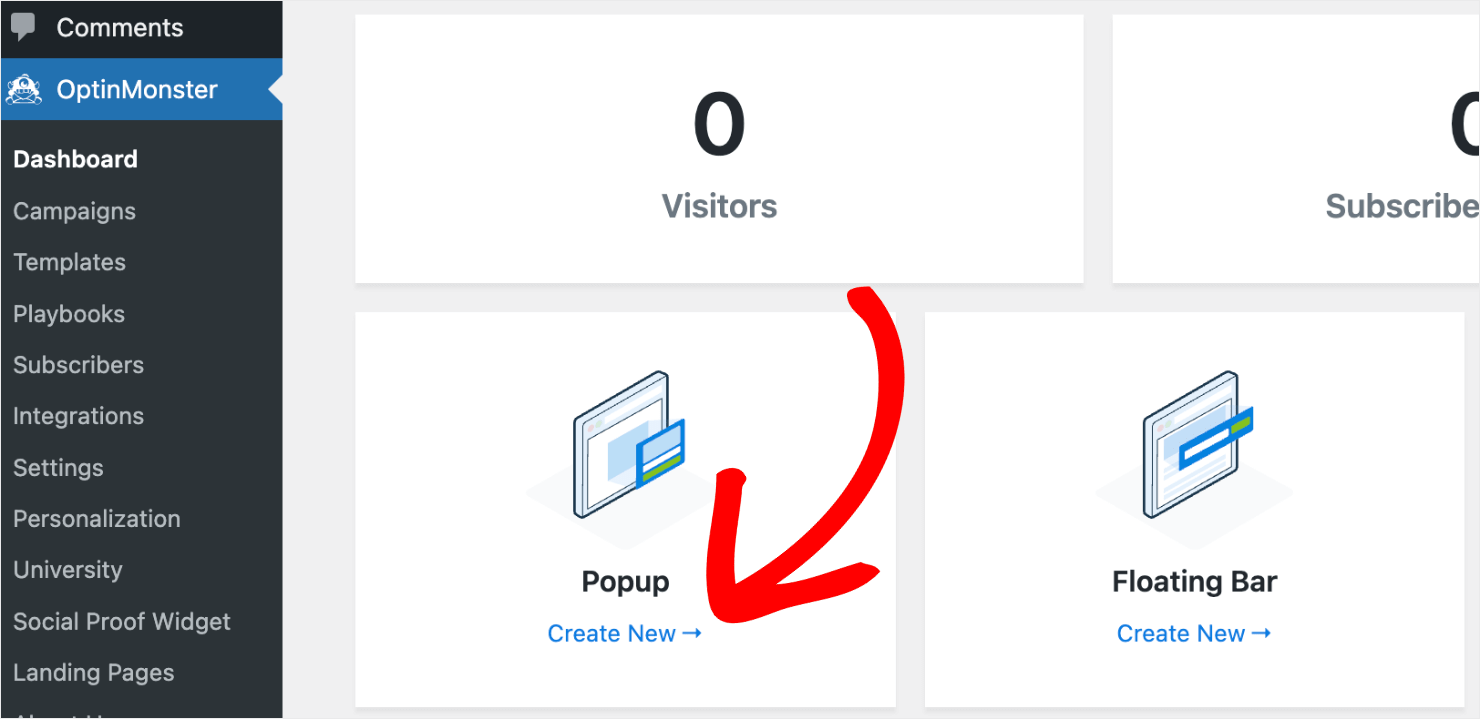
To get started, go to OptinMonster in your WordPress dashboard and click on Create New:
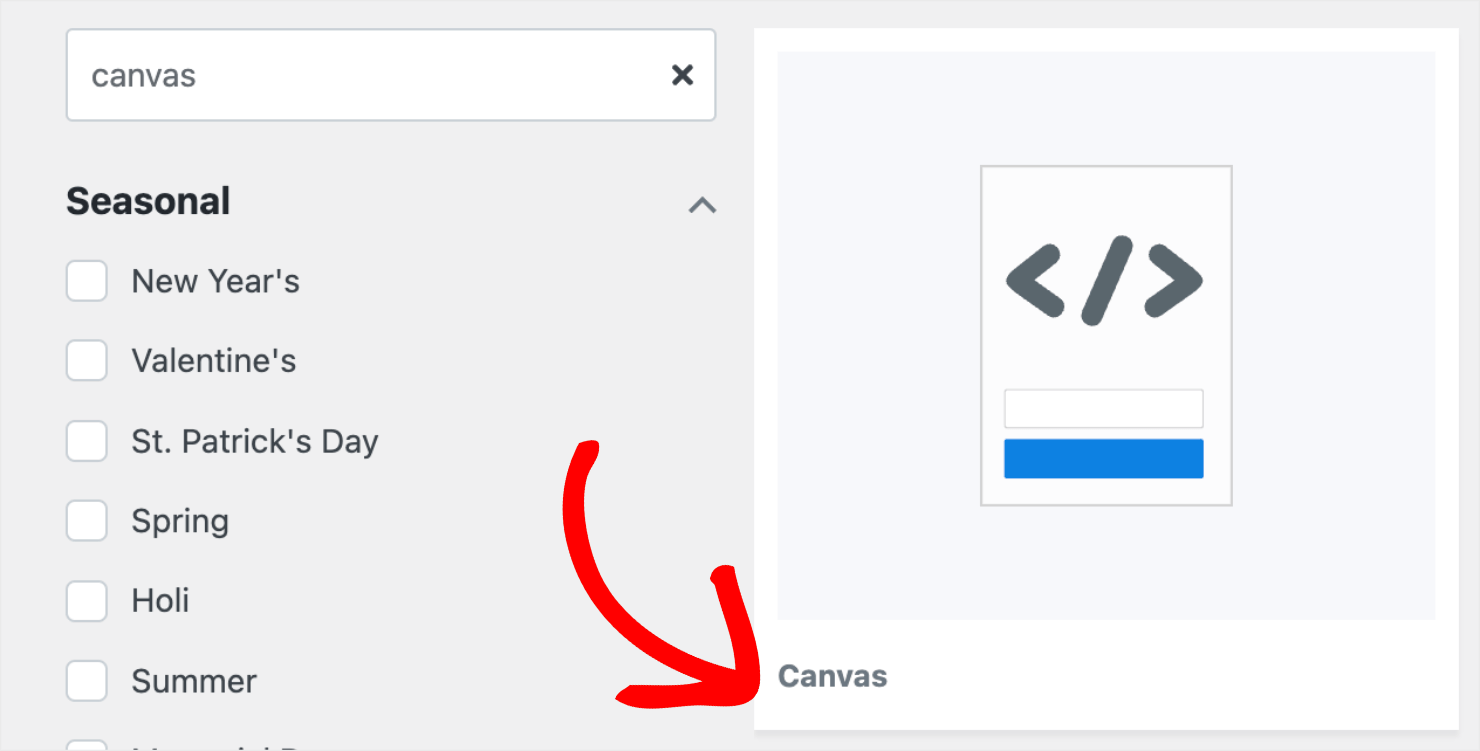
You’ll see a list of templates available. Since we already have a form we want to embed, I’ll select the Canvas template:
Embedding a pre-existing form (or other HTML, CSS, and JavaScript elements) into an empty canvas is much easier than choosing a fully-designed template that has a lot of design elements.
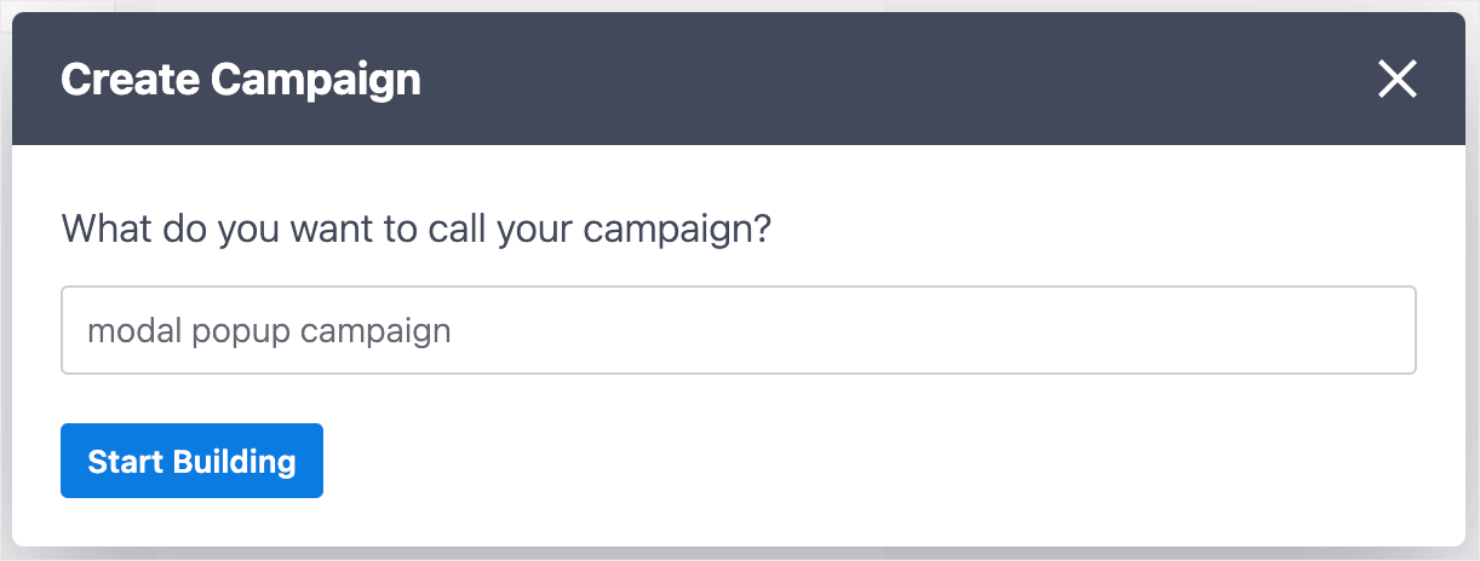
Next, name your campaign and click on the Start Building button:
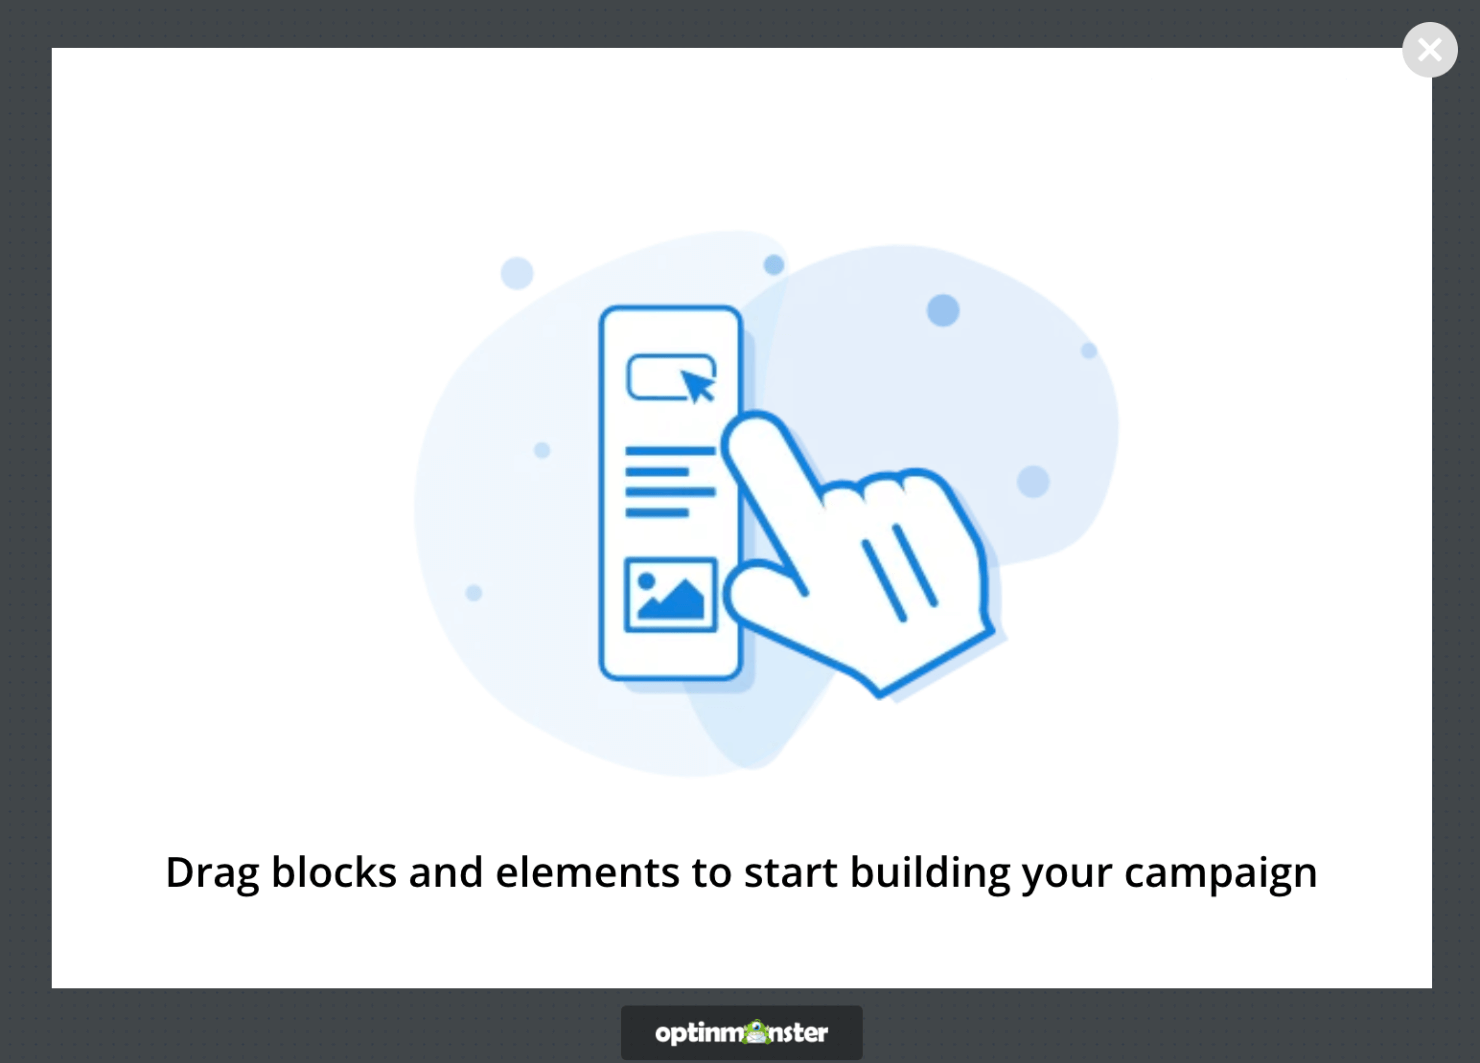
With this, you’ll now see the template appear in OptinMonster’s editor. Here’s how the Canvas template looks like at this point:
Next, you’ll need to embed the Gravity Forms shortcode.
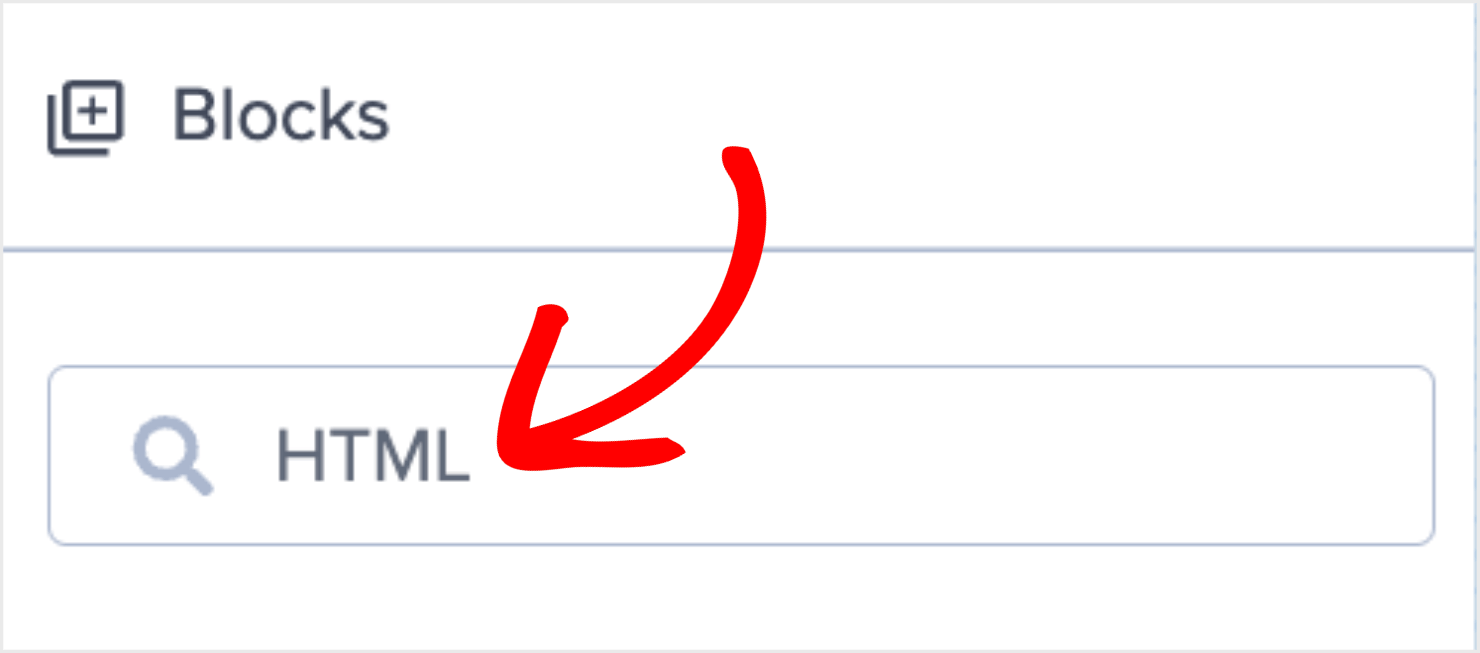
To do that, go to the Blocks button on the top-left of the screen and search for the HTML block:
Next, drag and drop the HTML block into your editor:
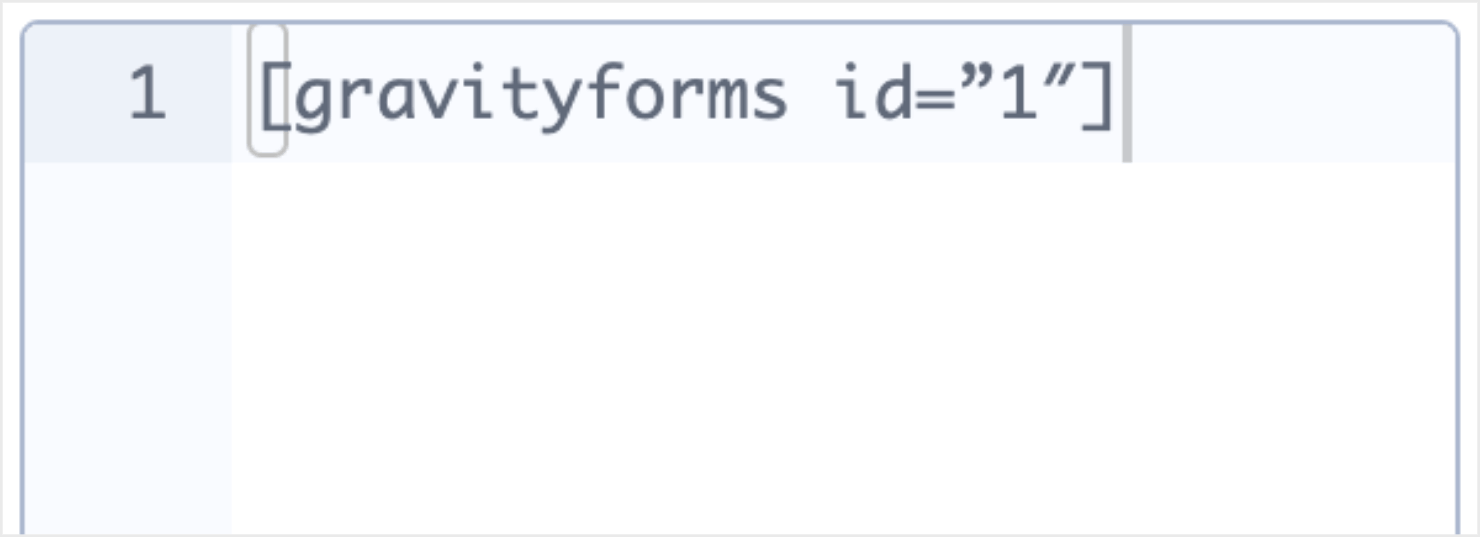
Now, you’ll need to use the form ID shortcode you copied from Gravity Forms in the earlier section:
[gravityforms id=”1″]In the HTML editor on the left panel, delete the default text and paste the Gravity Forms shortcode. Remember to replace the number 1 with your form ID:
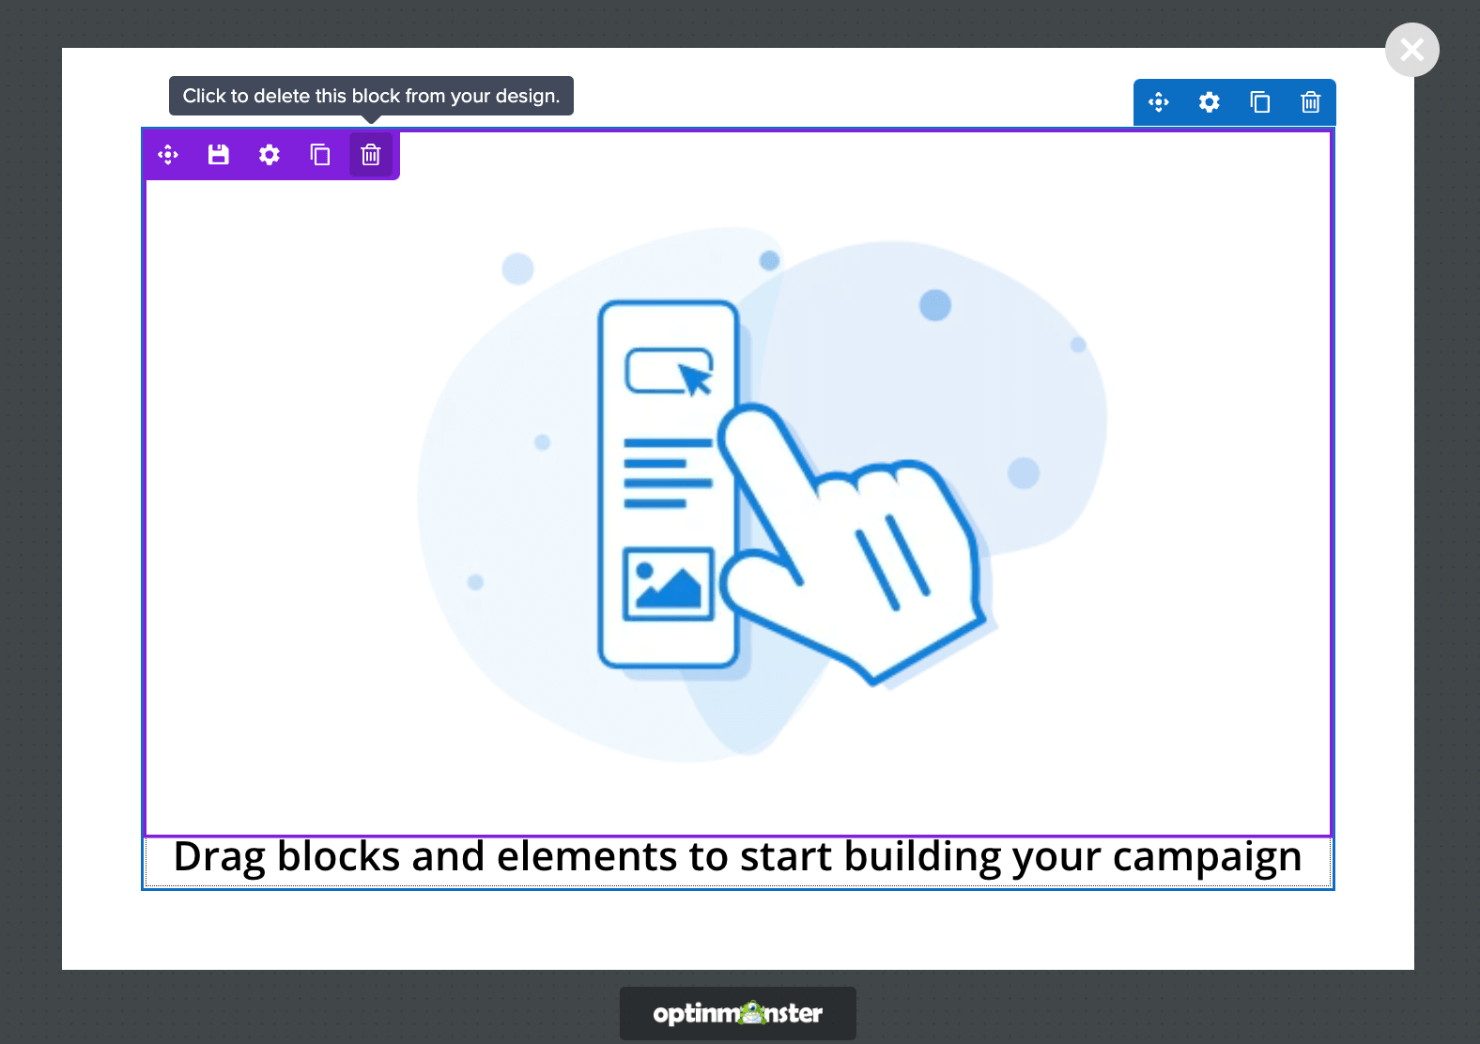
Next, you can clean up the popup design by deleting the default blocks in the popup editor.
To do this, hover over the image block and click on the trash can icon:
Do the same with the text block:
Now, you’ll need to convert this regular popup into a modal popup.
To do this, click on the gear icon in the bottom-left corner of the screen:
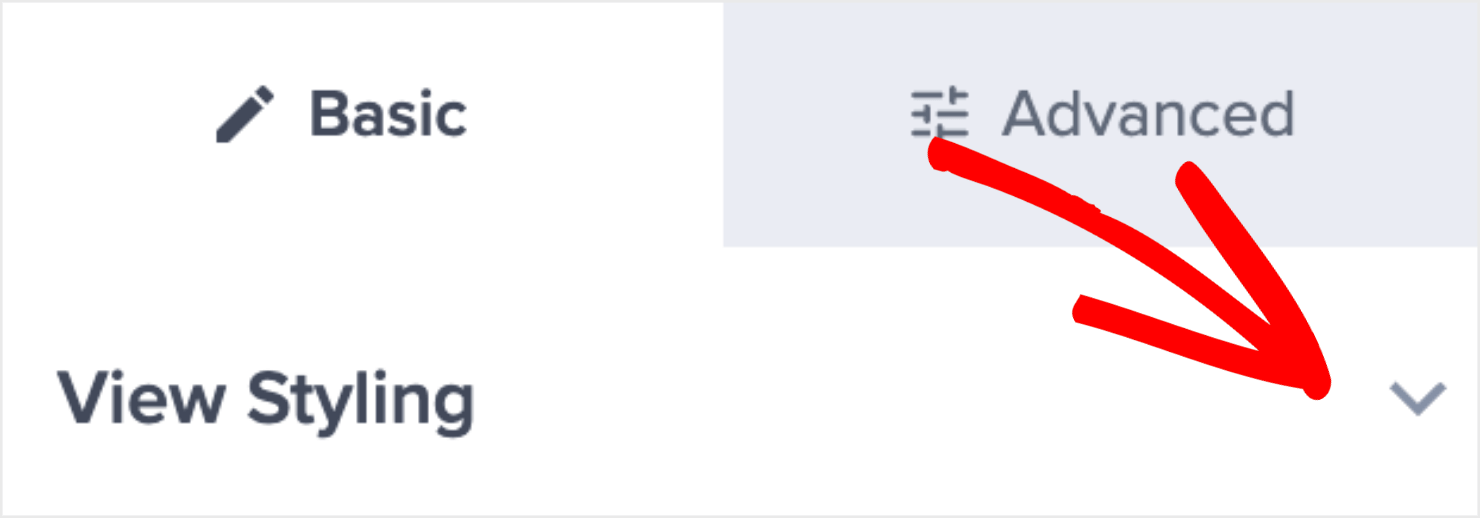
Under the Basic tab, click on the View Styling to expand it:
Scroll down the menu options and, under the Close Button Styling section, disable the ‘Display a close button?’ toggle:
Don’t forget to save the campaign to ensure you don’t lose the changes you’ve made so far:
With this, the modal popup is ready to be customized.
Step 3: Customize the Popup
If you’d like to make your modal popup form more interesting, you can add more blocks such as a title and an image.
For this, click on the home icon at the top-left of the screen. From here, you can drag and drop more blocks into your popup. First, I’ll add a text block to give the popup a nice title:
Write the copy you want in the text block. I’ll add ‘Connect With Us’ to keep the message simple:
Click on the default text copy to edit it directly in the editor:
Next, I’ll also add a background image just to give it some color.
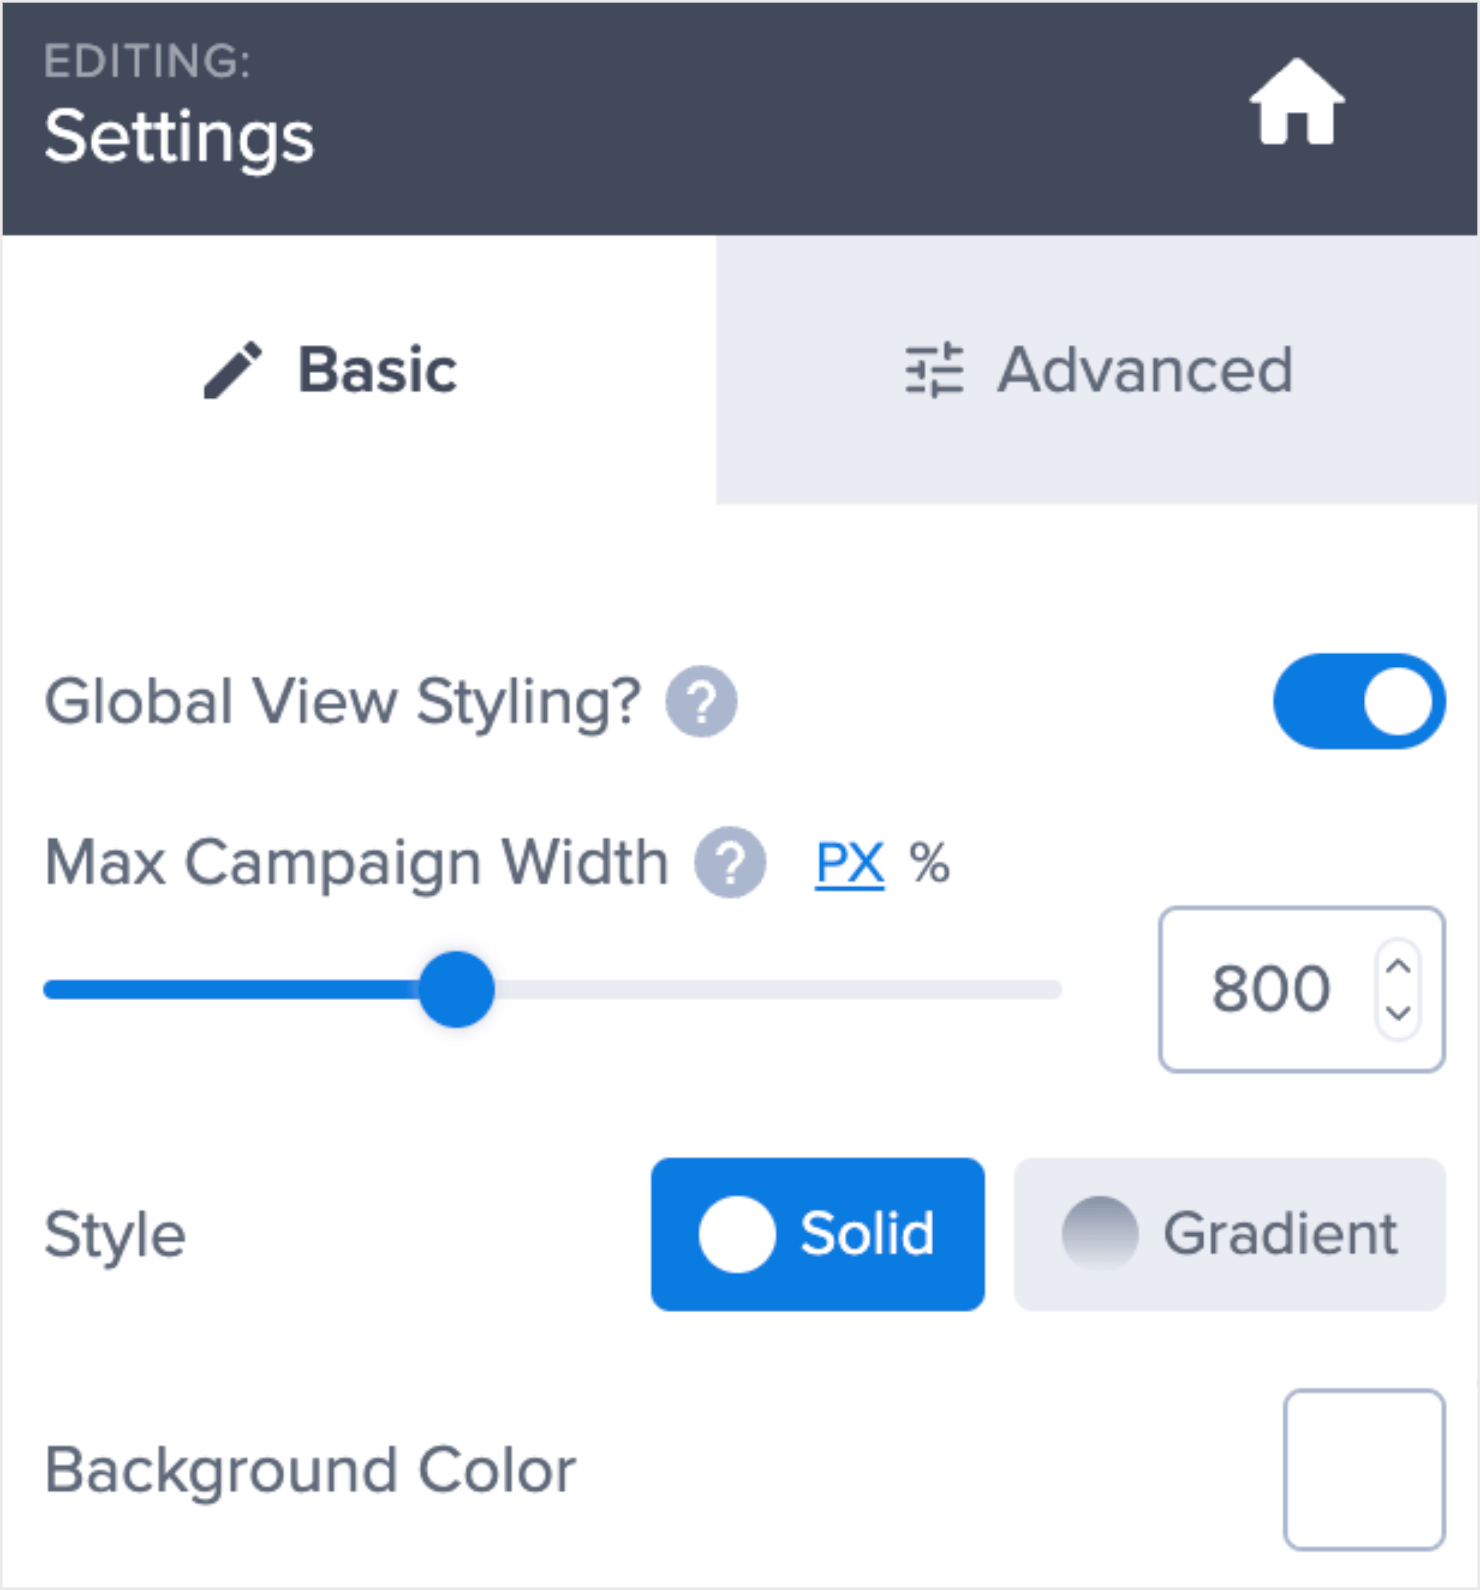
To do this, I’ll click on the template’s white background. This will bring up the Settings menu on the left-hand side:
OptinMonster has a ton of customization options so you can build a stunning modal popup.
For this tutorial, I’ll change the background color and add a background image:
Once you’re happy with the popup design, you can click on the Save button on the top-right to save the changes you have made so far:
Pro-Tip: Want more tips on how to design the perfect popup? Read our step-by-step guide on Creating Your First Campaign.
Step 4: Set Display Rules
The timing and placement of your modal popup can make a huge difference in how well it performs.
To change this, go to the Display Rules tab at the top of your screen:
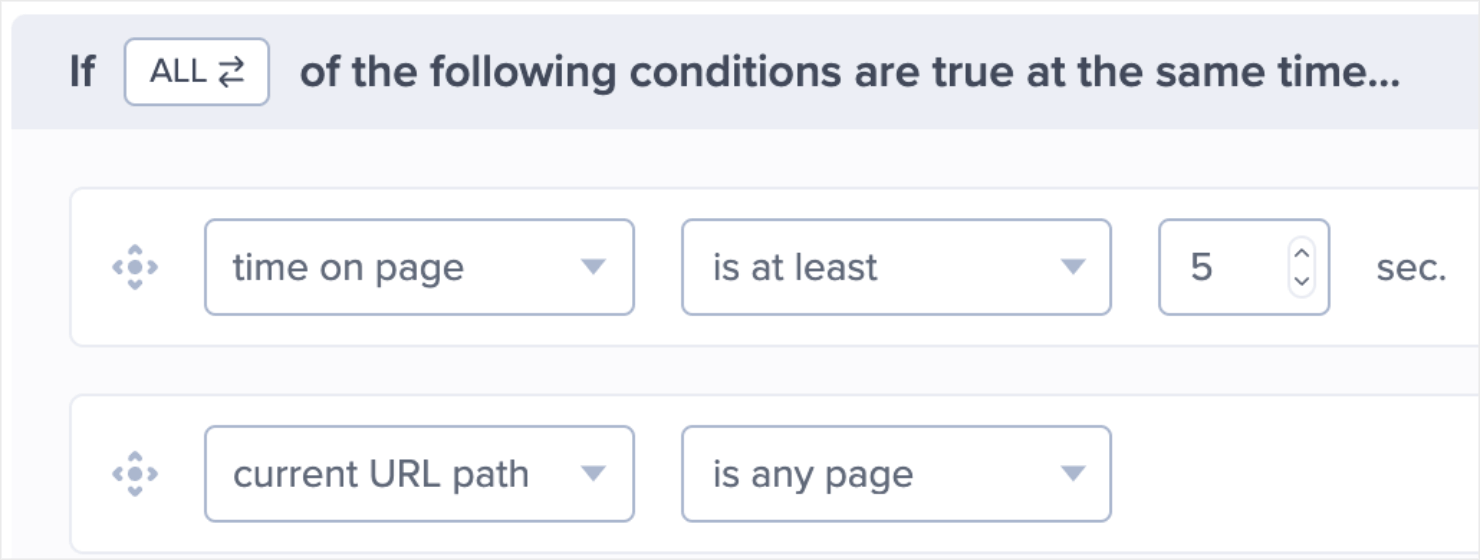
By default, the popup you created will appear on any page if the visitor spends at least 5 seconds on the page:
To change this, click on the time on page rule and select When. From the menu that appears on the right, click on MonsterLink™:
MonsterLink™ is one of OptinMonster’s most effective campaign types that lets you create a 2-step optin campaign from any link, button, or image.
For more information on MonsterLink™, read How to Use MonsterLinks™ to Load Your Popup with Click of a Button.
Back to our campaign, here’s how the display rules appear to you when you choose MonsterLink™ from the options:
Click on the ‘Copy MonsterLink™ Code’ link and keep the code handy for the next step.
Delete the 2nd rule by clicking on the trash can icon on the far right:
Now your display rules are set and your popup is ready to be published.
Step 5: Publish the Modal Popup Form
Go to the Publish tab at the top-right of the screen:
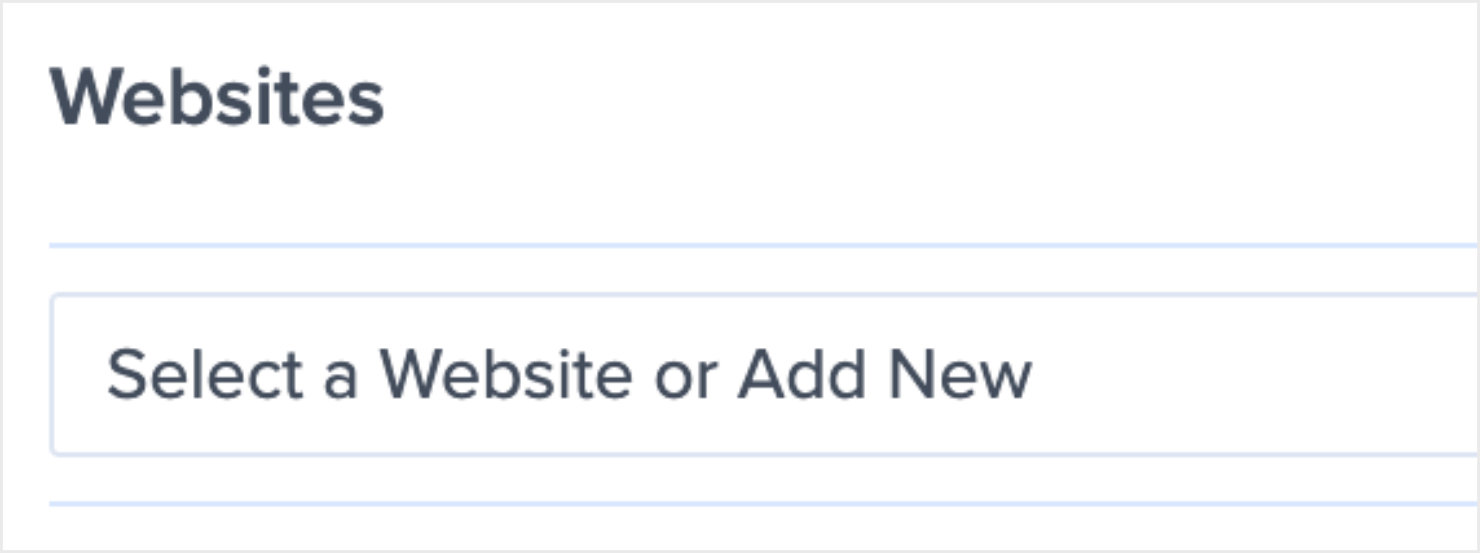
Under the Websites section, select an existing website or add a new one:
If you haven’t added any websites to OptinMonster yet, learn more about how to connect your website.
Next, go to the Publish tab under the Publish Status section:
Now, the only step left is to enable a button or link on your site that will trigger the modal popup when people click on it.
Step 6: Add the Popup Form to Your Site
You can easily add the modal popup form to any text or button in WordPress. I’ll show you how to add it to a button, link, or WordPress menu.
Add MonsterLink™ to a Button and Link
If you want the popup to appear when a visitor clicks on a button or a link on your site, you first need to edit the page or post where you want to add the popup.
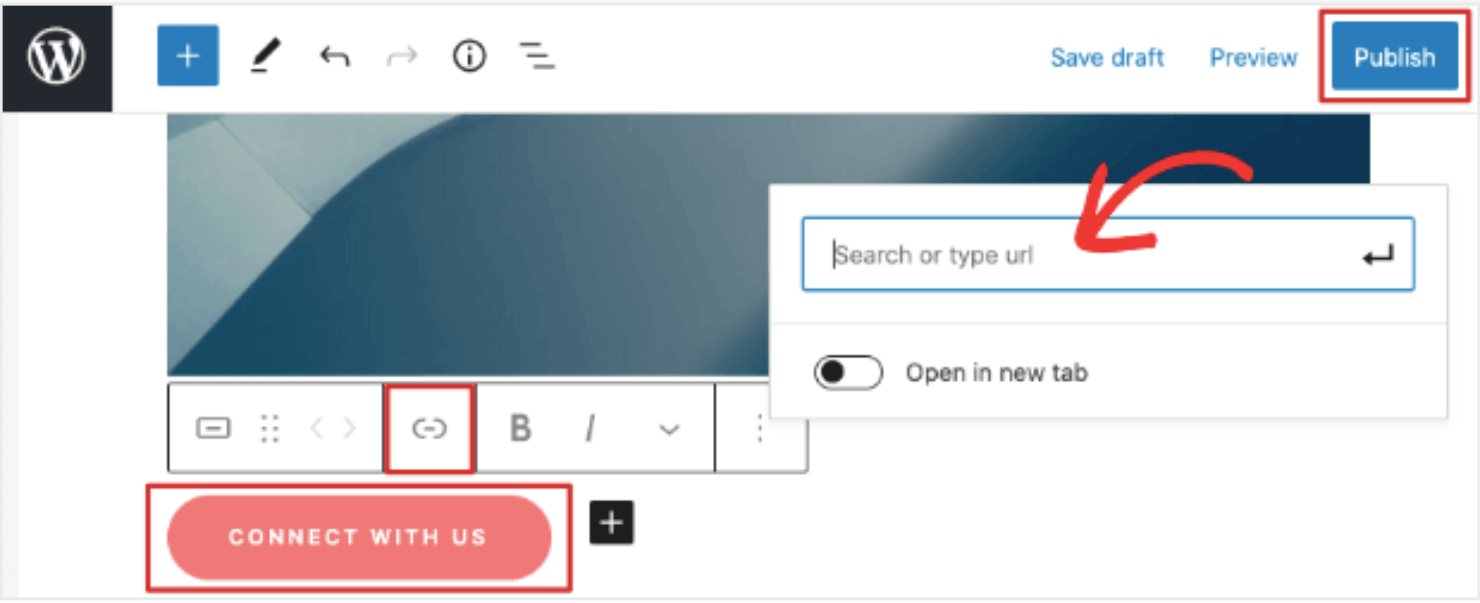
Go to your WordPress editor and click on the button to bring up the block settings menu bar above it.
Next, click on the link icon to open up the URL field. Paste the MonsterLink™ code in it:
You can follow the same steps to trigger a modal popup window when visitors click on a text copy.
Just highlight the text copy on the page you want, click on the link icon, and paste the MonsterLink™ in the URL field.
Once you are done, publish or update your page or post to make it live.
Add MonsterLink™ to a WordPress Menu
Modal popups work well when added to WordPress menu bars. Since we created a contact form, we’ll add it to the Contact menu tab.
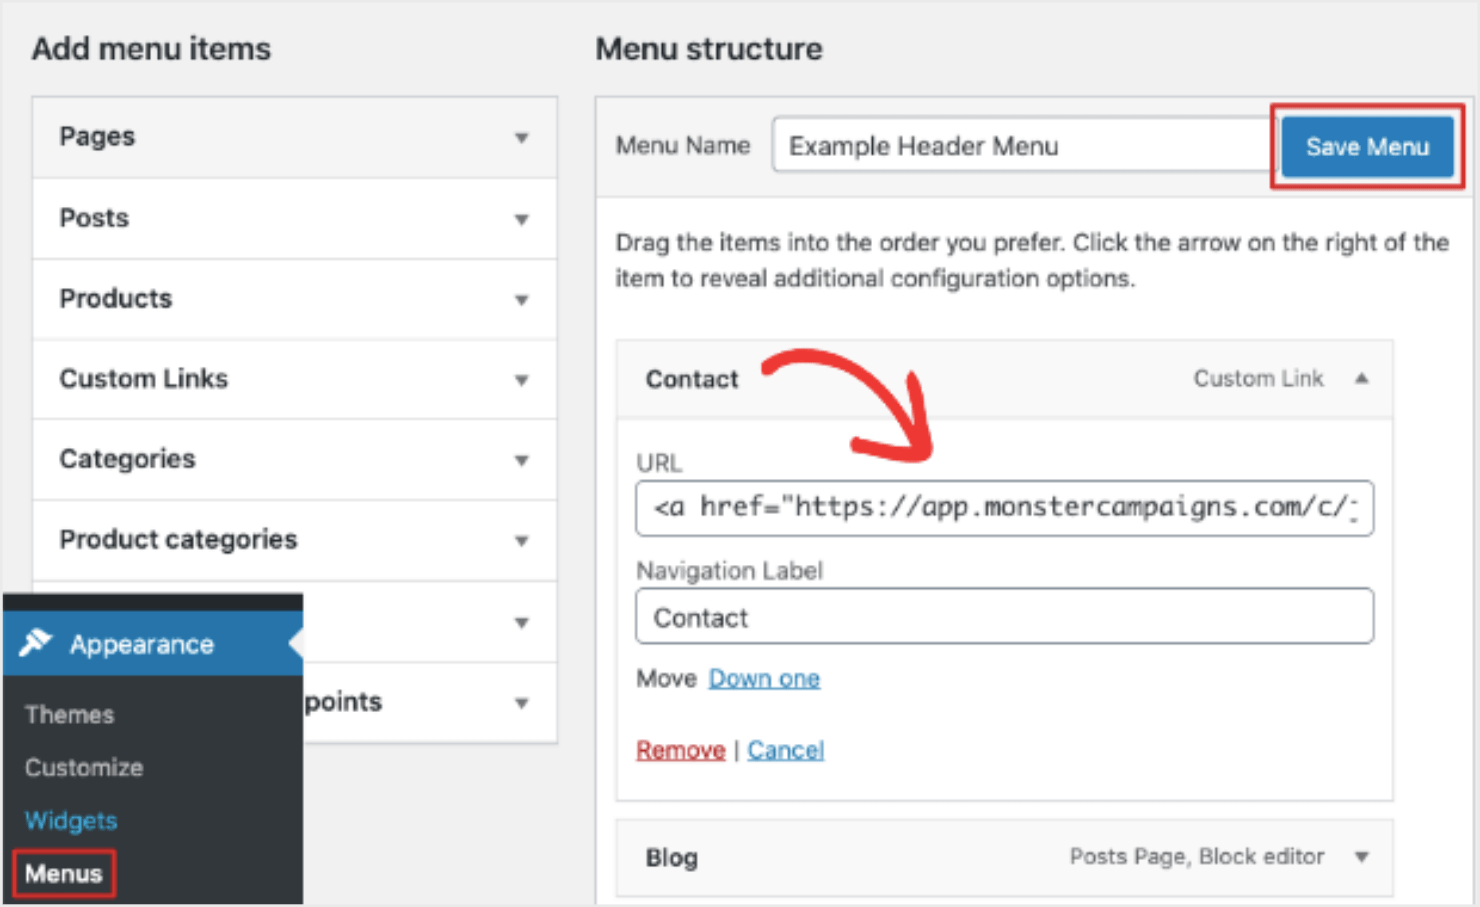
First, go to the Menus tab from within Appearance. Then, click on Custom Links. This will trigger a dropdown menu where you can enter a URL and text:
Paste the MonsterLink™ here and add relevant text in the Navigation Label field. Since ours is a contact form, I’ll name the text copy as ‘Contact.’
Once you’ve filled out the fields, select the Add to Menu button at the bottom of the editor, and save your menu.
Now, you can visit your homepage and click on the Contact menu to see how the Gravity Forms popup appears:
View Your Modal Popup Form Submissions
If you don’t use email marketing software or haven’t integrated OptinMonster with it, OptinMonster will store every form submission as Monster Leads™.
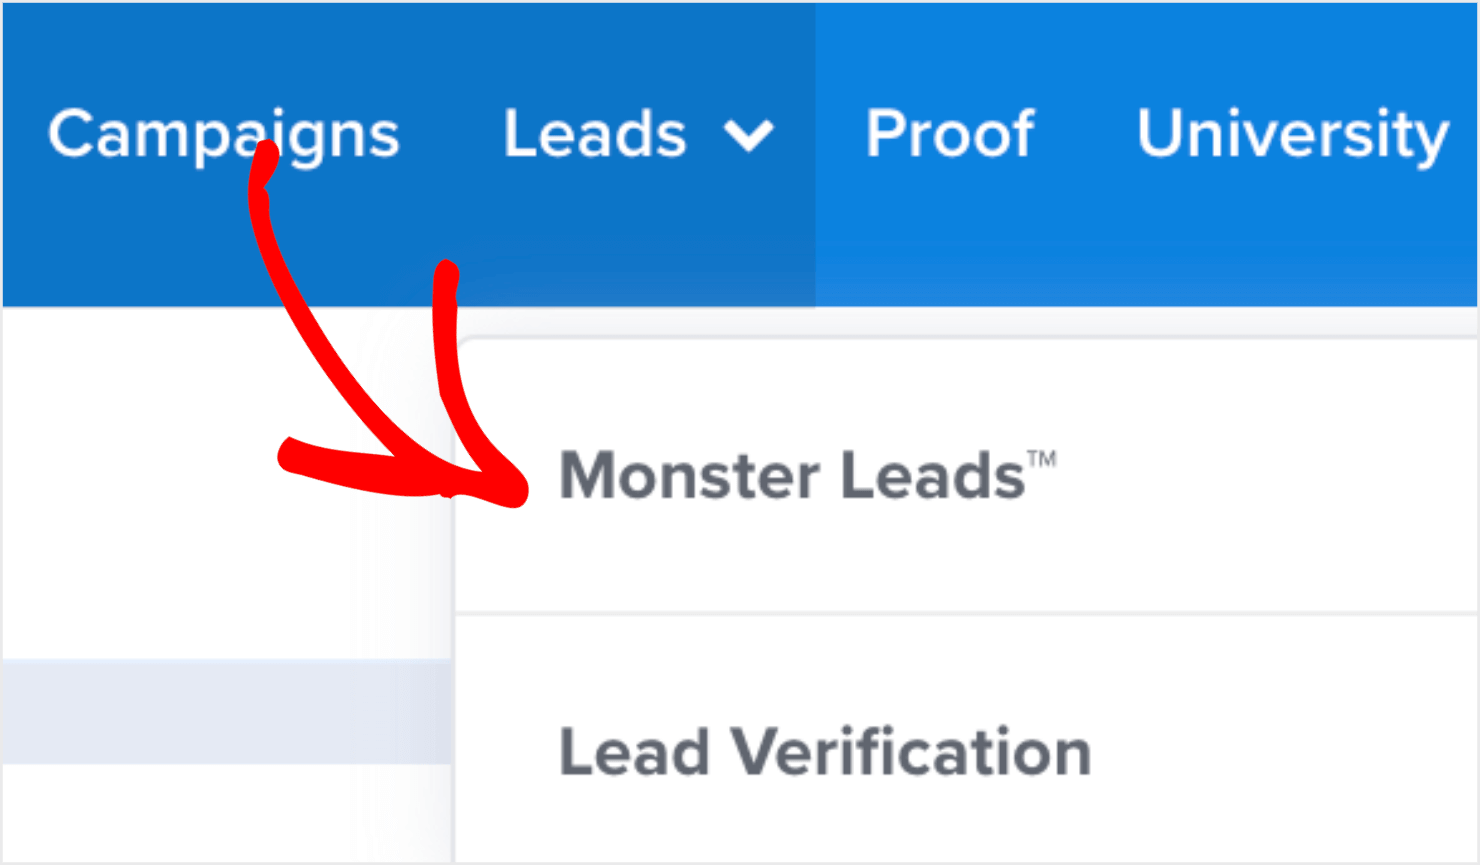
To view these lead entries, go to the Leads tab from within your OptinMonster dashboard and click on Monster Leads™:
With this, you’ll land on the Monster Leads page.
On this page, you’ll see a list of the subscribers’ names, email addresses, and dates. If you want to view more details of each entry, you can use the Actions menu on the far-right to dig deeper:
Optimize Your Modal Popup Campaign
Modal popup forms can be tricky as there’s no option to exit without filling out the form. How do you know if the popup window is performing well or not?
Since you’re using OptinMonster, you don’t have to run your campaign in the dark. OptinMonster comes with built-in data analytics that shows you how your campaign is performing.
To view your campaign’s metrics, go to the Campaigns tab in your OptinMonster dashboard. Here, you’ll see a list of the campaigns you’ve created:
Now, select the analytics icon under the Actions menu and you’ll see your campaign statistics:
It shows you how many people have interacted with your popup. You can also check which pages or links lead to the highest conversions.
This way, you can find out where the popup works and where visitors are not interested.
With that, your Gravity Forms popup form is ready for customers to interact with.
Ready to Create a Gravity Forms Popup?
Now you know how to create a Gravity Forms popup with OptinMonster, you can use it to capture leads and bump up your site conversions.
If you liked this post, then you may also be interested in learning more about:
- How to Create a Popup Registration Form in WordPress
- How to Create a WordPress Contact Form the Super Easy Way
- What Is a Lightbox Popup and How to Create One
Want to create a modal popup for your website with OptinMonster?

















Add a Comment