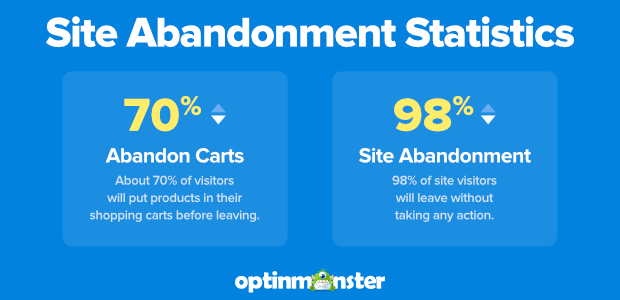
You already know that 98 out of 100 people will leave your site without buying anything.
Did you also know that about 70% of folks are going to actually put something in their cart before they leave without buying anything?
And it’s not just about spending money.
The same rate of people, 98%, will leave your site without taking any action at all. And many of them won’t return.
So, how do you get them to stick around long enough to join your mailing list, or buy something right then and there?
Onsite retargeting.
What Is Onsite Retargeting?
Onsite retargeting is very personalized and targeted advertising that focuses on visitor behavior. It’s intended to track visitors as they browse your site and detect when their behavior registers that they need new content to keep them engaged.
This new content can be popups, ads, or anything else that will reengage your audience and keep them from leaving.
The goal of onsite retargeting is to convert your visitors into leads, build your email list, and increase sales.
How Does Onsite Retargeting Work?
Onsite retargeting uses tracking algorithms to detect things like inactivity and mouse movements and uses that data to predict when a visitor needs reengagement.
For example:
- A user who hasn’t moved on your site for 30 seconds may have a question. This is a great time for a popup to give them guidance or a Chatbot to ask if they need help.
- If a visitor moves their mouse toward the close or back buttons, they’re probably planning to leave your site. An exit-intent offer gives you another chance to get their attention before they leave.
- A visitor who has scrolled to the bottom of a page has likely reached the end of a post and is engaged in your content. An in-line campaign is a great way to keep them engaged on your site and move them deeper into your sales funnel.
Case StudySee how Crossrope exploded their list 900% each month with exit intent optins!
Since the visitors are on your site, you’ll be able to gather information in a number of ways: cookies, web analytics, browsing, search history, etc. Just remember to get the proper agreement from them before gathering this info.
The Benefits of Using Onsite Retargeting
Onsite retargeting gives you another chance to reengage visitors at a much cheaper rate before they leave your site and you’re stuck paying for retargeting ads.
Even if visitors don’t convert, onsite retargeting can set you up for an even better return on your retargeting ad investments by laying the groundwork for visitors with information about your brand.
Plus, up to 25% of visitors exposed to onsite retargeting will react to the messaging positively, earning you subscribers or revenue.
How to Create Killer Onsite Retargeting Campaigns With OptinMonster
OptinMonster is the best platform for creating onsite retargeting campaigns. We’ve got the easy-to-use thing down, but the software is also ridiculously powerful, too.
So, epic onsite retargeting power AND a campaign builder that’s beginner-friendly.
Yeah, we did that.
Plus, it’s OptinMonster, so it just works. Join OptinMonster today (the Pro Plan is a fan favorite, btw)!
Okay, okay… Enough of the business.
What we really want to do is show you how you can use OptinMonster for onsite retargeting.
Use Onsite Retargeting to Reduce Cart Abandonment With an Urgent Offer
Urgency is a quick and easy way to boost conversion rates and the urge to act on urgent deals is rooted in psychology.
It’s called loss aversion or, as most marketers say, fear of missing out (FOMO). People simply don’t want to miss out on a great opportunity and we can’t help feeling the drive to go for it before it’s too late.
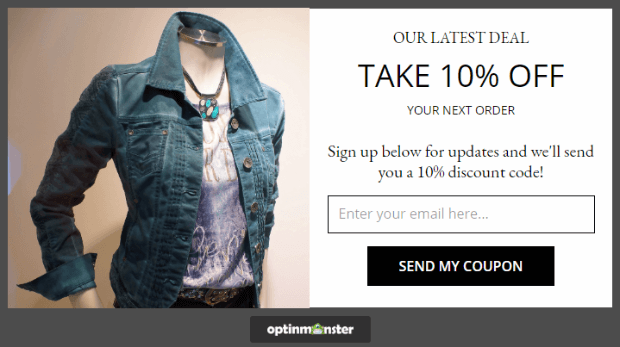
We’re going to use urgency and an OptinMonster technique called MonsterChains to reduce cart abandonment. This is what our initial campaign will look like:
Step 1. Create a Campaign
Login into the OptinMonster dashboard and create a campaign.
Choose a campaign type. We’ll use the Popup, which is one of our highest converting campaign types.
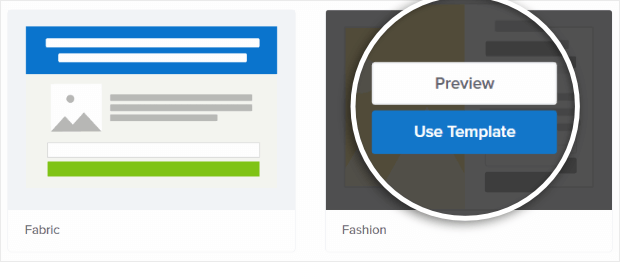
Choose a theme. We’ll use Fashion.
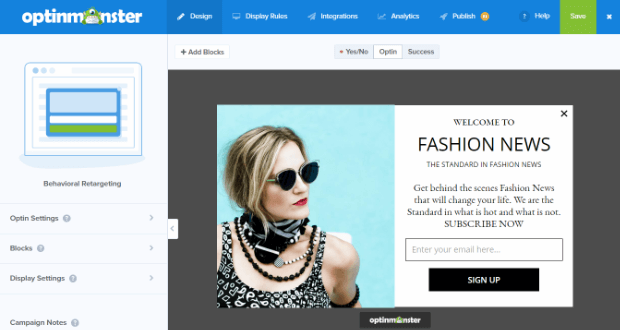
Name your campaign and press Start Building. This will take you to the OptinMonster campaign builder, where you’ll see the default Fashion template.
Step 2. Edit the Campaign
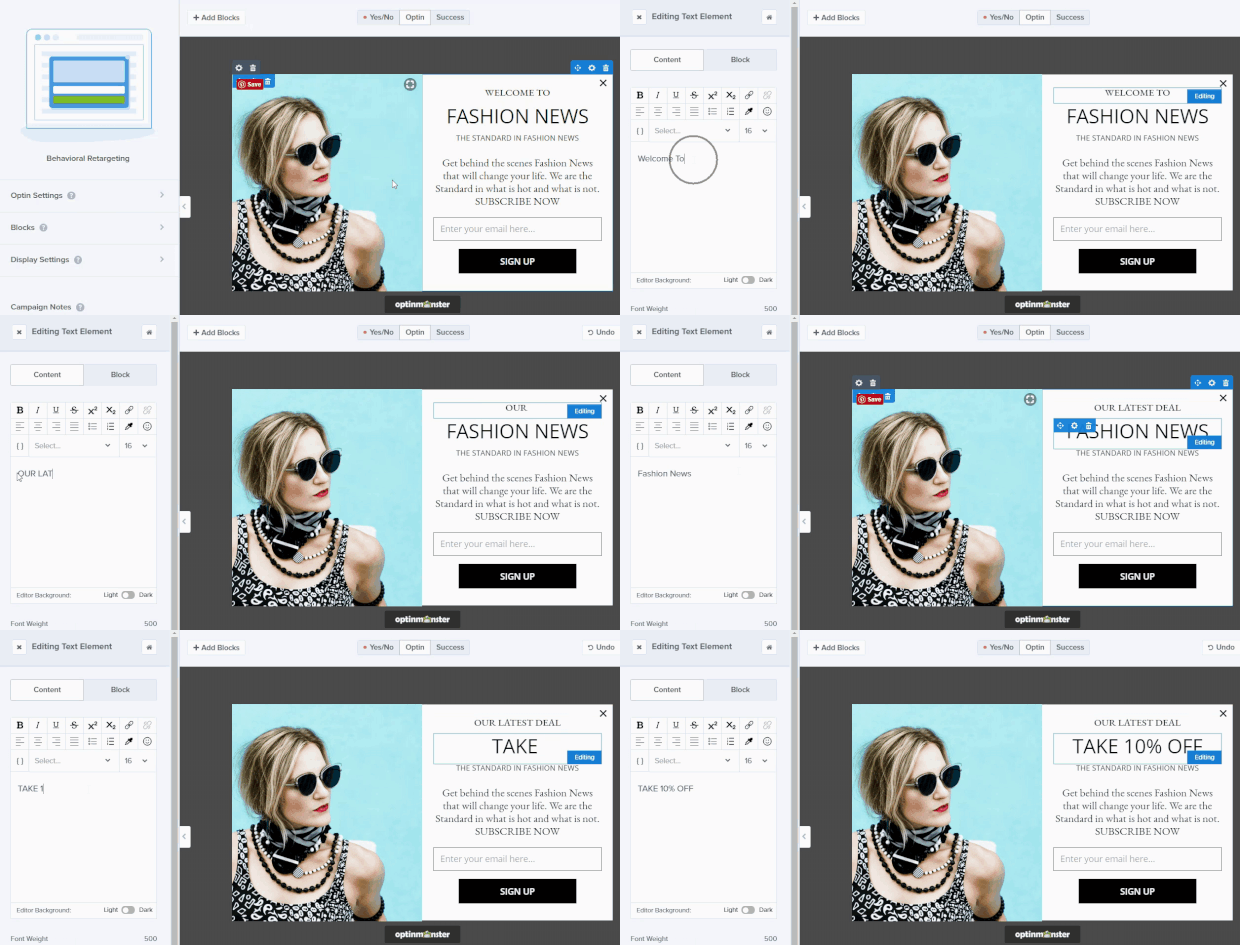
Next, edit the campaign. Select the headline text and edit it to match your campaign. Do the same with the body text.
Click on the image area to add an image that matches your campaign. If you’re stuck for ideas, check out our list of free image sites for inspiration.
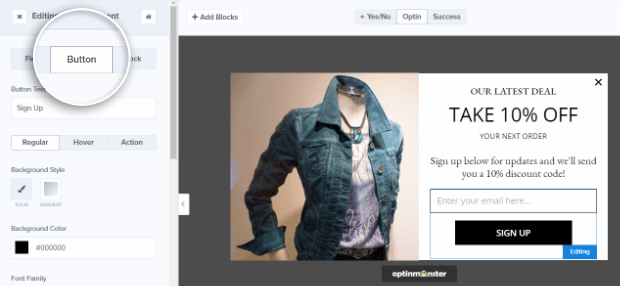
Click on the Submit button to bring up the Editing Fields Element menu. Click on the Button tab to edit the button text, color, and more.
Step 3. Set Up Form Success Action
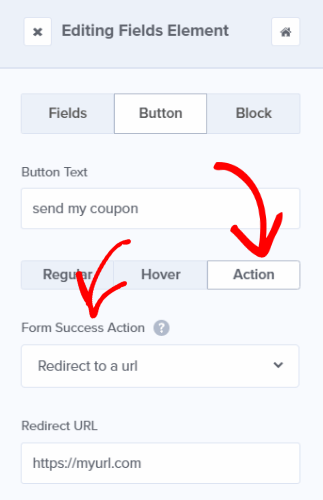
Set up your form success action. For example, you can redirect visitors who opt into your campaign to another page where they will see another campaign you have set up.
To do this, after editing your button text, click on the Action button, select Redirect to a url from the Form Success Action dropdown, and add the URL of the page you want visitors to see next.
Save your campaign design by clicking the Save button in the top right corner of the builder.
Step 4. Set the Display Rules
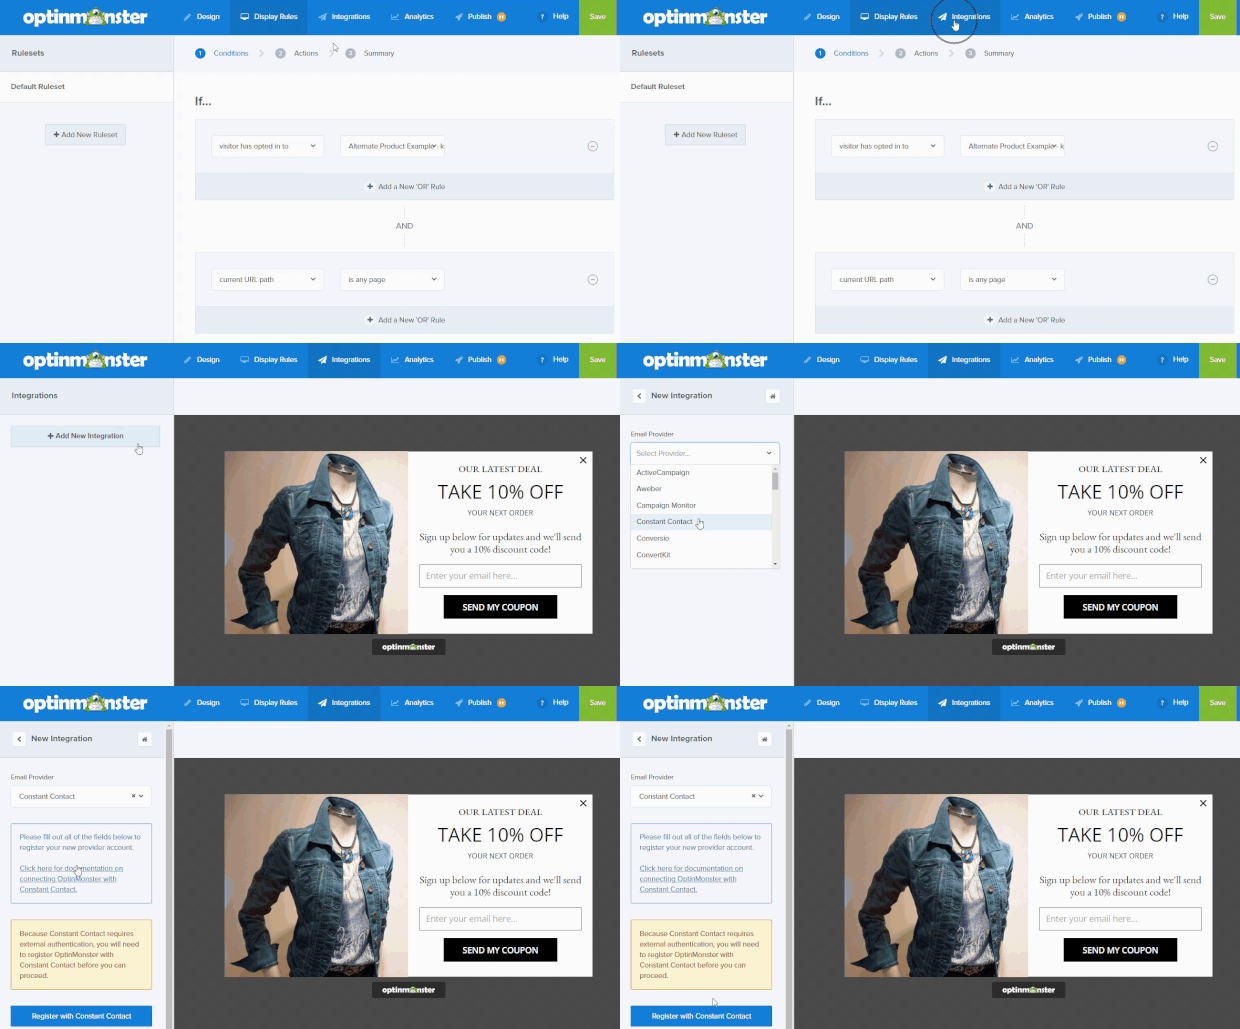
Next, set the display rules for your campaign. This is where you implement your retargeting campaign by starting your MonsterChain.
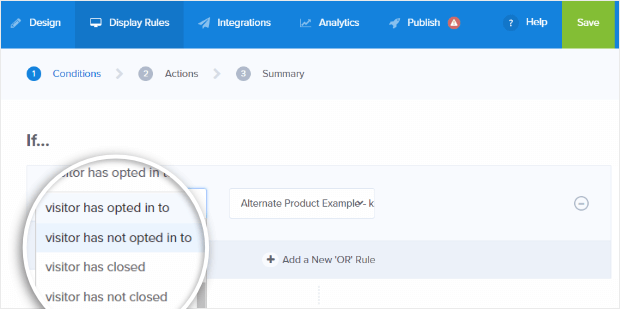
Go to the Display Rules tab and set a condition based on the way you want visitors to have interacted with your previous campaign. You can choose to show campaigns to visitors who have:
- Opted in or not opted into a specific campaign
- Closed or not closed a specific campaign
Once you have the type of interaction you want, select the name of the previous campaign you want visitors to have seen.
Step 5. Add Your Email Service Provider
Go to the Integrations tab and select Add New Integration. Then, select Constant Contact from the dropdown.
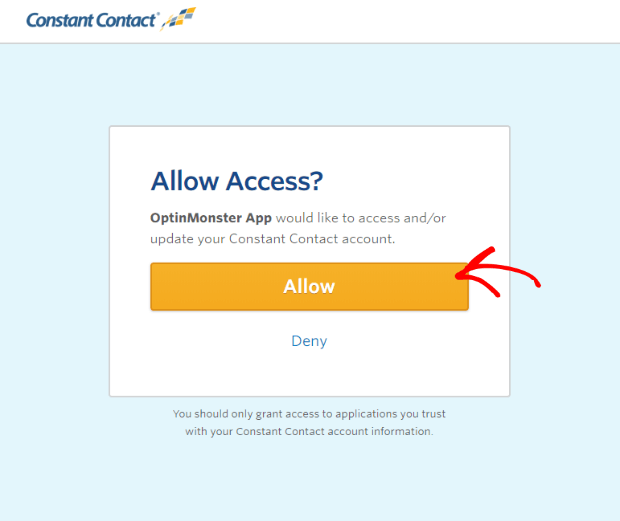
Click Register with Constant Contact and log in to your Constant Contact account when prompted. You’ll be asked to allow OptinMonster access to your Constant Contact account. Please click the Allow button.
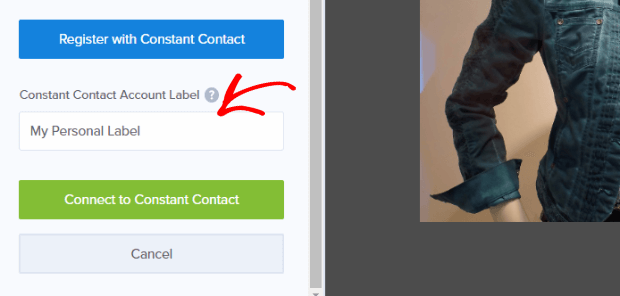
Assign a label to your Constant Contact account and click the Connect to Constant Contact button.
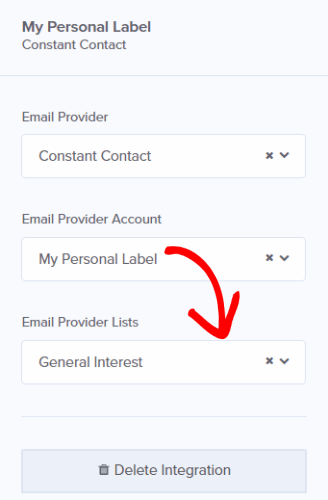
Now, select the email provider list from the dropdown. The default list created by Constant Contact is General Interest.
Step 6. Publish the Campaign
Save the campaign again and go to the Publish tab. This will bring up the publishing options.
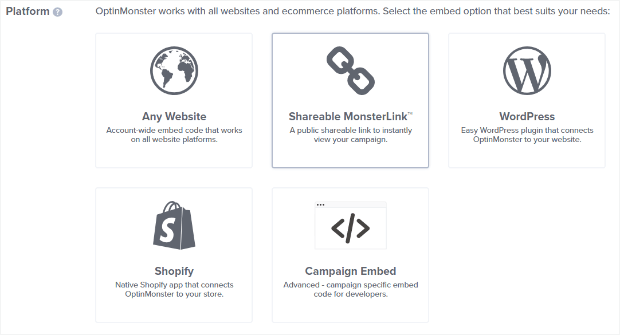
First, set the Status to Live. Then, you can publish your campaign via:
- Account-wide or campaign-specific embed code
- Our Shopify app
- WordPress, using the OptinMonster connector plugin
Step 7. Duplicate and Change the Campaign
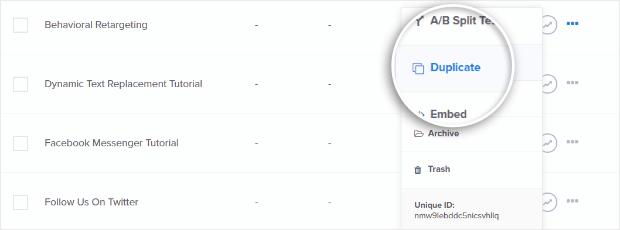
To create your MonsterChain, you’ll need at least one more campaign. One easy way to create a related campaign is to duplicate it by going to the three-dot menu in the dashboard and clicking Duplicate.
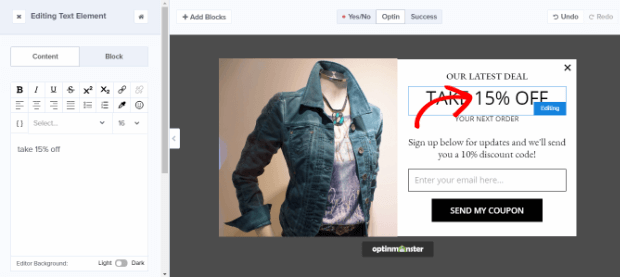
You’ll get an exact copy of the campaign, which you can edit. To create our MonsterChain, we’re going to offer a bigger discount to people who did not take the previous one, following the editing process described above:
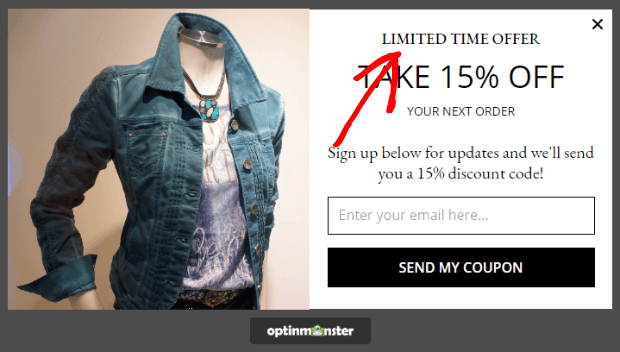
Remember, we want to add some urgency to this, so let’s change the OUR LATEST DEAL text to LIMITED TIME OFFER. We’ll leave it at that for now; the real urgency will come with the final campaign in our chain.
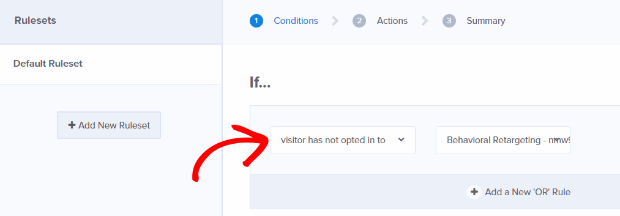
We’re going to set the display rule so this campaign only shows to people who did not opt into the previous one:
Save and publish this campaign.
Step 8. Create a Floating Bar Campaign
Now we’re getting really serious. We’re going to create a third campaign for our MonsterChain. This time, it’s going to be a floating bar campaign.
Floating bars are great for keeping your campaign front and center for your visitor… exactly what we’re looking for here.
We’re going to use the Countdown template and edit it to look like this:
You’ll want to use a dynamic countdown timer so each user will see a different countdown timer based on when they access your site.
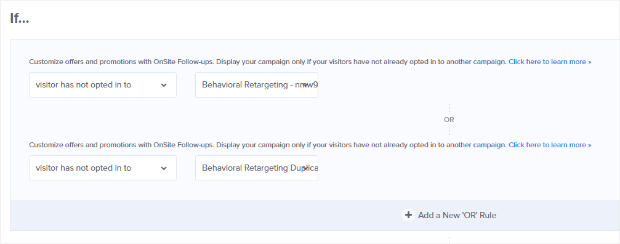
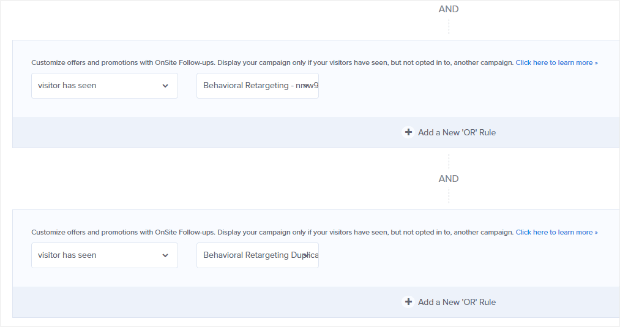
We’re going to set the display rule on this campaign so it only shows to people who did not opt into the previous two, but has also seen both campaigns:
You’ll want to use the OR logic in your display rule here to make sure that you target visitors who did not opt into either the first campaign or the other, but AND to target those who have seen both.
You’re now ready to integrate your email marketing service (or Monster Leads) and get this campaign saved and published.
That’s it! You just learned all about onsite retargeting and how to easily make it happen with OptinMonster.
Next time: Facebook retargeting ads made simple…








Add a Comment