
Use Your WordPress Site to Grow Your AWeber Email List
Last updated on
by

AWeber is a leading email marketing platform known for helping businesses connect with their audience and grow through effective campaigns. When combined with WordPress, you can easily capture leads and nurture them with powerful email workflows. In this guide, I’ll show you how to integrate AWeber with WordPress and why pairing it with OptinMonster is the best way to maximize your lead generation efforts.
- What Is AWeber?
- Why Use OptinMonster Instead of AWeber’s Built-In Forms?
- Connecting AWeber With OptinMonster
What Is AWeber?
AWeber is a popular email marketing platform.
Not only can you create beautiful email campaigns with AWeber, but you can also:
- Create email campaigns
- Automate email workflows
- Design landing pages
- Track results with reporting
- And much more…
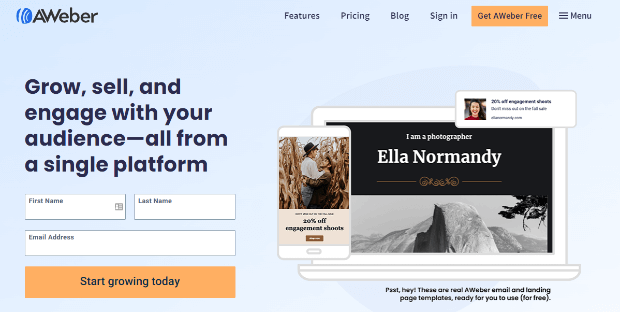
AWeber also has a WordPress plugin that lets you create email signup forms for your website. However, while AWeber has some great-looking templates, getting your form on your website can be difficult, especially for a beginner. Plus, targeting and display trigger options are severely limited with AWeber’s form builder.
But that’s OK. We have the perfect solution if you still want to use AWeber as your email service provider but want something else to generate a ton of leads.
The answer: Use OptinMonster, which seamlessly integrates with AWeber, letting you grow your email list through your website.
Why Use OptinMonster Instead of AWeber’s Built-In Forms?
AWeber offers reliable built-in sign-up forms, but OptinMonster provides advanced features that can supercharge your lead generation efforts.
With OptinMonster, you can easily make great-looking AWeber signup forms in minutes:

Here’s why you might choose OptinMonster to collect email addresses on your WordPress site:
1. Multiple Campaign Types
OptinMonster provides multiple campaign types beyond traditional forms, including:
- Popups and slide-ins to attract attention.
- Gamified forms like spin-to-win wheels to engage visitors.
- Inline forms, floating bars, and content lockers for flexibility in capturing leads. This variety allows you to experiment with formats and find what works best for your audience.
2. Advanced Targeting and Triggering Options
OptinMonster allows you to show forms to the right audience at the right time using:
- Exit-Intent® technology to capture visitors before they leave.
- Page-level targeting to display forms based on specific content.
- Geolocation targeting to customize campaigns for users in different locations. These options help you improve engagement and increase conversions, something AWeber’s built-in forms can’t fully achieve.
3. Enhanced Design and Customization
With OptinMonster, you can create visually appealing, high-converting campaigns using:
- A drag-and-drop editor for easy customization.
- 700+ pre-designed templates for various use cases.
- Advanced styling options for a professional look that aligns with your brand. While AWeber’s forms are functional, OptinMonster gives you the tools to create designs that grab attention.
4. Conversion Rate Optimization Tools
OptinMonster is designed with optimization in mind. You can:
- Run A/B tests to find the best-performing designs and messages.
- Use analytics to track conversions and fine-tune your campaigns.
- Personalize forms with dynamic content to appeal to individual users. AWeber’s forms lack these powerful optimization features.
5. Seamless Integration With AWeber
OptinMonster integrates directly with AWeber, so all the leads you collect sync effortlessly with your AWeber email lists. This lets you combine OptinMonster’s advanced capabilities with AWeber’s email marketing power for a streamlined workflow.
Get started with OptinMonster today!
Connecting AWeber With OptinMonster
Once you’re signed up for both AWeber and OptinMonster and have installed the OptinMonster WordPress plugin, connecting the 2 tools is simple. For detailed, step-by-step instructions, visit our documentation on integrating OptinMonster with AWeber. If you just want a quick idea of how easy it is, here’s a basic overview:
- Create Your First OptinMonster Campaign
- If you need help creating a campaign, refer to our step-by-step guide.
- Integrate AWeber:
- In OptinMonster, go to the Integrations tab and select AWeber.
- Log in to your AWeber account and choose the email list where you want new leads to go.
- Publish Your Campaign:
- Once everything is connected, publish your campaign on your WordPress site.
By combining OptinMonster with AWeber, you can take your lead generation to the next level with personalized campaigns and targeted offers.
Start Buiding Your AWeber Email List
Whether you use WordPress or manage any other type of site, OptinMonster is the best tool to create AWeber signup forms. We hope that you found this tutorial helpful. If you did, you’ll want to check out these other resources:
- 32 Best Lead Generation Software & Tools for Targeted Leads
- How to Grow Your Email List FAST: 23+ Proven Methods
- How to Automate Lead Generation in 3 EASY Steps (Step by Step)
These articles will give you the tools you need to automate your marketing efforts and show you more tools and trips to grow your business.
And if you’re ready to start building a great email list, sign up for OptinMonster and AWeber today!
Disclosure: Our content is reader-supported. This means if you click on some of our links, then we may earn a commission. We only recommend products that we believe will add value to our readers.

-01 - OptinMonster")


Add a Comment