TL;DR: How to Make a Squarespace Newsletter Signup Form
1. Select Campaign Type & Template: Choose a campaign style (e.g., popup) and template in OptinMonster.
2. Design Your Campaign: Customize text and design using OptinMonster’s drag-and-drop editor.
3. Configure Display Rules: Set rules for when and where your campaign appears, such as using exit-intent popups.
4. Sync Your ESP: Integrate with your email service provider to manage and segment new subscribers.
5. Inject OptinMonster into Squarespace: Add OptinMonster’s global code to your Squarespace settings for campaign activation.
6. Preview and Publish: Review and then publish your campaign to start collecting leads.
Are you trying to learn how to make a Squarespace newsletter signup form without relying on the platform’s native tools?
Squarespace is a popular eCommerce platform for entrepreneurs and small business owners. It allows anyone to create an online store in a matter of minutes, without any technical skills or experience required.
But once that store is built, you still need to get leads.
That’s why, in today’s post, we’re going to teach you the best way to make a Squarespace newsletter signup form.
Before we get started, though, let’s get clear on why we won’t be using Squarespace’s native popup or announcement bar builder.
Squarespace Lead Generation
If you’ve worked with or researched Squarespace in the past, then you’re probably aware that they have a popup builder that comes with the platform.
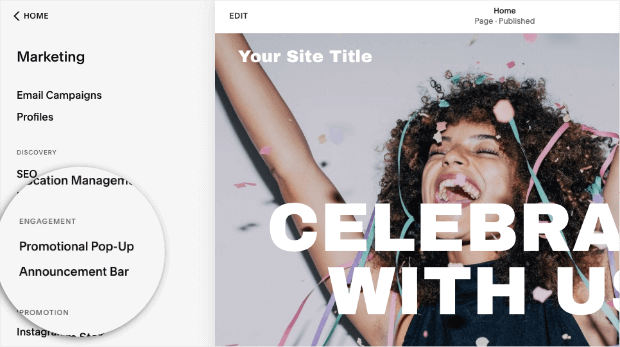
This is a good resource if you’re just getting started with your lead generation strategy.
That said, there are some limitations that can quickly result in leaving new leads on the table. These limitations include:
- Campaign Types: You’ll only be able to create popups and announcement bars.
- Display Rules: You can only trigger this popup based on time or scroll depth.
- Frequency: You have basic configurations to determine when this popup will appear to returning visitors.
In other words, with the Squarespace native popup builder, you’ll miss out on a LOT of potential subscribers.
That’s why, for this tutorial, we’re going to use a more advanced tool…
Meet OptinMonster:
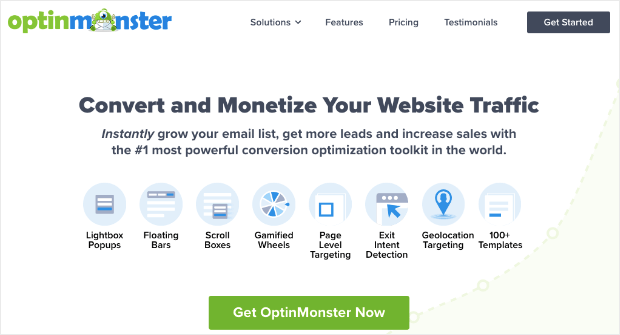
OptinMonster is hands down the best lead generation software on the market.
Why would you use OptinMonster over Squarespace’s native campaign builder? That’s simple:
OptinMonster will get you MORE leads in LESS time.
That’s because OptinMonster offers more campaign types to reach your audience. These include:
- Lightbox popups
- Floating bars
- Fullscreen welcome mats
- Slide-in scroll boxes
- Gamified spin-to-win wheels
- Content lockers
- Inline campaigns
- Sidebars
This allows you to present your Squarespace newsletter signup form in a variety of ways, depending on what posts or pages your audience is browsing.
You might display a floating bar on product pages, for example, but add an exit-intent popup to popular blog posts.
That brings us to OptinMonster’s second major advantage: targeting rules.
We just mentioned you can make an exit-intent popup with OptinMonster. This is when you show a campaign as users are actively leaving your website:

This is an incredibly effective method for getting more leads. In fact, it’s how Fastrack is able to recover 53% of its abandoning visitors.
But that’s only one of the many display rules you can work with.
Other popular triggers include:
- Geolocation Targeting: Personalize the customer journey by targeting people based on their physical location.
- OnSite Retargeting®: Display new campaigns to returning visitors to avoid “popup fatigue.”
- MonsterLinks™: Drive MORE conversions by letting the users’ behavior determine if they see a campaign or not.
All of these rules help you present the right offers, to the right people, at just the right times in their customer journey.
As a result, you can feel confident that you’re getting as many people as possible to join your Squarespace newsletter signup form.
Ready to get started? To follow along with this tutorial, click below and start your 100% risk-free OptinMonster account today:
Build a Squarespace Newsletter Signup Form
Once you’ve signed up for your OptinMonster account, you’ll be able to go through this step-by-step tutorial to have a high-converting signup form on your Squarespace site.
Again, we’re doing this because OptinMonster gives you MORE:
- Campaign types
- Targeting rules
- Control over customization
These are crucial components to ensuring that you never leave any leads on the table.
Ready to get started (and you’ve signed up for your OptinMonster account)? Let’s dive in.
Step 1) Select Your Campaign Type & Template
The first thing you’ll need to do is determine which kind of campaign you want to use for your Squarespace newsletter signup form.
Again, OptinMonster gives you plenty of options, including:
- Popups
- Floating bars
- Fullscreen welcome mats
- Inline campaigns
- Slide-in campagins
- Gamified wheels
- And more…
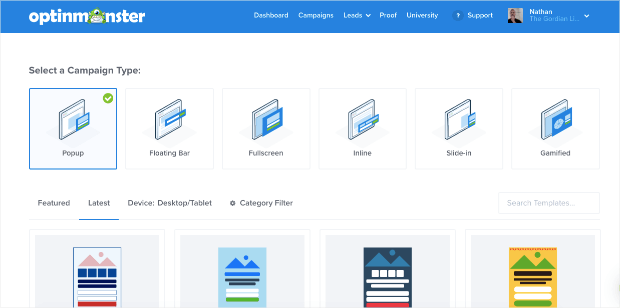
For this tutorial, we’ll use a Popup. That’s because it’s a great place to start your lead generation strategy. Plus, it’s very effective with the right targeting rules.
Next, scroll down and choose a template. You can browse through and preview the options to find the best one for your unique needs:
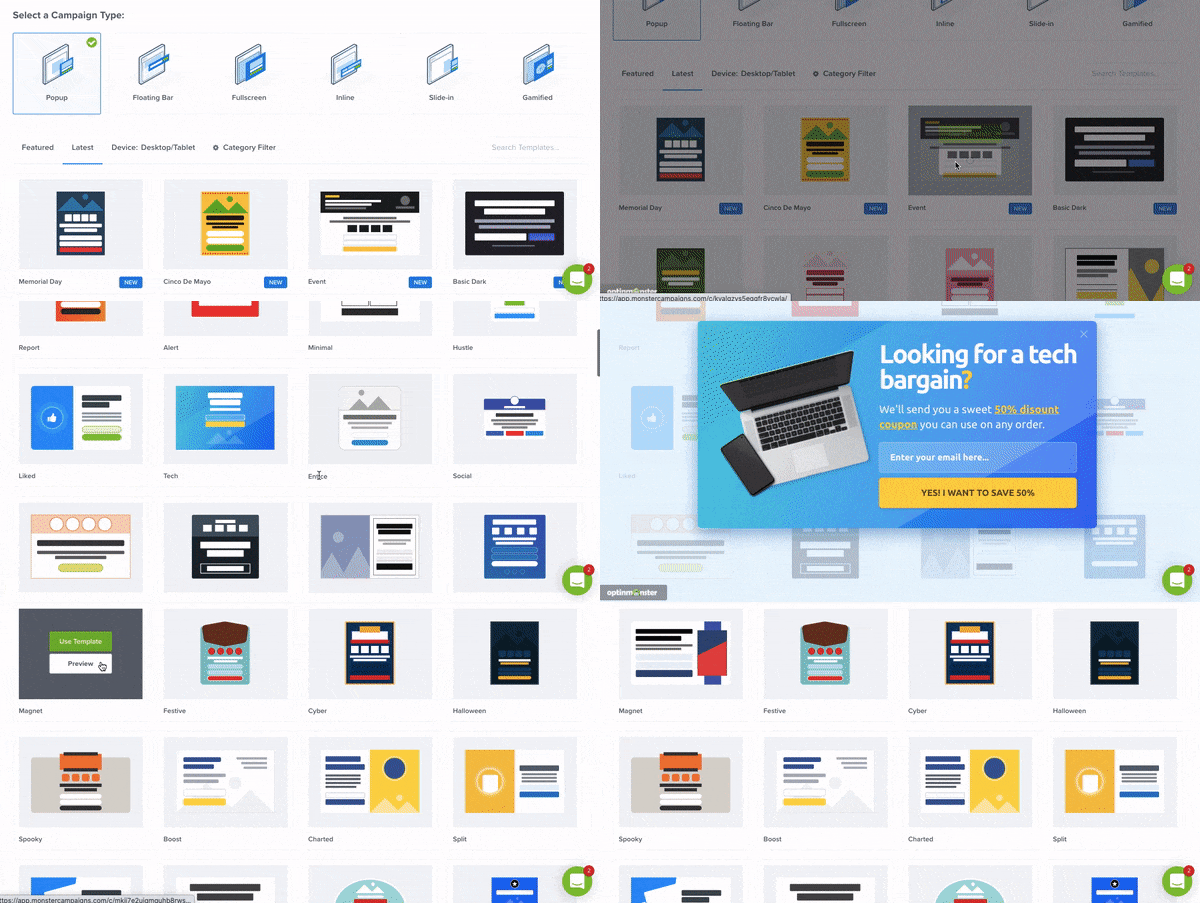
All of OptinMonster’s 50+ templates are mobile-friendly and fully responsive. That means they’ll look and function great across all your devices.
And many OptinMonster customers use the templates out-of-the-box with little or no modifications needed.
Once you’ve selected the right template for your Squarespace newsletter signup form, you’ll simply need to name your campaign and click Start Building:
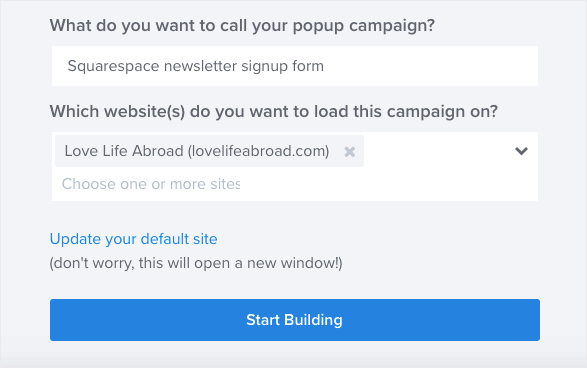
Now your campaign will appear in the OptinMonster editor.
Step 2) Design Your Campaign
Earlier, we mentioned that many people don’t make customizations to their OptinMonster templates.
But if you want to really connect with YOUR unique audience, then you might consider a few minor modifications.
Fortunately, OptinMonster makes this ridiculously easy. First, you can change any and all text with the inline text editor.
Just click the text areas you want to change and rewrite your campaign’s wording:
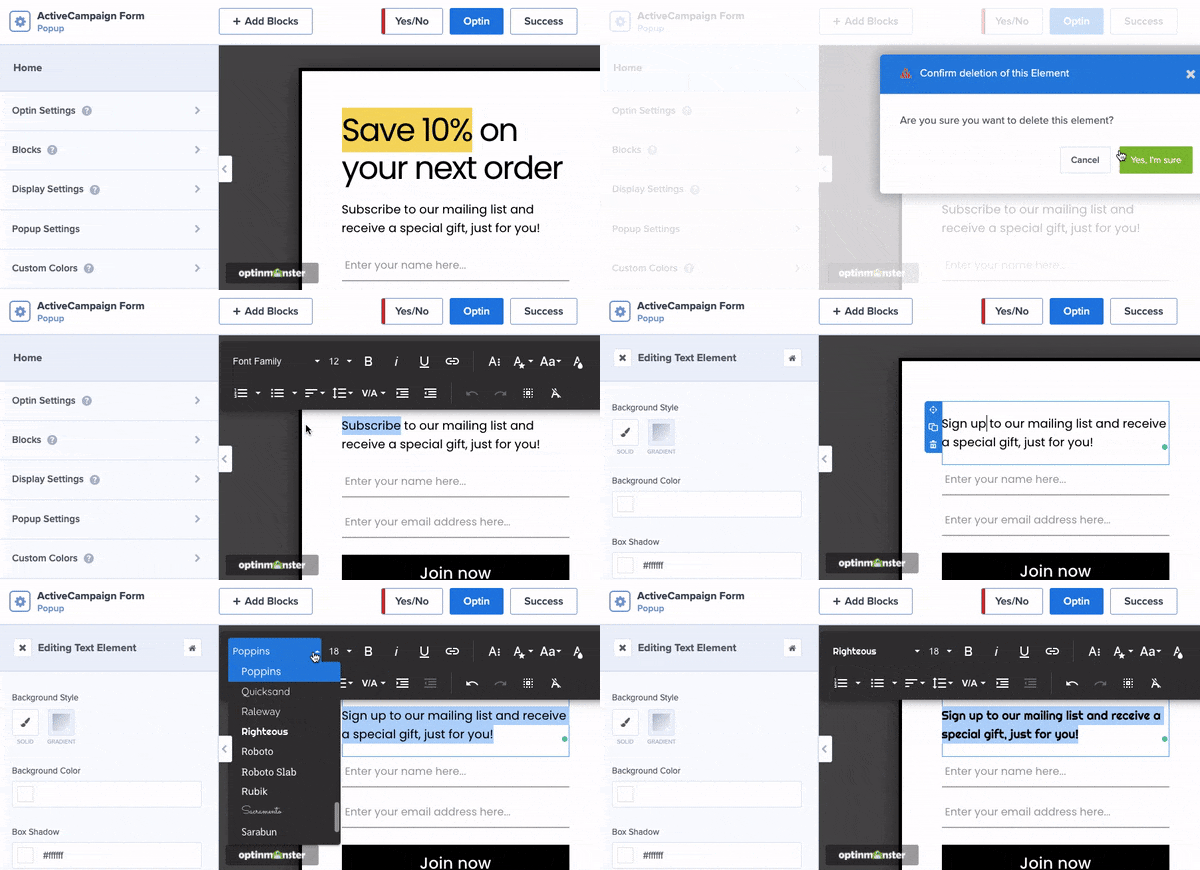
In some cases, you might want to add custom features to your popup.
You can do this with OptinMonster’s drag and drop codeless visual builder. That’s because all OptinMonster features come as “blocks.”
You can select the block you want and drop it into your campaign with a single click:

This gives you 100% control over how you present your newsletter signup form to your site’s visitors.
But the best part is that OptinMonster doesn’t require ANY coding knowledge at all.
You can make stunning and high-converting campaigns in minutes even if you have zero technical or design experience.
For more information on how to customize your campaigns, check out this helpful resource: How to Create Your First Optin Campaign With OptinMonster.
Now let’s turn to setting up when and where this popup will appear.
Step 3) Configure Your Display Rules
One of the biggest factors about generating leads with popups isn’t necessarily what the popup says.
Because it’s also important to understand WHEN and WHERE your popup delivers its message. Even the best popup in the world won’t convert if it’s shown in the wrong places or times.
That’s why OptinMonster gives you more targeting rules and options than any other lead generation software on the market.
Today, we’ll create an Exit-Intent rule. That’s where you can show a popup as users are actively leaving your website.
It’s the perfect chance to show your Squarespace newsletter signup form and prevent people from leaving your brand forever.
To add this or any other rule, head to Display Rules at the top of your OptinMonster editor. You’ll see that, by default, each campaign has 2 settings:
- Time on page is 5 seconds
- Displays on every page
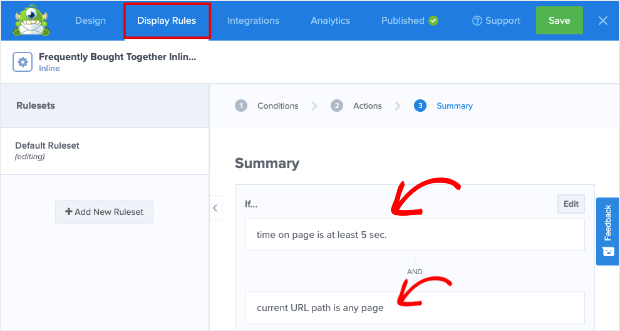
Click the first rule Time on Page to modify it. You’ll see a menu list of display rules menu t you can browse through to find the right one for your Squarespace campaign:
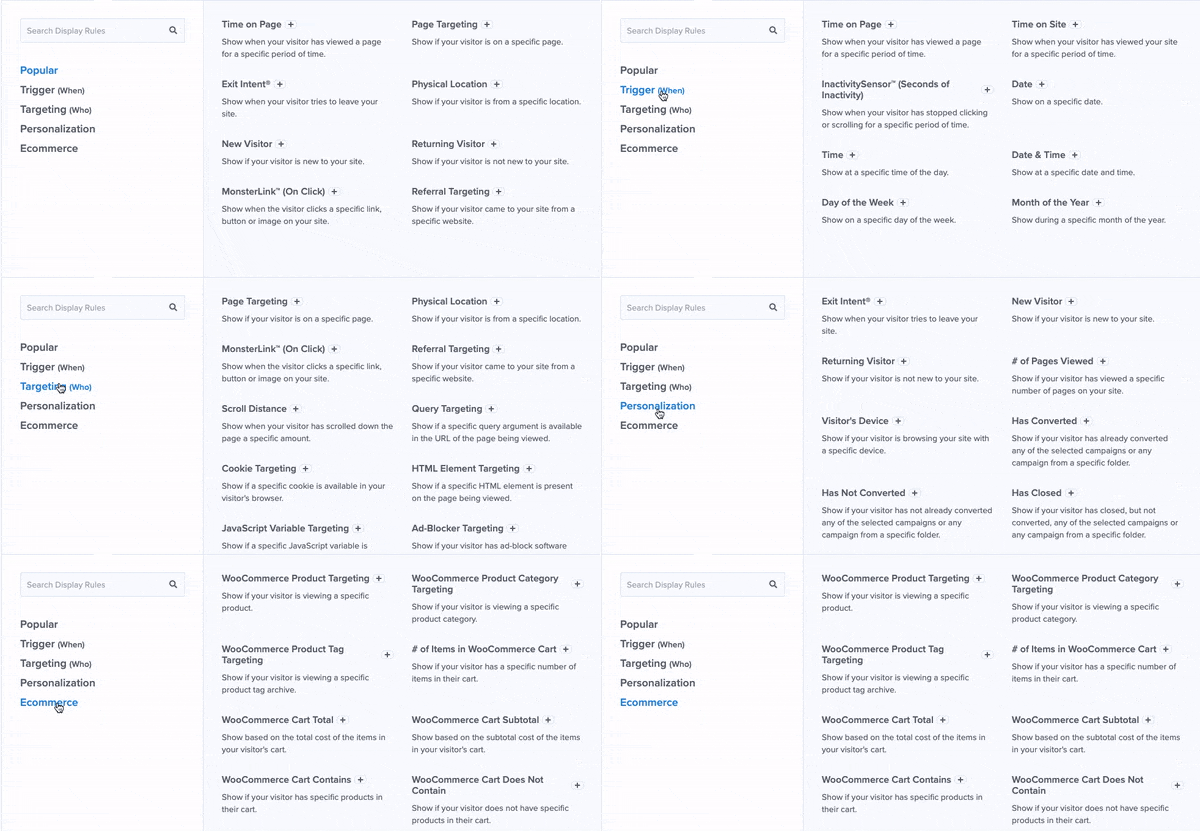
Again, for this tutorial, we’ll select Exit Intent®:
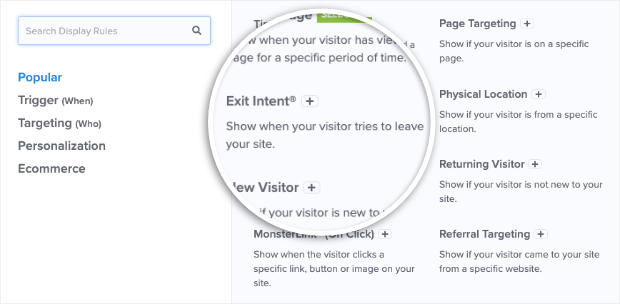
Then you’ll be able to determine which device you want this to appear on (mobile, tablet, desktop, or all three), and how sensitive this trigger is:
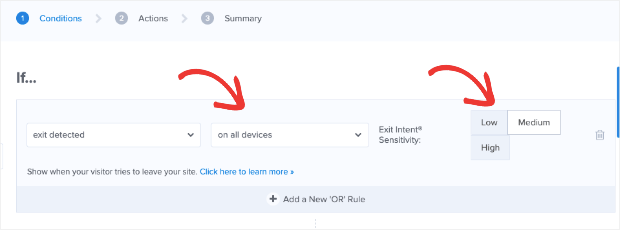
Exit-Intent® Sensitivity is important to understand.
For desktop use, exit-intent works by tracking the mouse cursor. As this cursor moves to leave the window, your popup campaign will appear.
And the sensitivity level determines how fast or slow the campaign appears depending on the cursor’s movement.
For mobile, sensitivity is even more important. That’s because mobile exit-intent works a little differently.
Low and Medium sensitivity levels will make your campaign appear as users scroll back up on their phones. This is usually an indication they’re going to leave.
High sensitivity, on the other hand, will make the popup appear when users hit the Back button with their thumb.
You can determine the configurations that work best for your specific situation. For this tutorial, we’ll make our exit-intent popup appear on all devices and with Medium sensitivity.
Next, you can determine what posts or pages you want this campaign to appear on. Since it’s a general Squarespace newsletter signup form, we’ll leave this to display on every page:

But understand that you can control exactly where this campaign appears with just a few clicks:
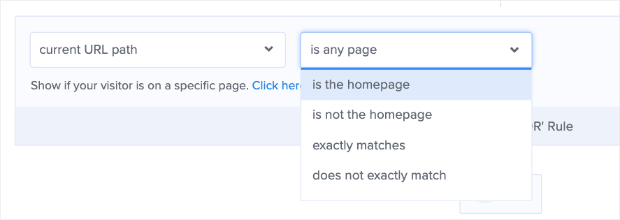
This is just one example of the ruleset that you can apply to your signup form. As you can imagine, though, your possibilities are endless.
When you find the right display rules for your Squarespace newsletter signup form, we’ll add your email provider. That way, your leads go to the right contact list automatically.
Step 4) Sync Your ESP
One of the most important parts about lead generation is sending your new subscriber to the right portion of your contact list.
That’s because if you really want to boost conversions, you need to personalize your email marketing strategy.
And that means “audience segmentation.”
Audience segmentation is a process through which you organize your new leads. You can group people into sub-groups based on their interests, behavior patterns, or demographics.
Then you can send more targeted messages to each of your sub-groups (or “segments”). In the end, this translates into more conversions and sales from your Squarespace store.
While audience segmentation takes place with your email service provider (ESP), OptinMonster makes it easy to sync your lists.
Go to Integrations at the top of your OptinMonster dashboard. Then click Add New Integration from the left-hand side menu:
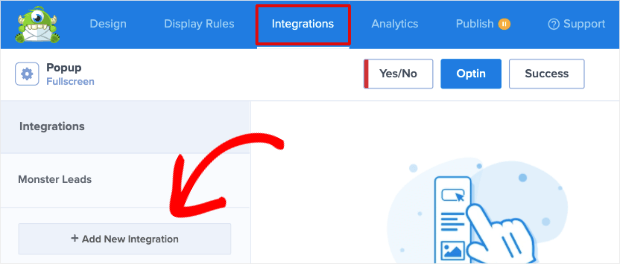
Find your ESP from the drop-down list:
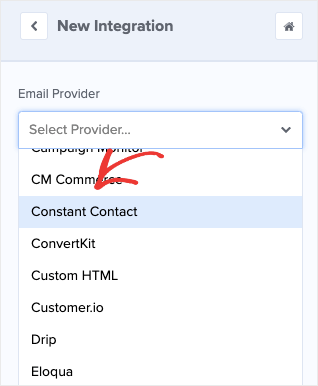
Then you can follow the directions to sync OptinMonster with your ESP depending on which email provider your use.
That said, most integrations are as easy as copying and pasting an API key from your ESP.
Once everything’s connected, you’ll be able to select which list in your ESP your new subscribers should be sent to:
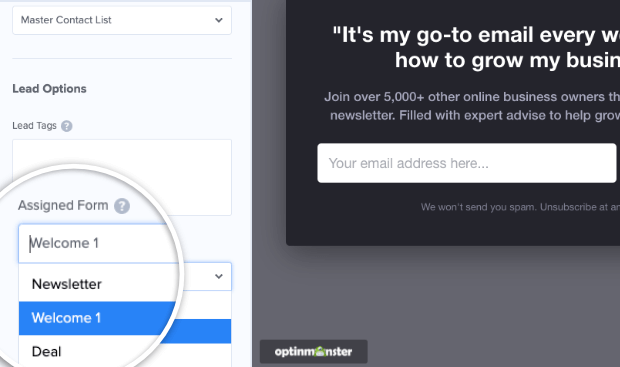
This level of personalization will pay off down the road as you keep your contacts organized and your messages targeted.
Don’t see your ESP in OptinMonster’s native integrations? No worries.
Check out this helpful guide to get connected: How to Sync OptinMonster to ANY Email Service Provider.
Next, we’ll quickly syn OptinMonster with your Squarespace site.
Step 5) Inject OptinMonster into Squarespace
If you didn’t hook up OptinMonster with Squarespace when you signed up, that’s OK.
We’ll go ahead and inject OptinMonster’s global code into your Squarespace site. Sound too technical?
Don’t worry! If you know how to copy and paste, you’ll know how to do this.
Switch to the Publish tab in your OptinMonster editor and search for the Global Site Code:
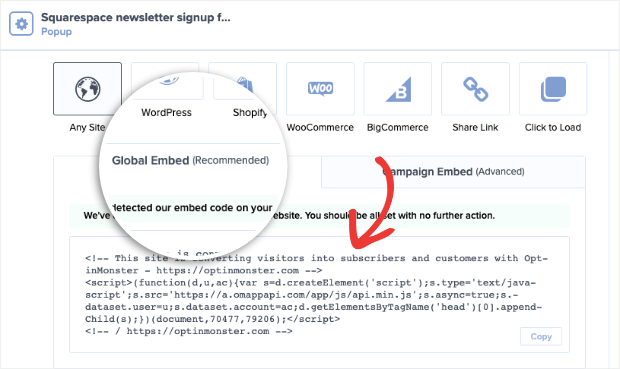
Copy that code and head over to your Squarespace site.
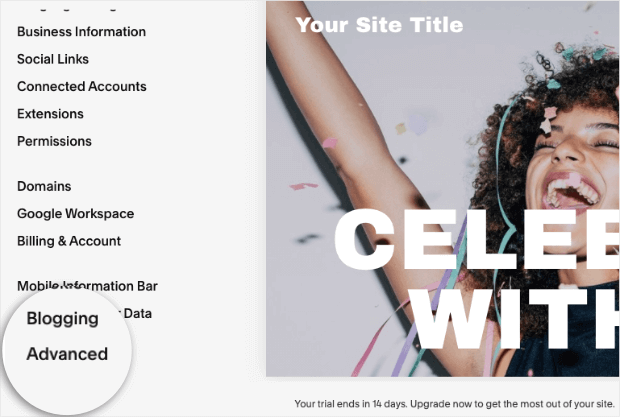
In the left-hand corner, click Settings:
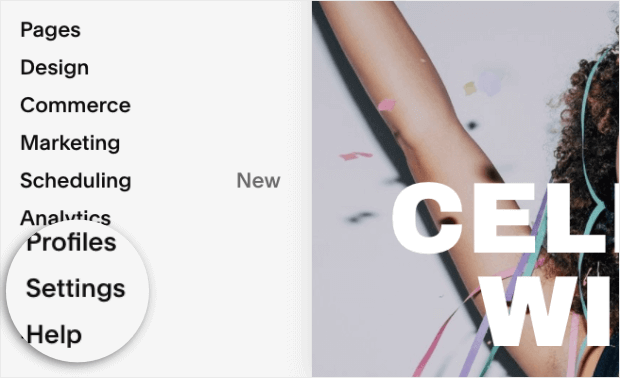
Then click Advanced from the next page:
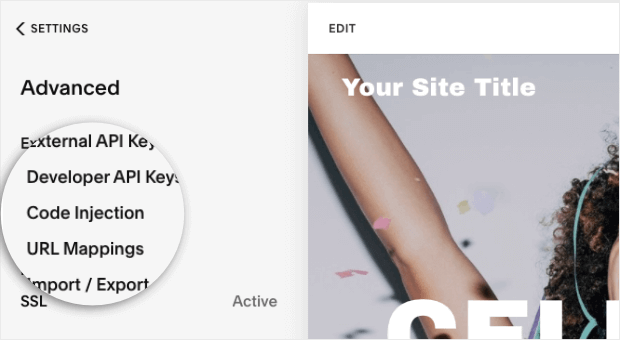
On the next page, locate and click Code Injection:
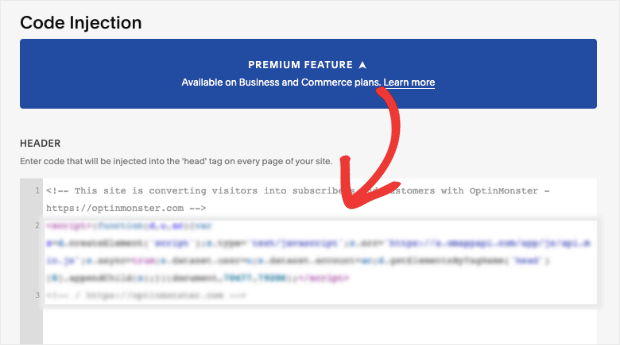
Note that you’ll need a Business or Commerce plan with Squarespace to use this feature.
Now you can paste the code in the Header section of your Squarespace site:
Head back to your OptinMonster dashboard and get ready to publish your Squarespace newsletter signup form.
Step 6) Preview and Publish Your Campaign
You can now test to make sure your site is connected and preview your campaign:
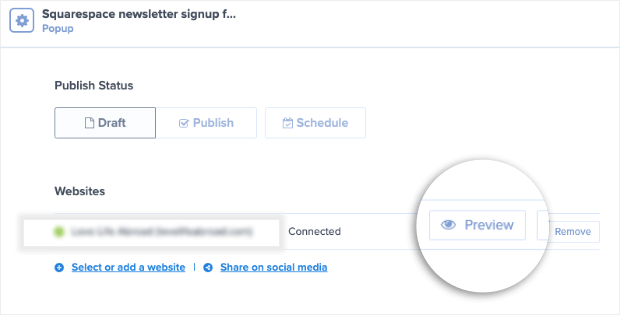
Then go ahead and switch your Publish Status from Draft to Publish:
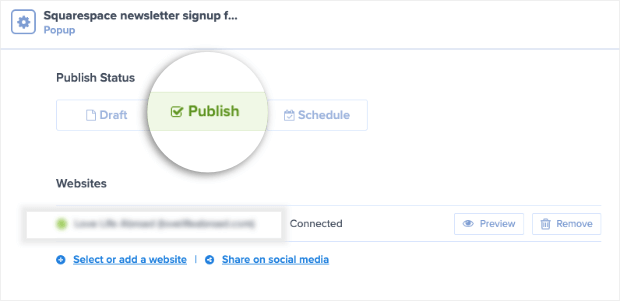
And that’s it! You’ve now created and published your Squarespace newsletter signup form.
You can now create professional, stunning, and high-converting campaigns across your site. Plus, you can target them to get as many conversions from your site’s visitors as possible.
We hope you enjoyed this post. If you did, you’ll definitely want to check out the following resources:
- How to Create a Promotional Popup in Squarespace
- 10 Website Builders for Small Businesses Compared
- Squarespace Email Campaigns vs. Mailchimp vs. OptinMonster
These articles will have even more information and tools on how you can increase signups from your Squarespace site.




Add a Comment