Are you looking for an easy way to integrate Mailchimp with WordPress?
Mailchimp is an extremely popular customer relation management (CRM) platform that helps you engage customers and make sales. In one tool, you can make marketing, sales, content management, and customer service easier.
By integrating Mailchimp and WordPress, you have a powerhouse duo that can generate and convert leads on your website.
So, how can you easily add Mailchimp to WordPress while putting some lead generation tasks on autopilot?
We have the answer and will show you the BEST way to connect Mailchimp to WordPress in today’s post.
Let’s get started!
What Is Mailchimp?
Mailchimp has quickly become one of the most popular CRM platforms and email service providers (ESPs) on the market.
It allows anyone to perform a variety of marketing tasks like:
- Create mailing lists
- Design emails
- Send out automated campaigns
- And more…
Mailchimp largely works as a separate tool, but you can integrate it with WordPress to generate leads on your website. The only part of Mailchimp that you can integrate with WordPress is their email signup forms.
If you search the WordPress Repository for Mailchimp, you will find multiple matches. However, most of them are unofficial plugins, meaning they weren’t developed by Mailchimp, so you’ll definitely want to take time to research the developers and plugins.
There are two official WordPress plugins from Mailchimp: Mailchimp for WooCommerce and Mailchimp List Subscriber Form.
You can install it like any other plugin on your WordPress site. Though, if you need some more help, feel free to use this resource: How to Install a WordPress Plugin (3 EASY Methods).
In a moment, we’ll teach you an even MORE powerful way to integrate Mailchimp with WordPress.
But you may be wondering why you should use a separate tool to integrate Mailchimp with WordPress. Well, if you want to unleash Mailchimp’s power, you need a full email marketing list.
And we have the secret to doing just that.
We already talked about how Mailchimp lets you add optin forms to your site. Unfortunately, these forms are basic and extremely hard to customize. Plus, display rules and targeting options are practically non-existent.
Putting a basic, non-targeted form on your website is like throwing a fishhook into a lake with no bait. You’re just hoping a fish will bite. Though chances are, while you desire a giant catfish, you’ll likely end up with algae-covered weeds.
Unleash Mailchimp’s Full Power
What you need is the right bait to make that hook irresistible.
So, if you are serious about reaching making the most of your Mailchimp account while adding the most leads to your email lists, you need something else. You need bait that’ll target your exact audience and help you create stunning optin campaigns.
That something is OptinMonster:
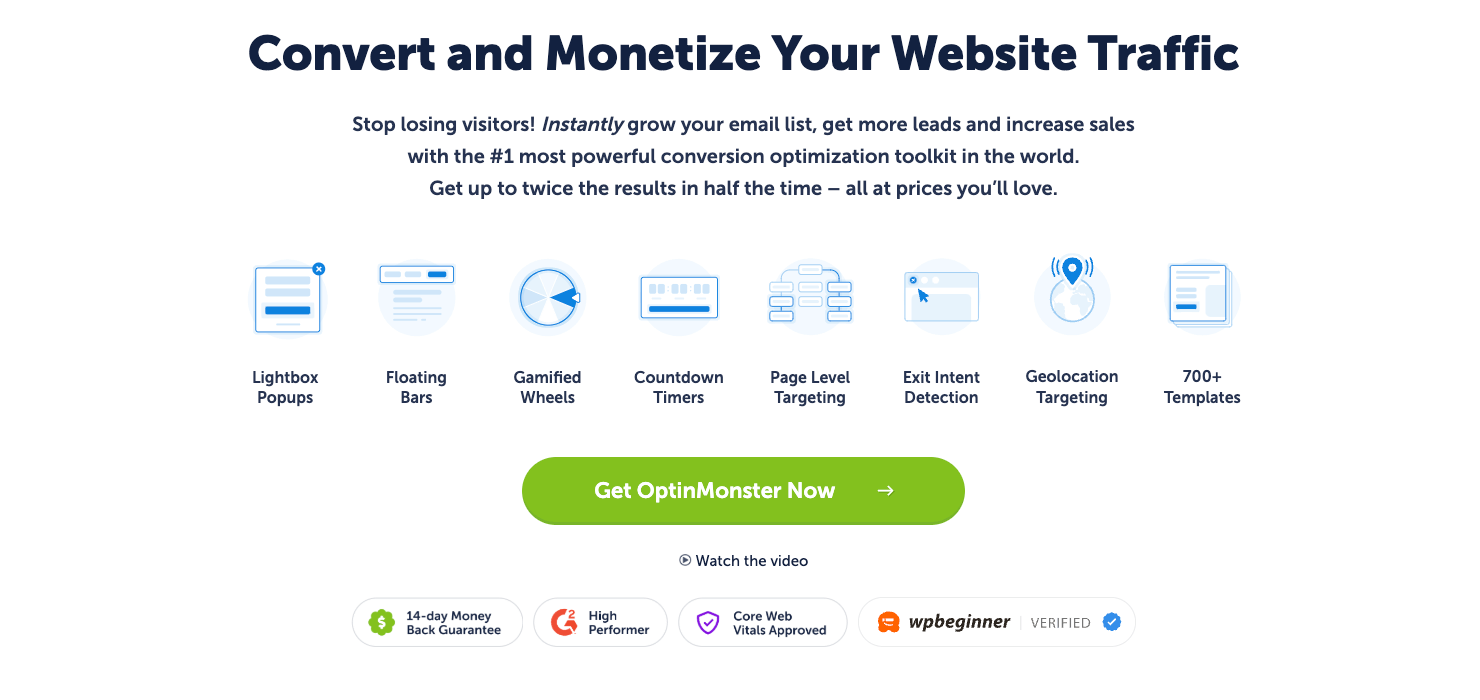
OptinMonster is the best WordPress plugin to help you unlock Mailchimp’s strengths and make up for the features it lacks.
With 700+ templates and a user-friendly drag and drop builder, you can easily create stunning campaigns like popups, floating bars, inline forms, gamified wheels, and more.
And don’t forget, OptinMonster comes with targeting rules so you can show your visitors the exact campaigns you want at the second you want:
- Exit-Intent® Technology: recover users actively leaving your site.
- Onsite Retargeting®: keep users engaged by showing fresh campaigns.
- MonsterLink™: boost engagement by showing offers based on what buttons and links your visitors click.
This level of personalization will not just increase the user experience (UX) but will drastically increase your conversions and sales.
In fact, pairing Mailchimp and OptinMonster is how Biddyco increased their conversions by 300% in just 30 days.
The best part is that you only need a few minutes and a handful of clicks to integrate OptinMonster and Mailchimp.
Ready to connect Mailchimp to WordPress using OptinMonster? Click below to start your 100% risk-free OptinMonster account today:
Let’s go ahead and jump right into our tutorial on how to integrate Mailchimp with WordPress by using OptinMonster.
How to Integrate Mailchimp with WordPress
Today’s tutorial will walk you through the steps to create an OptinMonster campaign and connect it to Mailchimp in 5 simple steps.
Step 1: Install the OptinMonster Plugin
First, you’ll need to sign up for an OptinMonster account. Then, you are ready to install the OptinMonster plugin for WordPress.
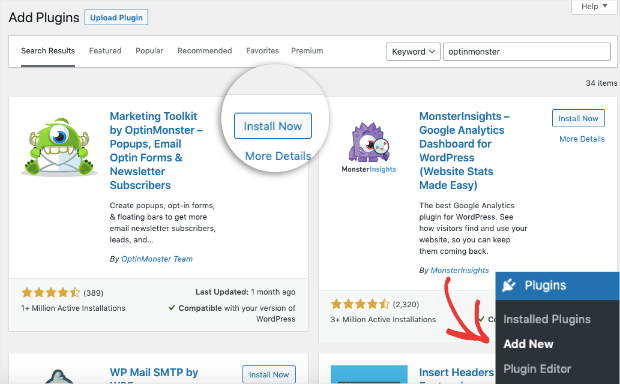
Log into your WordPress admin dashboard. Then, on the menu off to the left side, Log into the admin portion of your WordPress dashboard and navigate to Plugins » Add New.
In the Keyword search box, type in “OptinMonster” and hit Enter.
You should then see an option for OptinMonster. Next, click on the Install Now button:
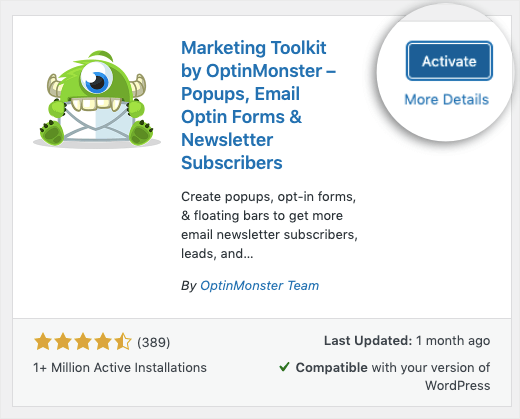
That same button will turn blue once the plugin activates and should say Activate.
Click on that button again:
Once the OptinMonster plugin is activated, go to the OptinMonster tab in your WordPress dashboard. Then, click Launch the Setup Wizard:
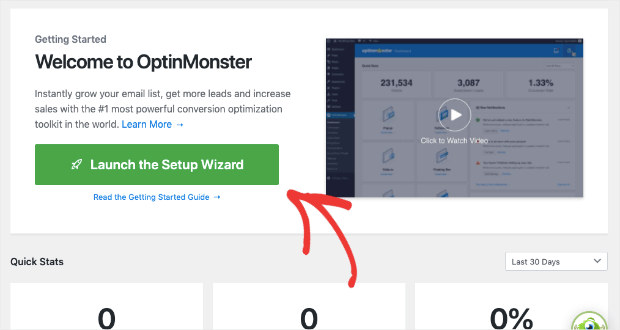
The setup wizard is incredibly easy to follow. When you are done with the wizard, OptinMonster and WordPress will be connected. But if you need help, here’s a handy guide on how to install the OptinMonster WordPress plugin.
Now that’s done, you are ready to create your first campaign and integrate Mailchimp.
Step 2: Create and Design an Optin Popup
If you aren’t there already, go back to the OptinMonster tab in your WordPress dashboard. As you scroll down, you’ll see the options for the different types of campaigns you can create:
- Popups
- Floating bars
- Fullscreen
- Inline
- And more…
Once you decide, click Create New under the type of campaign you’d like to create.
For today’s tutorial, we’ll select Popup:
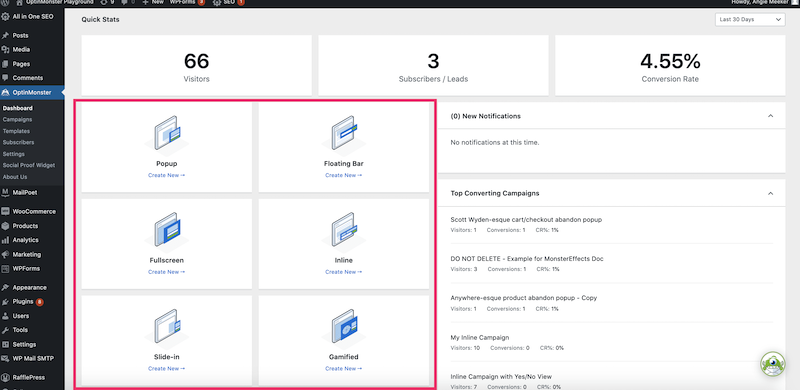
Next, select a design from one of OptinMonsters 700+ pre-built templates.
The best thing about these templates is that you’ll be saving so much time in designing your campaign:
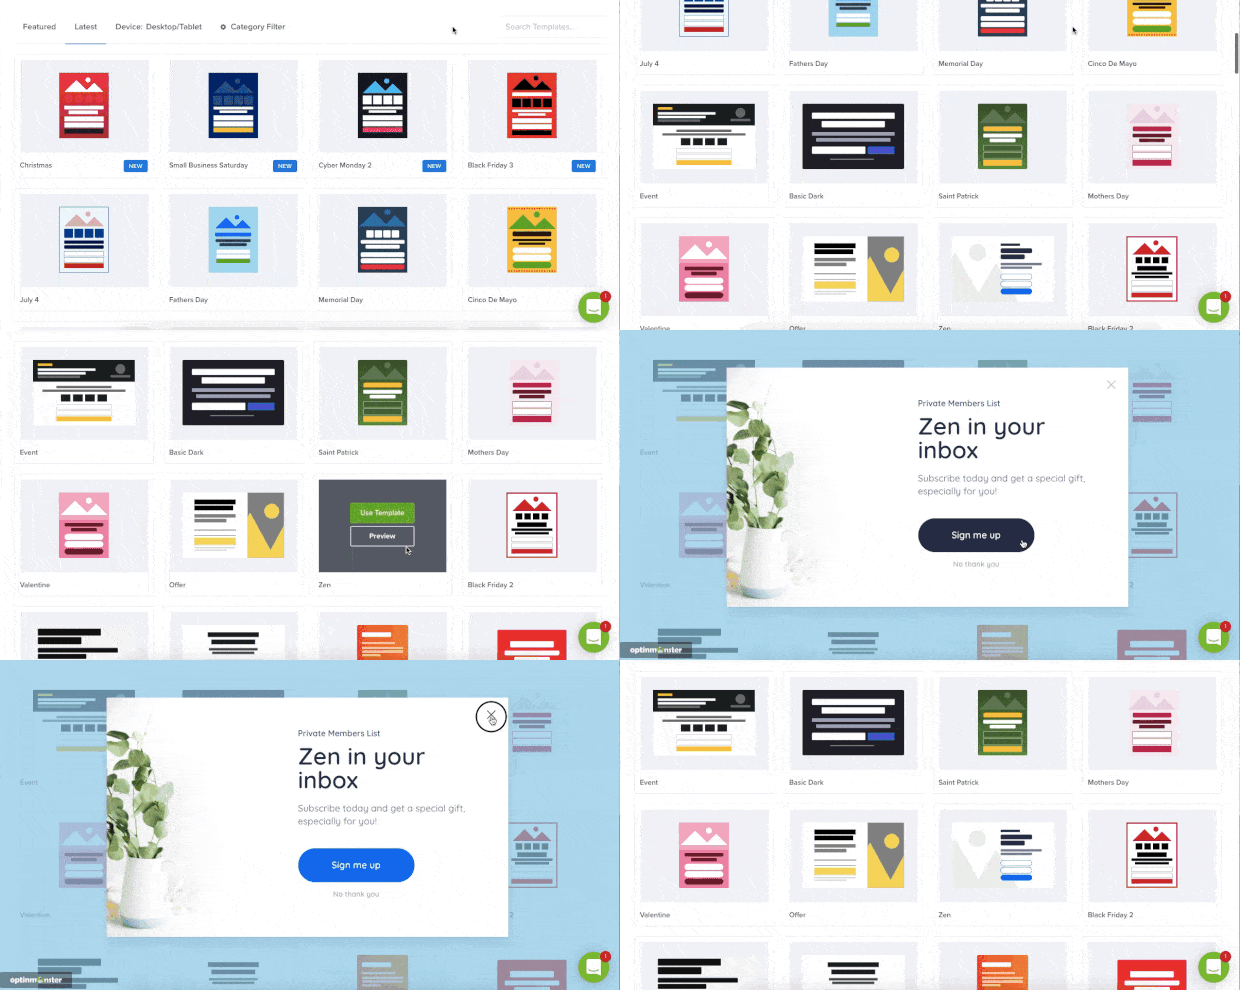
For this tutorial, we’ll work with the Basic template:
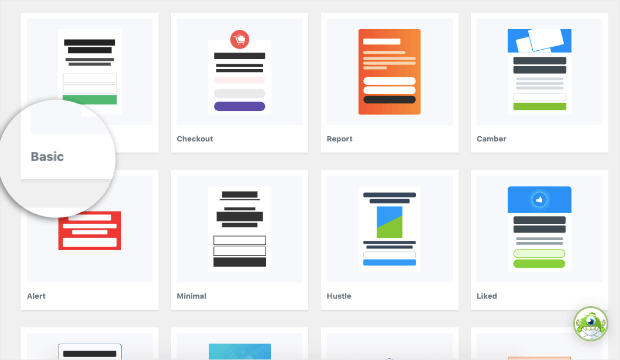
Basic is our go-to template. If you want a simplistic design, it’s perfect right out of the box. If you’re looking for room to customize amd play, this is absolutely he template for you.
Once you have selected your design, it’s time to name your campaign:
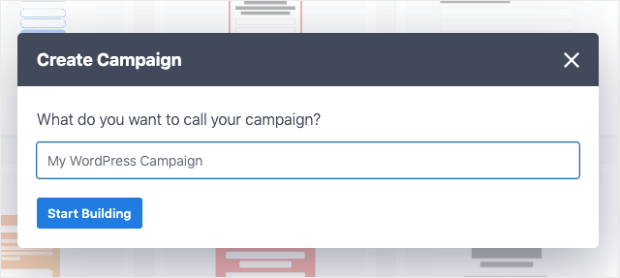
Then, click Start Building. You’ll now be taken to the builder screen. This is where you’ll design the visual part of your campaign.
If you want to make any changes, just click on the section you’d like to modify. Then, you can make edits directly in the builder. You’re free to change up pretty much anything, including the font, colors, and background:
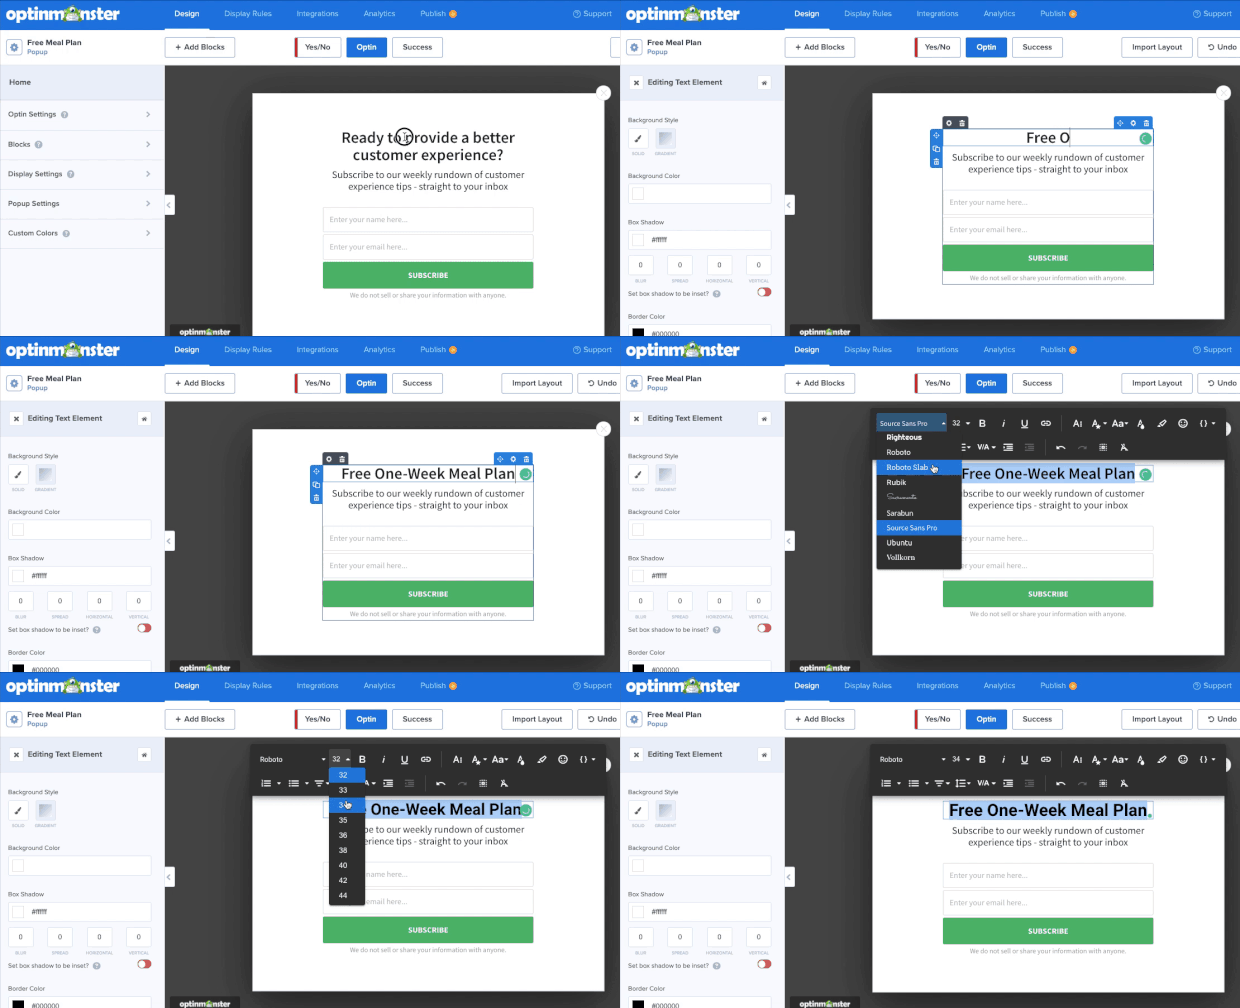
Remember how we mentioned that you can add things to your templates? This is where we’ll do that.
To do this, click on + Add Blocks on the left side of your screen.
Then, scroll down and find the element you want. Next, drag it to where you want it in your campaign:
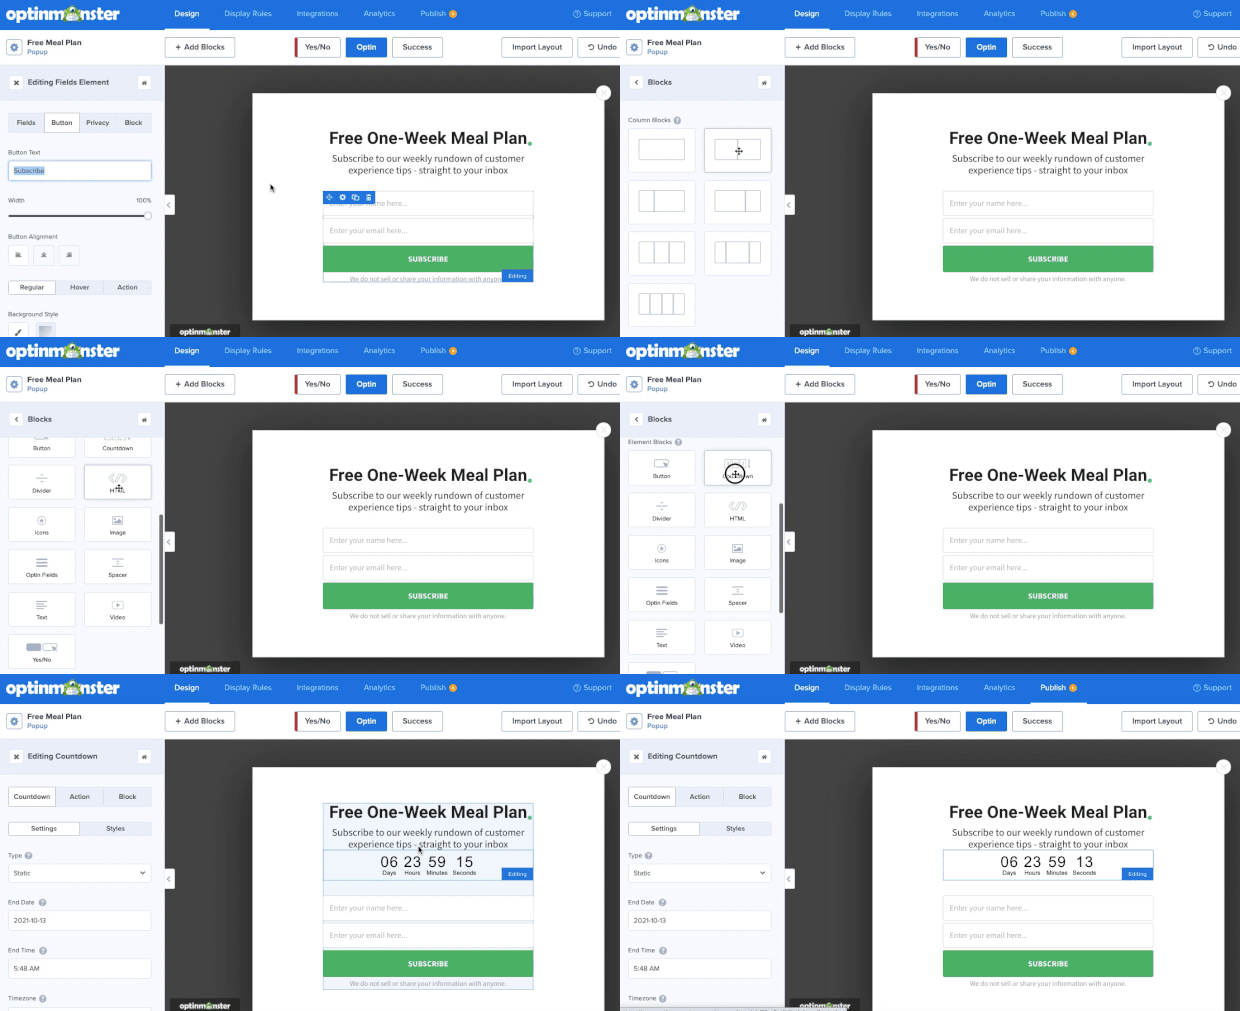
These elements come in something called a Block.
Block are preconfigured content areas that fit neatly into any campaign template.
If you’d like to explore more about the visual builder, check out our guide on creating your first OptinMonster campaign.
When you finish this step, it’s time to target your newly built campaign to your ideal audience.
Step 3: Target Your Audience
One of the most astonishing parts of OptinMonster is all of the ways you can target the audience you want with the perfect campaign for them. So, how exactly do you target an audience?
By telling OptinMonster exactly when, where, and to whom your popup will appear.
To set these rules and triggers, click on the Display Rules tab.
By default, OptinMonster has two display trigger rules in place:
- Time on page is 5 seconds
- Current URL path is any page
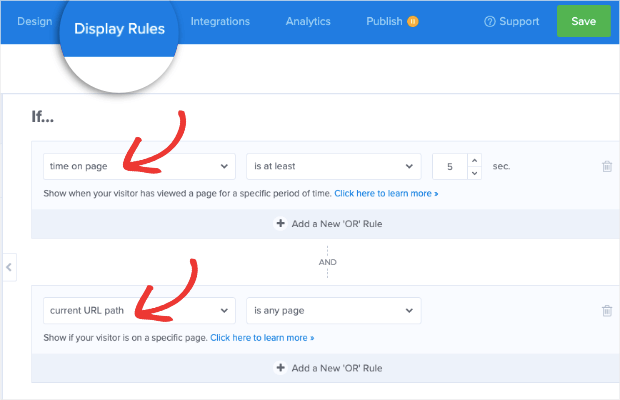
If you are getting started and want to get your campaign in front of the most eyes possible, then these rules are perfectly.
But, there are other remarkable rules and triggers that you need to explore to see all of the ways you can customize your targeting efforts. So, go ahead and take some time here and play with these rules to find the ones that best resonate with your audience.
We’ll take a closer look at the second rule: Page Targeting.
Click where it says “is any page” on the page. You’ll see a drop-down menu with all options to help customize this rule.
Let’s change it to “contains“:
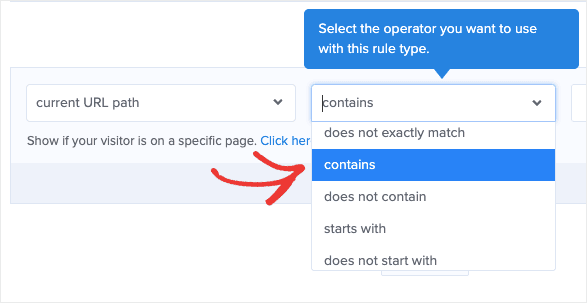
So, let’s say that you only want this popup to show up on pages that have a URL path with the word “products.”
It’s as simple as typing that work into the box to the right of contains:

This rule will help you target your campaigns to the most relevant audience based on the pages your visitors are browsing.
Now that your campaign is designed and the rules and triggers are set, it’s time to integrate it with Mailchimp.
Step 4: Connect OptinMonster with Mailchimp
Integrating OptinMonster and Mailchimp in WordPress only takes a couple of minutes.
First, log in to Mailchimp and click on your profile picture in the lower right corner of the dashboard. After that, on the popup menu, click Account.
On the top of the page, click on Extras » API Keys.
Then, scroll down to the Your API keys section and click on the Create A Key button.
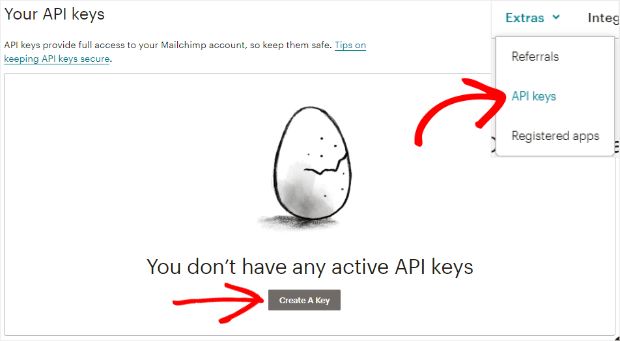
The screen will refresh with your Mailchimp API key.
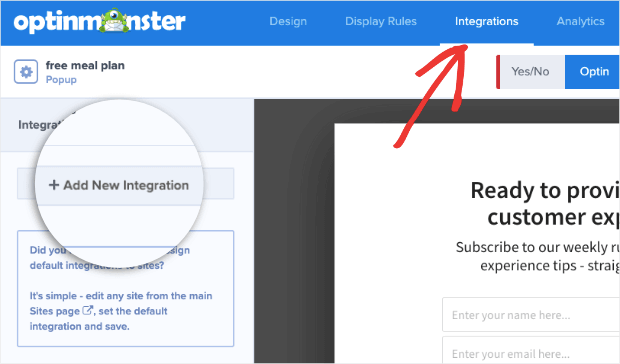
Next, go back to OptinMonster and click on the Integrations tab on the OptinMonster builder.
After that, click on + Add New Integration:
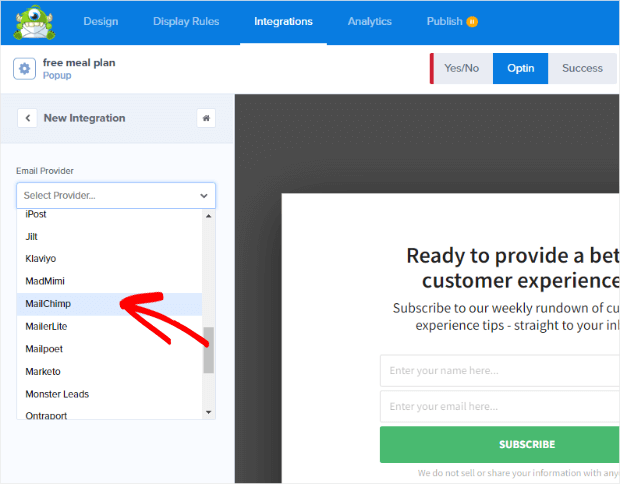
From the Email Provider drop-down, select Mailchimp.
All you have to do here is paste your API Key into the corresponding field. Don’t forget to add a unique label for easy identification, which is for internal use only.
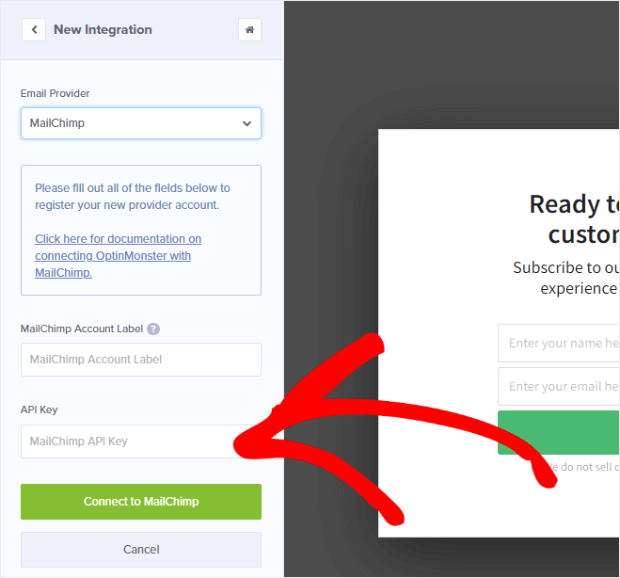
Finally, click on the Connect to Mailchimp button.
And that’s it! Mailchimp is fully integrated with OptinMonster and WordPress.
From here, you can also tell OptinMonster where to send your campaign leads if you have specific lists.
All that is left to do is publish your campaign.
Step 5: Publish Your OptinMonster Campaign
To publish your campaign on your WordPress site, click over to the Publish tab.
Here, you can Preview your campaign and review your popup’s display rules:
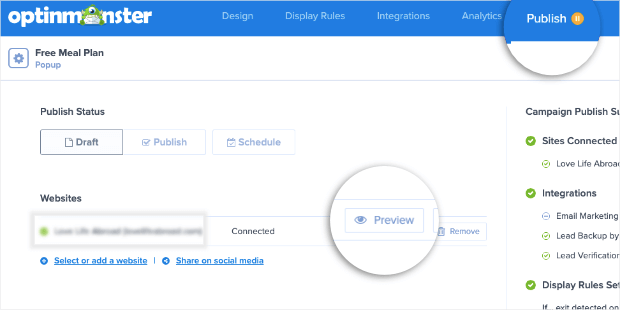
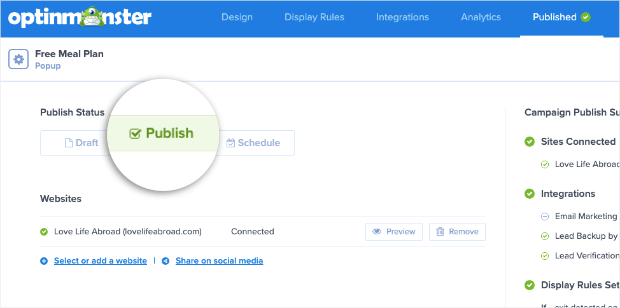
Once you are ready, change the status to Publish.
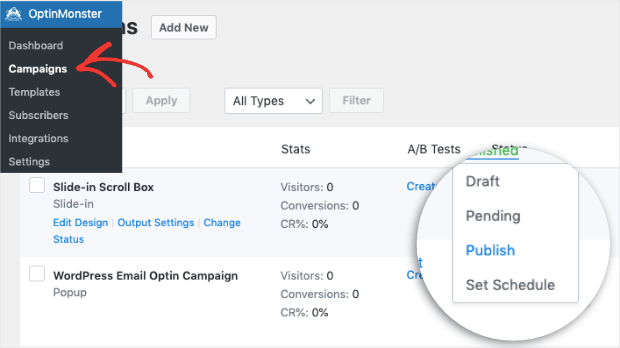
If your popup isn’t showing, you can verify its publish status in your WordPress dashboard.
Navigate to OptinMonster » Campaigns from your WordPress dashboard. Then make sure the status of your popup has switched from Pending to Published:
And that’s it! Your campaign is live and will start feeding all emails collected right into your Mailchimp email lists.
When you create future campaigns, connecting to Mailchimp will be a breeze now that everything is connected.
And that’s all we have for you today!
We hope that this tutorial. If so, you’ll definitely want to check out the following resources:
- 25 Email Popup Examples (& Best Practices) to Explode Your List
- How to Add Mailchimp Tags to a Signup Form in WordPress (2 Methods)
- How to Create a Mailchimp Contact Form (2 Methods)
These articles will have even more information on how you can use Mailchimp with WordPress while improving your lead generation strategy.





Add a Comment