TL;DR: How to Create a SendPulse Popup with OptinMonster
- Choose a Campaign Type: Use OptinMonster to create a popup campaign using customizable templates like “Magnet” to showcase a lead magnet (e.g., eBook, discount).
- Design Your Popup: Customize text, images, and blocks using the drag-and-drop editor—no coding needed.
- Set Display Rules: Define when and where your popup appears. Use triggers like Exit Intent® to display popups when visitors try to leave your site.
- Connect with SendPulse: Sync your OptinMonster campaign with SendPulse using REST API credentials to send leads directly to your contact lists.
Are you working with SendPulse and trying to find the best way to grow your email list?
Email marketing remains one of the best ways for you to build better relationships with your customers and generate more revenue for your business. And yet, many marketers struggle with getting more subscribers on their email list.
That’s why, in today’s post, we’re going to teach you exactly how to create a SendPulse popup to get better, higher quality leads.
But before we do, let’s talk about what SendPulse is and how it can help your marketing strategy.
What Is SendPulse?
SendPulse is a multi-channel marketing platform that helps with email, SMS, and live chat:
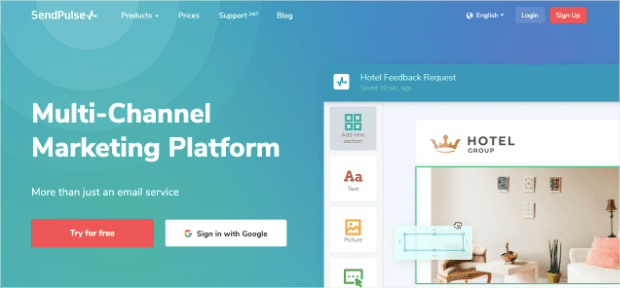
SendPulse has many features, but the one that’s relevant for today’s tutorial is how it functions as an email service provider (ESP). It allows users to build automated email campaigns with their drag and drop builder.
You can then create automation flows, send transactional emails, and check your campaign’s analytics reports to make smarter data-driven marketing decisions.
But at the end of the day, you’re going to face the same problem no matter which email service provider you’re using:
How do you get people on your contact list to begin with?
That’s where OptinMonster comes in:
OptinMonster is the world’s #1 lead generation software. What this means is that we’re great at getting your website’s visitors to take the actions you want them to.
Whether that’s increasing sitewide traffic, boosting sales, or getting more email subscribers, we help you get higher conversion rates for your calls to action (CTAs).
How do we accomplish that? By giving you the tools to build highly targeted optin campaigns.
Optin campaigns are small messages that appear to your visitors in the form of lightbox popups, floating bars, slide-in scroll boxes, and others.
These messages are shown to specific visitors on your site based on their demographics, user profile, or behaviors. You can also display your campaigns on specific pages or areas of your website, to give users a more personalized experience.
And since you’re able to make your optin campaigns highly personal, you drastically increase conversions across your site.
Here’s an example of the SendPulse popup campaign we built for today’s demo:
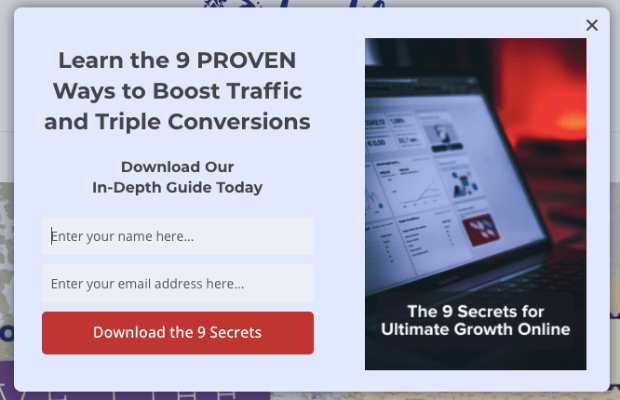
This took us less than 10 minutes to create and integrate seamlessly with SendPulse. That way, all your new subscribers will automatically flow into your contact list.
For more information, check out this article on how OptinMonster works (+ 8 benefits and 12 case studies).
How to Add a SendPulse Popup to Your Site
Step 1: Choose a Campaign Type
Once you’ve signed up with OptinMonster, you’ll need to log into your account:
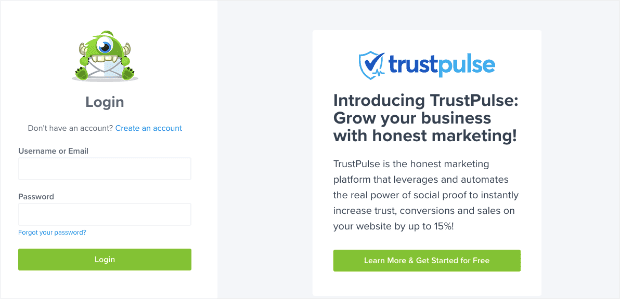
Locate and click Create New Campaign in the upper right-hand corner of your dashboard:
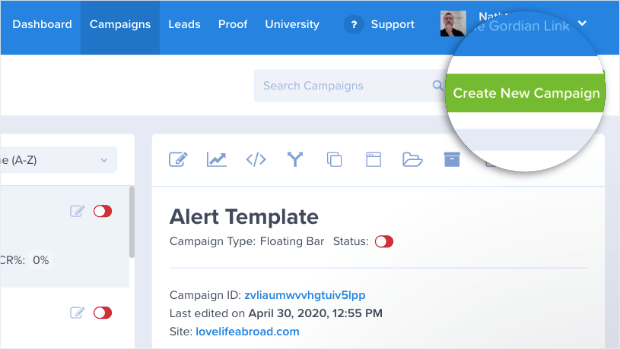
Next you need to choose your campaign type. Today, we’ll be using a Popup campaign:

Now it’s time to select the template you want to use for your SendPulse popup:
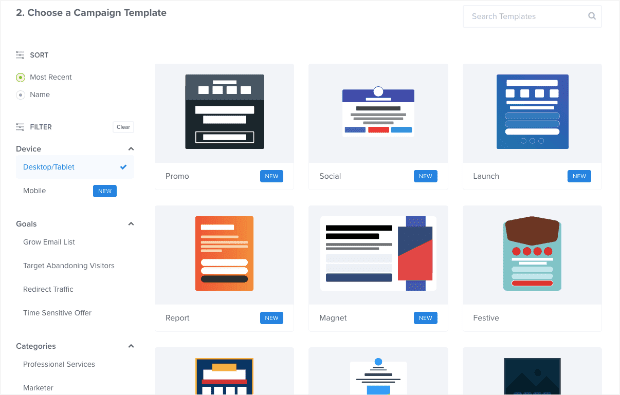
OptinMonster has over 50 pre-built templates that you can choose from. This saves you hours of time and energy in creating the right campaign for your brand’s voice, message, and design.
You can also choose to build your popup campaign from scratch using our Canvas template:
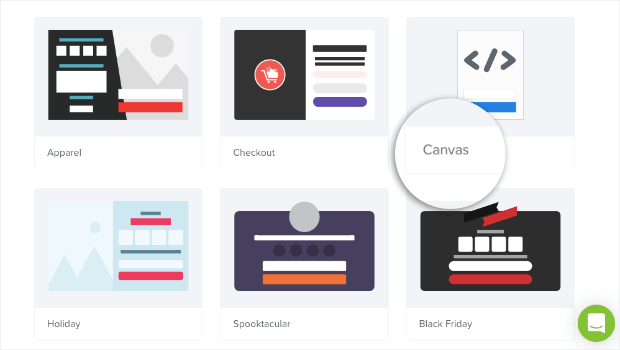
And with our drag and drop editor, you can design the perfect campaign with no coding skills required! That means you can still build a high converting popup even if you don’t consider yourself “tech-savvy.”
Our template design is so intuitive and user-friendly that it’s easy for just about everyone.
In this tutorial, we’ll be choosing the Magnet template:

This is an excellent choice for beginners who already have a lead magnet to entice visitors.
A lead magnet is something that you offer to your website’s visitors in exchange for a piece of contact information like an email address or phone number. You’ve likely seen lead magnets while visiting your favorite sites.
They can be things like eBooks, coupon codes, cheat sheets, or anything else that your target audience would find valuable.
Need some help brainstorming the right lead magnet for you? Check out this post on 69 lead magnet ideas that you can start using today.
Once you’ve found the best template for your SendPulse popup, you’ll need to name your campaign and assign it to your website. Then click Start Building:
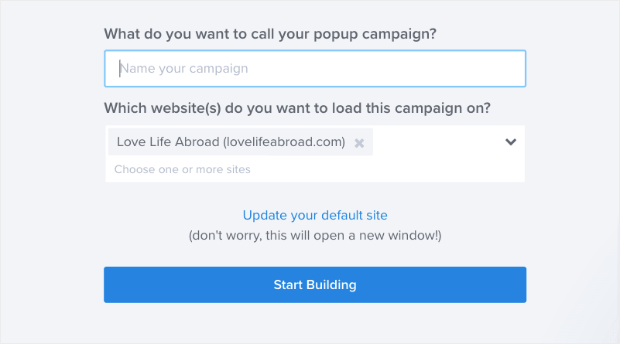
This will bring you to the OptinMonster editor where you can customize your popup.
Step 2: Design Your SendPulse Popup
The great thing about using OptinMonster is that you don’t need any technical knowledge to get started. There’s zero coding involved, and everything is done with our drag and drop editor.
So even if you aren’t a professional designer, you can still build stunning campaigns that convert in just a few minutes.
But since there are so many different ways you can customize your campaign, we won’t be able to cover everything in this post.
If it’s your first time using OptinMonster or you simply need a quick refresher, no worries. You can head over to this in-depth resource on how to create and design your first OptinMonster campaign.
For this tutorial, there are only a few things you need to know to create the perfect SendPulse popup.
All of our campaigns are made up of “blocks.” These are sections of your campaign that have different elements like text, images, video, and more.
To modify any of the blocks in your template, you simply need to click on it in your editor. Then the editing tools will appear in the left-hand side menu.
So let’s say you wanted to change the text in the Magnet template. You would click on the text block you want to modify and make the changes.
You’ll change the image block in the same way:
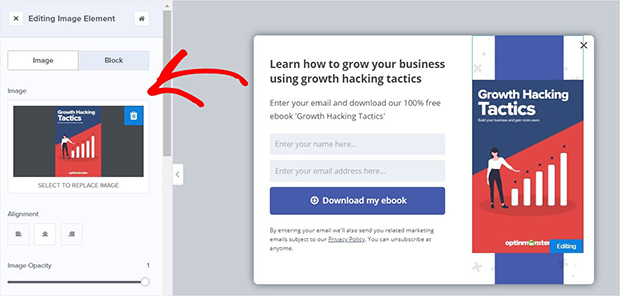
In fact, this is all you need to do to make changes to any template you choose. And if you decided to build a campaign from scratch or just want to add a new block, that’s easy too!
Just click + Add Blocks at the top of your editor:
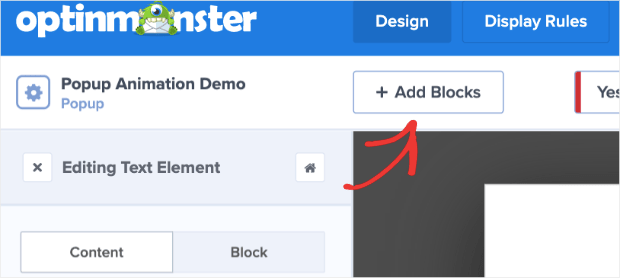
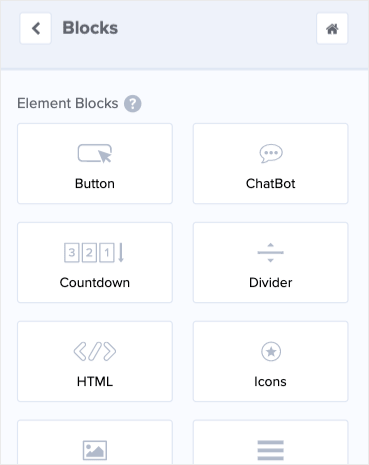
In the left-hand side menu, you’ll see a list of block options that you can add to your campaign, such as:
- Buttons
- Countdown timers
- Dividers
- Images
- Video
- And more
Then you’ll need to click on the block that you want to add so you can drag and drop it into place:
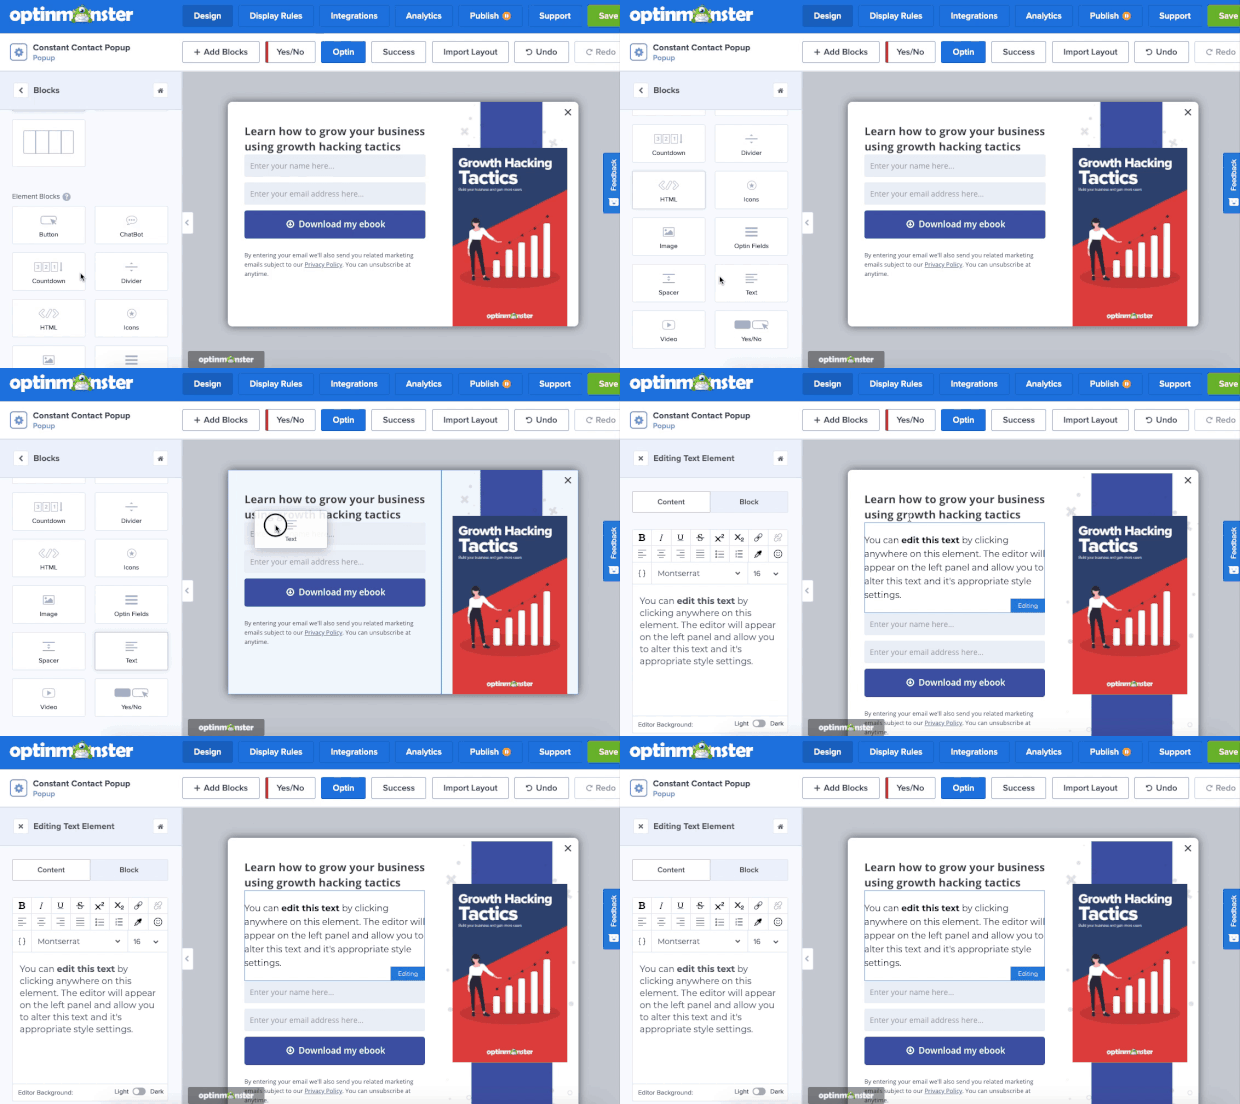
This makes creating optin campaigns super easy. Our drag and drop editor saves you hours of time and energy that you can dedicate to other aspects of your business.
Again, here’s the campaign we built for today’s tutorial in less than 10 minutes:

Once you’ve modified your SendPulse popup to reach your target audience, you’ll need to set your display rules.
Step 3: Configure Your Display Rules
Making a stunning popup is a great start to getting more emails for your SendPulse contact list. But it’s only half the battle.
The other half is determining when, where, and to whom that popup appears. To do so, OptinMonster gives you 2 types of rules to make sure your message is getting through to the right people:
- Targets
- Triggers
Let’s look at what these terms mean and how they apply to your SendPulse campaign.
Targets are rules that show your campaign to people who have specific characteristics. This could be things like basic demographic information, how visitors interact (or have interacted) with your website, or what device they’re using to consume your content.
These are just a few examples of targets we offer at OptinMonster. Though there are many more.
Triggers, on the other hand, are rules that make a campaign appear based on your user’s behavior. This would be like when your visitor is trying to leave your site (Exit Intent®), when they click a link (MonsterLinks™), or when they scroll down the page a certain percentage (scroll trigger).
In other words, when your visitors take a certain action on your site, it can trigger your campaign to appear.
Again, OptinMonster offers all of these triggers and many others.

Targets and triggers are essential to increasing your conversion rates and growing your email list. The more personal you can make your user experience (UX) as they browse your website, the more likely your message is to resonate with them.
And that means getting more people to sign up for your email list.
To set your campaign’s targeting or trigger rules, click Display Rules at the top of your editor:

There are 2 rules that are set for each OptinMonster campaign by default:
- Time on page is at least 5 seconds
- Your campaign will appear on every page of your website
But we’re going to change the first rule in this tutorial. Instead of showing our campaign when users are on the same page for 5 seconds, we want to capture users as they’re leaving the website.
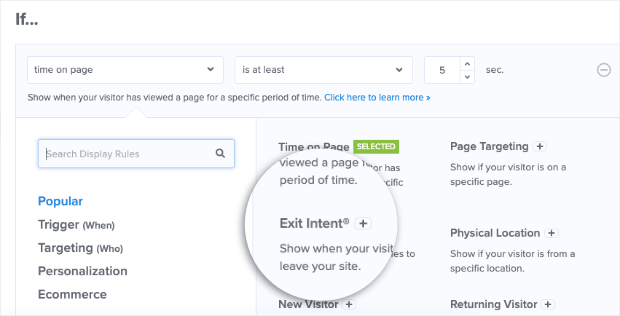
For that, we’ll use an Exit Intent® trigger.
Exit intent popups work by tracking when your visitor is trying to leave your website. This method is so effective that the fitness company Crossrope used it to grow their email list by 900%.
But they weren’t the only ones who found success with exit intent popups. Check out a few of our other clients who saw measurable success with a simple popup campaign:
- Rich Page Boosted Conversions by 316%
- Bonjour Lisbonne Doubled Its Email Subscribers
- Fastrack Recovered 53% of Abandoning Site Visitors
Now let’s get into how you can add an Exit Intent® trigger to your SendPulse popup.
Click on the first condition, Time on page. This will pull up your display rules menu. Locate and click Exit Intent® +:
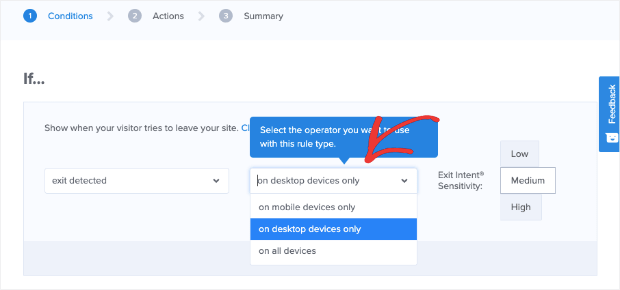
Then you’ll need to decide which devices you want your popup to appear on. You can choose between:
- Mobile
- Desktop
- Both
Finally, you’ll need to set your sensitivity level between Low, Medium, and High:
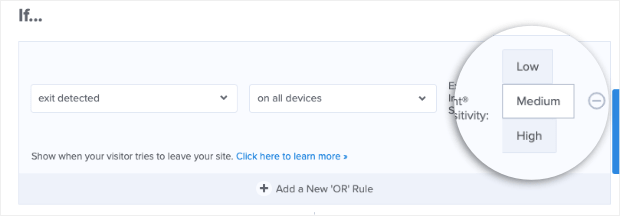
Your sensitivity level will determine how quickly your popup appears when users try to leave your site.
One thing you need to remember is that the sensitivity level you choose has a big impact on when your popup will appear on mobile devices.
Low and Medium sensitivity create a scroll trigger (as the user scrolls up the page), and High sensitivity creates a back button trigger.
For more information on how this works, we recommend reading this article: How to Make Mobile Exit Intent Popups That Convert.
Once your Exit Intent® trigger is set, you’ll need to determine where your SendPulse popup will appear across your site. Click the second default rule, Current URL path:

Right now, it’s set to appear on any page of your site. You can change this rule, though, so your popup displays on exact URLs, URL paths, or any other part of your website:
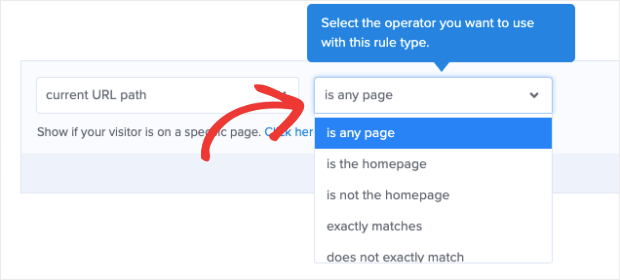
Today, though, we’ll leave the default setting to is any page. If you have a generic lead magnet that the majority of your site’s traffic will find helpful, this is a great way to get more subscribers across your website.
Now we’ve reached the last step of the tutorial: syncing SendPulse with OptinMonster.
Step 4: Connect OptinMonster With SendPulse
OptinMonster comes with over 30 native integrations to make it easy to sync with tons of email service providers. SendPulse is one of the integrations that takes a few clicks to set up.
At the top of your editor menu, click Integrations:

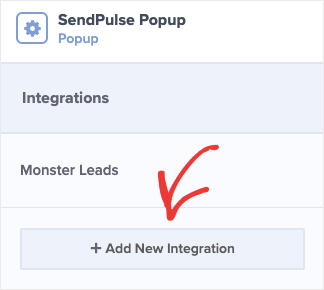
In the left-hand side menu, click + Add New Integration:
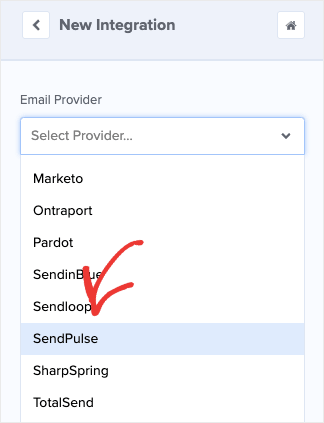
Find and select SendPulse from the drop-down menu:
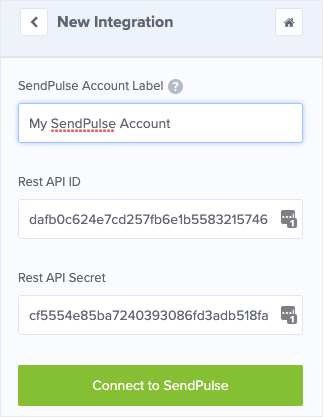
Now you’ll need to fill out 3 pieces of information:
- Account label
- REST API ID
- REST API Secret
Your account label is something you’ll create to keep yourself organized. It can be something like “My SendPulse Account.” Your users won’t see it, so feel free to make a label that makes the most sense to you.
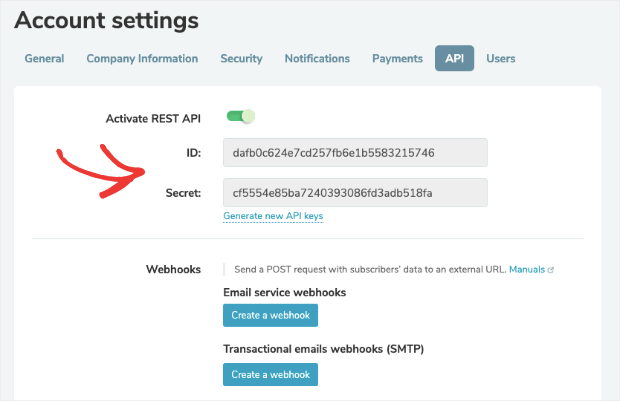
Your Rest API ID and your Rest API Secret can be found in your SendPulse dashboard.
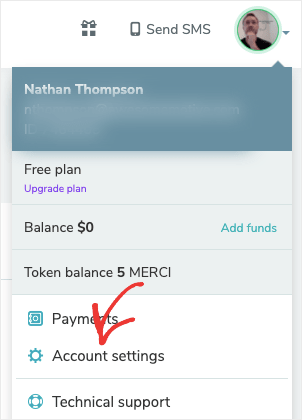
Go to your profile’s drop-down menu in the upper right-hand corner of your SendPulse dashboard. Click Account Settings:
In the navigational menu on the main Settings page, click API. Then click the toggle switch next to Active Rest API and click Save:
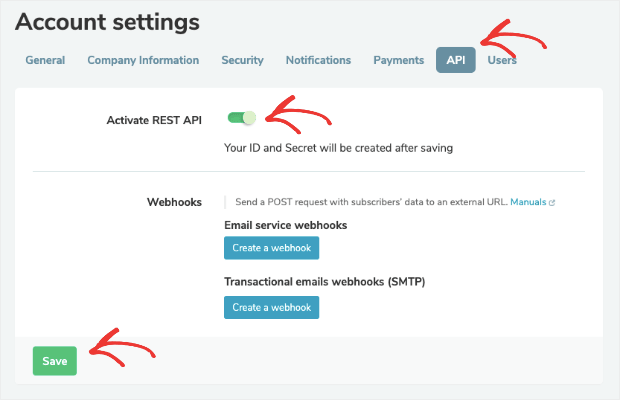
This will generate your Rest API ID and your Rest API Secret:
Now copy and and paste your Rest API ID and Secret into your OptinMonster dashboard. Then click Connect to SendPulse:
And that’s it! Your SendPulse account is now connected with OptinMonster.
That means that all the new leads you get from your popup campaign will go directly to your SendPulse contact list. You can even send these leads to specific lists you’ve built to further segment and organize your audience.
We hope you found this article helpful. And if you did, you’re probably interested in learning how to take your email marketing strategy to the next level.
For that, we highly recommend checking out the following articles:
- Email Marketing Made Simple: A Step by Step Guide
- How to Run a Successful Email Marketing Campaign
- How to Create an Email Autoresponder Series
These resources will have everything you need to grow and monetize your email list.
Ready to get started building more subscribers and generating more revenue? Sign up for your risk-free OptinMonster account today!



Add a Comment