TLDR: A lead generation landing page is a focused page that trades value for contact info. Keep one goal, one CTA, strong headline, social proof, and fast load times. Build the page with SeedProd, add an optin form, connect your email list, and test variations. Use OptinMonster to trigger on-page popups, A/B test your offer, and personalize by traffic source to lift signups.
Are you struggling to convert website visitors into leads? The solution might be a lead generation landing page. These specialized pages are built to capture visitor information, such as email addresses, by offering something valuable in return. Unlike generic web pages, lead generation landing pages focus on one goal: turning visitors into potential customers.
At OptinMonster, we’ve helped thousands of small businesses and marketers master the art of lead generation. In this guide, I’ll show you how to create high-converting landing pages, step by step.
What Is a Lead Generation Landing Page?
A lead generation landing page is a standalone web page designed to collect visitor information, such as names, emails, or phone numbers. The goal is to capture leads who can be nurtured into customers through email marketing or sales outreach.
These pages typically offer something valuable in exchange for contact details, such as:
- A free eBook
- Access to a webinar
- A discount code
- A newsletter subscription
For example, imagine you run an online fitness store. A lead generation landing page might offer a free “7-Day Workout Plan” PDF in exchange for a visitor’s email. This simple exchange builds your email list and allows you to promote products like protein powders or exercise equipment to potential customers later.
How to Make a Lead Generation Landing Page
For this tutorial, we’re going to use the SeedProd plugin:
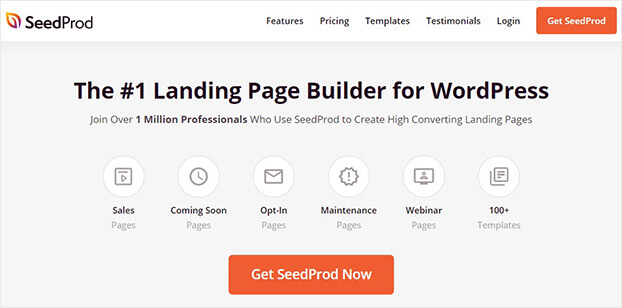
SeedProd is the world’s #1 landing page builder for WordPress. It allows anyone to quickly and easily create a landing page in minutes.
Plus, as you’ll see, SeedProd comes with over 100 templates. These are designed to save you time, energy, and headaches in the campaign creation process.
All of the page templates are fully customizable and look great across devices (mobile, desktop, and tablet).
And when it comes to the actual page design, you don’t need to have any technical experience or coding skills to create professional landing pages.
That’s because SeedProd uses a codeless drag and drop visual editor. That means literally anyone can have stunning pages up on their site FAST.
Ready to dive right in and build your lead generation landing page with SeedProd? Click here to sign up for your risk-free account today!
Step 1) Install & Activate the SeedProd Plugin
The first thing you need to do is install the SeedProd plugin. For that, sign up for your 100% risk-free SeedProd account.
Then in your SeedProd account dashboard, you can find your license key and download your plugin:
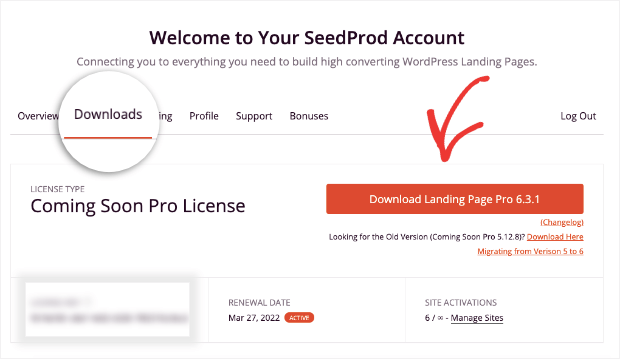
Once you’ve downloaded the plugin, you can upload it just like you would with any other plugin for your WordPress site.
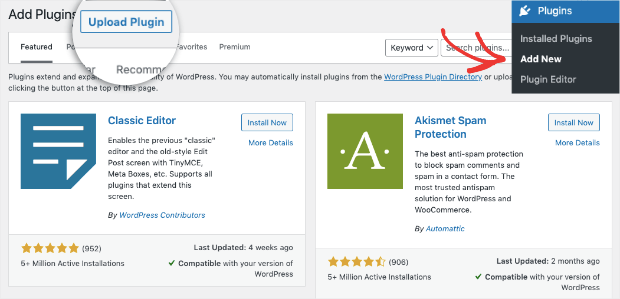
Simply go to Plugins » Add New in your WordPress admin menu:
Then drag and drop your plugin file over the Choose File button and click Install Now:
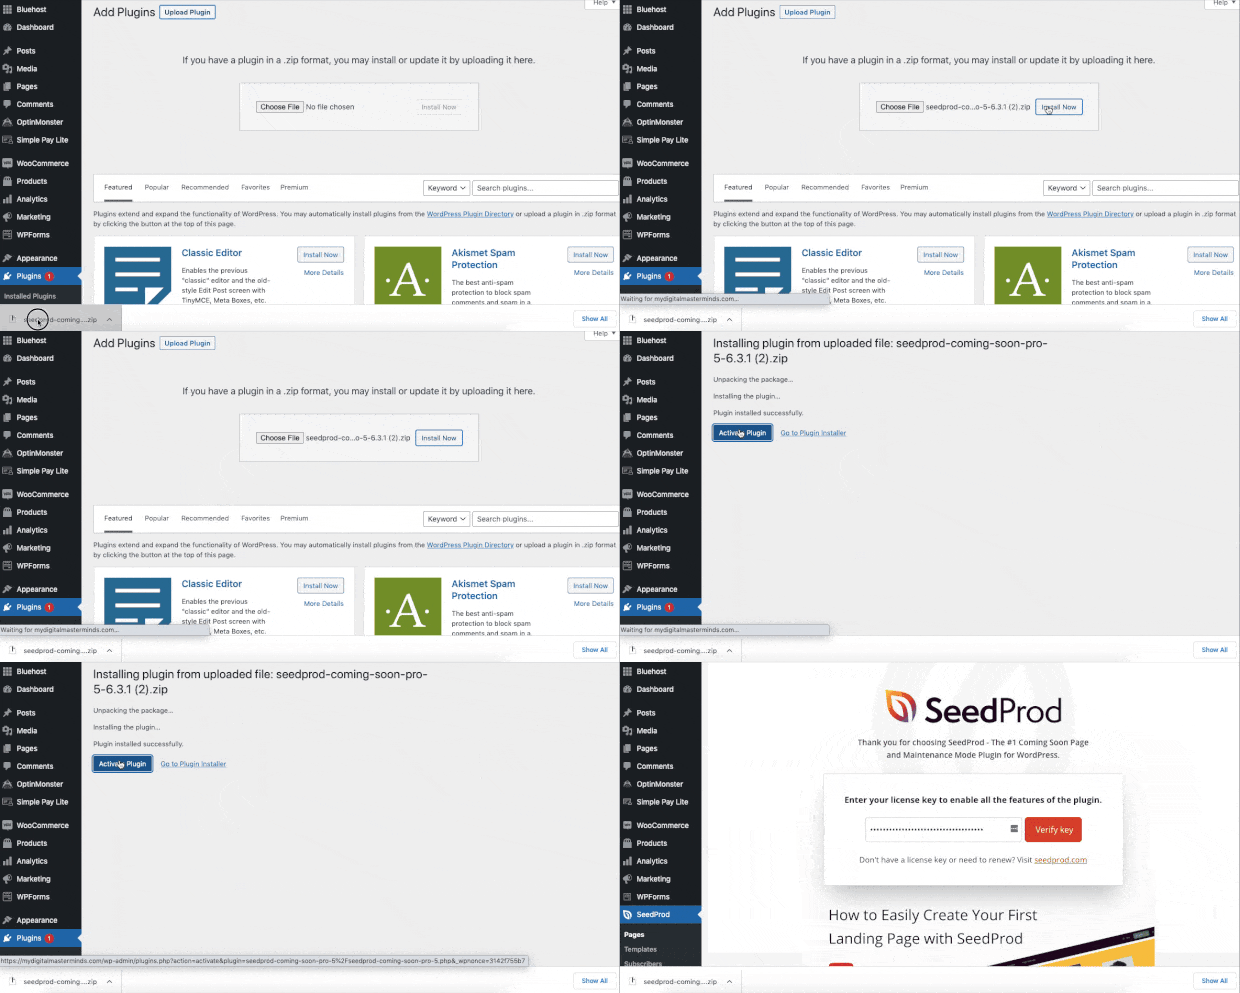
You can also click Choose File to manually select your SeedProd plugin download.
After that, click Activate Plugin:
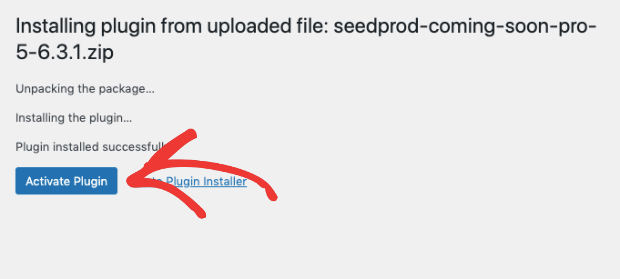
And that’s it. Your SeedProd plugin is now up and running on your site.
That means you’re ready to create your lead generation landing page.
Step 2) Create a New Landing Page
Once you activate your SeedProd plugin, you’ll be taken to your SeedProd dashboard in WordPress. Scroll down and click Add New Landing Page:
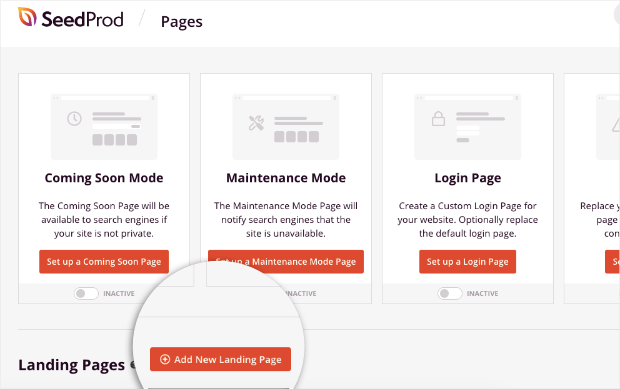
You’ll be able to choose from over 100+ templates:
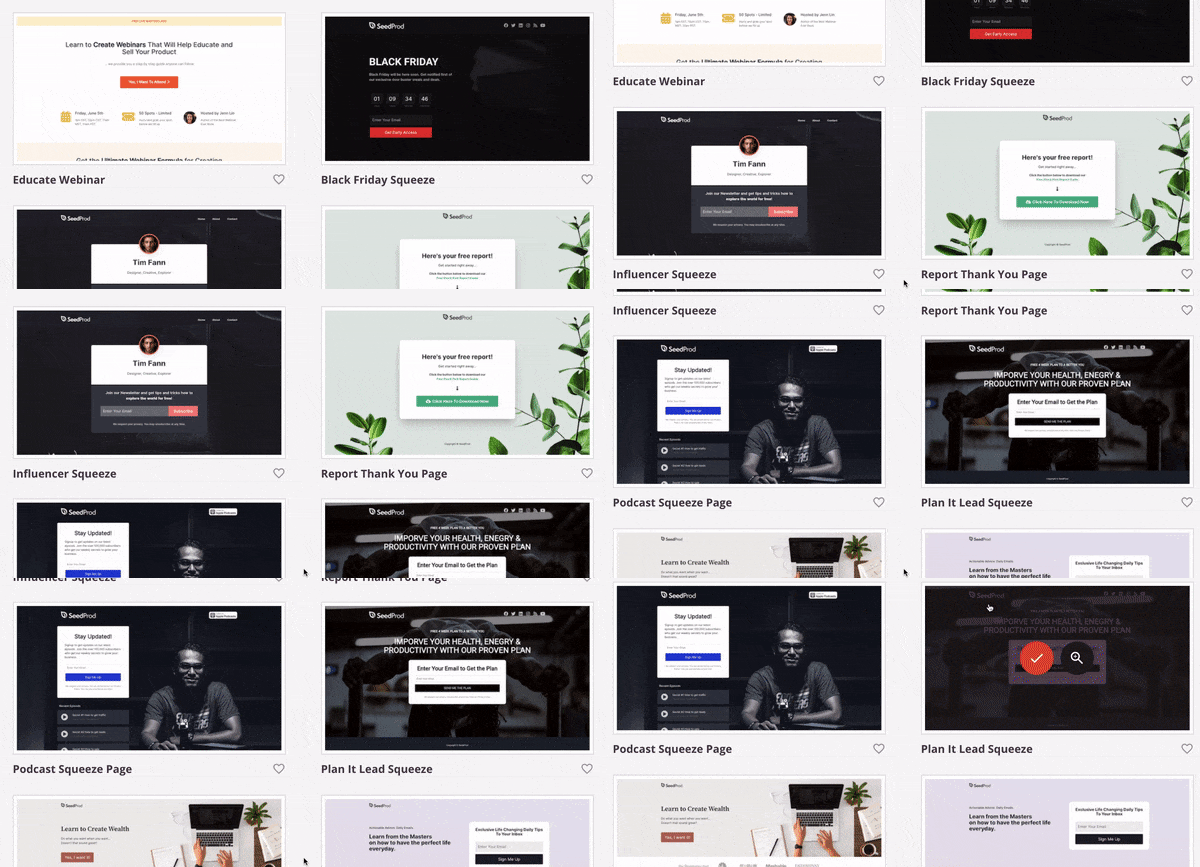
These can be filtered from different categories, depending on what marketing goal you’re trying to accomplish. You can filter these templates by:
- Coming Soon
- Maintenance
- 404 Page
- Sales
- Webinar
- Lead Squeeze
- Thank You
- Login
Today, we’ll use the Personal Links template under the Lead Squeeze category:

This is an excellent design to start growing your mailing list. It’s minimal in design, comes with all the features you need, and looks great across devices.
When you’ve selected the template that will work best for your goals, you’ll need to give your new page a name:
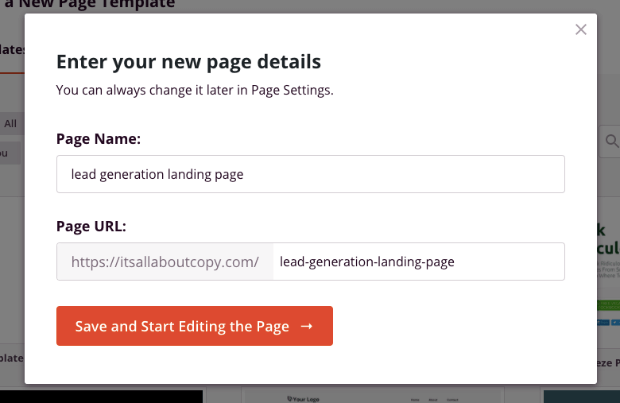
This will automatically generate the URL of your page. When you’re ready to start designing your landing page, click Save and Start Editing the Page.
Step 3) Modify Your Landing Page
One of the best parts about SeedProd is how easy it is to use.
You don’t need to touch a single line of code to have stunning and high-converting landing pages up in minutes.
You can start with the global editing tools by clicking the gear wheel icon in the lower left-hand side menu:
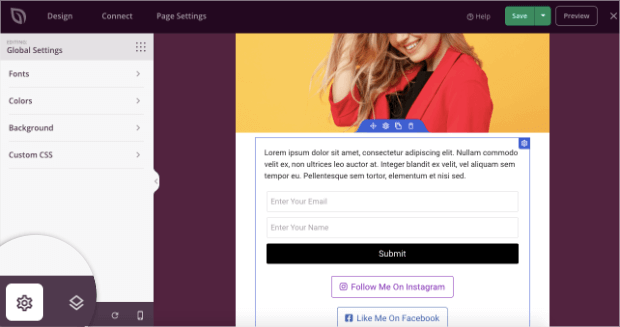
This allows you to change different aspects to your entire page, such as the:
- Font style
- Color
- Background
- Adding custom CSS to your page
And if you want to change any specific element of your landing page, all you need to do is click on it in the editor. Then the editing tools will appear on the left-hand side.
For example, you could click the text on your page to change the messaging:
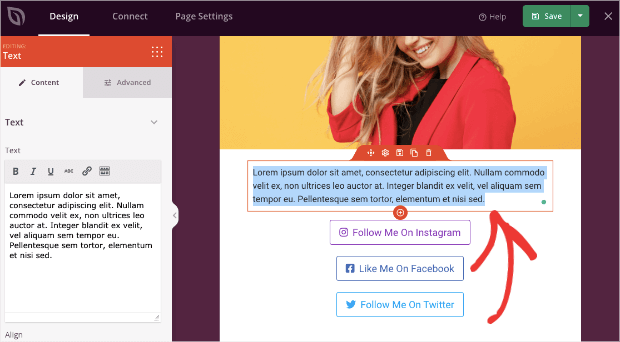
The editing tools let you change every element of your text, such as:
- Font size
- Font family
- Color
- Background color
- Line height
- Alignment
- And much more…
And if you want to add new features to your page, that’s just as easy. Simply select the feature you want from the left-hand side menu:
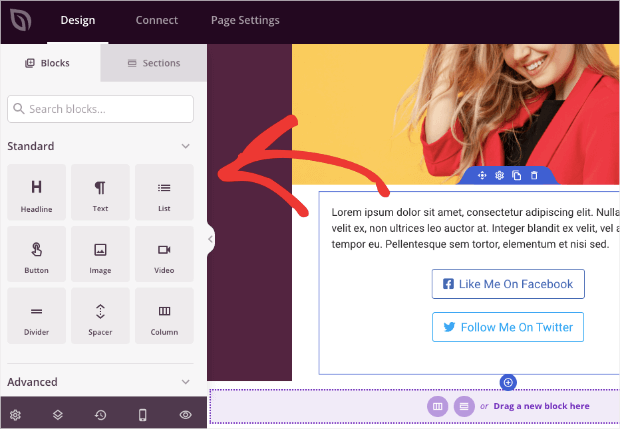
Then you can drag and drop it into place.
If we wanted to add a lead generation form to the page, for example, we could drop an optin form block onto the page:
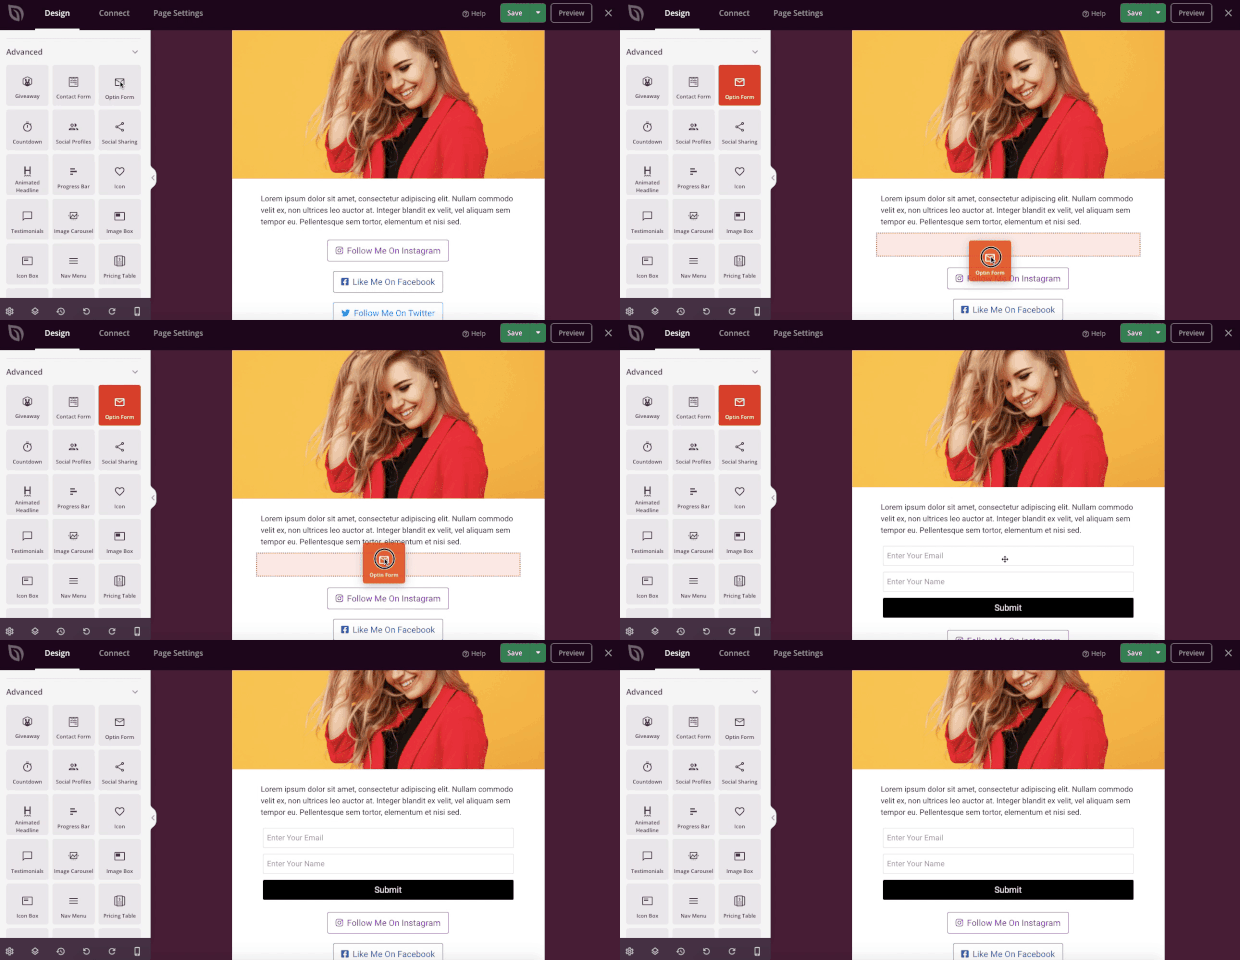
While we added an optin form for this tutorial, you can add as many new functions and features to your page as you’d like.
You can add things like:
- Countdown timers
- Image carousels
- Testimonials
- Reviews
- Pricing tables
- Headings
- Videos
- And much more…
There are even eCommerce integrations you can use to sell directly from your landing page. These let you sync your page with WooCommerce, so you can add things like popular products, Add to Cart buttons, and much more.
Once you’ve designed your page, you’ll need to hook up your optin form with your email service provider (ESP).
Step 4) Integrate Your ESP
To integrate your ESP with SeedProd, click Connect on the top menu of your page. Then you’ll see a list of the ESPs that you can natively integrate with SeedProd:
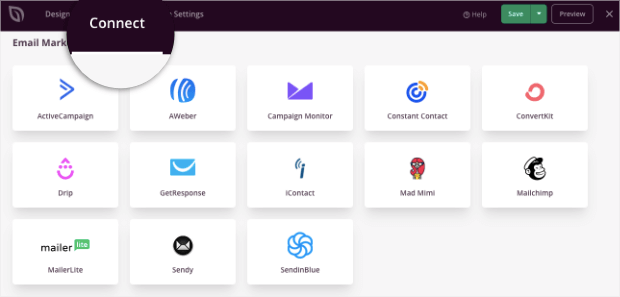
These are some of the most popular email providers on the market, like Brevo (formerly Sendinblue), Constant Contact, ConverKit, and more.
While the exact steps to integrate your ESP with SeedProd will depend on the service you use, most integrations are very straightforward.
In the majority of cases, you’ll just need to add your ESP’s API Key and give the connection a name:
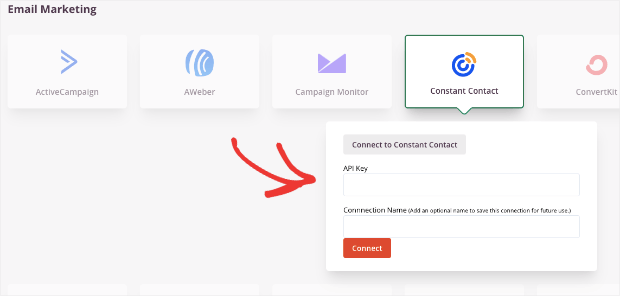
When your ESP is connected, you’ll be able to send your landing page leads to the right contact list within your ESP account.
Organizing your list in this way is known as “audience segmentation,” and it’s super important for increasing conversions through email marketing.
For more information, check out this valuable resource: 50 Email Segmentation Tips You Need to Know Now.
Once you’ve added your ESP, you’re all set. Now there’s just one step left: publishing your page.
Step 5) Publish Your Page
When you’re satisfied with your lead generation landing page, all you need to do is Save and Publish. In the upper right-hand corner of your SeedProd menu, click the drop-down menu under Save.
Then click Publish:

And that’s it! Your landing page is now up and running on your site.
Key Elements of a High-Converting Lead Generation Landing Page
- A Strong, Clear Headline: Your headline should immediately tell visitors what they’ll get and why it matters. For example, “Download Our Free 30-Minute Meal Planner” is specific and enticing.
- Compelling Visuals: Use high-quality images, videos, or illustrations to grab attention. If you’re offering an eBook, show a mock-up of the cover to make it feel tangible.
- A Clear Value Proposition: Explain the benefits of signing up. Instead of saying, “Subscribe to our newsletter,” highlight what’s in it for them: “Get weekly marketing tips that boost your ROI.”
- A Single, Focused Call-to-Action: Avoid multiple CTAs that confuse users. Stick with one, like “Sign Up Now” or “Download Your Free Guide.”
- Social Proof: Include testimonials, user reviews, or statistics to build trust. For example, “Join 10,000+ marketers who love our tips.”
- Mobile Optimization: Since most people browse on their phones, ensure your page is responsive and loads quickly.
- Privacy Assurance: Visitors are more likely to share their details if you reassure them their data is safe. Add a note like, “We respect your privacy and won’t share your information.”
Start Building Your High-Converting Lead Generation Landing Page Today
Creating a successful lead generation landing page doesn’t have to be complicated. With a clear goal, compelling copy, and proven best practices, you can turn visitors into leads and grow your business. By focusing on a single offer and providing real value, you’ll see better results from your marketing efforts.
Ready to take your lead generation to the next level? With OptinMonster, you can create high-converting popups and full-screen mats that capture more leads. Our drag-and-drop builder, advanced targeting tools, and built-in analytics make it easy to optimize every campaign.
Start growing your email list and boosting conversions today. Sign up for OptinMonster risk-free and see how simple lead generation can be!
More on landing pages:



Add a Comment