
How to Create a Shopify Mailing List Popup
Last updated on
by

Do you want to add a Shopify mailing list popup to increase your email signups?
Email marketing is a great way to reach your customers. A Shopify email signup popup can help get customers’ attention so they join your mailing list.
In this article, we’ll show you the easiest way to add a Shopify newsletter popup, as well as some great examples to inspire you.
Let’s jump in!
What Is a Shopify Mailing List Popup? (With Examples)
A mailing list popup is a popup form that you can use to collect email addresses from customers. The form connects to your email service provider (ESP), such as Mailchimp, Klaviyo, and others. Once customers join your list, you can send out email newsletters promoting your products.
Many business owners offer some sort of optin is an incentive to sign up for their email list. Some great optin ideas for eCommerce include coupon codes, free shipping, waitlists, or first access to new products and other perks. These special offers don’t have to cost your business a lot of money, they just have to be appealing enough for customers to hand over their email address.
Popups are particularly effective because they’re eye-catching and interactive. It’s easy for website visitors to scroll past a static signup form, but a popup demands attention. The key is to match the popup message and timing with the your target audience’s needs and intent. For example, a customer who’s about to abandon their shopping cart because of shipping fees would respond much better to a free shipping coupon compared to an upsell.
Shopify Popup Examples
There are several different popup styles you can add to your Shopify site.
A lightbox is what you probably think of when you think of popups. The campaign pops up in the center of the screen and partially hides the content behind it. AutoAnything used a lightbox popup on desktop and mobile to grow their email list by offering a discount code to subscribers.

A fullscreen popup is similar to a lightbox but takes up the entire screen. This makes your campaign impossible to miss, but can also annoy visitors. So be careful to target your fullscreen campaigns very carefully. For example, Expat.com showed their fullscreen campaign only to visitors who were about to leave the site, and hadn’t already signed up for their community.

Floating bars appear at the top or bottom of a web page. They’re less intrusive than lightboxes or fullscreens, but can still be highly effective. Kennedy Blue used a floating bar with countdown timer to advertise a flash sale and convert hesitant shoppers.

Slide-ins are another popup style that’s more subtle but still powerful. These popups slide in from one corner of the screen, blocking less of the content while still making the call to action highly visible. Libratone used slide-ins to target users who had scrolled at least 30% of the way down a page. Those customers already have their attention toward the bottom of the screen, so a slide-in from that side easily catches the eye.

Exit intent popups are popups that appear right when a visitor is about to leave your store website. They’re a great way to keep potential customers on your site longer, which increases the chance that they’ll buy from you. Crossrope used exit intent to convert abandoning visitors and recover abandoned carts.

Finally, there are 2-step optins. These popups have an initial step before the email signup form is displayed. They often convert better because users already feel committed to completing the action they began when they clicked “Yes” on the first screen. For example, The Eczema Company doubled their conversion rate simply by adding a 2-step optin.

Now that you’ve seen how powerful a Shopify subscribe popup can be, let’s learn how to make one, the easy way!
How to Add a Shopify Mailing List Popup
There are several ways to add pop ups to Shopify.
Your email service provider may have its own popup signup forms. You can copy the popup code and paste it into your Shopify theme code. But the design and targeting options may be quite limited and difficult to modify.
Another option is to use no-code Shopify popup builders. Some are available only through the Shopify App Store, like Rivo, Sales Popup Conversion Pro, and POWR Popup+. Others, like Privy, Popupsmart, and OptiMonk, are standalone popup apps that can also be used on other platforms like WordPress or Squarespace.
Our favorite way to add Shopify popups is OptinMonster.

OptinMonster is the best mailing list popup builder for Shopify and any other eCommerce platform. It features an easy integration with Shopify and works with all major ESPs. This means you can build your Shopify email list with whatever email marketing service you already have.
The drag-and-drop builder and extensive template library make it easy to create a popup on Shopify in minutes.

You can A/B test different popup designs, copy, calls to action, and more to see what performs best.

There are also advanced display rules to show your message to the right customer at the right time. The Shopify-specific ones are especially useful for important eCommerce marketing tactics like preventing cart abandonment and cross selling related products.

Now we’ll show you how to create a Shopify newsletter signup popup using OptinMonster.
Step 1: Install OptinMonster for Shopify
First, you need to sign up for an OptinMonster plan. To use OptinMonster with Shopify, you’ll need a Growth plan. Once you’ve created your OptinMonster account, stay logged in so Shopify can connect automatically.

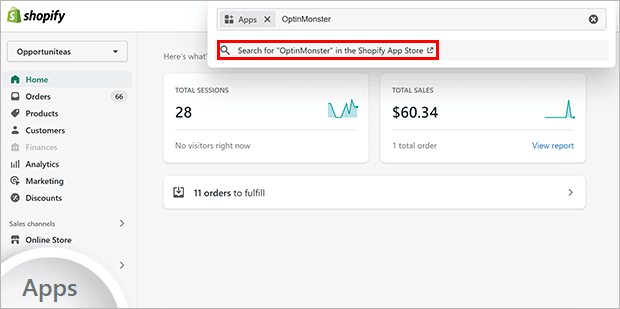
Now you can install the free OptinMonster Shopify app. This will allow all of your Shopify campaigns to sync automatically from OptinMonster to your Shopify site. From your Shopify account, click on Apps. This will pull up a list of any apps you already have installed. Search for “OptinMonster.”
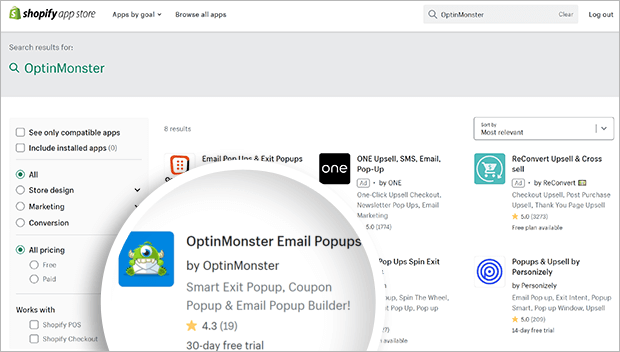
Your search results will appear in a new window. Find OptinMonster Email Popups and click on it.
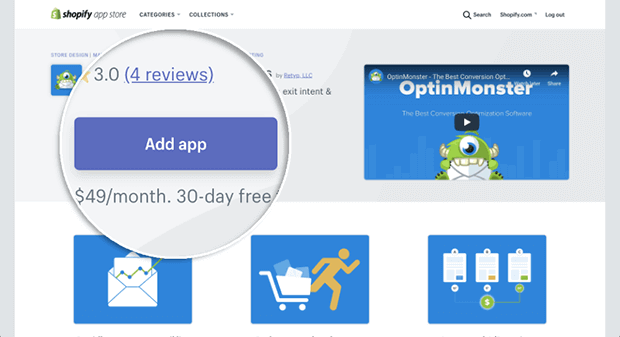
After that, click Add App.
Please review the permissions requested by the app and then click Install App.
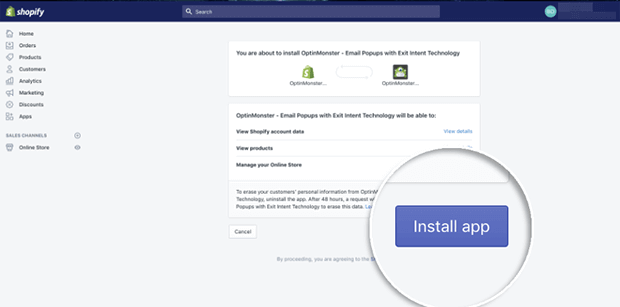
Shopify will connect with your logged-in OptinMonster account. Now you can create your email signup form!
Step 2: Create Your Shopify Mailing List Popup
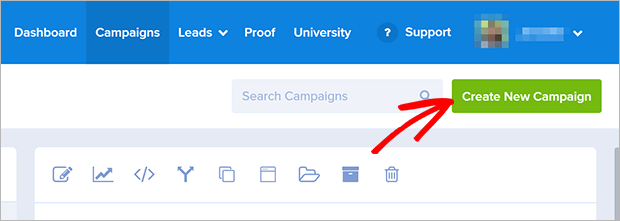
Go back to the OptinMonster app and click Create New Campaign.
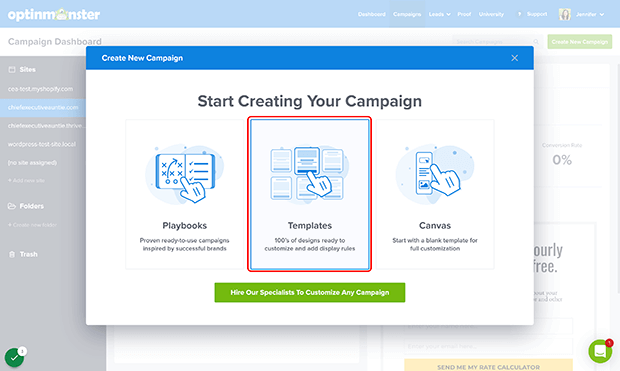
We’ll use a template for this tutorial. You can also choose from Playbooks inspired by marketing campaigns from top brands, or completely design your own campaign with the Canvas template. Click on Templates to go to the template gallery.
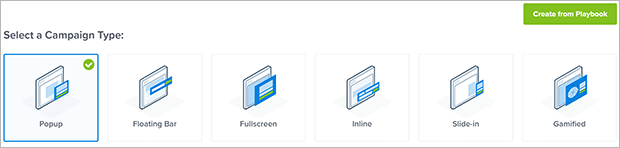
Choose a campaign type. We’ll create a lightbox popup in this example.
Browse through the templates and find one that you like. We’ll use the Zen template to demonstrate how to customize a popup campaign template. Click Use Template when you’ve chosen a template.

Name your campaign and choose your Shopify site from the dropdown menu. The name won’t be visible to customers but will help you identify campaigns in the OptinMonster dashboard. Click Start Building to enter the popup builder.

The drag-and-drop editor is designed to be very beginner-friendly. The Zen template comes with a Yes/No 2-step optin. If you want to disable the 2-step optin, click the dropdown in the footer and click Disable Yes/No View.

Otherwise, you can customize any part of the template by clicking on it and modifying the settings in the left panel.

To edit the Optin view, click on the Optin tab in the footer. Click on any part of the template to edit it, or drag new Blocks in from the left panel.

Don’t forget to customize your Success view appropriately. This view is what subscribers see after they join your email list, so include any instructions about confirmation emails or next steps to take.

When your email subscription popup looks the way you want it to, click Save in the upper right.
Step 3: Add Your Shopify Email Popup
Now let’s add your email popup to Shopify. Your Shopify site is already connected, but you need to set your display rules.
Display rules make your popup appear at specified times or situations. A newsletter popup interrupts the browsing experience, so remember to let your users fulfill their original intent before asking them to subscribe.
Some good display rules to use include time on page, exit-intent, or scroll distance. You can also target users based on location or whether they’ve visited your Shopify store before.
Click on the Display Rules tab in the header. Next, click the dropdown to pull up the full list of display rules. You can choose from popular ones or search by category, including Shopify-specific rules under eCommerce.

Choose the display rules you want to use. You can mix and match display rules as needed.
 - OptinMonster")
Click Next Step when you’re ready. Now you need to set the actions that will take place when the display rule conditions have been met. If you have a Yes/No view, that should be the campaign view shown. You can also add MonsterEffect animations and sound effects. Just make sure they aren’t distracting or disruptive to the user experience.

Click Next Step to see a summary of your display rules. Make sure everything is in order, and then click Save.
Step 4: Connect Your Email Service Provider
You’re almost done! Now we just need to connect your ESP to OptinMonster. Click on the Integrations tab in the header. Then click Add New Integration in the left panel.

Choose your ESP from the dropdown menu. Then follow the instructions provided. Each ESP works a little differently, so please look for the documentation specific to your ESP.

When you’re done, click Save.
Step 5: Publish Your Shopify Email Popup
We’re at the final step! It’s time to publish your popup. Click on Publish in the header. Next, change the Publish Status from Draft to Publish. You can also schedule it to go live at a future date.

Your Shopify site should already be listed under Websites, but double-check that it’s there. Look over the Campaign Publish Summary in the right column to make sure everything is correct.

That’s it! You just created a Shopify mailing list popup.
Frequently Asked Questions
Can I Create an Email List on Shopify?
Yes, Shopify now has its own email marketing service called Shopify Email. Learn more about how to set up email marketing in Shopify.
Does Shopify Email Have a Popup?
Unfortunately, no. If you use Shopify email, you can only collect emails at checkout or through a form on the homepage. The placement of this form is determined by your Shopify theme.
That’s all there is to it! We hope this article helps you add a Shopify mailing list popup to your eCommerce store.
Next, check out some ways to increase your Shopify store’s conversion rate.
Ready to build your Shopify email list? Get started with OptinMonster today!
If you like this article, please follow us on Facebook and Twitter for more free articles.
Disclosure: Our content is reader-supported. This means if you click on some of our links, then we may earn a commission. We only recommend products that we believe will add value to our readers.

-01 - OptinMonster")


Add a Comment