TL;DR: How to Create a Lead Capture Page in WordPress in 5 Steps with OptinMonster
1. Install and Activate OptinMonster: Sign up for an OptinMonster account. Install and activate the OptinMonster plugin on your WordPress site. Access the OptinMonster menu in your WordPress dashboard and complete the setup wizard to connect your account.
2. Create an Inline Campaign: In your WordPress admin area, navigate to OptinMonster » Campaigns and click on Create New Campaign. Choose the Inline campaign type and select a template that fits your needs. Give your campaign a name and start building.
3. Customize Your Inline Form: Use OptinMonster’s intuitive drag-and-drop builder to customize your inline form. Edit text, images, and colors to match your brand. Modify the call-to-action to encourage visitors to subscribe. You can also add or remove elements by dragging blocks onto your form.
4. Connect to Your Email Service Provider: Go to the Integrations tab in the OptinMonster builder. Click Add New Integration, select your email service provider from the list, and follow the prompts to connect your account. This ensures new subscribers are automatically added to your email list.
5. Publish and Embed Your Campaign: In the OptinMonster builder, switch to the Publish tab and set the status to Publish. To add the inline form to your site, edit the WordPress page or post where you want the form to appear. Use the OptinMonster block in the Gutenberg editor to select and insert your campaign. If you’re using a different page builder or the Classic editor, you can use the provided shortcode or widget.
Let’s learn how to create a lead capture page in WordPress and transform visitors into leads and paying customers.
A lead capture page lets you add opt-in forms to collect email addresses from visitors. But when done right, a lead capture page can do much more than that. You can use a lead capture page to promote products and sales, increase engagement, and drive revenue.
And who would know that better than us at OptinMonster? With over a decade in the industry and having helped over 1 million site owners in their lead capture pursuits, we’re uniquely positioned to guide you.
That’s why, in this article, I’ll show you how to easily create a stunning lead capture page in WordPress.
But first, let’s get crystal clear on what a lead capture page actually is.
What Is a Lead Capture Page?
A lead capture page is a dedicated landing page where visitors can sign up for email newsletters, get a quote, register for events, buy a product, and much more.

To incentivize visitors and get them to sign up, you need to make your content valuable. And you can do that by offering discounts, freebies, and lead magnets, such as a free eBook.
With a lead capture page, you can direct traffic from all sources to this dedicated page. That means you can send people from different social media channels and PPC ad campaigns to the same lead capture page.
Before you create a lead capture page, here are a few pointers to keep in mind:
- Offer something valuable in exchange for their email address
- Ask only for details you need in the optin form to make it easier to complete the form
- Write a captivating message so visitors know exactly what you have to offer
- Add a highlighted CTA (call to action) button or link
- Elevate the page with countdown timers, social media links, images, and videos
- Build trust with visitors by displaying reviews, testimonials, and trust badges
Now that you know what to include in a lead page, let’s look at how to create one in WordPress.
How to Create a Lead Capture Page in WordPress
In this tutorial, we’re going to show you 2 easy ways to create lead capture pages in WordPress. First, we want to show you how to use our OptinMonster tool to transform any web page into a lead capture page.
After that, we’ll show you how to create a new lead capture page in under 5 minutes using the SeedProd – the best WordPress landing page builder.
1) Make a Lead Capture Page with OptinMonster
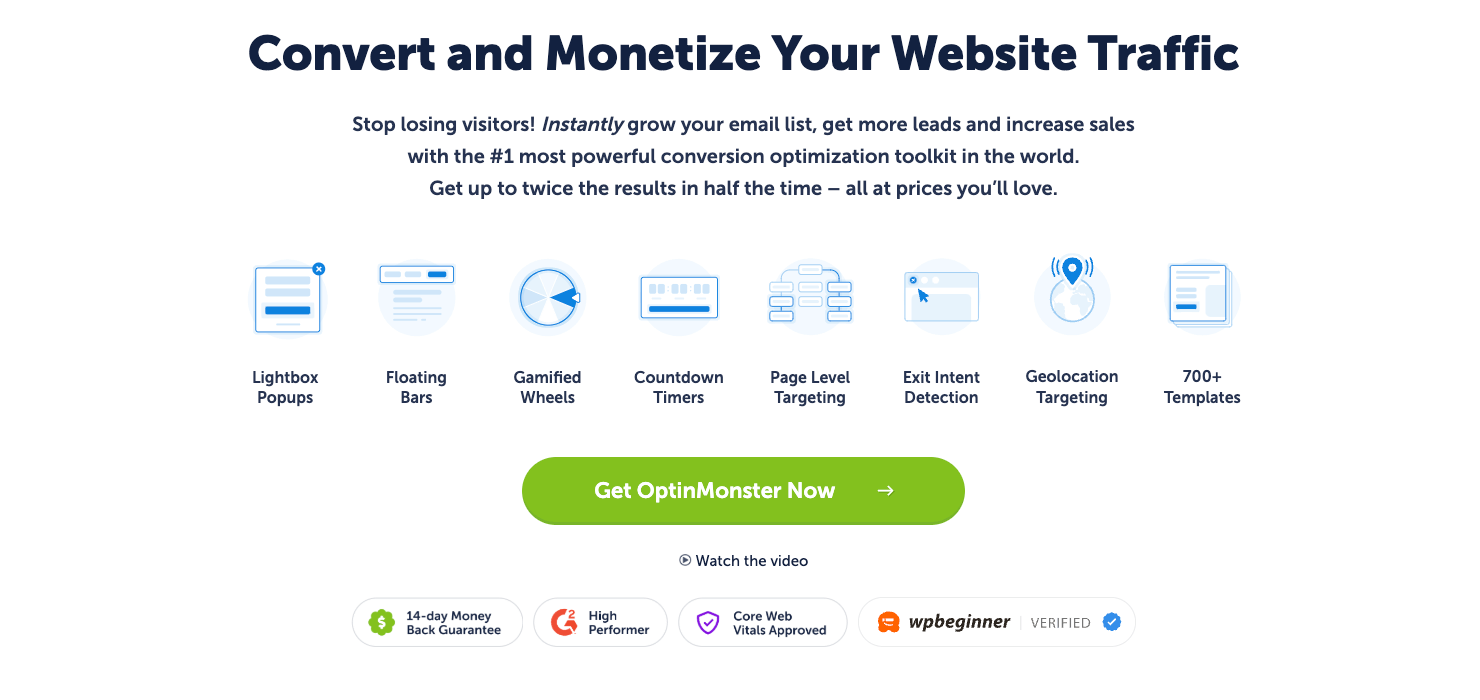
OptinMonster is the most powerful lead generation and conversion optimization tool in the world.
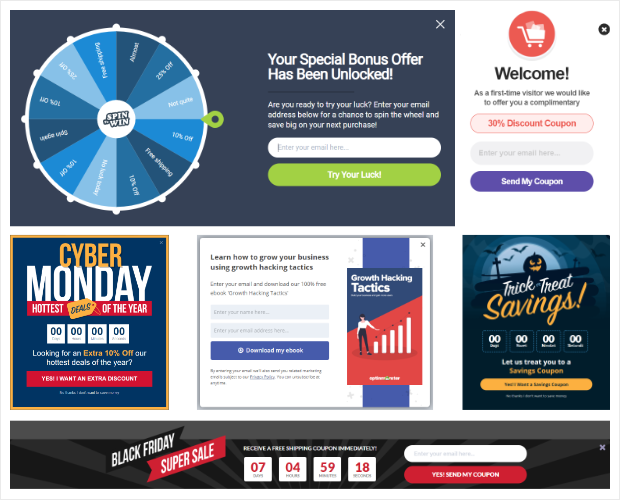
You can use OptinMonster to add lead generation campaigns such as optin forms, popups, slide-ins, and floating bars to any webpage.
OptinMonster comes with powerful targeting rules so you can personalize campaigns based on a customer’s activity, location, interests, and where they are coming from.
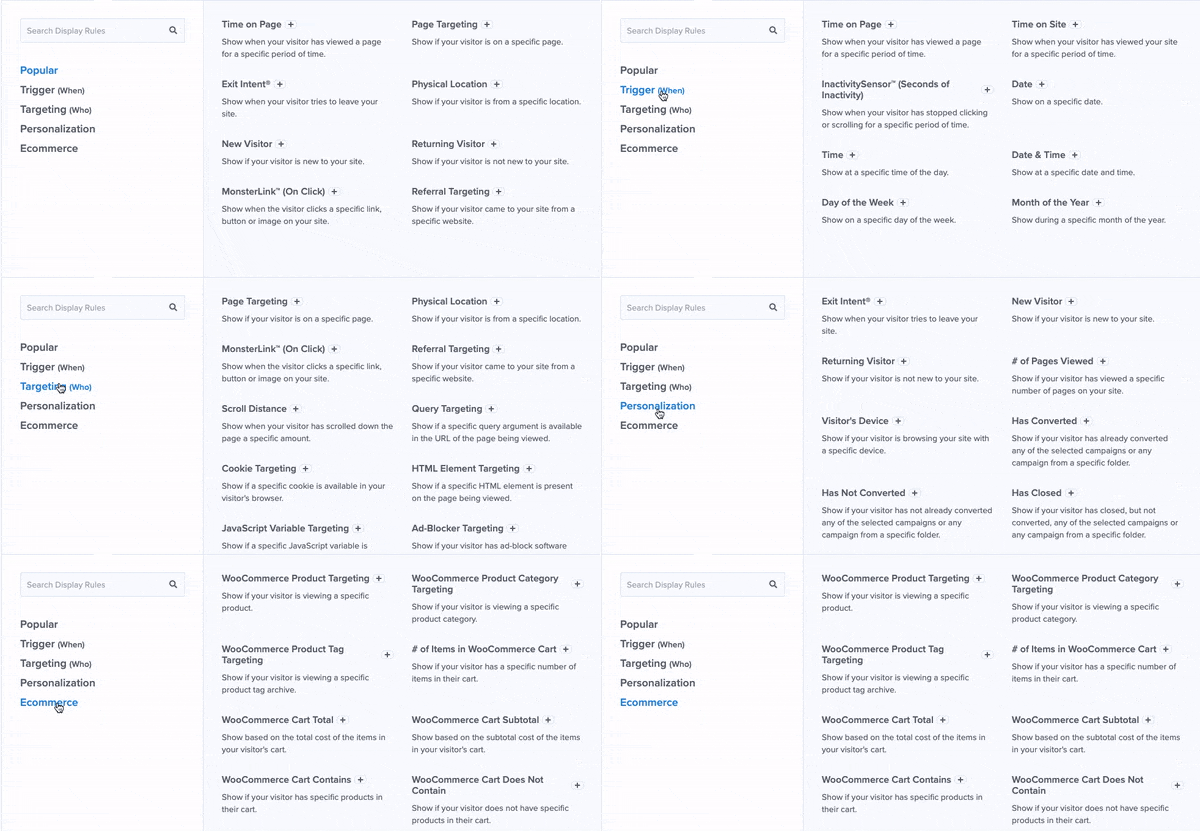
This means you can target different audiences using the same webpage. So, for instance, you can display one optin campaign for visitors coming from Twitter and a different one for those coming from Facebook.
You can even use OnSite Retargeting® to display separate campaigns to visitors that have engaged with another campaign on your site.
These targeting rules help optimize your campaigns to maximize the number of email subscribers you get.
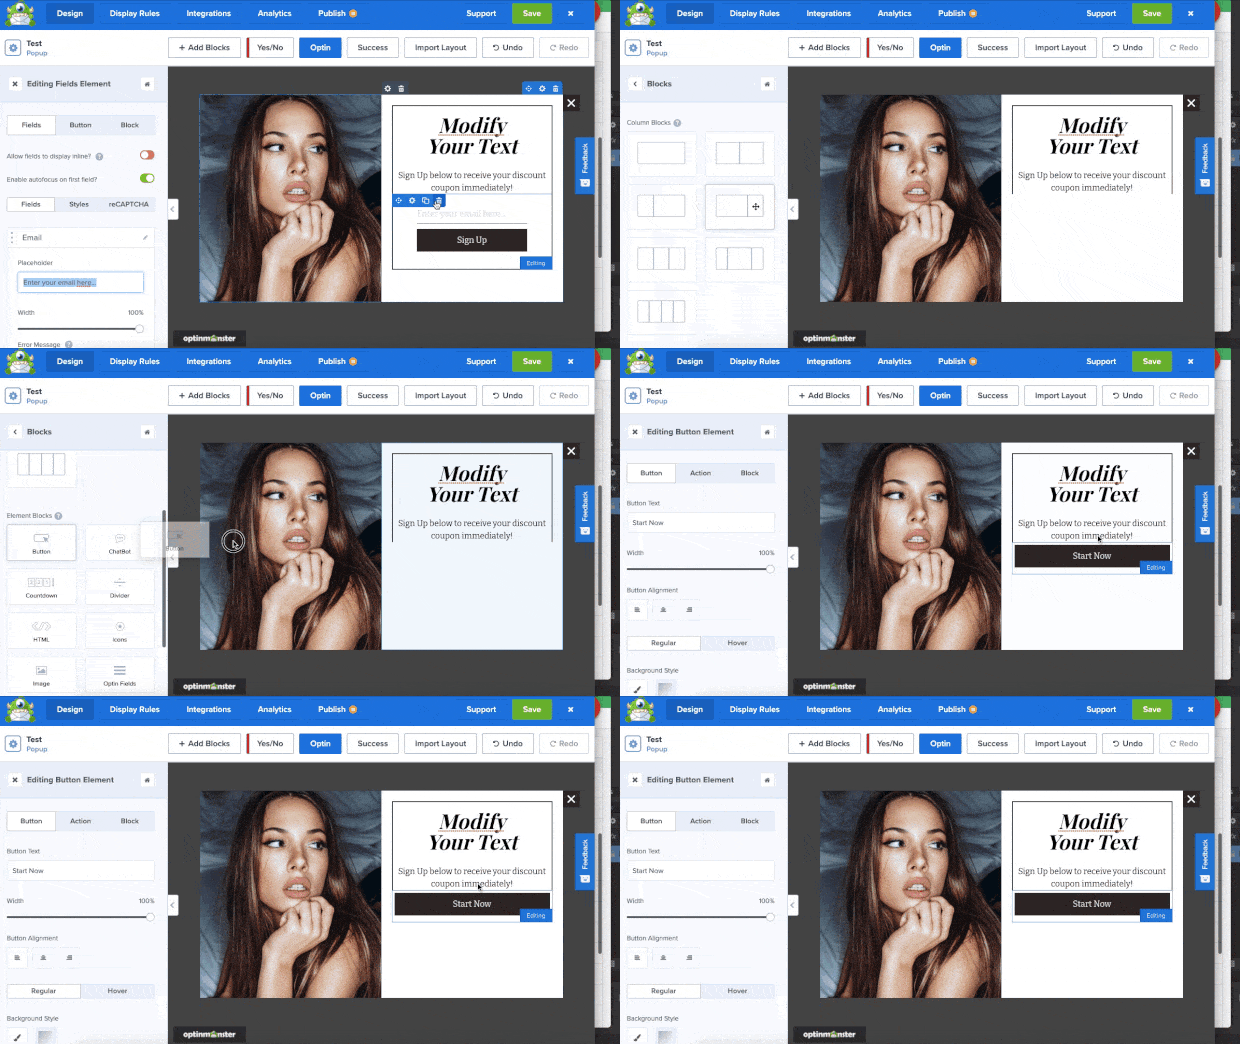
Plus, OptinMonster comes with 700+ stunning templates and an easy-to-use drag and drop builder. You can create beautiful campaigns in a matter of minutes and reap the benefits for years to come!
OptinMonster lets you sync your campaigns with all popular email service providers (ESPs) like Constant Contact, Mailchimp, AWeber, and Brevo (formerly Sendinblue), and more all at the click of a button.
With an email integration set up, you can trigger automated email series to be sent to subscribers as soon as they sign up.
OptinMonster also tracks every campaign, so you can see which ones perform well and which ones need improvement. You can see how many people signup and even track how much money you make from these campaigns.

You can even A/B test different versions of the same campaign. This will help you find what works for your audience to maximize your subscribers.
Want to see if OptinMonster really works? Check out how Adam Enfroy added 11,000+ subscribers to his email list in 1 year using OptinMonster’s inline forms.
Ready to create a lead capture page with OptinMonster? Click below to sign up for your 100% risk-free OptinMonster account:
Now we’ll show you how to add an OptinMonster inline form to any page of your website to transform it into a lead capture page. Here’s a sample of the campaign we’ll create that can be added to any WordPress page, post, sidebar, or even inside the footer:

If you want to create other kinds of lead generation campaigns, you can follow our guides to creating a popup and making a floating bar with OptinMonster.
Let’s get started with the tutorial.
Step 1: Installing OptinMonster in WordPress
OptinMonster is really simple to set up. First, you’ll want to install the OptinMonster plugin on your WordPress site.
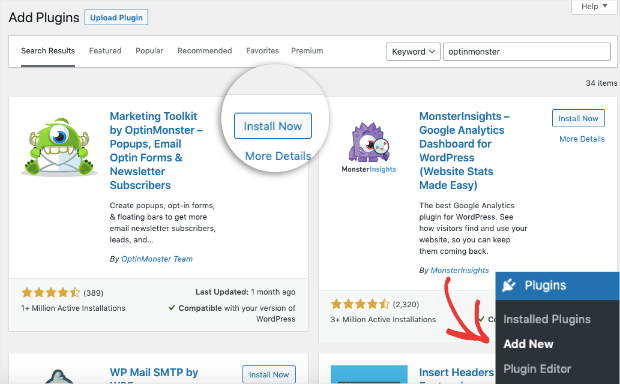
Once activated, access the OptinMonster page from your WordPress menu and launch the setup wizard.
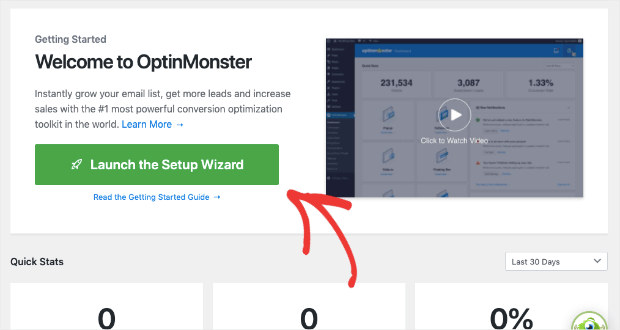
Then follow the onscreen instructions to upgrade your account and, once you’ve finished, you’re ready to create your first campaign with OptinMonster.
Step 2: Creating an Inline Form
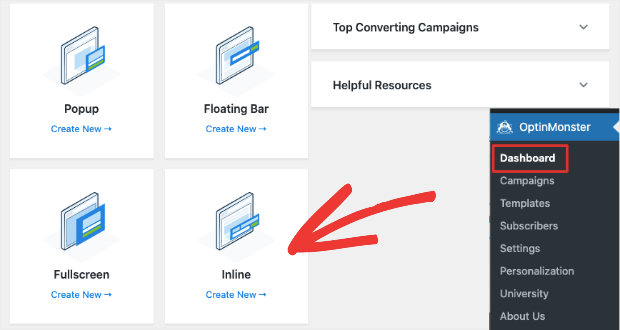
On the OptinMonster page in your WordPress dashboard, you’ll see that OptinMonster lets you create all sorts of campaigns like popups, floating bars, inline forms, and slide-ins.
To make a lead capture page, select the Inline form option.
This will open up a page where you can select a template. You can explore the templates by hovering over them to get the preview option.
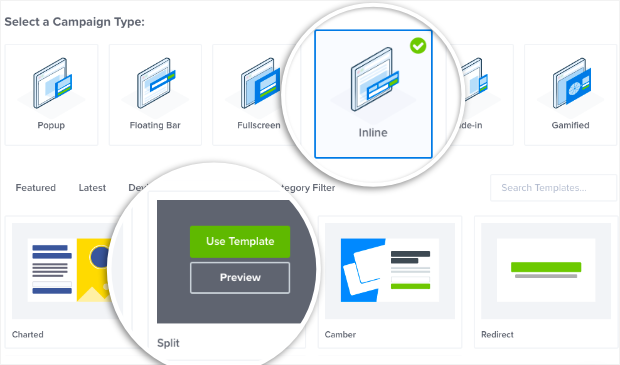
You can select any template you want. Today, we’ll choose the Split template.
When you select a template, Optinmonster will ask you to name your campaign so you can find it easily in the list of campaigns you create.
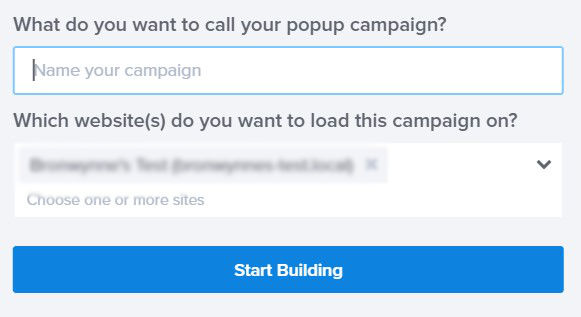
Once you click on the ‘Start Building’ button, OptinMonster’s campaign builder will open up where you can customize the inline form using the drag and drop builder.
Step 3: Customizing the Inline Form
OptinMonster has a visual builder that allows you to edit a live preview of your template.
To add your own message, you can select the text and type in your own.
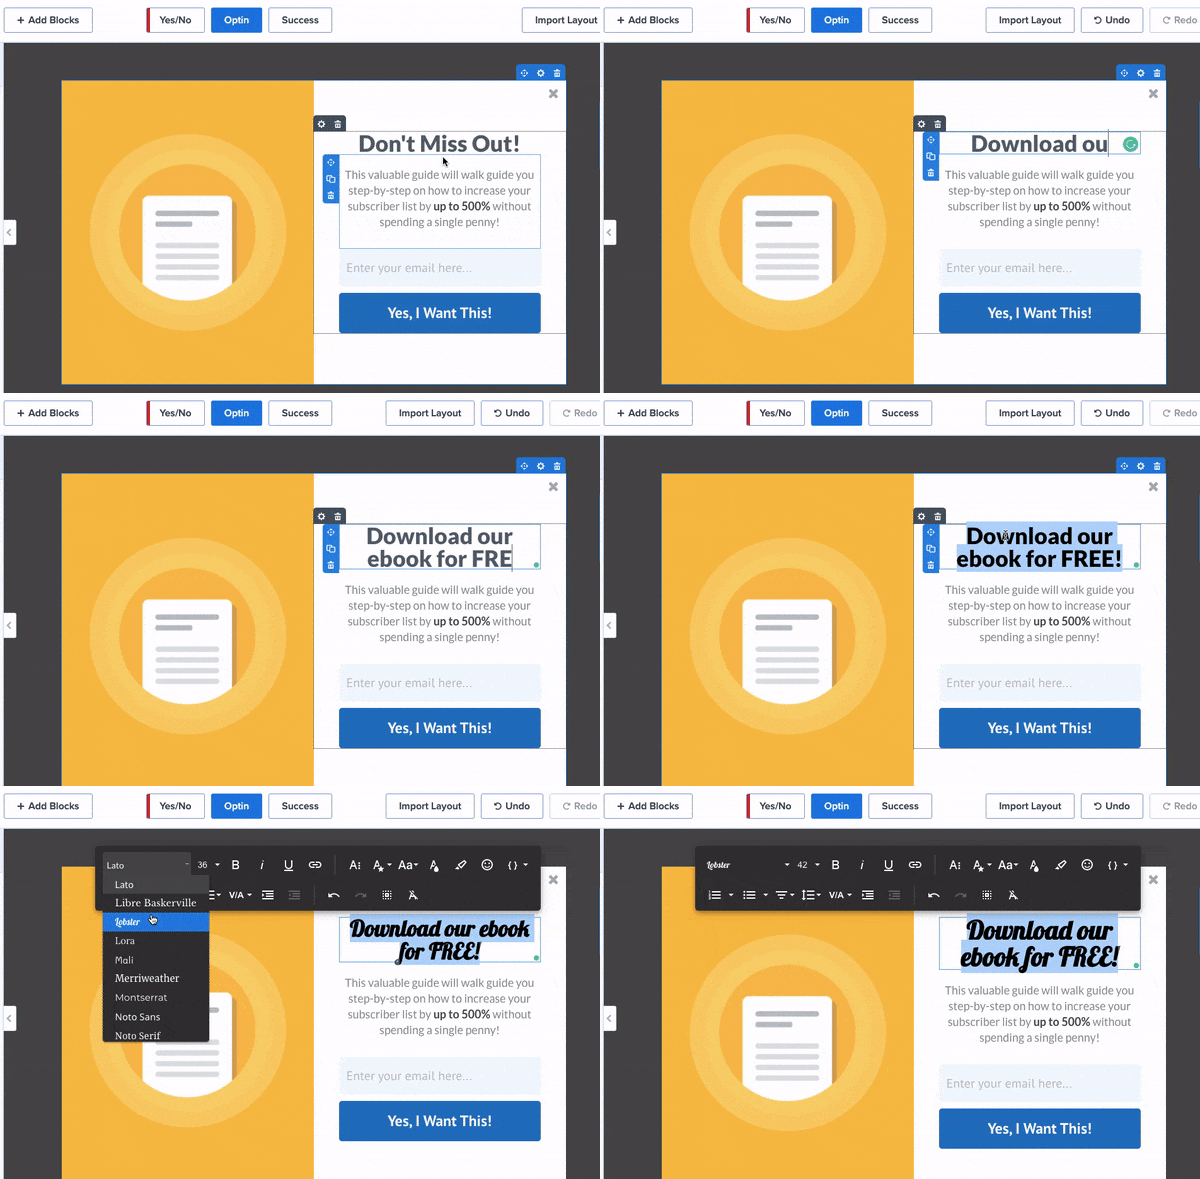
OptinMonster has a built-in text editor that will appear when you select all the text in a block. This will give you options to change every aspect of your text, including:
- Font
- Color
- Size
- Alignment
- Line height
- And much more…
All of OptinMonster’s templates are designed to look beautiful with images, CTAs (calls to action), and colors that work in most cases.
That means you won’t have to change much in the design.
However, OptinMonster lets you customize every aspect of your template if you want to match it better to your brand, message, and campaign.
For example, you can modify the button to add your own CTA. Click on the button, and you’ll see options to change the text, color, font, and more in the left-hand side column.
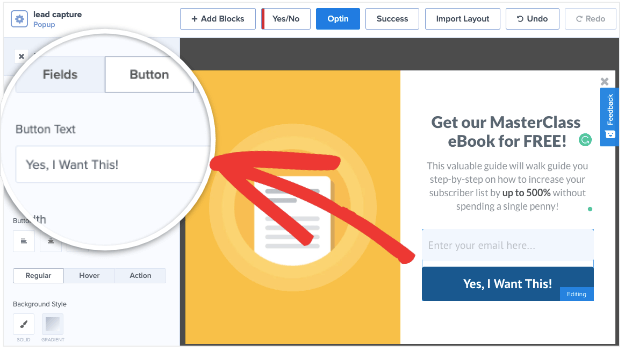
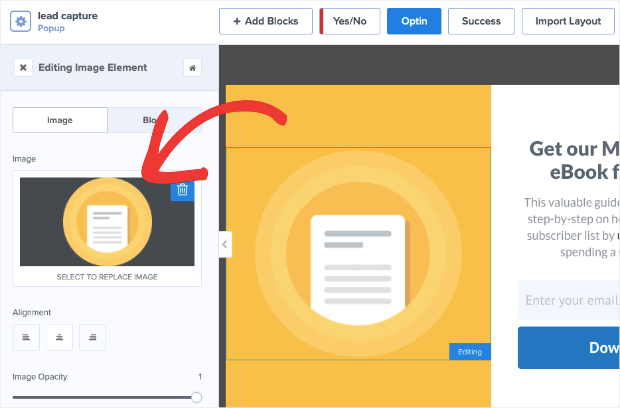
You can also replace the image with your own logo or another image that suits your campaign:
In case you want to change the background, click on the Home button in the left-hand side menu and navigate to Optin Settings » Optin View Styles page. You can upload an image here or use the color palette to change the color.
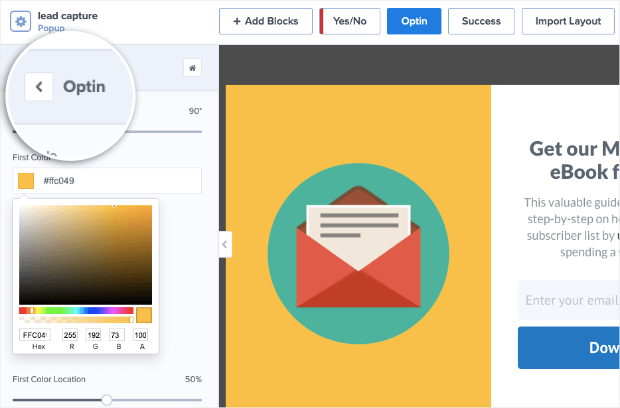
Finally, switch to the Success tab to customize the confirmation message. This will appear to visitors as soon as they submit the form.
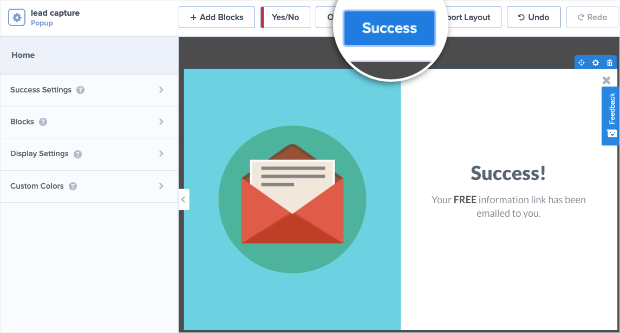
And with that, your lead capture inline form is ready.
The next step in building OptinMonster campaigns is to add targeting rules. This lets you show your campaigns to the right people at the right time.
We won’t be using display rules for inline forms because they appear wherever you embed them.
In case you’re building a different campaign such as a popup, you’d want to configure the targeting options under the Display Rules tab.
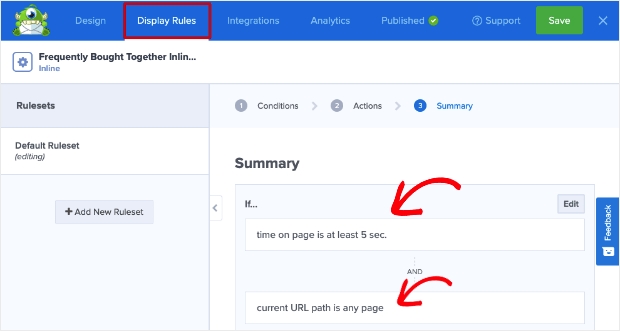
A few popular display rule options include:
- Exit-Intent® Technology: Recover abandoning users as they’re actively leaving your website.
- OnSite® Retargeting: Keep users engaged by showing new campaigns to returning visitors.
- Geolocation: Customize the customer experience by targeting users based on their physical location.
- Referral Targeting: Engage with visitors based on which channel or source they’re coming from
Next, we’ll show you how to connect your campaign to your email service provider (ESP).
Step 3: Connecting OptinMonster to Email Marketing
Inside the OptinMonster campaign builder, open the Integrations tab and click on the ‘Add New Integration’ button.
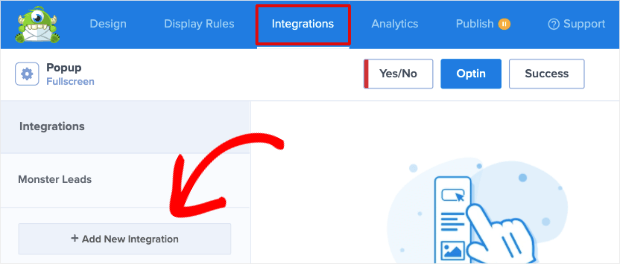
A drop-down menu will appear where you can choose your email service provider.
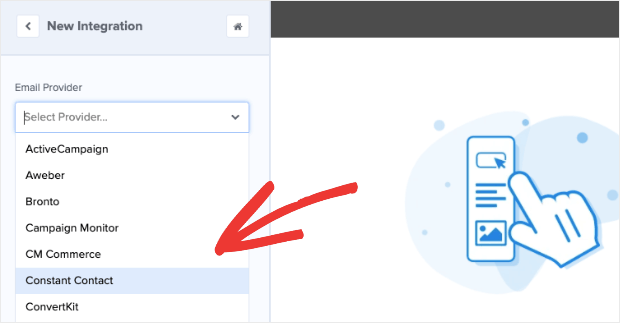
Follow the on-screen instructions to sign in to your account and link the OptinMonster campaign. It takes just a few clicks.
Now you can go ahead and publish the OptinMonster campaign on your site.
Step 4: Publishing the OptinMonster Campaign
OptinMonster makes it really easy to add the inline form to your WordPress site without any coding knowledge required.
First, switch to the Publish tab in the OptinMonster campaign builder and set the status to ‘Publish’ here.
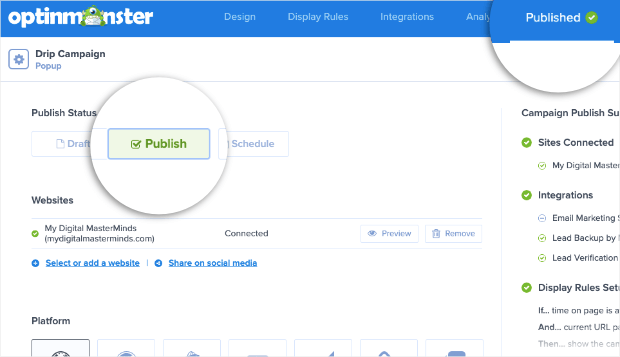
Next, OptinMonster has a built-in widget for WordPress sites that you can add anywhere on your site.
So if you want to turn a WordPress page or post into a lead capture page using the Gutenberg editor, you can select the OptinMonster block and choose your campaign:
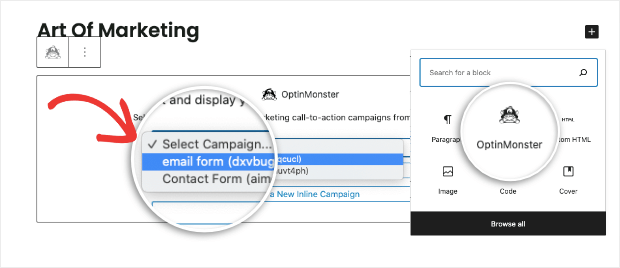
You’ll find the OptinMonster widget in all popular WordPress page builders like Elementor as well.
And if you’re still using the Classic editor, there’s an ‘Add OptinMonster’ button that lets you select your campaign to add it to a page or post.
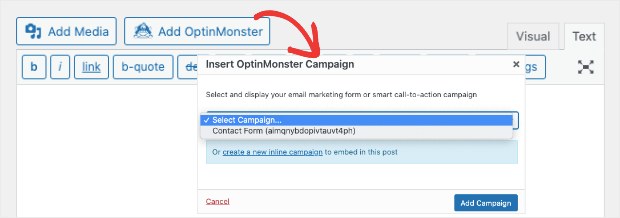
You can even add the inline form to a WordPress sidebar. In your WordPress dashboard, navigate to the Appearance » Widgets tab. Then drag and drop the OptinMonster widget into your sidebar menu and select the inline form.
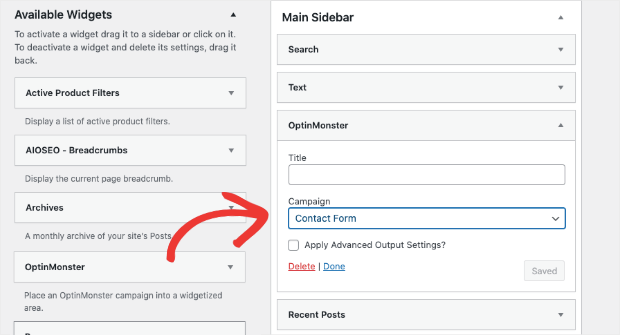
Once you save and publish your page or sidebar, you’ll see the form appear on your site.
Now you know how to turn any page of your website into a lead capture page with OptinMonster.
Learn more about adding inline campaigns to your site by checking out the following detailed guide: How to Add an After Post or Inline Campaign.
If you haven’t signed up for OptinMonster yet, what are you waiting for? Get your 100% risk-free OptinMonster account now by clicking below:
If you’re looking to create a fresh lead capture page, we’ll show you the easiest way to do that next.
2) Creating a Lead Capture Page with SeedProd
You can also create an incredible lead capture page that’s optimized for conversions and SEO using SeedProd.
SeedProd is the most powerful landing page builder for WordPress. It comes with 100+ beautiful ready-to-go templates that make it easy to create a lead capture page in a matter of minutes.
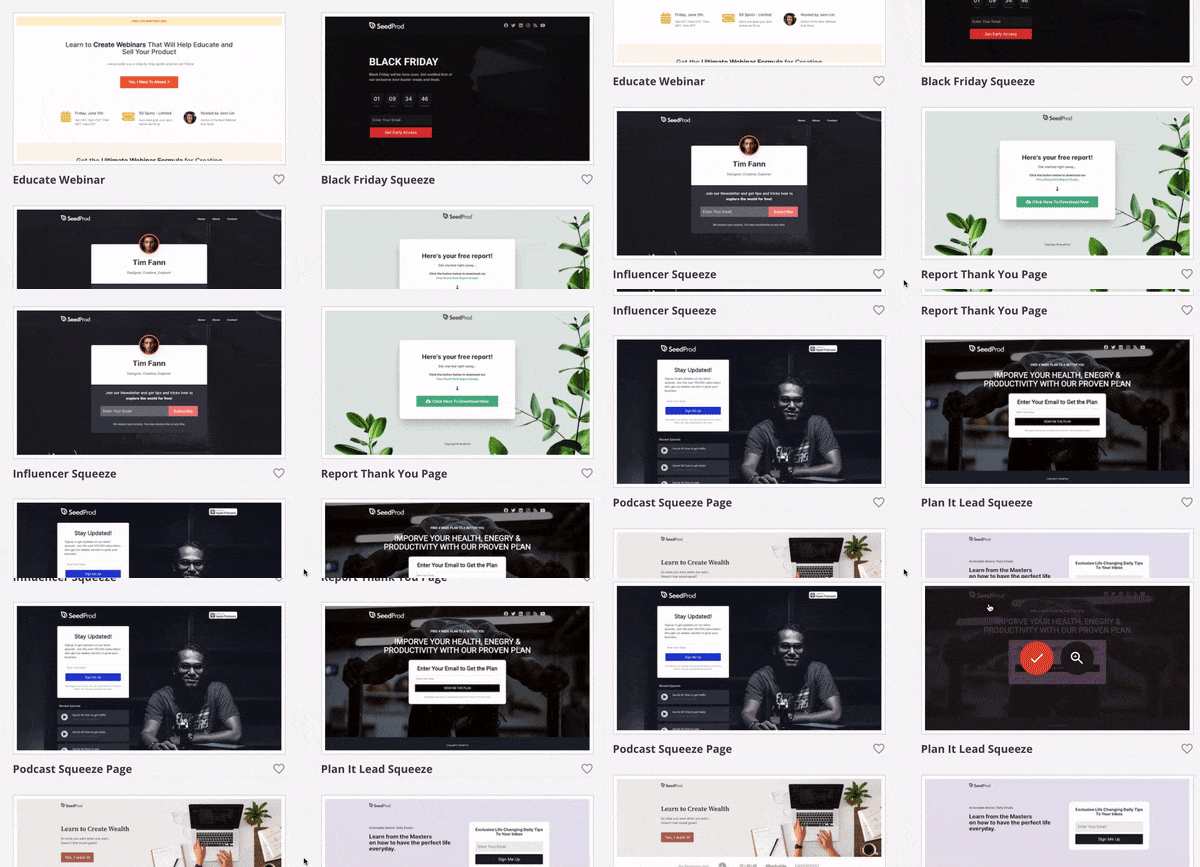
Plus, it has a drag and drop builder to customize the template to match your brand and website theme.
A few highlights of the SeedProd builder include:
- Email marketing integrations – Connect to popular email marketing services like MailChimp, AWeber, GetResponse, ConvertKit, and more
- Designed for high conversions – Use built-in features to add optin forms, countdown timers, and CTA buttons to maximize conversions
- Control Access – Choose to show or hide certain parts or pages of your website to users
- Spam Protection – Add Google reCAPTCHA to detect bots and prevent spam or fraud submissions on your page
- Affordable – SeedProd has a lite and premium version that’s reasonably priced
To give you a more comprehensive view of this page builder, we’ve covered this tool in detail with our SeedProd review.
To follow along in this tutorial, you’ll need to sign up for SeedProd. Once you’ve done that, you can create a beautiful lead capture page.
Let’s get started.
Step 1: Setting Up SeedProd in WordPress
When you sign up for SeedProd, you’ll receive a file to download and a license key.
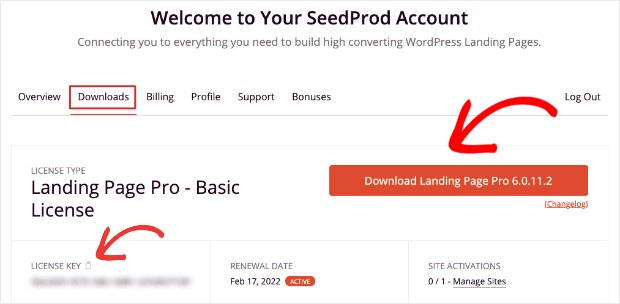
You can install SeedProd on your WordPress site by uploading the plugin file to the Plugins » Add New page.
Never uploaded a plugin? No worries. Follow this guide for more info on how to install a WordPress plugin.
After you’ve installed and activated the plugin, access the SeedProd page in your WordPress admin area. Then open the Settings tab, where you can enter your license key.
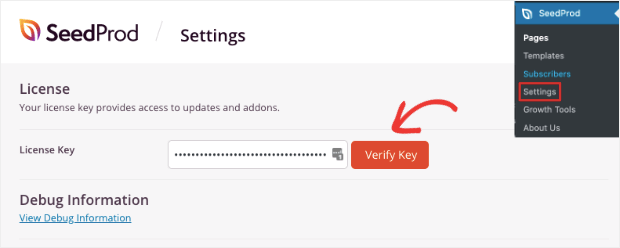
Now you’re all set to build a beautiful lead capture page.
Step 2: Building a New Lead Capture Page
In your WordPress dashboard, navigate to the SeedProd page. You’ll see 4 options to create coming soon, maintenance mode, login, and 404 pages.
Below that, select the ‘Add New Landing Page’ button.
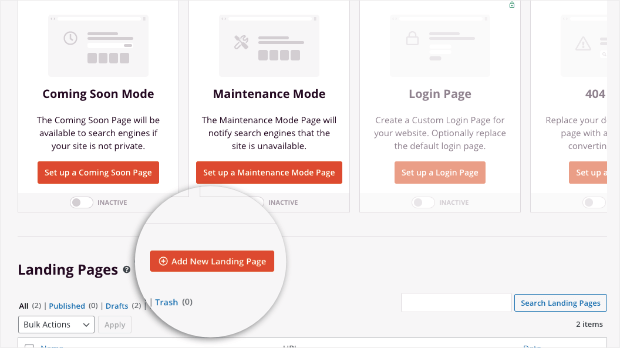
This will open up a page with all the template designs. You can hover over any template and you’ll see an option to preview or select it.
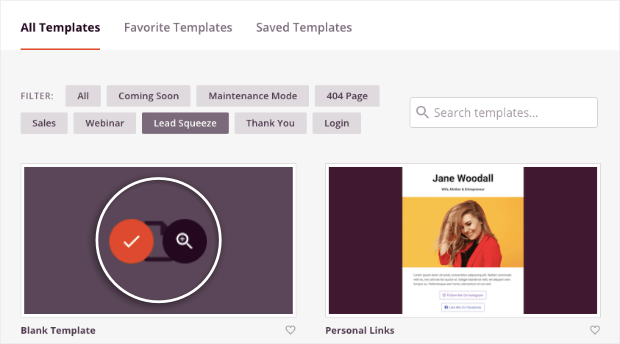
You can also filter templates by category using the tabs available. We recommend exploring the Sales and Lead Squeeze categories as they’re designed to better fit your lead capture goals.
For this tutorial, we’ll choose the Free EBook Squeeze page because it’s got all the fields we want to include.

SeedProd will prompt you to enter a name for your page. This will also auto-generate the URL that will serve as your landing page.
Then click on the ‘Save and Start Editing the Page’ button.
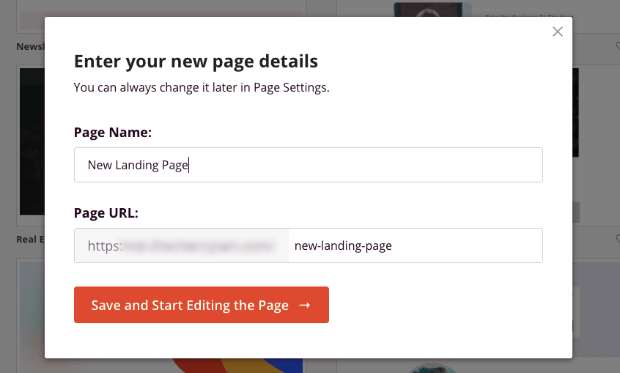
The landing page builder will then open where you can customize your design.
Step 3: Customizing the Lead Capture Page
SeedProd’s builder is quite similar to OptinMonster. You can see a preview of your lead capture page and make edits to it directly.
Every aspect of the page can be edited using SeedProd’s drag and drop builder. You don’t need any coding or design skills.
To add more elements to the page, simply drag and drop any block from the menu on the left.
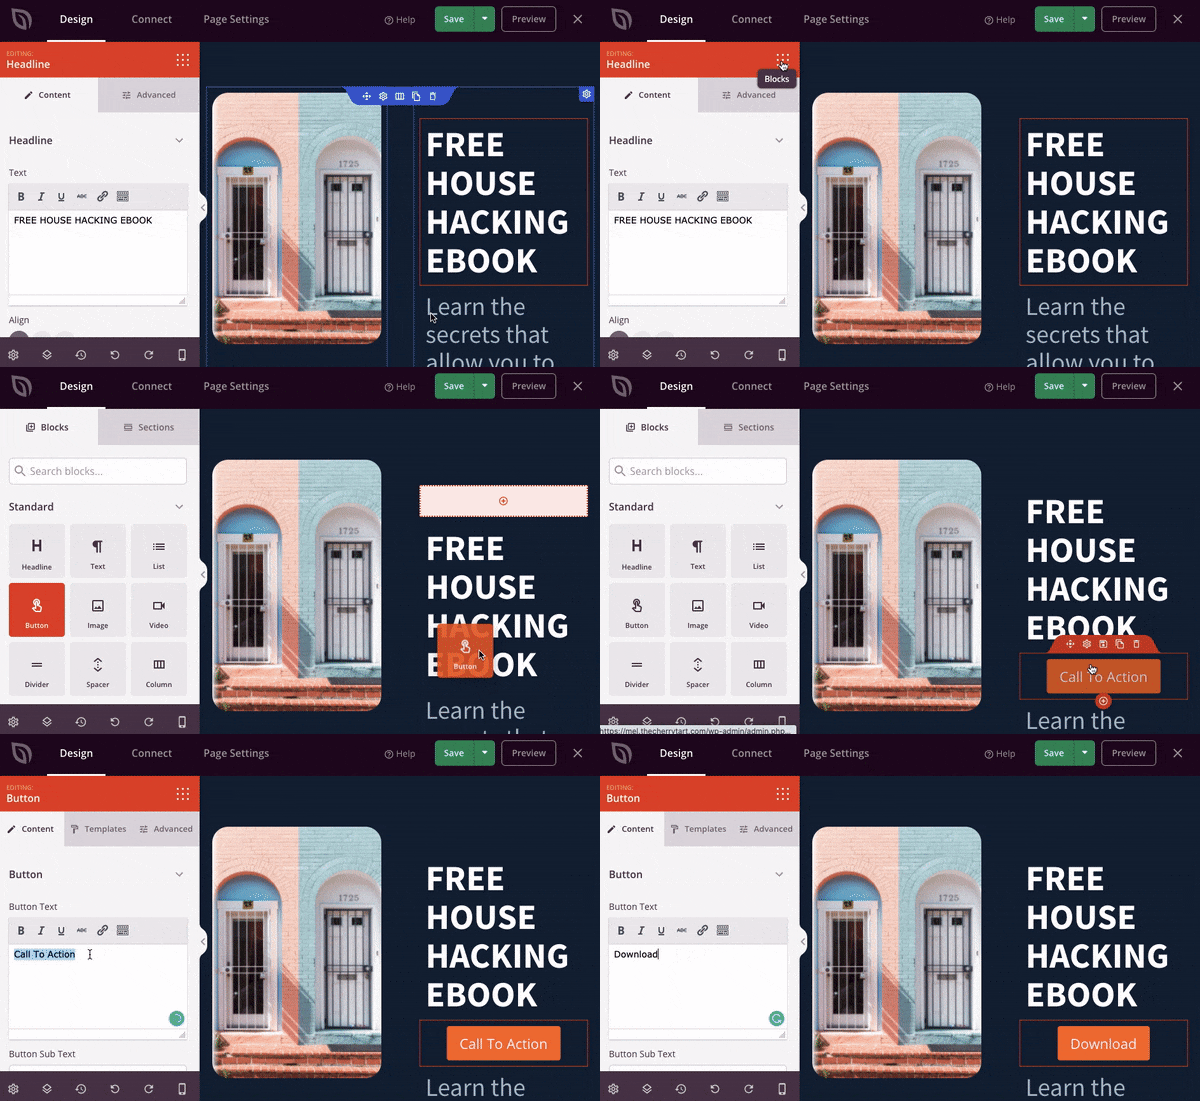
SeedProd has standard blocks to build a basic page. The advanced blocks take your page to the next level. You’ll find elements like:
- Giveaways
- Animated headline
- Optin form
- Countdown timer
- Star rating
- Testimonials
- Social profiles
- Social sharing
- And more…
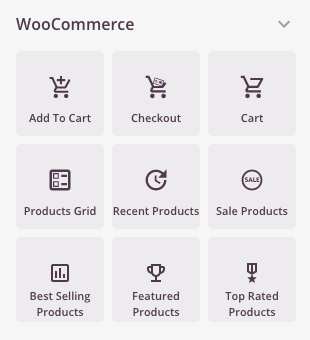
SeedProd also has WooCommerce-specific elements that let you add buttons to ‘Add to Cart,’ ‘Checkout,’ and much more. So you can sell products, events, and services right from your lead capture page.
You can create sections to include a product grid, recent products, best-selling products, and other features to boost sales.
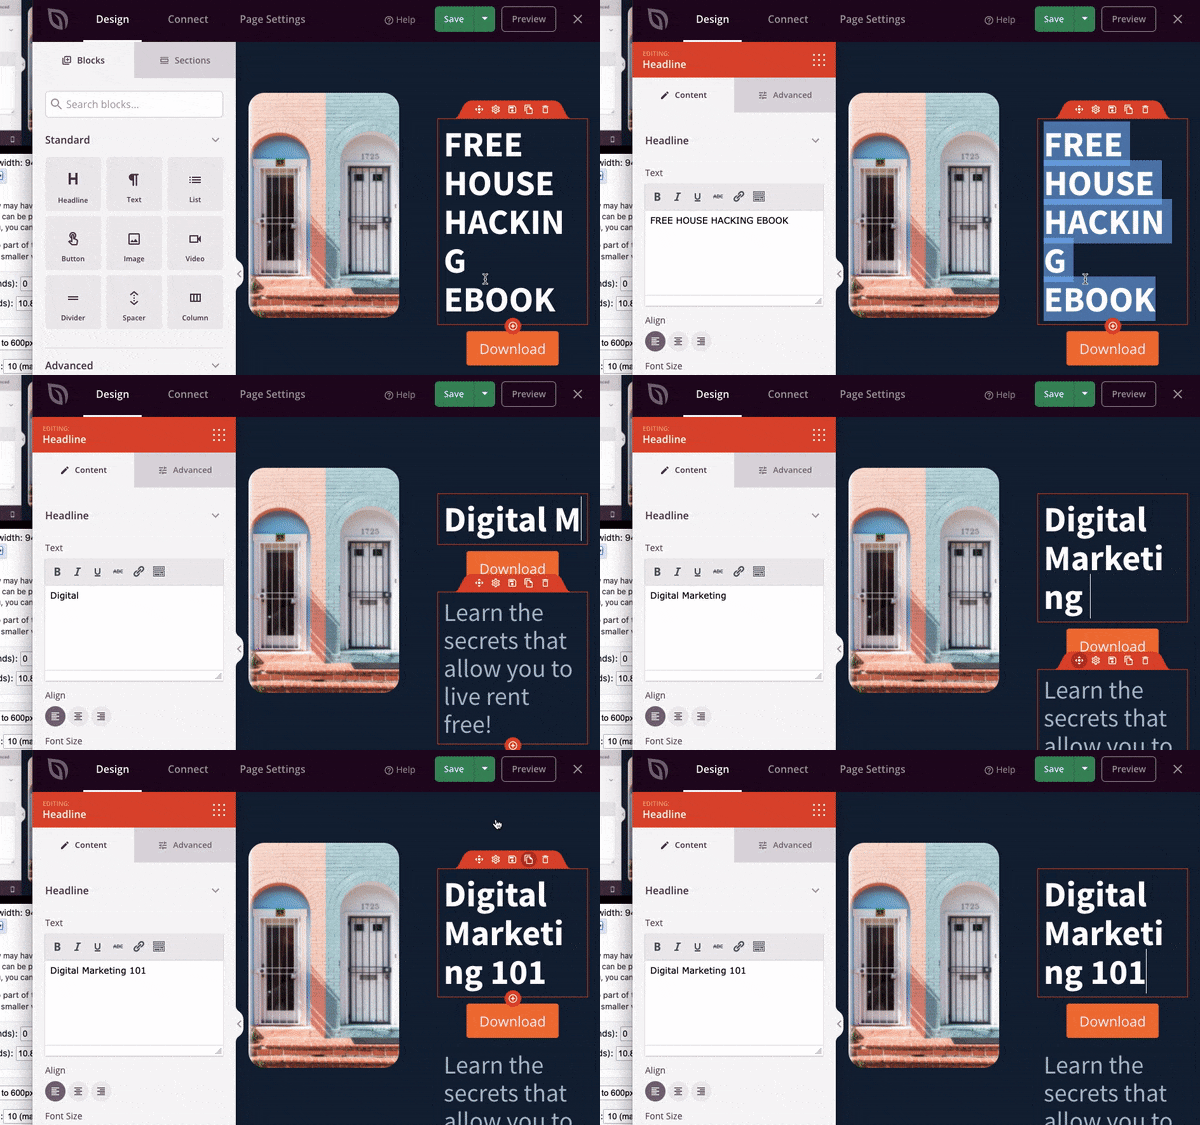
Next, you can make changes to the title and content by selecting the field and entering your unique messaging to connect with your target audience.
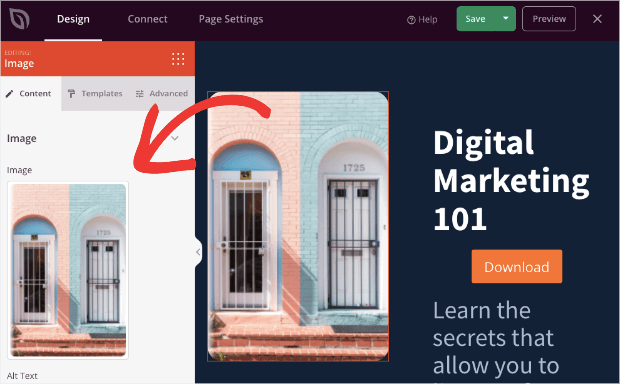
You may want to upload your own image or logo to match your lead capture campaign. You can select the existing image and you’ll see options to upload your own on the left.
We should mention here that SeedProd has a library of 2+ million free stock images that you can access with the Plus plan or higher.
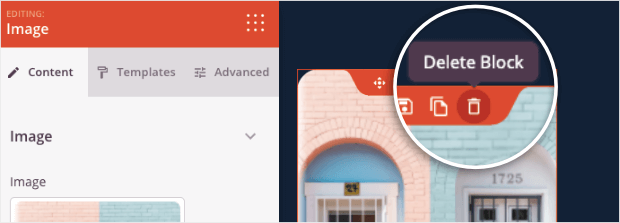
Next, if you want to remove elements from the page, there’s a delete block option above every element when it’s selected, like this:
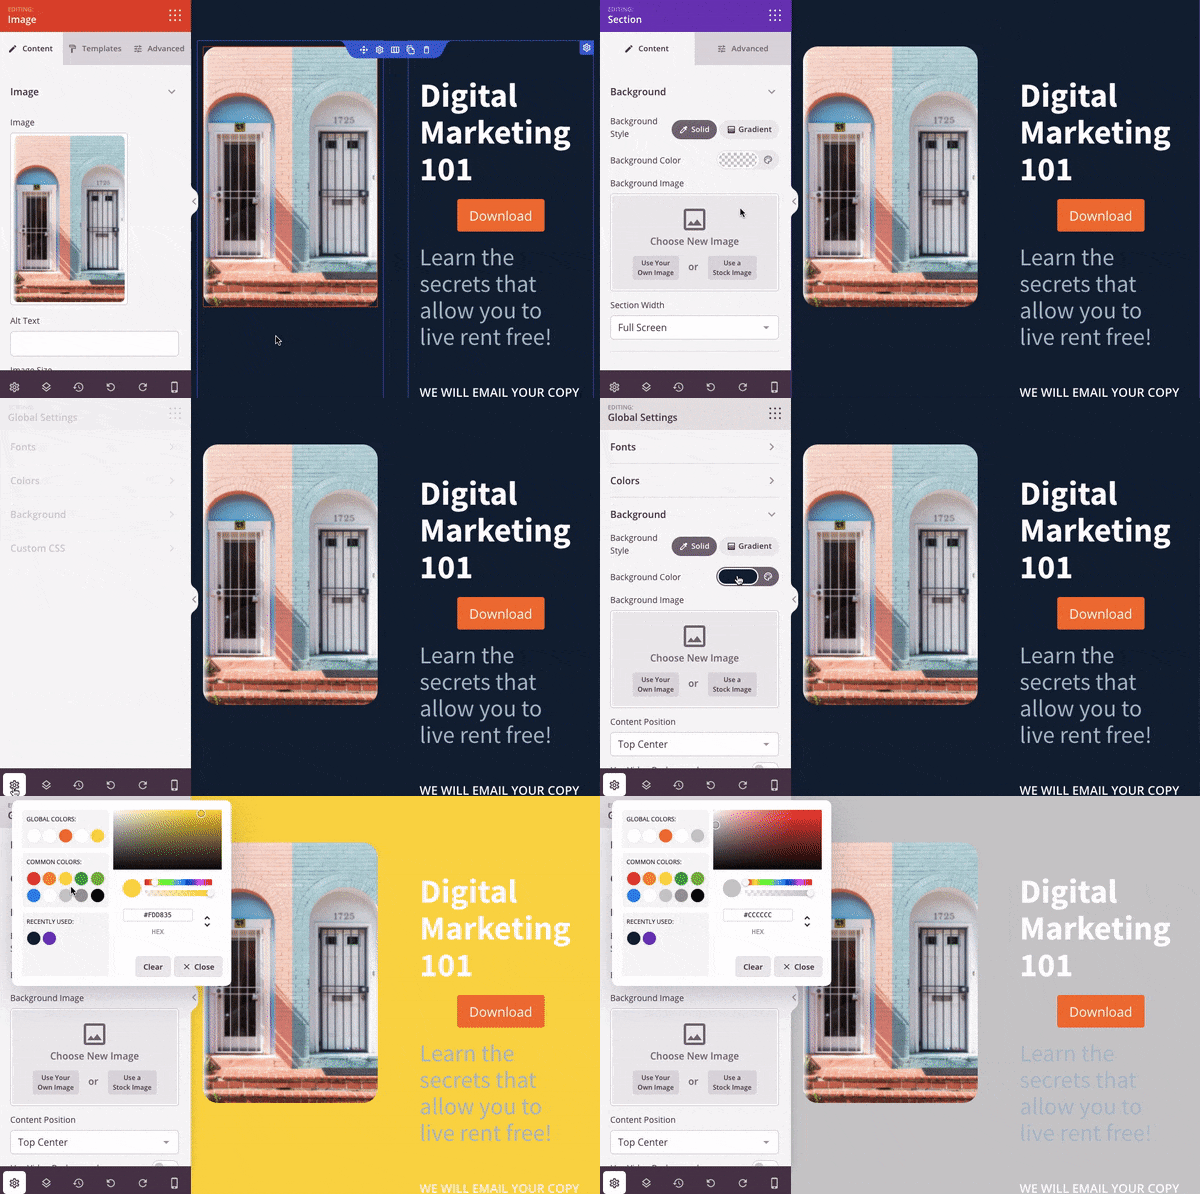
To change the background color, you’ll want to navigate to the Global Settings tab at the bottom left corner of the builder.
Then select the Background tab and you’ll see options to add background colors and images.
Scroll down to the next section of the page and customize it the same way.
You can edit the social media icons here to add your preferred channels and page links.
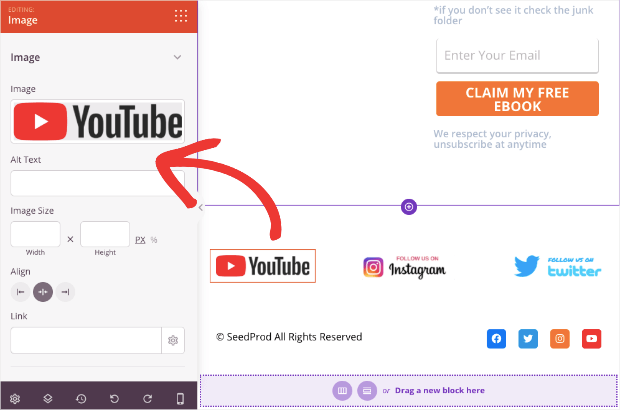
You can also add new sections and blocks if you want to add more content to your page.
Now your lead capture page is ready to be synced to your email marketing campaigns.
Step 4: Integrating with Email Marketing
With SeedProd, you won’t have to collect leads in WordPress and then export/import them to your email service provider.
Instead, you can easily integrate your email account and all new leads will automatically be added to your email contact list.
In the SeedProd builder, open the Connect tab.
You’ll see the email and marketing integrations available.
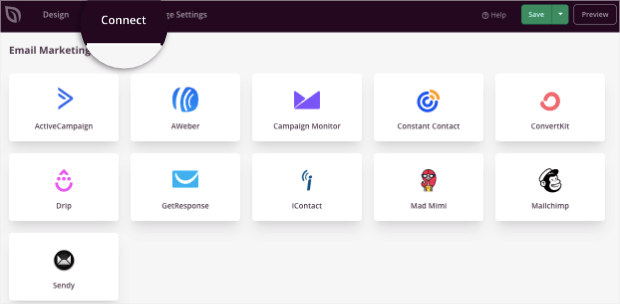
Select your favorite email provider and follow the instructions to log in and connect your account.
With this connection, we can use our email service provider (ESP) to create an email with the eBook and trigger it to be sent as soon as the user subscribes to the campaign.
Step 4: Configuring Page Settings
Before publishing your page, you may want to configure the page settings to make sure it performs the way you want it to.
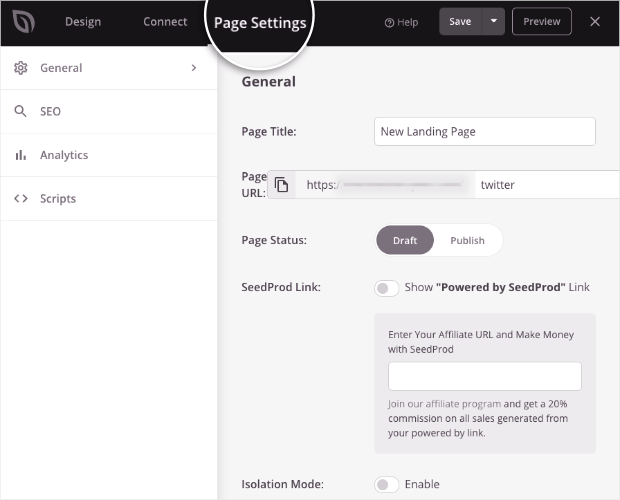
In the Page Settings tab, you’ll see options to set a page title and URL slug.
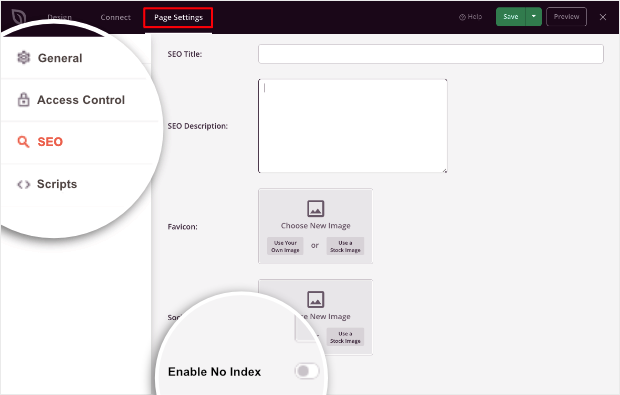
You can use the left taskbar to navigate to the SEO settings. If you want to use this page for promotions and don’t want it to appear on search engines like Google, select the ‘Enable No Index’ option here.
Next, you can add your own header, body, and footer scripts as well.
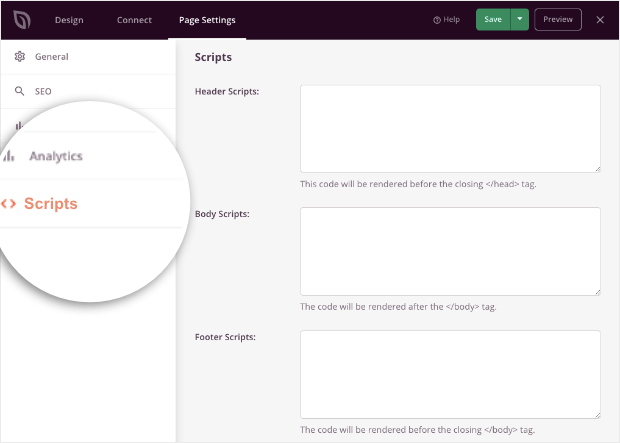
If you aren’t tech-savvy, we recommend leaving these empty as the out-of-the-box templates will have everything you need.
Now you’re ready to publish your new lead capture page.
Step 5: Publishing Lead Capture Page
Before you publish your page, you can see a sample of it using the Preview button. You can also see what your page looks like on mobile using the mobile preview option at the bottom-left of the page.
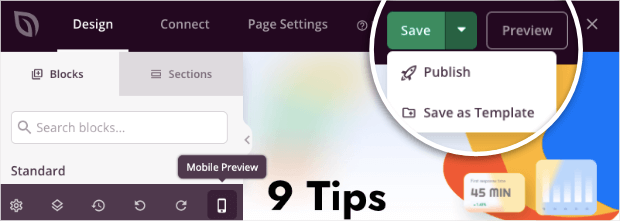
Then Save the page and use the drop-down menu here to Publish it.
With that, you’ve created a stunning lead capture page in WordPress to target your audience better.
You can share the page URL in emails, social media pages, and PPC ad campaigns to direct traffic to the promo page.
That brings us to the end of this tutorial. You now know 2 awesome ways to create lead capture pages in WordPress.
SeedProd lets you create dedicated lead capture pages while OptinMonster lets you convert any page into a lead capture one.
OptinMonster also goes beyond lead capture pages and lets you create all sorts of lead generation campaigns including gamified wheels, floating bars, slide-ins, and much more.
This means you can use OptinMonster for a wide range of purposes to grow your email list, promote sales and offers, and generate more revenue.
Want to get started with OptinMonster? Sign up for your 100% risk-free account below:
We hope you found this tutorial helpful. For your next steps, we recommend these resources to boost your lead generation efforts:
- 9 B2B Lead Generation Best Practices (That Actually Work)
- How to Make a Lead Capture Form That Actually Converts
- 38 Best Lead Generation Tools to Get More Targeted Leads
We’ve added the best practices, tools, and methods inside these posts to help you advance your lead generation strategy and results.




Add a Comment