Do you want an easy way to connect GetResponse to WordPress?
GetResponse is a popular bundled marketing suite that can help your business thrive online. From sending emails to marketing automation, GetResponse helps you engage with your customers in many ways.
If you use WordPress to manage your content and build your site, you will want to make sure GetResponse is integrated.
That’s why, in today’s tutorial, we’ll show you the BEST ways to integrate GetResponse with WordPress.
Though, before we get into the tutorial, let’s take a quick look at GetResponse.
Integrating GetResponse With WordPress
The GetResponse – WordPress integration comes with a lot of benefits. For example, you can add GetResponse forms to your site with a WordPress plugin without even logging into your GetResponse account.
While there are a few different plugins that offer the integration, we highly recommend OptinMonster.
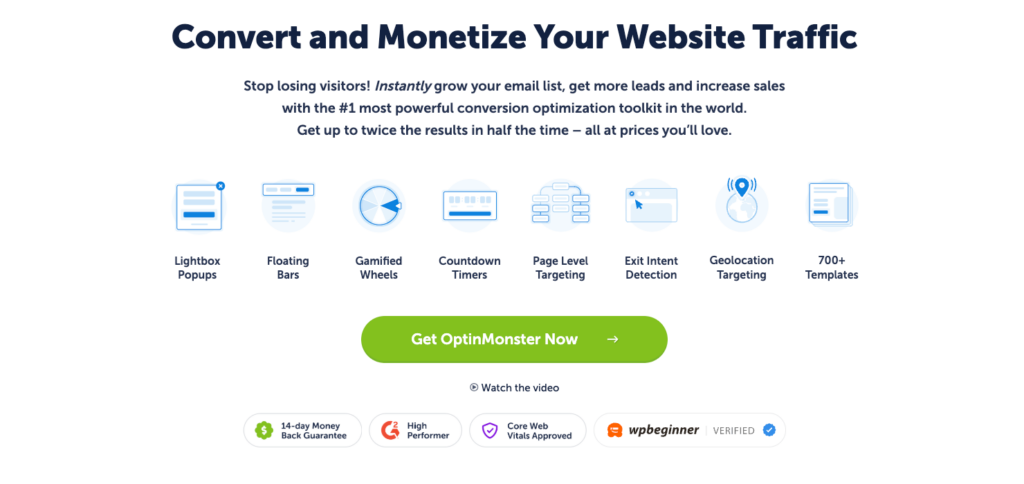
OptinMonster is a premium and easy-to-use WordPress plugin that lets you create high-converting email optin campaigns for your site that sync with GetReponse.
Here are a few reasons why OptinMonster is the best way to integrate GetResponse with WordPress.
- Easy peasy: OptinMonster comes with tons of beautiful optin forms and an easy-to-use drag and drop builder that help you quickly launch your lead generation campaign.
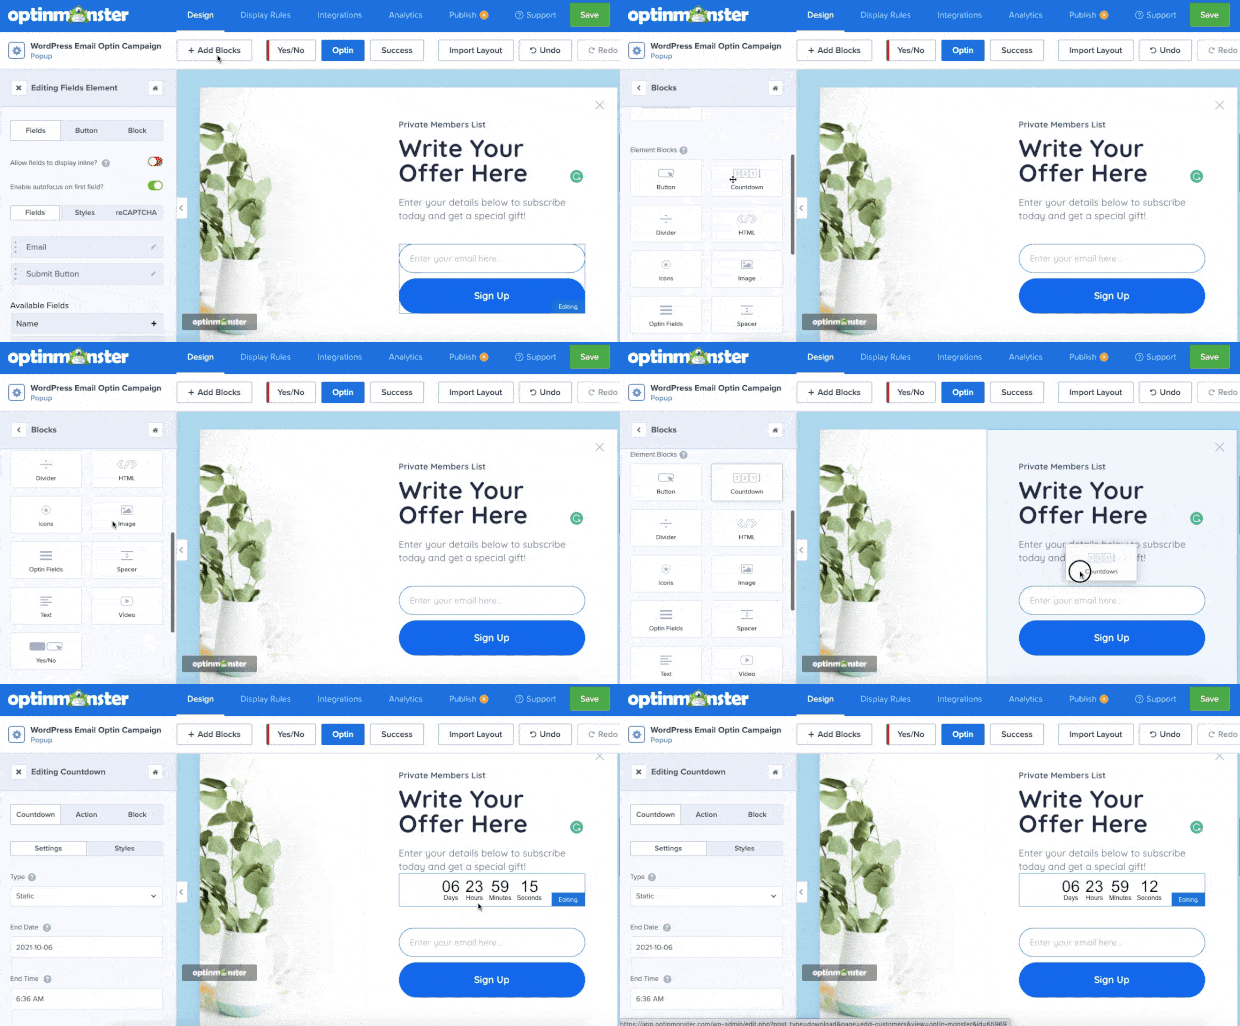
- Form types: Not just typical optin forms, OptinMonster supports a variety of form types that are proven to convert, like popups, floating bars, gamified wheels, and more.
- Custom fields: Capture detailed lead information with ZERO coding using radio buttons, phone fields, text areas, number fields, lists, and more. And the best part? You can easily map any of these fields with GetResponse.
- Auto-segmentation: Tag your leads automatically with your forms so you send personalized emails with GetResponse.
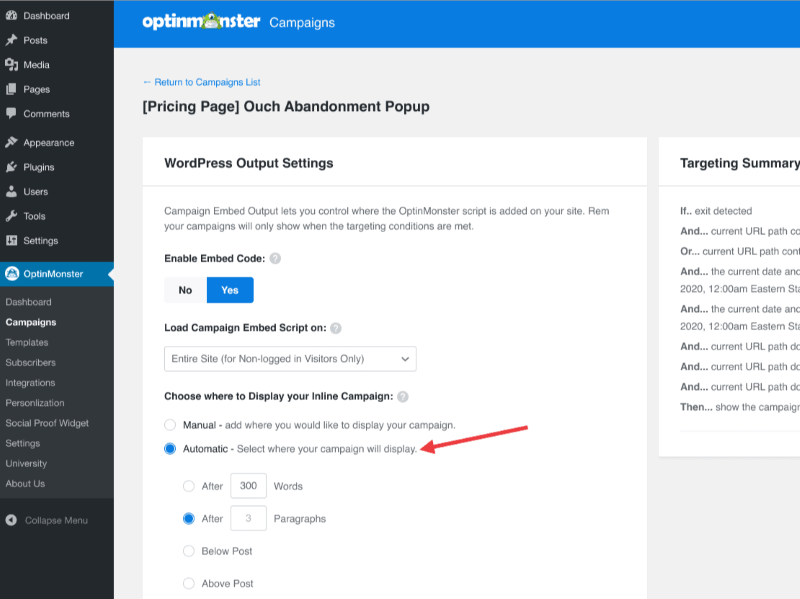
- Auto-display: Automatically display your Getresponse form anywhere on your site, like before post, after post, on a sidebar widget, and more.
- Targeting: With its precision targeting feature, you can show campaigns based on the user’s physical location, the page the visitor is viewing, and more
- Triggers: You can detect your site visitor’s behavior to show the right campaign at the right time. For example, triggering a popup when they’re more likely to leave your site, and more.
- Testing: OptinMonster also lets you split test your campaigns to find the messages and designs that your site visitors love
Are you ready to try OptinMonster for yourself? Click below to claim your 100% risk-free OptinMonster account today.
How to Create a GetResponse Form in WordPress
Now that you have your OptinMonster account, let’s walk through how to connect GetResponse to WordPress by using OptinMonster. OptinMonster is incredibly easy to set up and should take less than 5 minutes.
Step 1: Install and Activate the OptinMonster Plugin
First, you’ll need to install the OptinMonster plugin on your WordPress site.
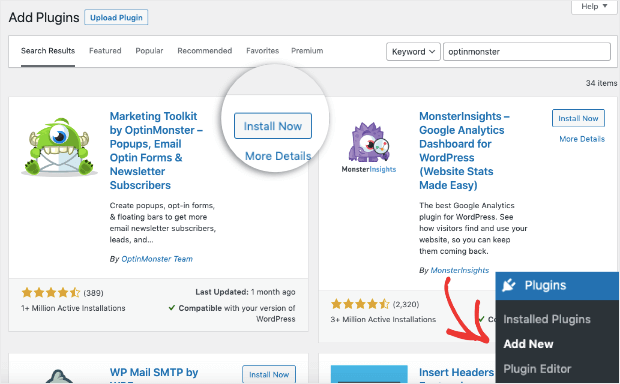
Once the OptinMonster plugin is activated, click Launch the Setup Wizard:
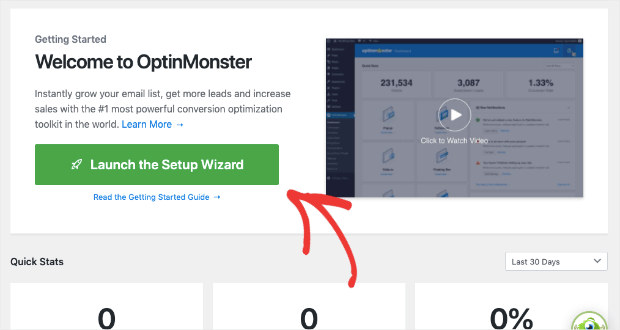
Then, follow the onscreen instructions. Once you’re finished, it’s time to create your first OptinMonster campaign.
If you need some more help, follow our guide on installing the OptinMonster WordPress plugin.
Step 2: Design and Create a New Campaign
On the OptinMonster page on your WordPress dashboard, you’ll see the option to create all sorts of campaigns like popups, floating bars, inline forms, and slide-ins.
For this tutorial, we’ll select Inline, but feel free to choose any of the other campaign types. However, the following steps will remain the same, regardless of what campaign type you choose.
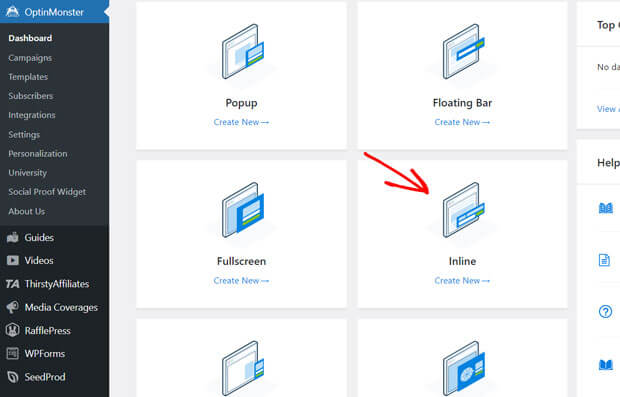
Next, you’ll select one of OptinMonster’s predesigned templates.
The templates are designed to use right away with minimal modifications.
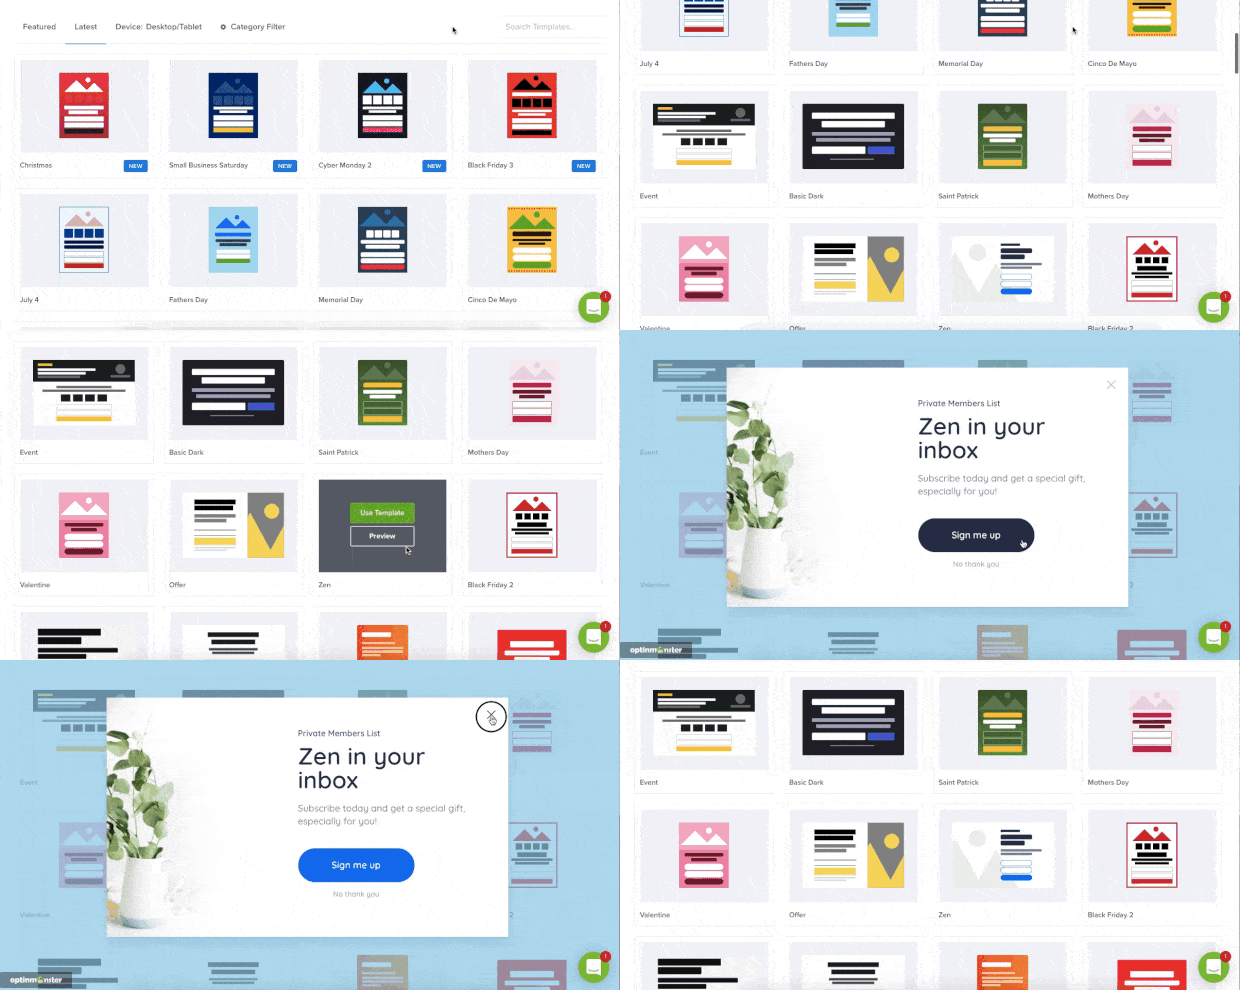
As you can see, you don’t need to be a graphic design expert to create a stunning, eye-catching campaign. These templates are specially crafted to inspire people to take action.
But, OptinMonster makes customizing these templates simple too.
Go ahead and select a template and give it a name.
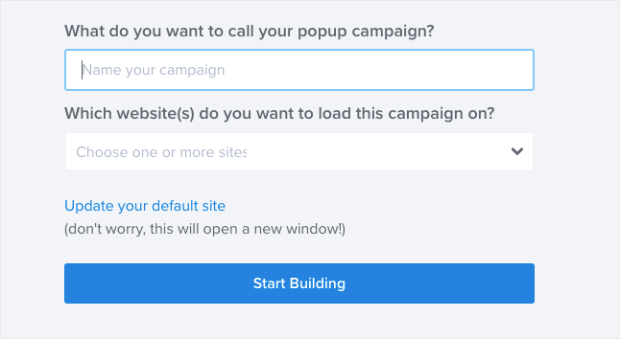
We suggest a name that will describe what your campaign is offering. That way, you can easily find it later.
After that, you’ll be taken to the OptinMonster builder screen, which is an easy-to-use drag and drop editor.
Making changes is incredibly simple. Just click what you want to modify. From there, you can make all changes right there in the builder. So, feel free to play around with the font, colors, background, and other elements of your campaign:
If you want or need more details, check out our guide to creating your first OptinMonster campaign.
Now, it’s time to tell OptinMonster which site visitors you want to target. By targeting specific visitors, you’ll personalize their user experience, resulting in high email subscription rates.
Step 3: Configure Your Inline Form Options
In the campaign builder, using the home menu, navigate to the Inline Settings tab.
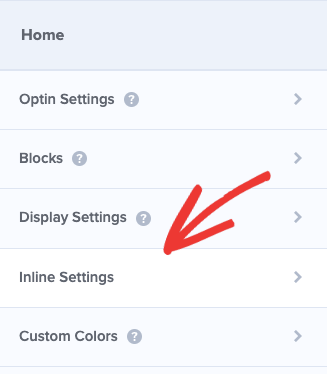
You’ll see 3 options here to:
- Enable Smart Success: If a visitor has already opted in through another campaign, the success view will be shown. This will make sure those who have subscribed don’t see repeated campaigns.
- Lock Content Below Campaign: Blocks or blurs out any content below the form until the visitor unlocks it by subscribing.
- Enable Attention Activation: Fades out the rest of the page and highlights the campaign when the user scrolls 100% of the form into view.
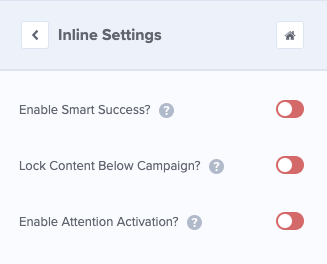
These features take your inline form to a whole new level. The content locking feature is especially helpful if you want to get more people to sign up in order to access premium content.
Learn more about content locking by checking out the following detailed guide: How to Lock Content in WordPress for Premium Subscribers.
If you want a simple inline form, you can leave these settings turned off.
What makes OptinMonster shine, and why it’s the perfect campaign for GetResponse, is the built-in display and targeting rules.
Let’s head over to the Display Rules tab now.
We used Inline campaign type in the second step just so we can publish the form on a page. However, if you’ve chosen other campaign types, like popup, you’ll find quite a few options in Display Rules, which gives you the ability to target your perfect audience with the best campaign for them.
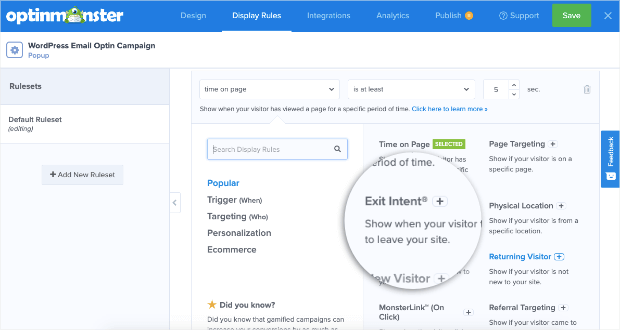
Just click on the drop-down menu. You’ll now see more display rules like:
- Exit-Intent® Technology: Recover abandoning users as they’re actively leaving your website.
- OnSite® Retargeting: Keep users engaged by showing new campaigns to returning visitors.
- Geolocation: Customize the customer experience by targeting users based on their physical location.
- Referral Targeting: Engage with visitors based on which channel or source they’re coming from
It’s as simple as that.
You can customize the rule to target desktop or mobile users. You can also set the rule to target both.
Our next step is to connect OptinMonster and WordPress to GetResponse.
Step 4: Connect OptinMonster with GetResponse
In the OptinMonster dashboard, open the Integration tab. You’ll see an option to Add New Integration.
This will give you a drop-down menu of all the available service providers. Select GetResponse. You’ll see new fields to enter a name for the connection along with your API URL and API key.
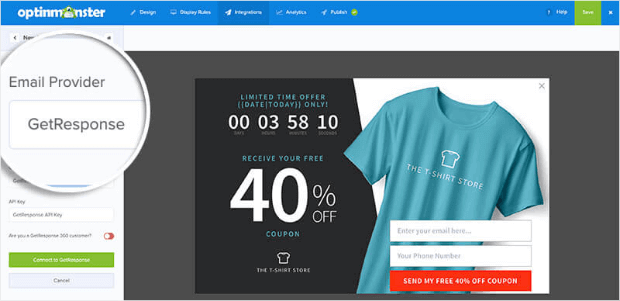
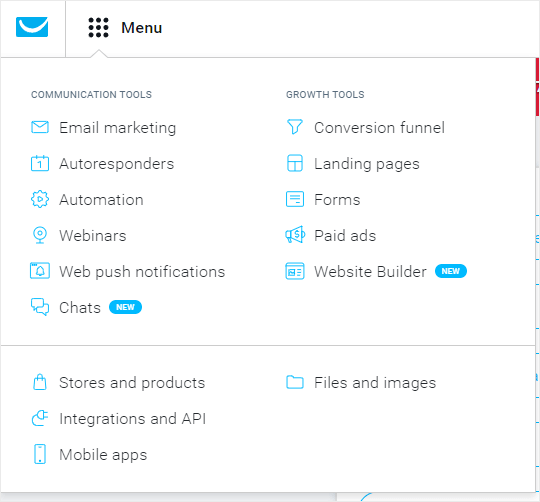
Log in to your GetResponse account and navigate to Menu > Integration & API > API.
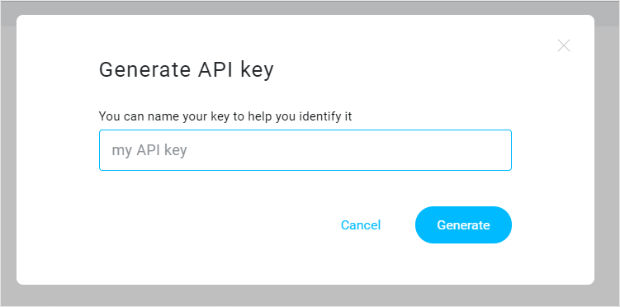
You’ll see a prompt to Generate API key. Click on the button.
Next, name your API key. Then, click Generate.
GetResponse will generate an API key for you. Copy the key.

Now, you’ll return to the OptinMonster builder and paste the API key into the API Key field. Be sure to add a unique account label for easy identification. Note: this is for internal use only.
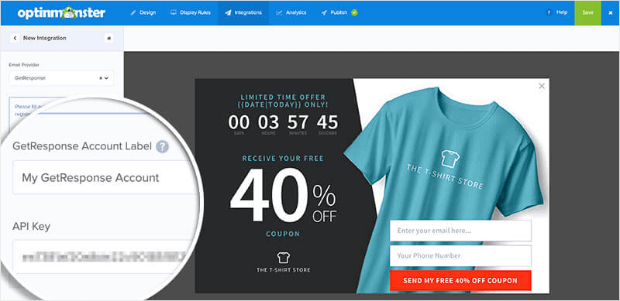
Next, select the Connect to GetResponse button.
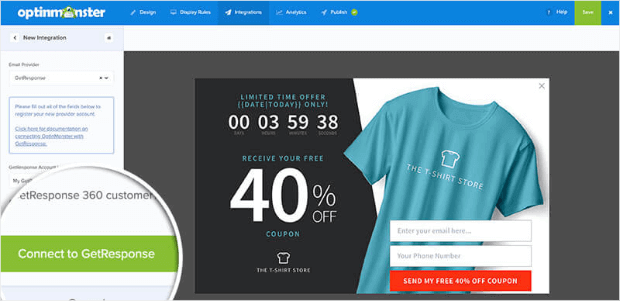
Once OptinMonster and GetResponse are connected, you can select which list you’d like to add your new leads to.
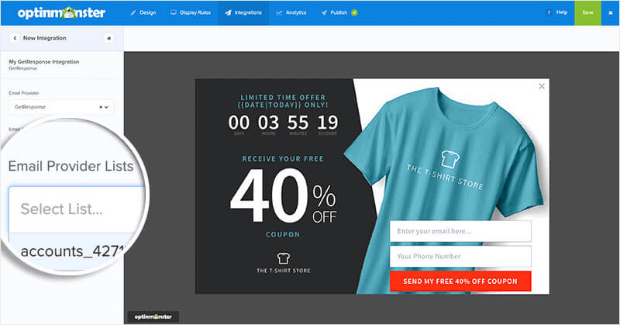
Now, all you have to do is publish your campaign.
Step 5: Publish GetResponse Form in WordPress
To make your campaign appear on your WordPress site, you’ll need to switch to the Publish tab in the OptinMonster builder.
Be sure to double-check your settings before publishing. Then, when you are satisfied, set the status to Publish.
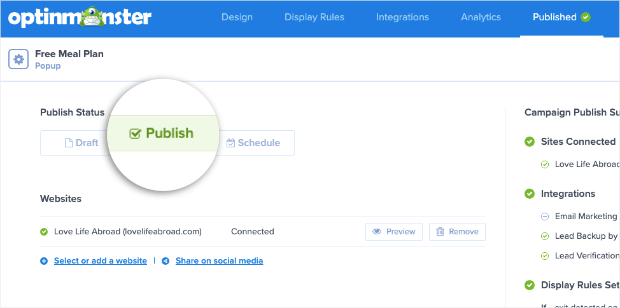
Finally, you’ll want to go back to your WordPress dashboard and open the OptinMonster > All Campaigns tab. Check the campaign status is set to Publish on this page as well.
To add the campaign to a post or page using the block editor, you can select the OptinMonster block and choose your campaign:
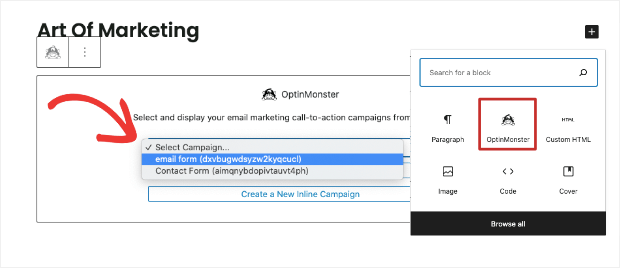
Alternatively, you can even choose to show the campaigns automatically across the site by using the OptinMonster sidebar widget. You can even display the campaign on before or after the post or even between the posts automatically.

There’s just one final step before we wrap up today’s tutorial. And that is to make sure GetResponse is set as your default integration.
Step 6: Set GetResponse as Your Default Integration
Setting GetResponse as your default integration in WordPress makes setting up future campaigns even easier. Once you design the campaign, you just need to pick which specific list you want to send leads to. That’s because WordPress and OptinMonster will already be synced with GetResponse.
To get this set up, open up your WordPress admin panel and go to the OptinMonster > Settings page. Click on Site Settings. Then, scroll down to where you see Default Integration. Click in the box next to where it says, “Set the default integration to be used for campaigns associated with this site?“
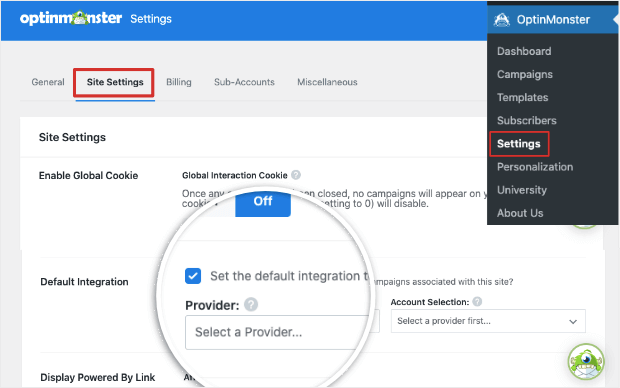
A drop-down many will appear. Choose GetResponse and your account name. Once that is done, hit the Save Changes button.
Now, all future campaigns you create with OptinMonster and WordPress will automatically link to GetResponse.
And that’s it for today! We hope this guide to integrating GetResponse with WordPress was helpful.
If you want to take your lead generation efforts to the next level, check out some of our other resources:
- 69 Highly Effective Lead Magnet Ideas to Grow Your Email List (Updated)
- 40 Exit Popup Hacks and Examples to Grow Your Email List
- How to Create a Lightbox Popup + 6 Ways Popups Win You More Leads
Want to boost email subscription on your WordPress site? Get started with OptinMonster today!



Add a Comment