TL;DR:
Steps to Follow:
- Create a Campaign: Choose a campaign type (e.g., popup, floating bar) and a template from OptinMonster’s library.
- Design Your Popup: Use the drag-and-drop editor to customize text, images, and design elements.
- Set Display Rules: Target visitors with rules like Exit Intent® or Page-Level Targeting to show popups at the right time.
- Integrate With Campaign Monitor: Connect your Campaign Monitor account to automatically send leads to your email list.
- Publish Your Popup: Change the campaign’s status to “Publish” and confirm its activation on your site.
With OptinMonster, you can create and publish stunning popups in minutes, helping you grow your email list and boost conversions effortlessly. Start today with a risk-free OptinMonster account!
Do you want to create a Campaign Monitor popup, but you’re not sure how to get started?
Campaign Monitor is a popular email service provider (ESP) on the market. It comes with all the tools you need to create an automated email marketing campaign FAST.
And while it’s a great tool for sending your emails, it won’t be the best option for growing your email list.
That’s why, in today’s post, we’re going to teach you how to create a Campaign Monitor popup.
This is a quick and easy way to get more leads to subscribe to your list in less time.
In fact, here’s an example of the popup we built for today’s article:

This took less than 5 minutes to make from start to finish.
Ready to begin? Let’s dive into the tutorial.
How to Create a Campaign Monitor Popup
For this tutorial, we’ll make our Campaign Monitor popup with OptinMonster:
OptinMonster is the world’s #1 lead conversion toolkit. It allows you to create stunning optin campaigns like popups, floating bars, fullscreen welcome mats, and much more.
Plus, it doesn’t require any coding experience to use.
That’s because, as you’ll see, OptinMonster has a codeless drag and drop visual builder. This lets you freely design your campaigns without getting stuck on technical configurations.
Instead, everything can be set up, automated, and targeted to your audience in minutes.
So, before we get started, you’ll need to create an OptinMonster account to follow along.
You can get your 100% risk-free OptinMonster account by clicking below:
From there, it’s easy to connect your website.
If you’re not using WordPress, we highly recommend checking out this tutorial: How to Connect OptinMonster to ANY Website.
And for WordPress users, things are even easier. You can install OptinMonster just like you’d install any plugin on your site.
For a breakdown on how to do that, check out this helpful resource: How to Install the OptinMonster WordPress Plugin.
Once you’ve connected OptinMonster, you’ll be ready to build your Campaign Monitor popup.
Step 1: Create a New Campaign
First, you will need to log into your OptinMonster account.
From your dashboard, select Create New Campaign.
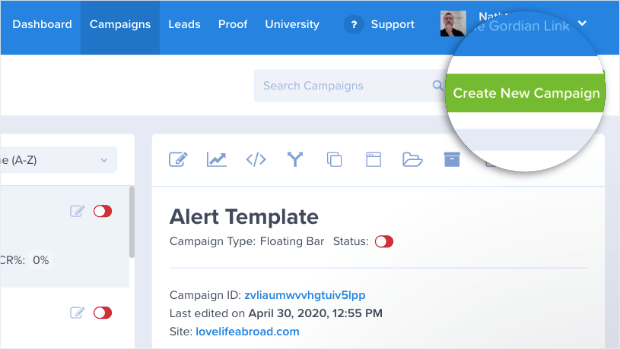
Now you’ll need to select your campaign type and template.
OptinMonster offers several optin campaigns to choose from, including:
- Lightbox popups
- Floating bars
- Fullscreen welcome mats
- Gamified spin-to-win wheels
- And much more…
For today’s tutorial, we’ll select a Popup campaign.
Then you can hover the mouse over the template selection at the bottom to either Use Template or Preview the template first:
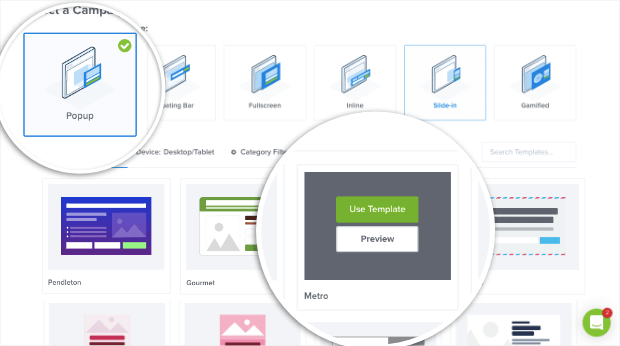
This is a huge advantage because these templates were specifically designed to save you time, energy, and headaches in the campaign creation process.
Each template is fully responsive and mobile-friendly.
In fact, many OptinMonster users choose not to make ANY changes to the template. Instead, they simply integrate their email provider to send leads to their Campaign Monitor list.
But we’ll get to that in a moment. Now, we’ll need to select our template.
Today, we will go with the Shopping template. It’s the perfect template for the discount offer we’re presenting to our visitors.

Now, you need to name your campaign and click Start Building to enter the builder.
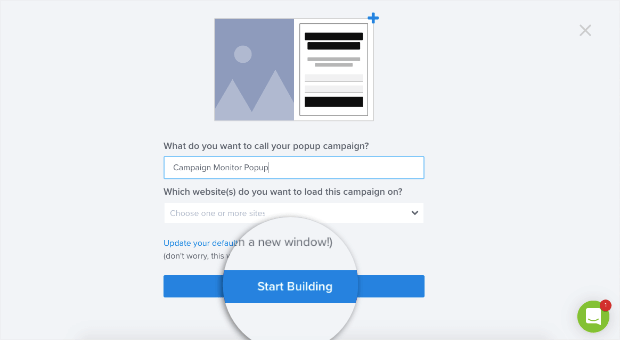
In the next step, you’ll be able to customize your template if needed.
Step 2: Design TotalSend Popup
You’ll now be in the OptinMonster editor.
And customizing your popup in here is super simple. You can change anything about your popup, like the colors, images, and copy.
Even if you have zero design skills, you’ll be able to build a professional-looking popup in minutes.
All you need to do is click on any part of the popup to edit it. That’s all there is to it.
So, to change the text, simply click on it.
Using the inline text editor, you can tweak the:
- Copy
- Font
- Font size
- Text color
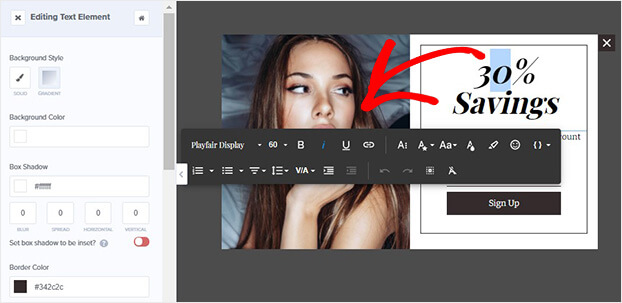
Plus, you can make those changes directly on the template in your OptinMonster editor.
And modifying elements, like the image, is just as easy.
For this template, for example, click on the image to pull up the editing tools on the left-hand side menu:
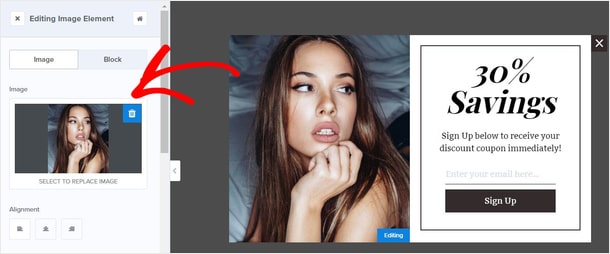
You’ll have the option to select an image you’ve used in the past or upload a new one from your computer.
But what if you want to add other features to your popup, like:
- Video
- Image
- Text
- Optin fields
- And more…
For that, you can use the codeless drag and drop builder to make changes in seconds.
That’s because each feature offered by OptinMonster comes as a Block. These blocks fit neatly into place so you don’t need to be a professional designer to create stunning campaigns.
Simply click Add Blocks at the top of your editor:

Now select which feature you’d like to add to your campaign. Then, drag and drop this block where you’d like it to appear in your Campaign Monitor popup:
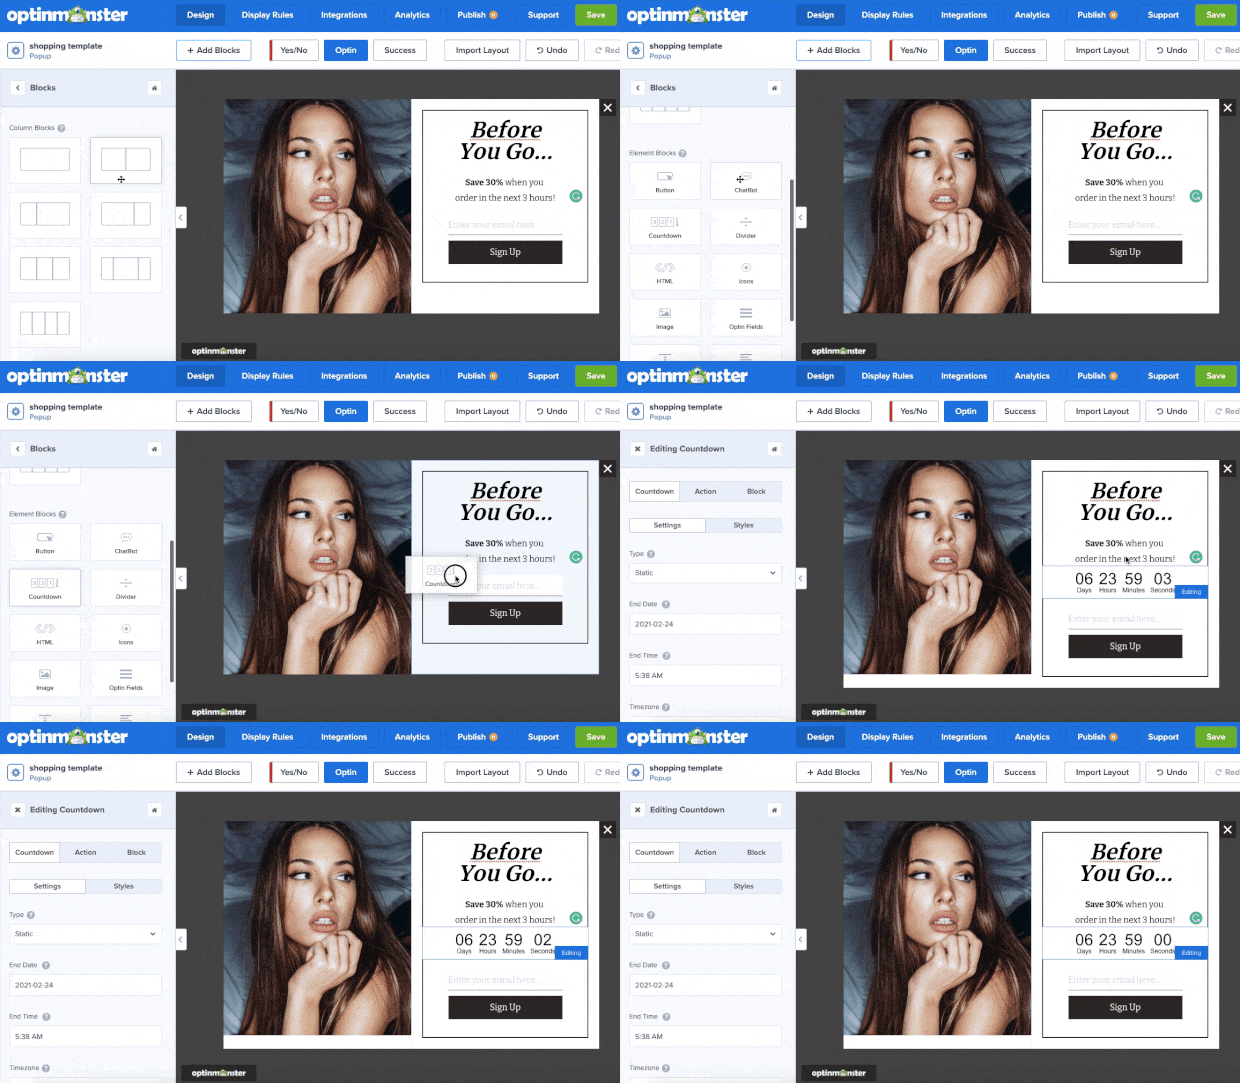
We’ll stop there for now.
But know that you can modify anything about the template, from the background color to the size of your images. And you can do all that in just a few clicks.
At this point, we’re ready to decide when and where we want to show our Campaign Monitor popup.
Step 3: Display Your Campaign Monitor Popup
With OptinMonster, you can finetune your targeting, so you’re showing the right message, to the right people, and at just the right times in their customer journey.
Imagine your site’s visitor has spent 60 seconds looking at a particular product or blog post.
Right at that moment, your popup appears offering a discount for the same product they’re looking at.
Or create a popup specifically designed to recapture visitors who are abandoning your website.
As a user’s mouse begins to leave their browser, your Campaign Monitor popup appears and gets them re-engaged.
This is actually the same strategy Neil Strauss used to increase conversions by 125%.
These are small glimpses into the types of personalization you can do with OptinMonster.
To get started, click Display Rules at the top of your OptinMonster dashboard:
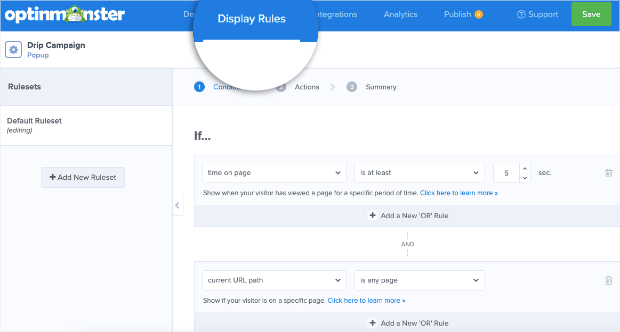
Today, we will take a closer look at two display rules:
- Exit Intent®
- Page Targeting
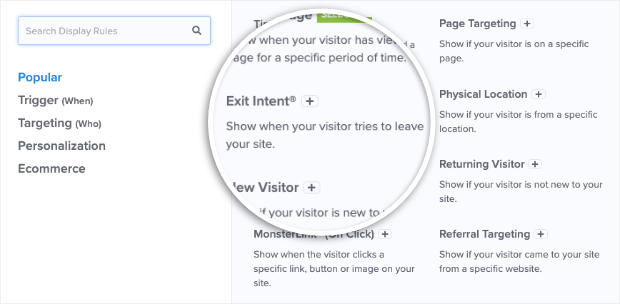
Find and select Exit Intent®.
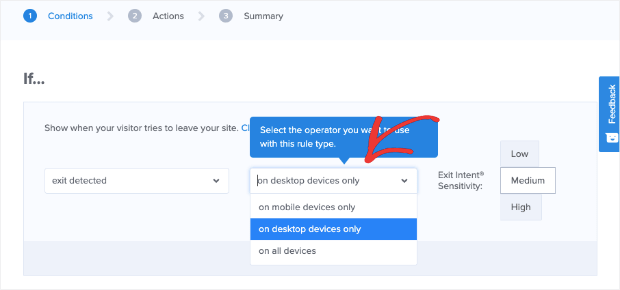
Then, choose which devices you want to show your popup.
And finally, you can set your sensitive level to:
- Low
- Medium
- High
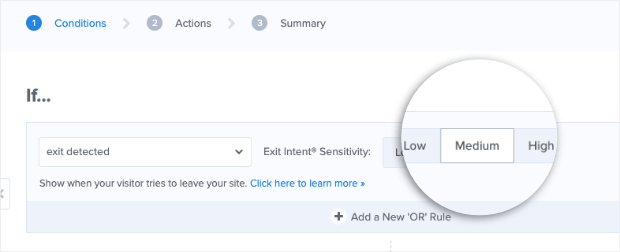
This will determine how quickly your Campaign Monitor popup appears as a user scrolls their mouse away from the browser window.
Keep in mind that if you’re targeting mobile devices, the sensitivity level changes when your popup appears.
Low and Medium will trigger your campaign to display when a user scrolls back up the page. And High sensitivity will make your popup show when a user hits the “Back” button from their mobile device.
Once you’ve configured these settings, we’ll move to our second display rule: Page-Level Targeting.
Page Targeting
OptinMonster’s Page-Level Targeting lets you get super specific about where to show your popup.
In fact, Brian Tracy used page targeting and content upgrades to increase his list by 150%.
From the Display Rules tab, select Page Targeting.

Then, set the page where you want your popup to appear:
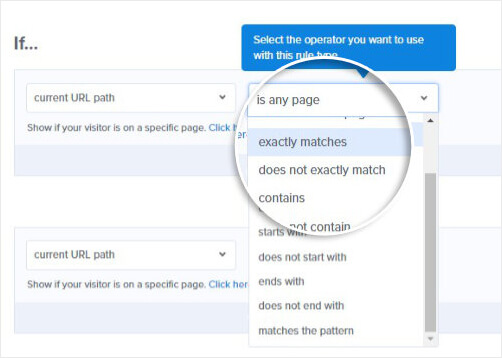
You can make your campaign appear on multiple pages, too. Click + And to add another rule:
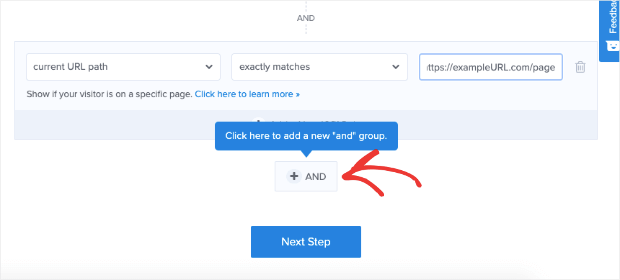
Then repeat the steps above to add another custom URL to your display rules.
In this way, you can personalize all of your site’s offers to specific pages or posts. This leads to higher conversions as you personalize your message with the on-page content people are viewing.
Before moving on, we’ll need to set up OptinMonster with Campaign Monitor.
Step 4: Integrate With Campaign Monitor
In this step, we’ll connect OptinMonster to Campaign Monitor.
Head over to Integrations at the top of the editor.
Next, select Add Integration from the right-hand side menu:
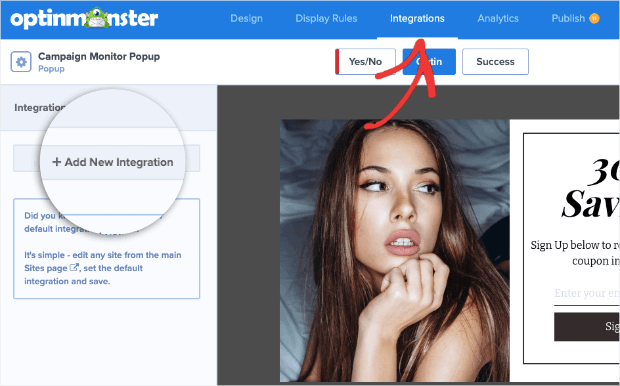
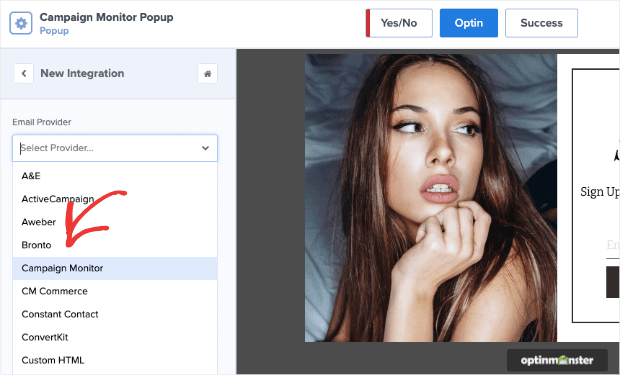
Select Campaign Monitor from the drop-down menu:
Now you’ll be able to click Register With Campaign Monitor:
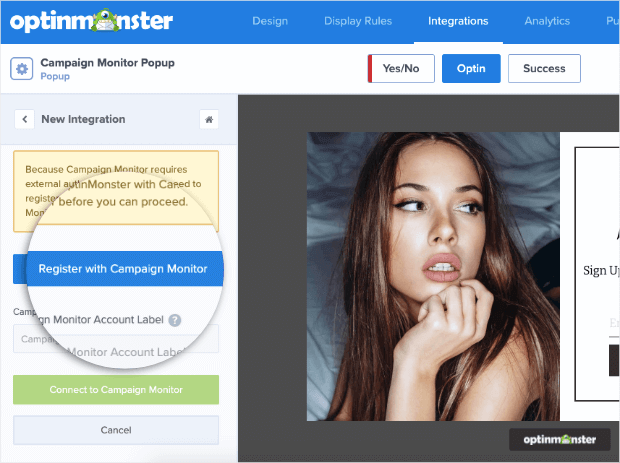
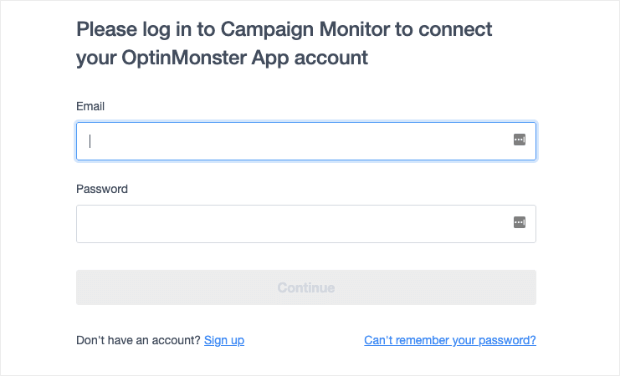
A separate window will appear prompting you to log into your Campaign Monitor account:
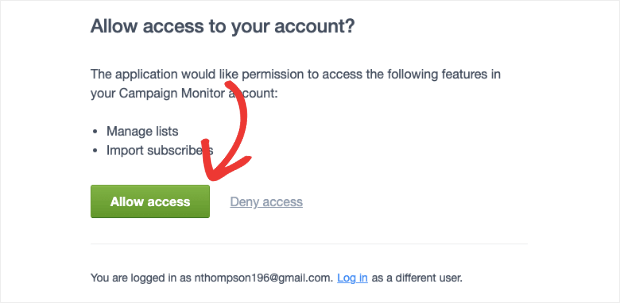
When your login details have been accepted, click Allow Access:
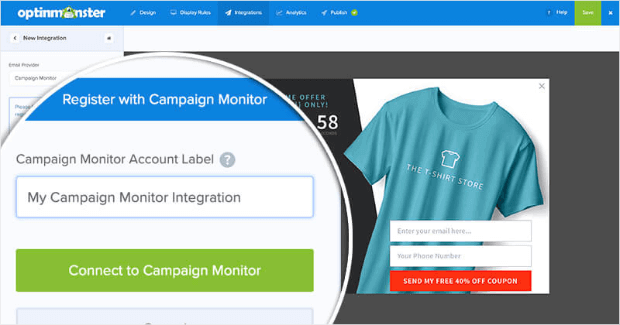
Return to your OptinMonster dashboard and click Connect to Campaign Monitor:
Now your new leads will go directly to your Campaign Monitor mailing list.
This allows you to automate your email marketing strategy. Your new popup campaign will collect more email addresses.
Then those leads will be sent through to your automated email series through Campaign Monitor.
Over time, you can refine the process to optimize for conversions and drive more revenue from your mailing list.
But first, there’s one last step: publishing your campaign.
Step 5: Publish Your Campaign Monitor Popup
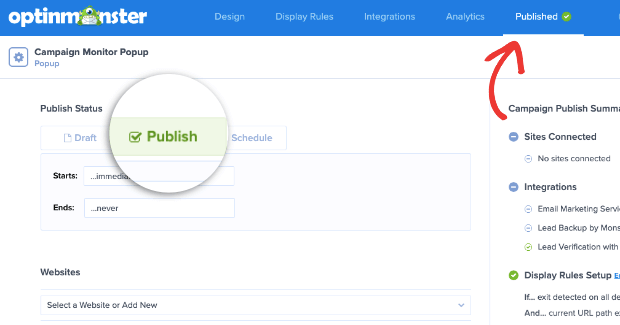
The last step is to publish your Campaign Monitor popup. You can do this by going to the Publish tab in your OptinMonster account.
Then switch the status of your post from Draft to Publish:
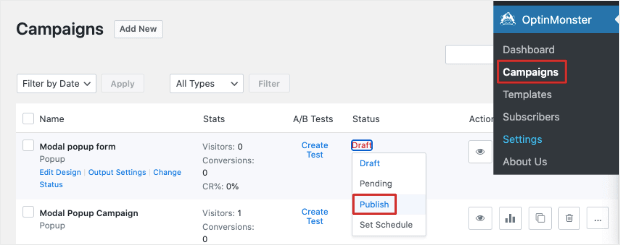
If you’re using WordPress, we also recommend going to OptinMonster Campaigns from your admin menu.
Then confirming that your popup’s status has been changed from Draft to Publish:
And now you officially have your Campaign Monitor popup ready to collect your new leads.
We hope you enjoyed this tutorial. If you did, you’ll definitely want to check out the following resources:
- Email Marketing Made Simple: A Step by Step Guide
- 69 Highly Effective Lead Magnet Ideas to Grow Your Email List (Updated)
- How to Create Mobile Optins That Get More Leads and Grow Your List
These articles have even more ideas on how to improve your email marketing strategy to generate more sales for your business.



Add a Comment