Are you looking for ways to increase communication with customers on your Shopify store? Or a way to nurture leads and boost sales in real-time?
If so, then you may want to add a ManyChat chatbot to your Shopify store.
Adding a live chat feature is a great way to improve user experience (UX) while growing your business. It lets you speak with customers about their issues in real-time or make targeted product suggestions based on user behavior.
This ultimately leads to higher profits for your company.
That’s why, in today’s post, we’ll teach you 2 methods for adding a ManyChat chatbot to Shopify.
- Adding ManyChat directly to your Shopify store
- Integrating ManyChat with OptinMonster for higher conversions
Here’s a quick glimpse of the Shopify popup we’ll build in today’s demo that integrates a ManyChat chatbot:
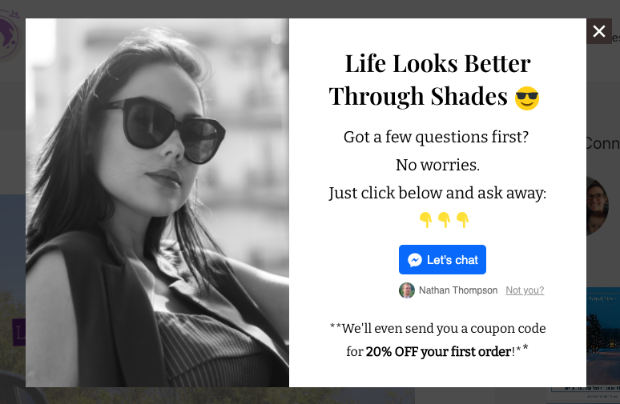
But before we get to all that, let’s introduce you to what ManyChat is and why you’d want to use it.
What Is ManyChat and Why Use It?
ManyChat is a chatbot that allows business owners to communicate more efficiently with their customers:
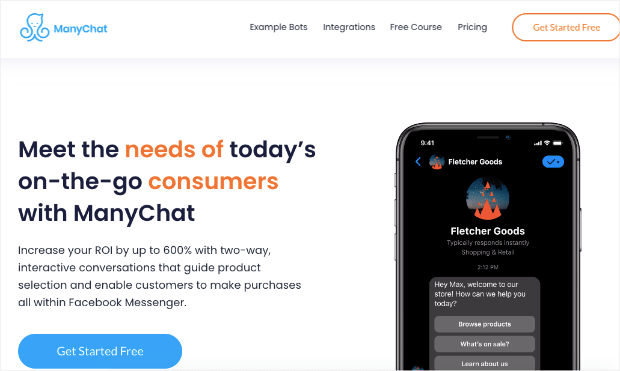
ManyChat goes beyond simply adding a live chat feature to your website. You can communicate with customers via Facebook, email, and SMS too.
This allows you to accomplish many of your marketing goals, including:
- Increase sales
- Distribute coupons
- Take reservations
- Create custom quotes
And much more. Plus, ManyChat lets you create systems for putting everything on autopilot based on the questions your customers ask.
That means you don’t need to hire hundreds of support agents to field repetitive questions. And you also don’t have to spend hours of your own time troubleshooting common problems.
Instead, you can create automated responses to help customers get where they need. And though there are tons of benefits of using ManyChat, here are the top 3:
1) Improve user experience (UX): When users have a problem, they don’t just want to get answers. They want to get answers fast.
ManyChat will help you solve your customer’s problems or questions more quickly. That leads to happier customers, which, in turn, leads to more spending on your website.
2) Nurture relationships with clients: Just like relationships in your personal life, the business-client relationship takes effort. Most consumers need to be exposed to your brand several times before making a purchase.
You can use your live chat feature to engage your audience and be proactive with your communication. Then, you can offer discounts or make targeted product suggestions to build a relationship with your customer.
The more confident a consumer feels about your brand, the more likely they’ll be to repeat business with you.
3) Sell products: You can use your ManyChat chatbot to make product suggestions, remind people they have items left in their cart (to reduce shopping cart abandonment), and give out coupons.
All of these strategies are geared to getting you more sales and generating more revenue through your Shopify store.
Now, let’s get into how to add ManyChat chatbots to Shopify stores online. As you’ll see, the process couldn’t be simpler!
How to Add ManyChat Chatbot to Shopify
Today, we’ll teach you 2 ways you can add ManyChat to your Shopify store:
- Installing ManyChat directly to Shopify
- Integrating ManyChat with OptinMonster for more advanced targeting
But before we dive into the tutorial, let’s quickly discuss why we’re adding the second method.
In other words, if ManyChat has an overlay widget that works like a popup, why would we show you how to integrate it with OptinMonster?
That’s easy.
It’s because OptinMonster gives you more targeting rules and triggers to capture your audience’s attention, start meaningful conversations, and boost conversions.
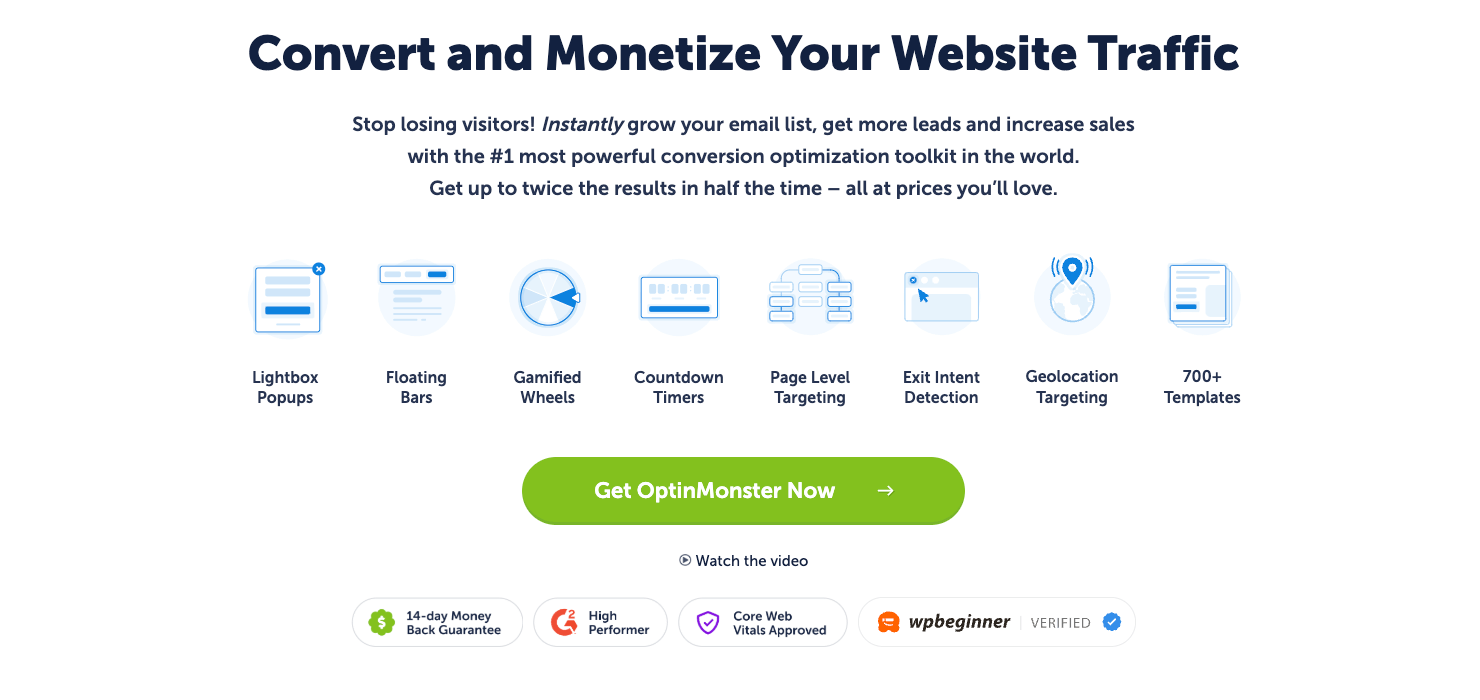
OptinMonster is the #1 lead generation tool in the world, and it’s by far the best way to get the right messages to your Shopify customers.
OptinMonster makes it easy to create and design stunning campaigns like popups, floating bars, fullscreen welcome mats, and more. These campaigns are sure to grab your audience’s attention, and they don’t require any coding skills to get setup.
When you add powerful integrations like ManyChat, you can leverage OptinMonster’s advanced targeting rules to display your campaigns exactly where, when, and to whom you want.
That way, you can start meaningful conversations with your customers to personalize their experience. In the end, that leads to higher conversions across your site and more sales for you.
Now let’s dive into our first method for adding ManyChat to your Shopify store.
Method 1: Install ManyChat on Shopify
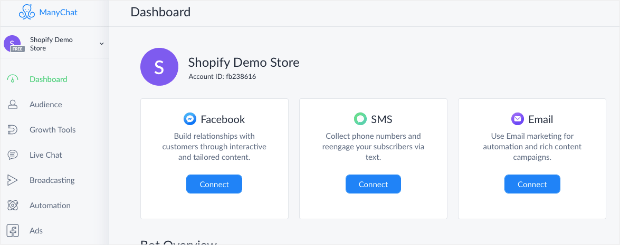
Step 1: First, log into your ManyChat dashboard:
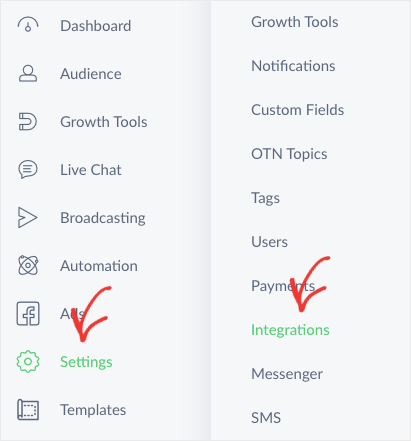
Step 2: In the left-hand side menu, locate and click Settings » Integrations:
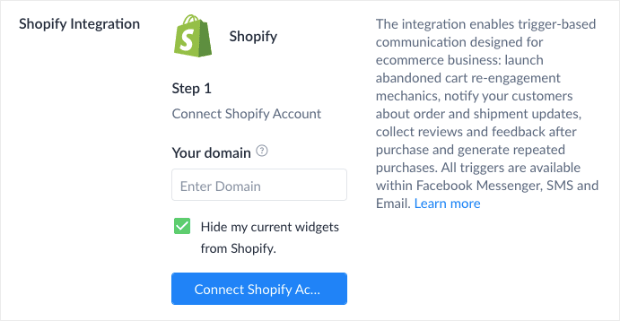
Scroll down and locate the Shopify integration. Enter your domain name and click Connect to Shopify Account:
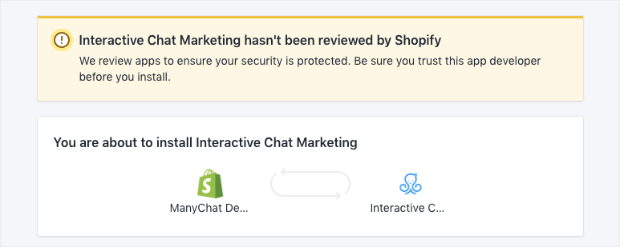
This will redirect you to the app installation page on Shopify:
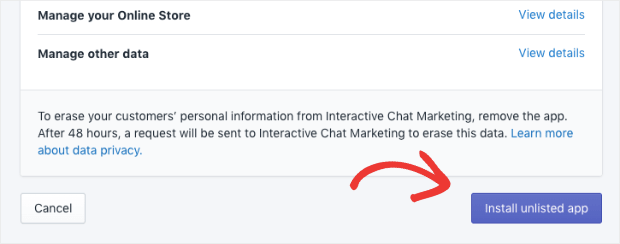
Step 3: Click the Install Unlisted App button:
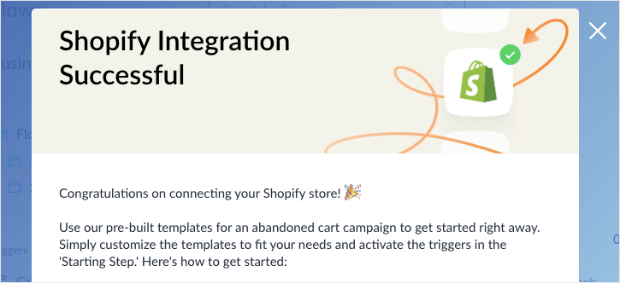
And that’s it! You should now get a confirmation message showing that your Shopify store has successfully integrated with ManyChat:
Now, let’s look at how we can kick things up a notch to combine ManyChat’s awesome chat features with OptinMonster’s powerful targeting rules.
Method 2: Integrating With OptinMonster
Step One: Create an Embeddable Widget With ManyChat
When you use OptinMonster to display your ManyChat chatbot, you’ll need to head back to your ManyChat dashboard. That’s because we’ll need a specific type of widget to integrate the chatbot with OptinMonster.
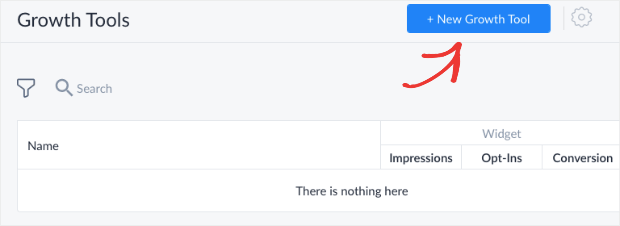
So head over to your ManyChat dashboard and click New Growth Tool:
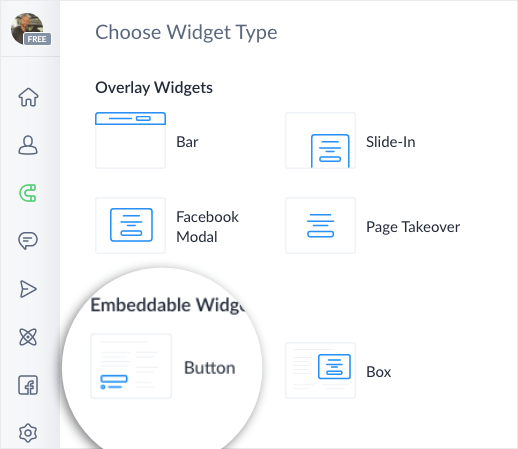
Next, it’s time to choose your widget type. For this tutorial, we’ll need to use a Button:
Then you can style your ManyChat chatbot to look and say what you want. When you’re finished, you’ll see instructions for setting up your widget. This will include an embed code that we’ll need for later:
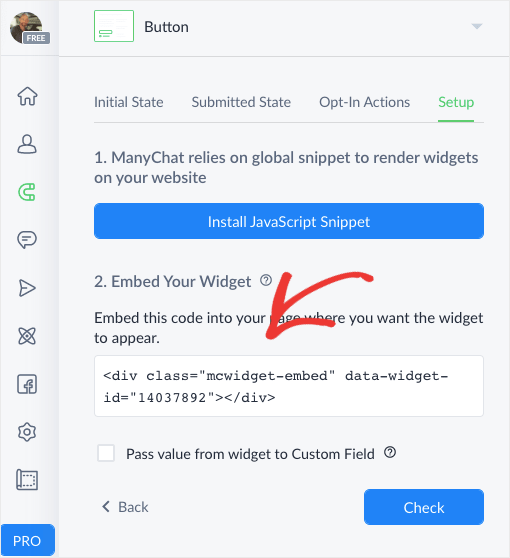
This embed code contains your Widget ID, which is something we’ll need to integrate ManyChat with OptinMonster. So you’ll definitely want to leave this tab open.
Right now, we’ll need to switch gears and head back to our OptinMonster dashboard to create a Shopify popup.
Step Two: Create a Popup for Shopify
If you don’t already have an OptinMonster account, no worries. You can sign up here risk-free to test things out.
When you’re in your account’s dashboard, click Create New Campaign:
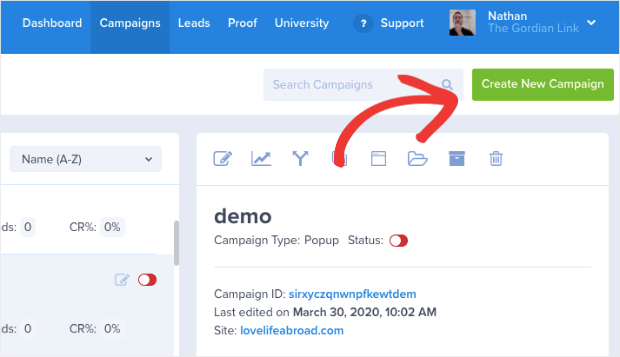
Next, we need to choose the campaign type. OptinMonster has tons of campaigns you can choose from, including:
- Popups
- Floating bars
- Fullscreen welcome mats
- Inline campaigns
- Slide-in scroll boxes
And much more. Today, we’ll select a Popup campaign:

Now it’s time to pick a template to get started:
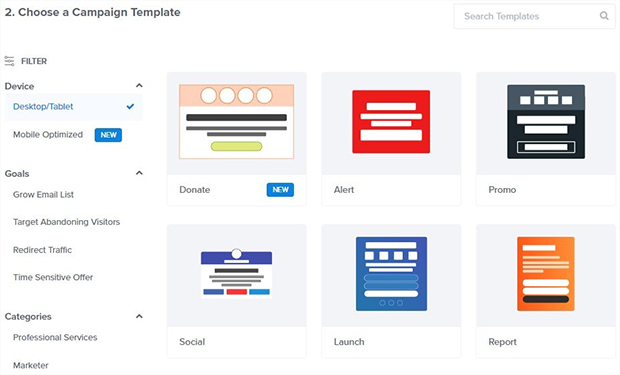
OptinMonster offers over 700 pre-built templates to save you time in the campaign design phase. Plus, all of their templates work great across mobile, tablet, and desktop devices.
That means you can start meaningful and personalized conversations with customers regardless of the device they’re using.
Another thing to keep in mind is that you can also prioritize campaigns for mobile users with our Mobile Optimized template filter:
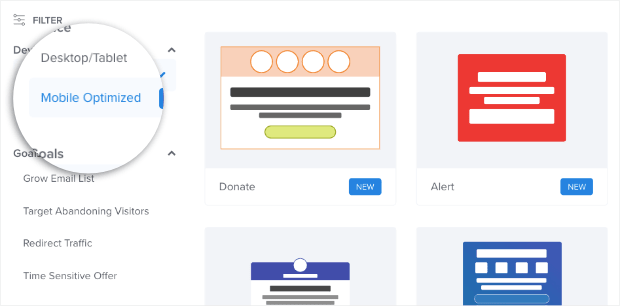
This lets you have 100% control over how your campaigns appear across devices.
For today’s tutorial, we’ll go with the Basic template:

All that’s left is to name your campaign, assign it to your website, and click Start Building:
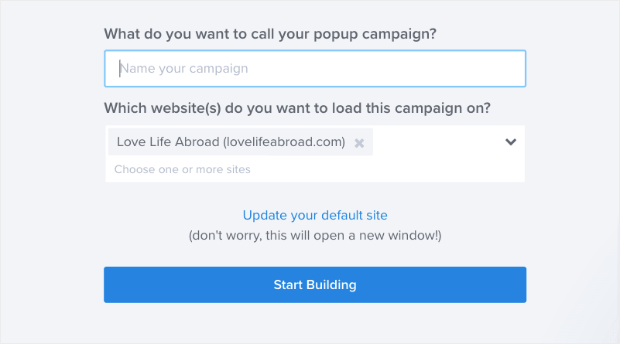
Then you’re ready to add ManyChat to your Shopify store with OptinMonster.
Step Two: Integrate ManyChat in Your Popup
The next step is to create your Shopify popup and integrate ManyChat.
Today, we won’t be getting into the different ways you can customize your Shopify popup. Frankly, there are too many design options to cover for our purposes here.
That said, if you’ve never built a campaign with OptinMonster before, no worries. It’s incredibly easy.
There’s a drag and drop editor to make sure you can add new features even if you don’t have any technical knowledge or coding skills. And our inline text editor allows you to quickly change your messaging, font family, size, color, and more.
For more help, check out this post: LightBox Popups for Shopify: How to Make Them Boost Your Sales.
That post will have everything you need to teach you how to make the perfect Shopify popup for your ManyChat chatbot.
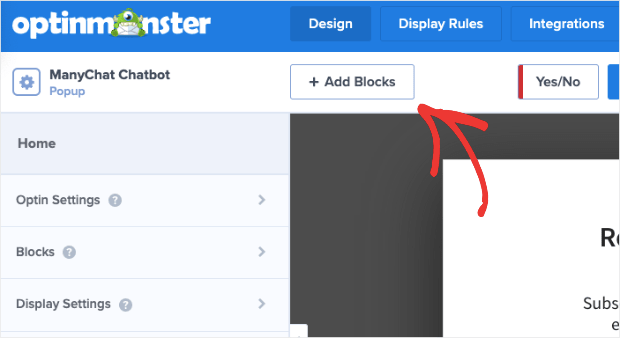
Once you’ve designed your popup, you’ll need to add the ManyChat chatbot feature. At the top of your editor menu, select + Add Blocks:
Scroll down until you find the ChatBot block:
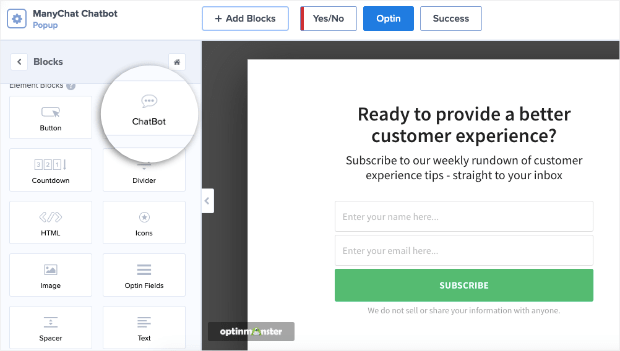
Then drag and drop it into your popup:

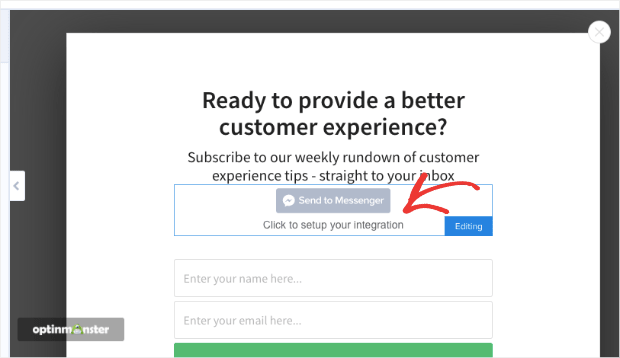
Next, click on Setup Your Integration where your new block was just added:
In the left-hand side menu, you’ll see that ManyChat appears as the default chatbot integration. Now you’ll need 2 pieces of information:
- Facebook ID
- Widget ID
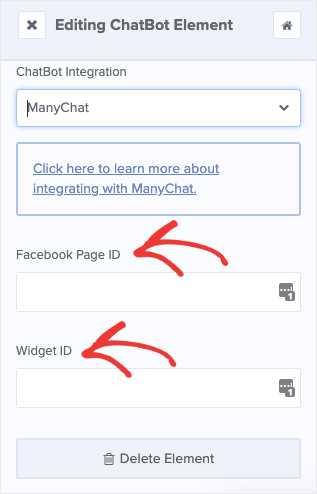
This is why we left our ManyChat dashboard tab open from earlier. Head back over and find the section Embed Your Widget that we saw from before. The embed code will have your Widget ID in the form of a number:
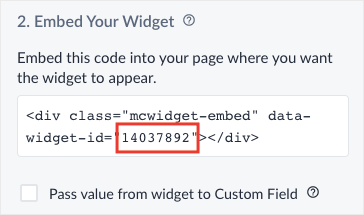
Copy and paste the Widget ID into your OptinMonster dashboard. Then you’ll need your Facebook ID.
For that, click Install JavaScript Snippet. Then click through to Install ManyChat Snippet. The number in your widget’s URL is your Facebook ID:
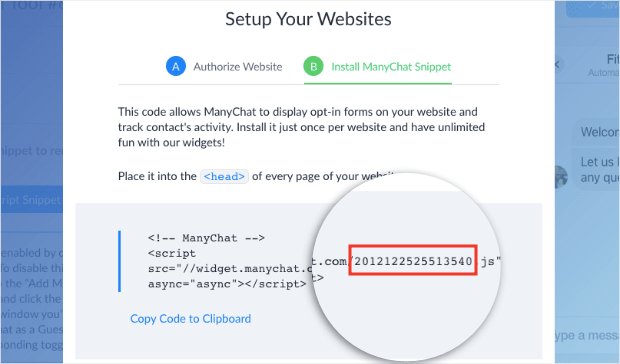
And that’s it! Your ManyChat chatbot is now integrated with your Shopify popup. Here’s an example of what that might look like:

And now we’re ready for the most important part: setting your display rules to target your Shopify popup to the right people and at the right time in their customer journey.
Step Three: Set Your Targeting Rules and Triggers
Now we’re going to configure our Shopify popup display rules. Click Display Rules at the top of your editor menu:

OptinMonster has 2 types of display rules:
- Targets
- Triggers
Targets use a user’s demographic information to determine if a popup will appear. This would be things like what device they’re using, where they’re located, what kind of content they’re looking at, and much more.
So imagine that a customer is browsing a specific product page but hasn’t added it to their cart yet. You could create a popup for that specific page with a personalized message to engage them in conversation.
Then you’re able to begin the conversation by discussing the exact product your customer is already interested in. This level of personalization is guaranteed to boost sales.
But OptinMonster offers another type of display rule in the form of triggers.
Triggers rely on your user’s behavior to determine if your popup will be displayed. That would be like how far down a person scrolls, how long they’ve been on your site, or if they’ve clicked a link.
One of the most powerful examples of this is OptinMonster’s Exit-Intent® Technology. With an exit-intent popup, you can recover people as they are abandoning your site.
This is important because most customers who leave never come back. But if you can start a conversation with someone as they’re actively exiting your Shopify store, you can recover tons of leads.
That’s the exact strategy that Fastrack uses to recover 53% of their abandoning visitors.
And while you’ll need to determine the right targets and triggers or your Shopify popup, rest assured that OptinMonster has you covered.
That’s because OptinMonster has tons of advanced display rules created specifically for Shopify stores. Simply click Ecommerce from your display rules menu to pull them up:
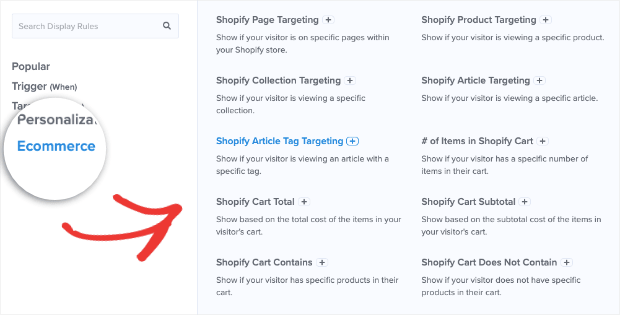
With these advanced targeting rules, you can automatically display your popups when visitors:
- Looked at certain pages on your Shopify store
- Added or removed items in their shopping cart
- Reached a specific shopping cart total
- And much more…
With OptinMonster’s eCommerce display rules, you don’t need to have any coding or technical knowledge to create highly targeted popup campaigns.
Again, you’ll need to determine the right display rules for your ManyChat popup. It will depend on your goals and your audience.
But with OptinMonster, you can start conversations with the right people at just the right time in their customer journey.
And that’s it! You now have 2 ways to add a ManyChat popup to your Shopify store.
We hope you found this article helpful. If so, you may want to read the following articles to increase conversion rates for your Shopify store:
- Best Shopify Apps to Increase Sales
- Shopify SEO Guide: Your Ultimate Guide to Rank #1
- Shopify Conversion Rate Optimization: How to Make More Sales from Your Current Traffic
- How to Add ManyChat to Your WooCommerce Store
These posts have everything you need to start boosting sales from your Shopify store.
And if it’s your first experience with OptinMonster, you should read this post on how OptinMonster works (including 8 benefits and 12 case studies).
Ready to get started? Sign up for your risk-free OptinMonster account today!




Add a Comment