
Updated Guide: How To Sell Digital Products With WooCommerce (Tutorial + Pro Tips)
Last updated on
by

If you want to start an online business, one of the easiest and fastest ways is to learn how to sell digital products with WooCommerce.
Digital products like audio files, eBooks, templates, stock photos, and even software can be a great stream of revenue. Without the need for inventory or shipping, you can scale your digital product sales more easily than sales of a physical product.
In this article, I’ll show you step-by-step how to sell digital products with WooCommerce, and share some pro tips for increasing your digital product sales.
- How to Sell Digital Products With WooCommerce
- How to Sell More Digital Products
- How to Protect Your Digital Downloads in WooCommerce
How to Sell Digital Products With WooCommerce (Tutorial)
1. Configure Downloadable Product Settings
Navigate to WooCommerce → Settings → Products → Downloadable Products.
- File Download Method: Select Force Downloads to serve files via PHP, enhancing security. Alternatively, X-Accel-Redirect/X-Sendfile can be used if your server supports it for better performance.
- Access Restriction:
- Enable Downloads require login to ensure only registered users can access downloads.
- Enable Grant access to downloadable products after payment to allow immediate access post-payment.
- Filename Protection: Ensure Append a unique string to filename for security is enabled to prevent unauthorized access.
These settings help secure your digital products and streamline the download process for customers.
2. Add a New Digital Product
Go to Products → Add New in your WordPress dashboard.
- Product Title and Description: Enter a clear title and detailed description of your digital product.
- Product Data:
- In the Product Data section, check both Virtual and Downloadable options.
- Under the General tab, set the regular price.
- In the Downloadable files section, click Add File, enter the file name, and upload your digital file or provide the file URL.
- Set Download limit and Download expiry as needed. Leave blank for unlimited access.
- Product Image: Upload a relevant product image to enhance visual appeal.
- Publish: Once all details are filled in, click Publish to make the product live.
This process ensures your digital product is correctly set up for sale.
3. Create Variable Digital Products (Optional)
If offering variations (e.g., different formats or licenses):
- In the Product Data dropdown, select Variable product.
- Navigate to the Attributes tab to add custom attributes (e.g., format: PDF, ePub).
- Move to the Variations tab, click Add Variation, and for each variation:
- Check Downloadable and Virtual.
- Set price and upload the corresponding file.
- Click Save Changes and then Publish.
This setup allows customers to choose from different versions of your digital product.
4. Optimize Checkout for Digital Products
To streamline the checkout process for digital goods:
- Consider using the Digital Download Goods Checkout for WooCommerce plugin.
- This plugin removes unnecessary fields (e.g., shipping address) during checkout when only digital products are in the cart, reducing friction and cart abandonment.
Implementing this can enhance user experience and increase conversion rates.
Now that you have a digital product ready to sell, you can repeat the process for other digital products.
You may also want to consider further customizing your WooCommerce store to match your branding and workflow. There are hundreds of extensions and themes for WooCommerce to help you do that.
A full tutorial on customizing your WooCommerce store is too much to include in this article, but here are some articles on building a custom product page, creating a checkout page popup, and choosing the best WooCommerce theme.
How to Sell More Digital Products
Selling digital products is just another form of eCommerce. Many of the eCommerce optimization strategies originally meant for physical goods apply to digital products as well. Here are some of our favorite tips for boosting your conversion rates and digital product sales.
1. Capture Abandoning Visitors
One of the biggest challenges facing online business owners is cart and site abandonment. This is when visitors leave their shopping cart or your entire website without taking any action.
The good news is that both problems have an easy solution: exit-intent popups.
An exit-intent popup is a campaign that appears as users are navigating out of your website.
Imagine a visitor reaching your digital download product page. They spend a few seconds looking at it but start to leave the page. This triggers a popup to grab their attention and contact information for follow-up emails.
Here’s an example of what an exit-intent popup might look like:

Exit-intent popups have been proven to grow email lists and drastically BOOST sales. But how can you make these campaigns if you’re not very technical?
That’s where OptinMonster comes in:

OptinMonster is the best WordPress lead generation plugin that you can use to build high-converting campaigns FAST.
You start by choosing one of OptinMonster’s many campaign types. These include things like:
- Popups
- Floating bars
- Fullscreen welcome mats
- Slide-in scroll boxes
- Gamified spin-to-win wheels
- And more…
From there, you can select from any of OptinMonster’s 700+ templates:

These are all mobile-friendly and 100% responsive, so you know they’ll look and function great across devices. Plus, we offer dozens of mobile-first templates, which you can pair with our Device-Based Targeting.
Then, your campaign will appear in the OptinMonster editor. This is where you can add new features or change the text without any coding experience.
That’s because OptinMonster has a drag-and-drop editor that makes modifications EASY:

Once your popup looks the way you want it to, you can determine precisely who will see your campaign and when. You can do this in just a few clicks with our display rules.

To create an exit popup, you’ll choose Exit-Intent® in the display rules Our Exit-Intent® technology lets you show your best offers right as users are about to leave your online store. Exit popups can help you win a sale or collect a shopper’s email address, so you can continue nurturing them through email marketing.
Once you’ve selected Exit-Intent®, you’ll set the sensitivy level for the feature and save:

OptinMonster also integrates seamlessly with WooCommerce, so you can target your campaigns based on the product page your shopper is viewing, their cart total, and more.
Once you have your display setting exactly how you want them, simply publish your campaign and start seeing results!
Shockbyte used OptinMonster’s Exit-Intent® popups to double their sales and grow their business 10x!
We’re confident that you can see similar results by clicking below and starting your 100% risk-free OptinMonster account today:
Our conversion experts will design 1 free campaign for you to get maximum results – absolutely FREE!
2. Incentivize Your Audience
As a business owner, you have specific actions you want your customers to take. But they will only take the action if they feel like they get something out of it.
This means you need to incentivize your audience to take action. This can be done in a few ways, but the most effective is with a sale or discount on your downloadable product.
As we mentioned earlier, you can quickly create and schedule sale prices for all of your digital goods directly in WooCommerce. So an incentive could be as simple as a popup reminding them to check out the sale prices.
You can also use Advanced Coupons for WooCommerce to extend your coupon features.
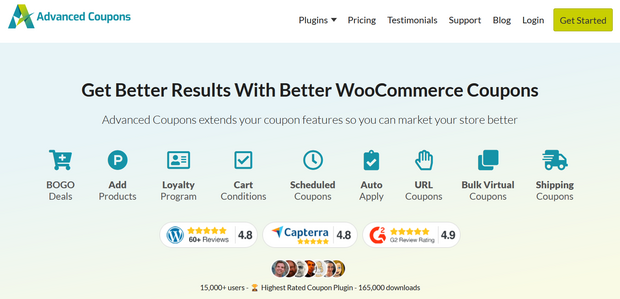
Advanced Coupons lets you give your customers more exciting offers like BOGO deals, loyalty program points, URL coupons, auto-apply coupons, and much more. There’s also a free version of the plugin with limited features.
You can use OptinMonster’s many campaigns to promote these incentives across your website.
Imagine, for example, showing a sale for your digital product in a floating bar on key pages across your site:
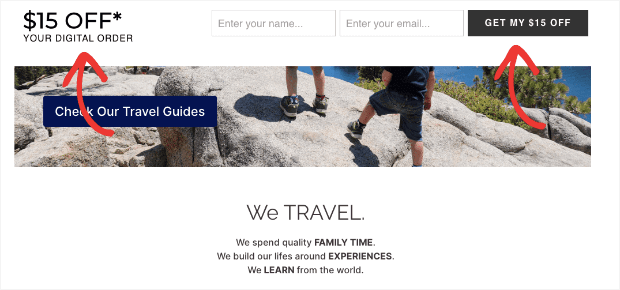
And you also have the ability to target these campaigns to any page on your website.
Or you can let your user’s behavior determine whether or not the campaign will appear. You have 100% control over when, where, and to whom this incentive appears.
As a result, you’ll have a more personalized customer journey and more sales for your WooCommerce digital product.
3. Add Social Proof
It’s no secret that when it comes to marketing, social proof just works.
Online consumers are hardwired to look for signs of social proof to be sure others have tested (and loved) your products.
That’s why you should leverage social proof across your website to increase conversions for your digital downloads.
Social proof can take many forms, including:
- Reviews
- Testimonials
- Social media posts talking about your brand
- Case studies
- And much more…
But the most effective form of social proof comes in the form of a small notification.
These messages looking something like this:
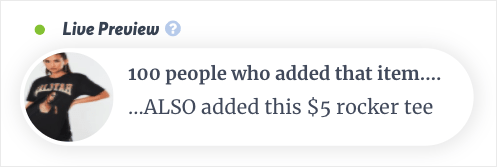
The example above would be for physical products, but you can create the same type of notification for digital downloads, too.
How? You can quickly create social proof notifications with a tool like TrustPulse:

TrustPulse is hands down the best social proof software on the market. It lets anyone create highly effective social proof notifications in minutes.
Plus, there are no technical or coding skills required.
Once you download and activate the TrustPulse plugin, you’ll have immediate access to 4 types of campaigns:
- Recent Activity: Show a live stream of website activity like purchases, registrations, signups, and more.
- On-Fire: Display the number of people taking action on your website in a given period.
- Visitor Analytics: Highlight active interest in your site by showing real page visitors over time.
- Action Message: Show a single static notification to drive more visitors into action.
It’s no surprise that TrustPulse users have seen instant boosts in sales by up to 15%.
Ready to see it in action for yourself? Get started with your 100% risk-free TrustPulse account today!
4. Run an Online Contest
So far, we’ve looked at a few ways you can boost sales from people who are already on your website. But what about getting more people who AREN’T on your website to come visit your product page?
For that, there’s no better solution than running an online contest.
In many cases, you’d want to make the prize something your target audience really wants. So it only makes sense to create a contest around your digital product. Not only will this expand your brand’s presence online, but it will also educate more of your audience on what your product is and why it’s the perfect solution to a problem they face.
And if you use a tool like RafflePress, you can design these contests to get TONS of traction:

RafflePress is the best giveaway and contest builder plugin for WordPress.
RafflePress lets people enter contests with “entry tickets.” But each participant can have multiple entry tickets depending on the actions they perform.
You could, for example, award 1 entry ticket for users who check out your product page. But then you can add 3 entry tickets to people who sign up to your email list.
Now a single participant can have 4 entry tickets which will increase their odds of winning. As you can imagine, this gives people an extra incentive to interact with more of your calls to action (CTAs).
After the contest is over, you’ll have 1 winner. That means you’ll also have:
- 1 solid lead for a testimonial in your hands
- A long email list with warm leads who’ve shown direct interest in your product
From there, you just need to nurture your leads through some email marketing best practices.
Get started with your 100% risk-free RafflePress account today!
5. Leverage Push Notifications
If you aren’t currently using push notifications to reach your audience, then you’re missing out.
Push notifications are small messages that appear on your audience’s browser. But they also stay on their browser until there’s an interaction:
They either need to click to visit your product page or click to close the notification.
Either way, they need to click.
Plus, these messages are easy to subscribe to since your visitors only need to hit an Allow button to sign up. That means they never have to hand over personal details like their name or email address.
Imagine having an audience of thousands that you can instantly share your digital product with.
How can you make that happen? We highly recommend going with a software like PushEngage:

PushEngage is the leading push notification software on the market today.
It has everything you need to target your audience and send high-converting messages. Plus, it comes with all the bells and whistles you’d expect from a premium software such as segmentation, personalization, and automated drip sequences.
Other key features include A/B testing, campaign scheduling, cart abandonment sequences, and much more.
Want to see it in action for yourself? Try out PushEngage 100% risk-free today!
How to Protect Your Digital Downloads in WooCommerce
Once your digital products are live, it’s critical to protect them from unauthorized access or misuse. Here’s how to secure your WooCommerce downloads effectively:
1. Use “Force Downloads” or X-Accel-Redirect
Go to WooCommerce → Settings → Products → Downloadable Products and choose one of these secure methods:
- Force Downloads (most common): Files are served via PHP, hiding the true file path.
- X-Accel-Redirect/X-Sendfile: A faster, server-level option that protects file URLs and improves performance. Requires server support.
Avoid “Redirect only” — this exposes file URLs and makes them easier to share illegally.
2. Set Download Limits & Expiry
In your Product Data → General settings:
- Download Limit: Limit how many times the file can be downloaded (e.g., 3).
- Download Expiry: Restrict how long the link is valid after purchase (e.g., 7 days).
These settings help prevent unauthorized reshares and create urgency for customers.
3. Require Login for Access
In the same settings panel, make sure to:
- Enable “Downloads require login” – this ensures only registered users can access their files.
- Enable “Grant access after payment” – avoids delays in delivering paid content.
4. Use License Keys or File Watermarking (Advanced)
For premium content or software:
- Use plugins like WooCommerce Software Add-On or License Manager for WooCommerce to assign license keys per purchase.
- For PDFs, consider watermarking with the customer’s email or order ID using plugins like PDF Watermark.
Start Selling Digital Products With WooCommerce
Now you know how to sell digital products with WooCommerce.
Digital products can be a scalable and sustainable revenue generator for your business. WooCommerce is a great solution for selling digital products, whether you also sell physical products or not.
Want to learn more about selling digital products? Here are some resources to help:
- How to Sell Digital Products Online (5 Proven Tips)
- How to Launch a Product: 14-Step Checklist for Your Next Product Launch
- How to Market Digital Products: 11 Proven Strategies
Frequently Asked Questions About Selling Digital Downloads in WooCommerce
1. How do I make a product downloadable in WooCommerce?
To create a downloadable product, go to Products → Add New, check both Virtual and Downloadable, then upload your file under the “Downloadable files” section. You can set limits and expiry dates there too.
2. Can I sell different versions of the same file (e.g. PDF and ePub)?
Yes. Use Variable Product settings in WooCommerce to offer different formats. Create a product attribute (like “Format”) and assign variations for each file type.
3. How do I prevent customers from sharing the download link?
Use the “Force Downloads” method and enable login-required settings in WooCommerce → Settings → Products → Downloadable Products. Also, consider adding watermarks or license keys for added protection.
4. Why can’t my customer access their download?
There are a few common causes:
- The order status must be Completed for access to be granted.
- The product must be marked as Downloadable.
- Ensure you’ve uploaded a valid file URL or media attachment.
- Downloads require user login (check if the buyer checked out as guest).
5. What plugins help manage digital product security?
Here are a few top tools:
- WooCommerce Software Add-On – for managing license keys.
- License Manager for WooCommerce – for tracking and revoking access.
- PDF Watermark – for embedding buyer info or branding into files.
6. How do I track digital download activity?
By default, WooCommerce logs the number of times each customer has downloaded a file. For more advanced tracking, use extensions like:
- WooCommerce Customer History
- Download Monitor
Disclosure: Our content is reader-supported. This means if you click on some of our links, then we may earn a commission. We only recommend products that we believe will add value to our readers.
4 responses to “Updated Guide: How To Sell Digital Products With WooCommerce (Tutorial + Pro Tips)”
-

Hey Jennifer, great explanation. We will check that out again.
I have an additional question: we do sell print books in the very same woocommerce store: how could I make sure, that ebook buyers need to pay via Paypal, whereas all the other printed products could be paid with bankwire / transfer later on?
-

Great question, Claudia! You can restrict payment methods based on product types, which would make sense to do if your digital products are priced lower than the print books and you’d like to minimize fees to preserve your margins. You may need a separate plugin or be comfortable modifying the function.php post. Here’s a post that might help: https://passwordprotectwp.com/restrict-woocommerce-payment-methods-product-types/
-
-
Hello,
When selling WP plugins and release a new version, how do you perform automatic updates in your customers ?-
Your customers have to enable automate updates. You can recommend to your customers that they enable them, and link them to this article for instructions: https://www.wpbeginner.com/plugins/how-to-enable-automatic-updates-for-wordpress-plugins/
-


-01 - OptinMonster")


Add a Comment