Do you want to learn how to schedule a popup in WordPress in less than 10 minutes?
Popups are one of the most effective lead generation tools in 2021.
You can find popups practically everywhere on the internet. And the big reason for this is that they are really effective.
Popups have the potential to boost conversions and give huge benefits to any business. The success of a popup campaign is often determined by how well you schedule it.
That’s why in this article, we’ll demonstrate how to easily create an amazing popup campaign and schedule it in WordPress.
But first, let’s help you understand the true benefits of scheduling a popup campaign.
Why Schedule a Popup in WordPress?
Popups are a proven method for helping brands get more leads, subscribers, and sales.
Scheduling these campaigns is one of the easiest ways to increase your site’s overall conversions. That’s because it allows you to connect with customers at exactly the right time in their customer journey.
Imagine this: you’ve just read a blog post on how to grow your email list. As you’re scrolling halfway through, a popup appears inviting you to join a webinar on how to boost subscribers.
This is the perfect time for you to see that popup because it’s presenting a solution to the problem you’re actively trying to solve.
As a result, you’d be much more likely to sign up for that webinar.
The same logic applies to YOUR audience, too.
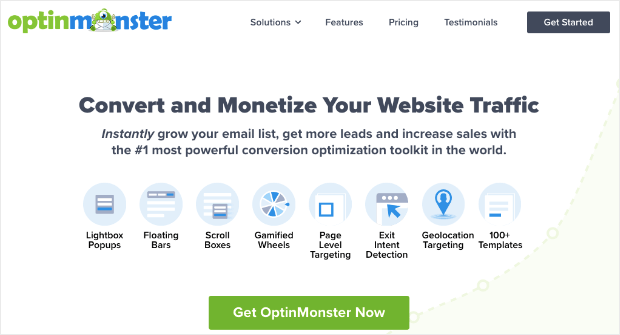
The good news is that you can display time-specific deals and offers by scheduling popup campaigns with OptinMonster.
OptinMonster is hands down the best campaign scheduling tool at your disposal. It helps you create stunning popup campaigns and schedule them in WordPress in less than 10 minutes.
In fact, this tool helps you schedule a campaign based on the following:
- Audience behavior
- Demographics
- Time
- Source
- Actions on your site
The best part is that OptinMonster comes with 50+ eye-catching prebuilt templates. It also lets you choose different high-converting campaign types such as floating bars, lightbox popups, full-screen welcome mats, and more.
We’ve seen OptinMonster’s customers using the campaign scheduling feature to deliver timely and relevant content to their users.
For example, KnivesShipFree.com made $10,118.20 on the first day of launching a new product by using this advanced campaign scheduling feature.
Ready to see it in action for yourself? Click below to start your 100% risk-free OptinMonster account right now:
Otherwise, keep reading to learn more about how you can quickly and easily use OptinMonster to schedule a popup in WordPress.
How to Schedule a Popup in WordPress
Step 1: Install OptinMonster
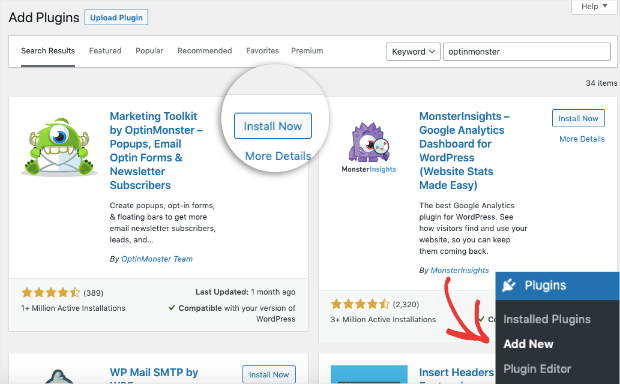
The first thing you need to do is to add the OptinMonster plugin to your WordPress site.
To get started, pick your OptinMonster subscription and sign up for your 100% risk-free account.
From there, you can easily add the OptinMonster plugin to your WordPress site like you’d add any other plugin.
Just click Plugins » Add New from your WordPress dashboard. Then search for OptinMonster in the repository. When you’ve found OptinMonster, click Install Now:
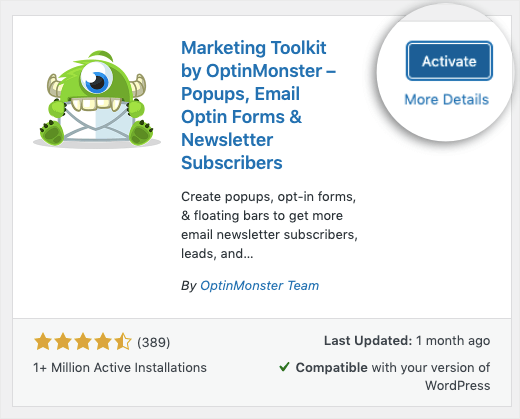
When the plugin has been installed, click Activate:
You can then use the setup wizard to connect your WordPress site with OptinMonster.
Need a bit more help? No worries! Check out this detailed guide: How to Integrate OptinMonster With Your WordPress Site.
Once OptinMonster is officially installed, you can quickly get started creating your campaigns.
Step 2: Create Your First Campaign
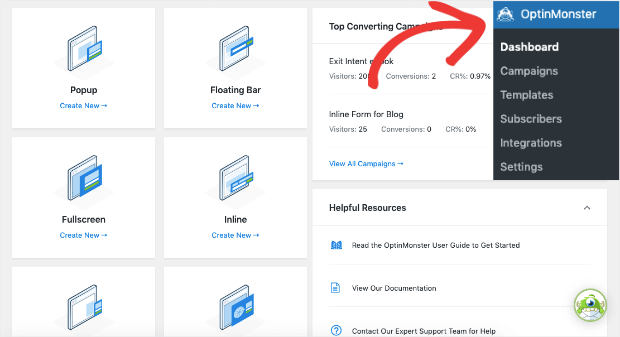
From your WordPress dashboard menu, click on OptinMonster. Then select your campaign type:
OptinMonster offers a variety of unique campaign types, including:
- Popup
- Floating bar
- Fullscreen
- Inline campaign
And much more. For today’s post, we’ll use a Popup campaign. It’s one of our highest converting campaign types.
In fact, Crush Empire increased conversions by 12%-26% with intelligent popup campaigns.
When you select the campaign type you’d like to schedule, you’ll be ready to choose a campaign template.
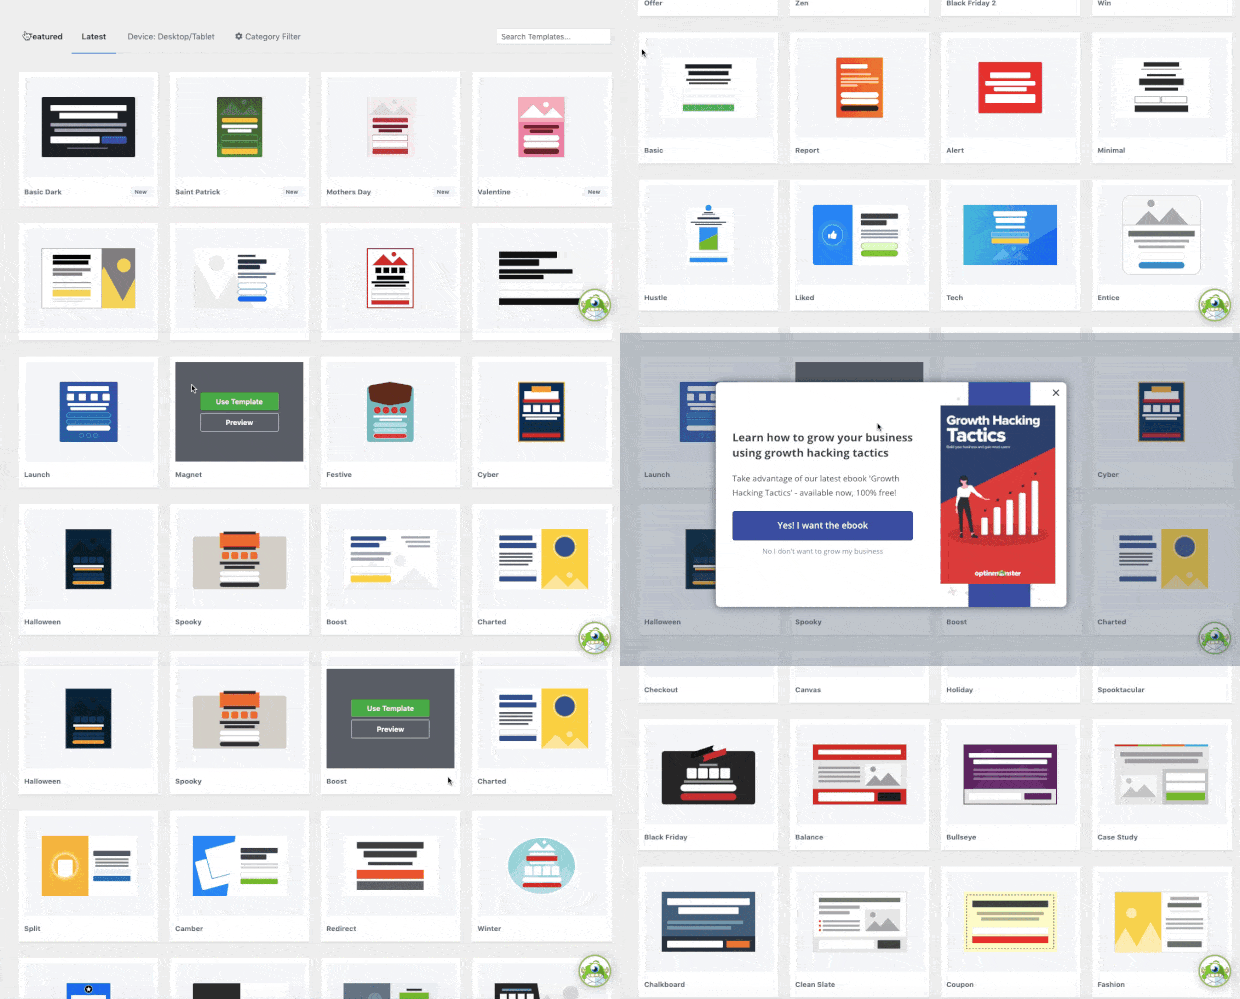
OptinMonster has over 50 templates that work across all devices. You can browse the templates and preview them to find the right fit for your brand:
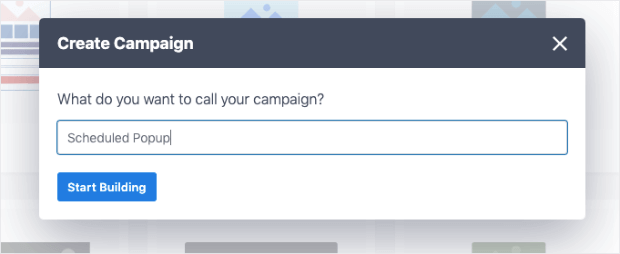
When you’ve selected your template, you’ll need to give your campaign a name and click Start Building:
Now you’re ready to modify your campaign’s template.
Step 3: Customize Your Campaign
After selecting the template, OptinMonster’s campaign builder will open up. Here you can use the codeless drag and drop builder to make changes.
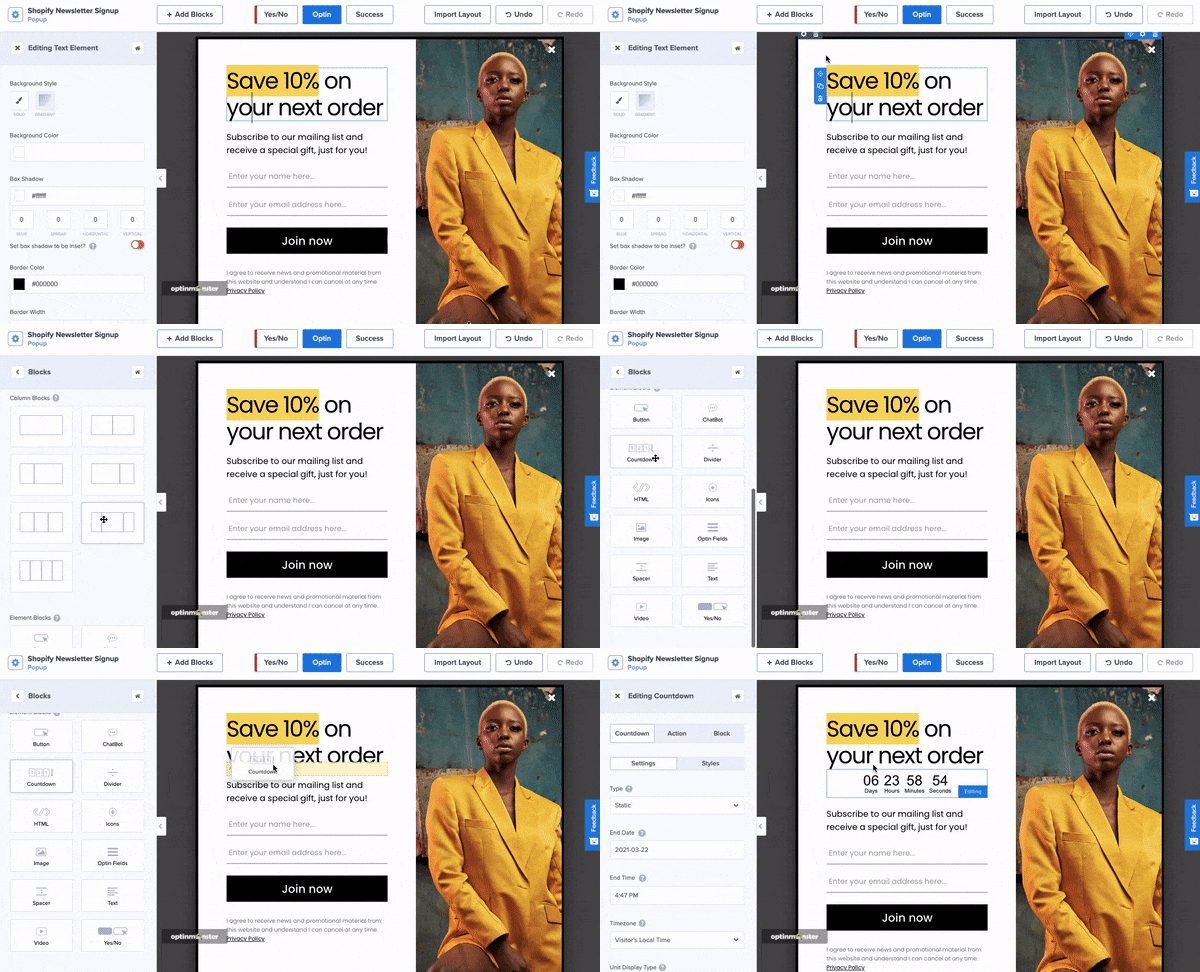
You can edit the text of your campaign by simply writing the text you want:
Plus, OptinMonster allows you to create really engaging campaigns by helping you add more elements such as:
- Buttons
- Images
- Video
- Countdown timers
- Custom HTML
- And much more…
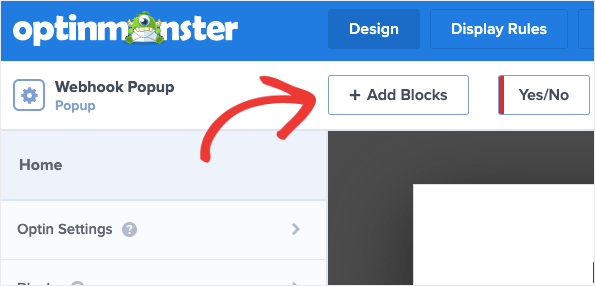
Want to add something to your campaign? Click Add Blocks at the top of your editor:
You can simply drag and drop the blocks in the place where you’d like them to go.
Everything is so user-friendly with OptinMonster that you don’t need any coding or technical skills to create high-converting campaigns FAST.
Need some more help designing your campaign? Check out this helpful resource to get started: How to Create Your First OptinMonster Campaign.
In a moment we’re going to show you how to schedule your campaign. But first, let’s quickly walk through how you’d automate a portion of your email marketing campaign by integrating your email service provider (ESP).
Step 4: Integrate Your ESP
One of the best parts about OptinMonster is that you have the ability to integrate your email service provider (ESP).
That means you can send new leads and contacts to the right email lists and nurture those relationships over time.
In this article, we’ll connect one of our favorite ESPs, Brevo (formerly Sendinblue).
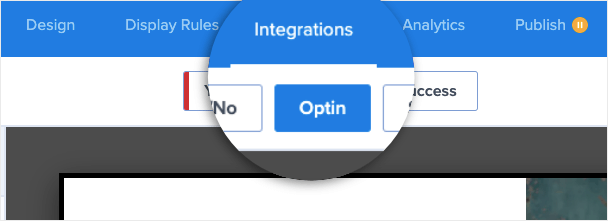
Start by clicking Integrations at the top of your OptinMonster editor (just above the Optin button):
If you need to figure out which email service provider suits you the best, check out our article on the 7 best email service providers for small businesses.
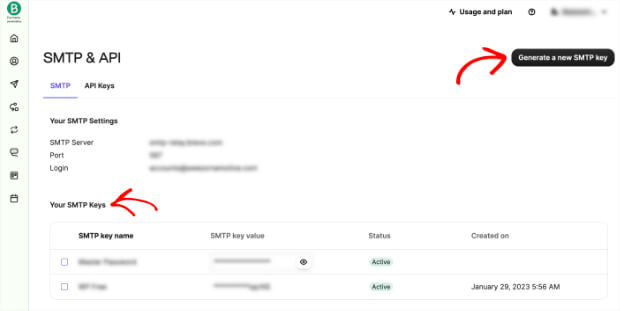
In most cases, you’ll simply need an API Key from your ESP to integrate it with OptinMonster. And this is true with Brevo, too.
In the Brevo navigation bar, click on your account name. In the drop-down menu, click on SMTP & API. You should see a default API key that has already been generated for you:
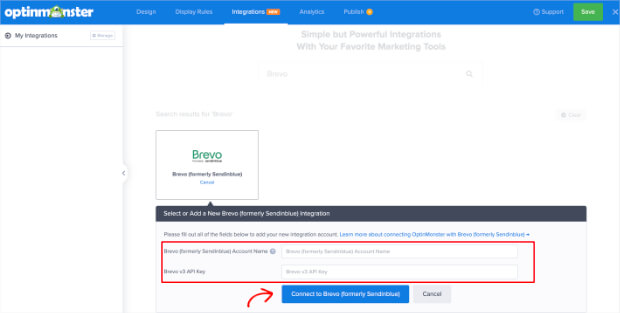
Head to the OptinMonster dashboard. Click Add New Integration and search Brevo. Add your Brevo API key and then click on Connect to Brevo:
Now when a new lead opts into your popup form, they’ll be added to your email provider.
This is an important step because it automates your entire workflow. You can create automated email series with your ESP.
Then when you schedule the campaign, your new leads will be automatically added to the right contact list and can be guided through your sales funnel.
Meanwhile, you’ll free up more time and energy to focus on other parts of your business that you love.
All that’s left is to schedule the campaign and publish your popup.
Step 5: Schedule Your Campaign
Scheduling your popup campaigns in WordPress is super easy with OptinMonster.
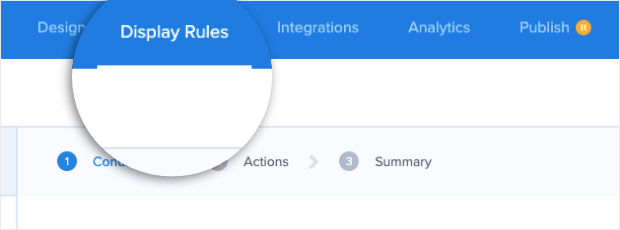
Click on Display Rules in the campaign builder:
One of the best features of OptinMonster’s display rules is that they’re easy to set up but also incredibly advanced. Some of the most popular targeting rules include:
- Geo-Location: Boost conversions by targeting users by their physical location.
- Exit-Intent® Technology: Recover abandoning visitors at a crucial moment in their customer journey.
- On-Site Retargeting®: Engage returning visitors by showing fresh campaigns they’ve never seen before.
These are just a few of the most popular targeting rules, though there are many others.
Let’s get you started with scheduling your first campaign.
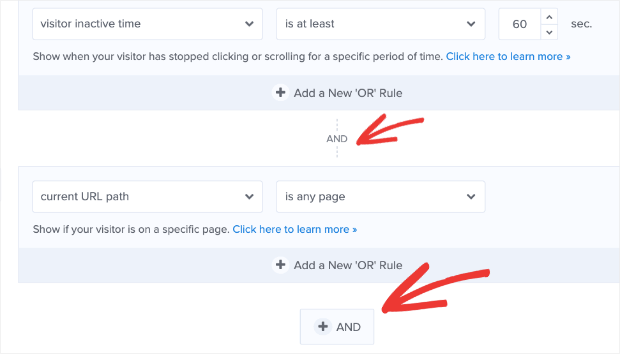
Select the + AND button to add a new rule:
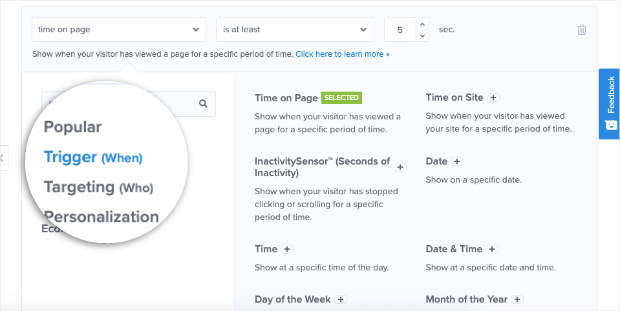
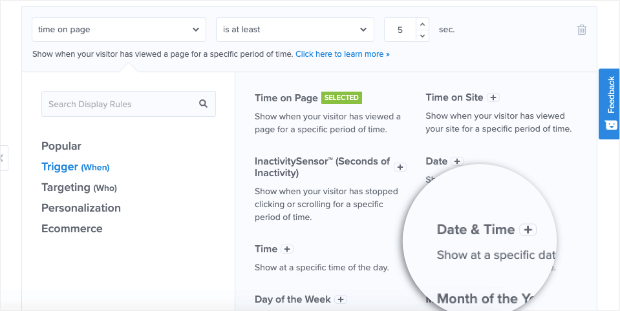
Search for and select Trigger (When) from the sub-menu options:
The best feature of OptinMonster’s campaign scheduling is that it allows you to combine different scheduling rules to fit your brand’s marketing/sales goals.
Today, we’ll create one of the most common scheduled campaigns: Limited-Time Offers
It’s tailor-made for limited-time offers or sales. You can schedule this campaign with a start date and time and then add an end date and time.
This is great for building urgency around your campaign.
Select Date & Time rule from the display rules menu:
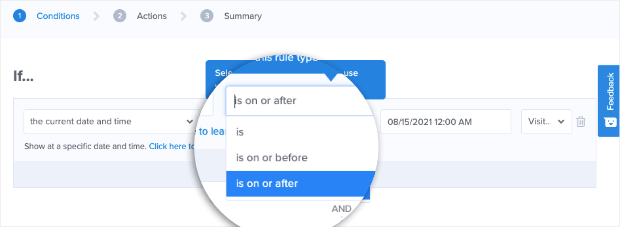
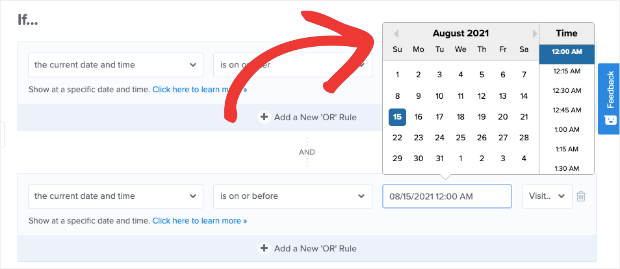
Next up, you need to start the campaign time. You can do that by hovering on the second field and select is on or after.
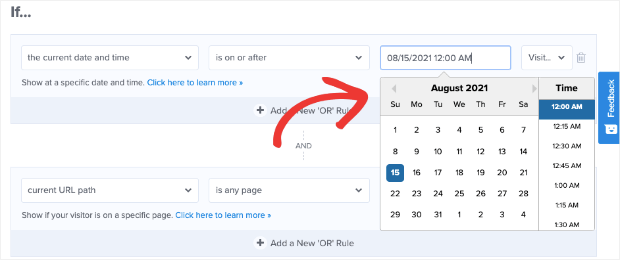
You can now select a date, time, and time zone for when you want your campaign to begin:
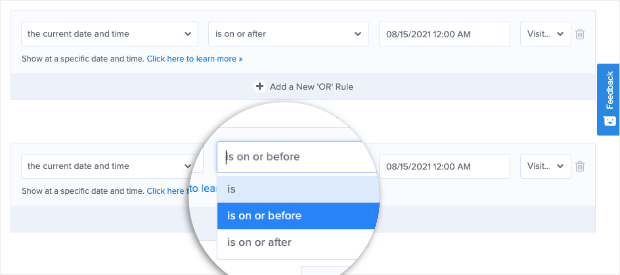
When you’ve finished, click + AND to add a new rule like you did before.
Choose the same rule as before (Date & Time). Then select the rule is on or before:
Then select the date that you want your campaign to finish:
You now have a display rule that will show your campaign for a limited time. All that’s left is publishing your campaign to make sure it goes live on time.
Step 6: Configure Campaign Scheduling
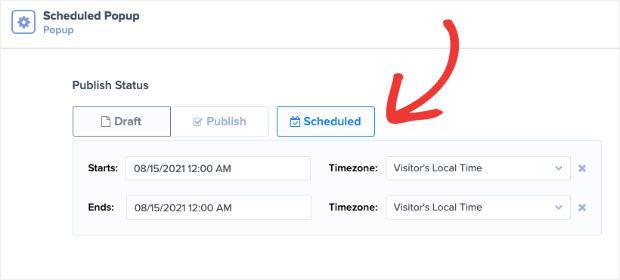
Head to the OptinMonster dashboard and select Publish from the top menu.
You’ll get a complete preview of the campaign schedule, and you can also adjust the campaign’s date and time schedule in case you made a mistake:
And that’s it! You’ve now scheduled a popup for your WordPress site.
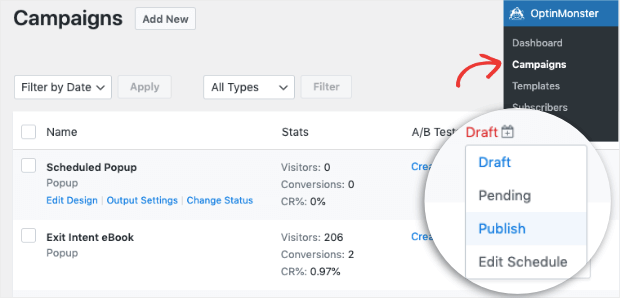
Be sure to double-check that your post is set to Publish (and not Draft) in your WordPress editor. To do so, go to your WordPress menu and click OptinMonster » Campaigns.
Then find your scheduled popup campaign and make sure the status is set to Publish:
And that’s it for today! You can click below to start scheduling your popups in WordPress with OptinMonster, 100% risk-free:
We hope you enjoyed this post on how to schedule a popup in WordPress in just a few minutes.
If you did, you’ll definitely want to check out the following resources:
- 25 Email Popup Examples & Best Practices to Explode Your List
- How to Create an Inline Form in Under 10 Minutes
- 37 Types of Popups to Use on Your Website
These articles will help to boost your lead generation efforts to get more conversions and drive more sales from your WordPress site.




Add a Comment