Are you trying to figure out how to make a Google RSVP form?
And once that’s done, are you having trouble promoting the form so people actually use it?
If you’re facing either (or both) of these problems, then don’t worry. Because in today’s post, we’re going to walk you step-by-step on how to create a Google RSVP form.
Then we’ll show you how you can promote that form to get higher engagement from your audience.
Ready to get started? Let’s dive straight into the tutorial.
How to Make a Google RSVP Form
Google offers a large variety of tools that their users can have for free. This includes things like:
- Gmail
- Sheets
- Docs
- Live Chat
- Slides
- Calendar
And many others. But before you can access any of these tools, you’ll need to have an account with Google.
If you haven’t already, the first step will be to create a Google account.
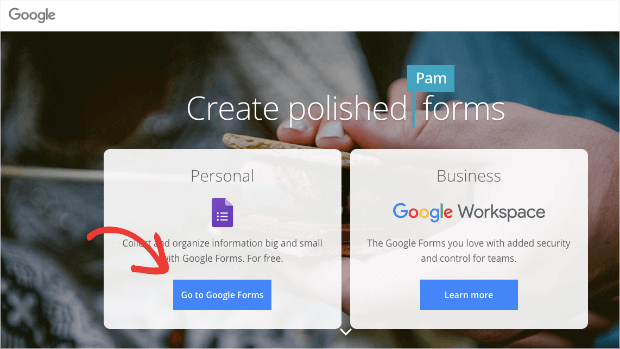
Stay logged into your account and access the Google Forms homepage.
Then click “Go to Google Forms.”
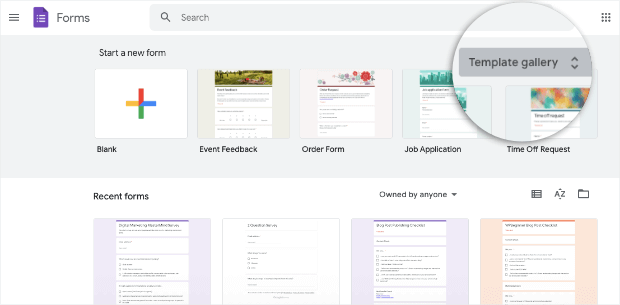
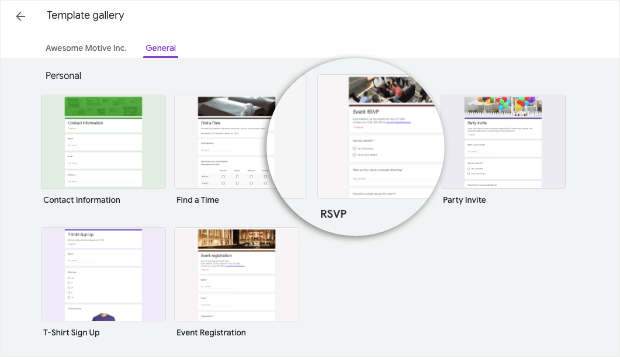
At the top of the page, you’ll see a few suggested templates. If you don’t see RSVP as an option, click Template Gallery:
Scroll down and look for Google’s RSVP template (under the “Personal” category):
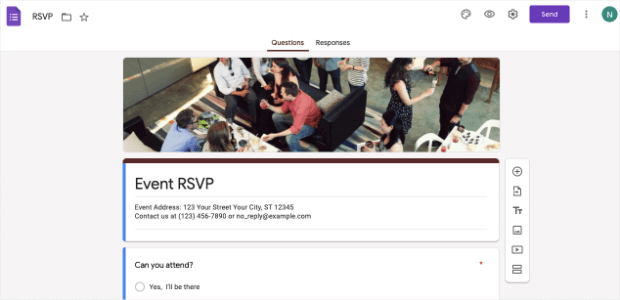
Now your form will be ready to modify in the Google form builder.
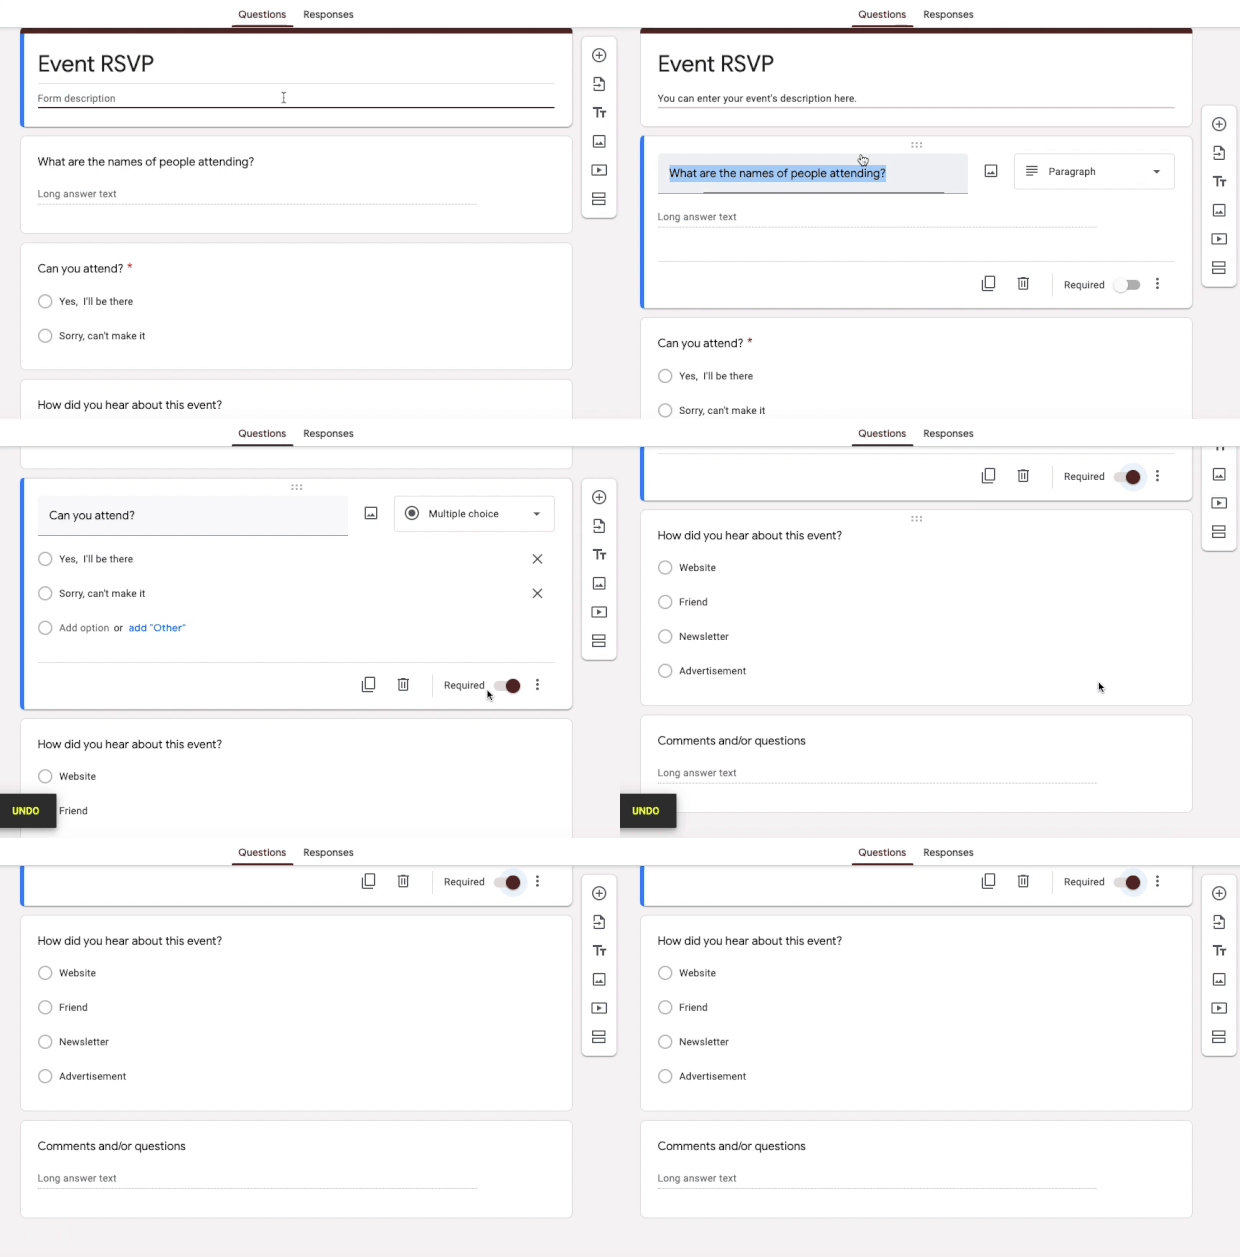
Customizing your form is easy. You can move blocks around, add new blocks, edit text, and much more with Google’s drag and drop user interface (UI).
As you’re modifying your form, here’s something to keep in mind:
Don’t add more fields than ABSOLUTELY necessary.
With each new field you ask users to fill out, you’re decreasing your chances that they’ll successfully finish the form.
That’s because every new field adds a layer of friction to the signup process. If you’re showing this RSVP form to your website’s traffic and you don’t already have their email address, we recommend 3 fields for your online form:
- Description about the event
- Email address to confirm
- Can you attend (Yes or No)
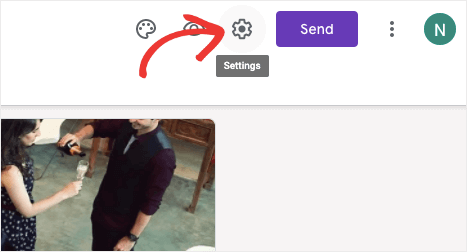
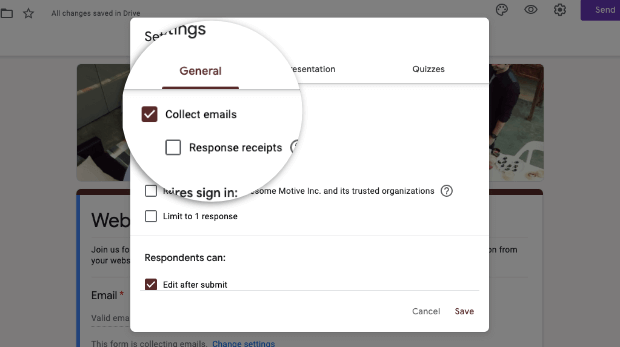
Collecting the email address is particularly important. To add this field, click the Settings gear wheel icon in the upper left-hand corner:
Then flip the toggle switch next to “Collect Emails:”
If you’re ONLY sending this to your current email list, though, then you don’t need to worry about this field.
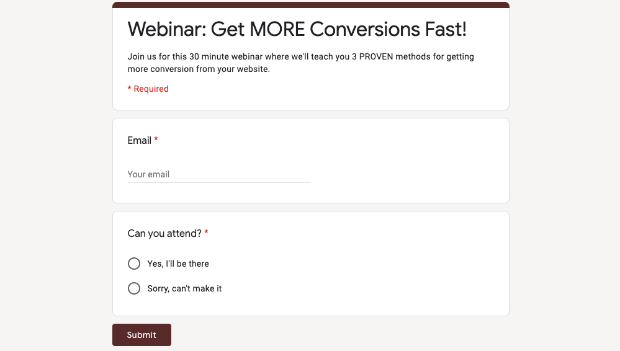
In the end, you should have a simple form that looks something like this:
Now you have 2 options:
- Send this form to your current email list
- Promote your Google RSVP form across your website
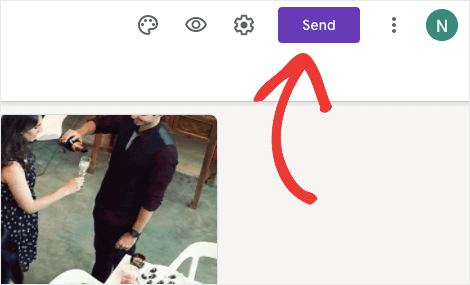
For the first option, that’s easy. Simply click Send in the upper right-hand corner of your form builder:
Then you can add the emails of people you want to receive your Google form.
But if you want to get even MORE subscriptions, you’ll need to promote it. And right now, we’ll show you exactly how you can do that to get the highest conversions possible.
Promote Your Google RSVP Form
If you want to use Google RSVP forms to get more engagement from your site’s traffic, Google provides a free and flexible solution.
The only problem? How do you present this form to the right people, at the right times, and in the right places across your site so they’ll actually fill the form out?
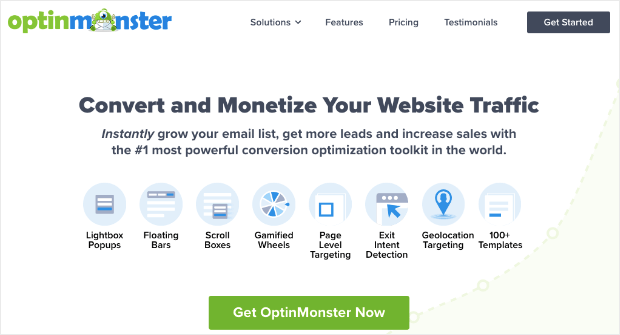
This is where OptinMonster steps in:
OptinMonster is a premium lead generation software and the BEST way to promote your Google RSVP form.
This tool allows you to increase conversions across your site with optin forms. These are things you’re already familiar with, like:
- Popups
- Floating bars
- Slide-in scroll boxes
- Fullscreen welcome mats
- And much more…
Plus, as you’ll see in a moment, you don’t need any technical skills to create stunning and high-converting campaigns in a matter of minutes.
That’s because OptinMonster comes with a codeless drag and drop visual builder with a super low learning curve.
And unlike sending Google RSVP forms via email, you’ll be able to present these campaigns to your site’s visitors with advanced targeting rules.
Some of the most popular targeting rules include things like:
- Exit Intent® Technology: Capture RSVP registrations as users are actively abandoning your site.
- Page-Level Targeting: Attract the right type of leads to your events by showing offers that match the content your users are reading.
- Geolocation: Personalize your campaigns by targeting users based on their physical location.
These are just a few examples of OptinMonster’s display rules, though there are many others.
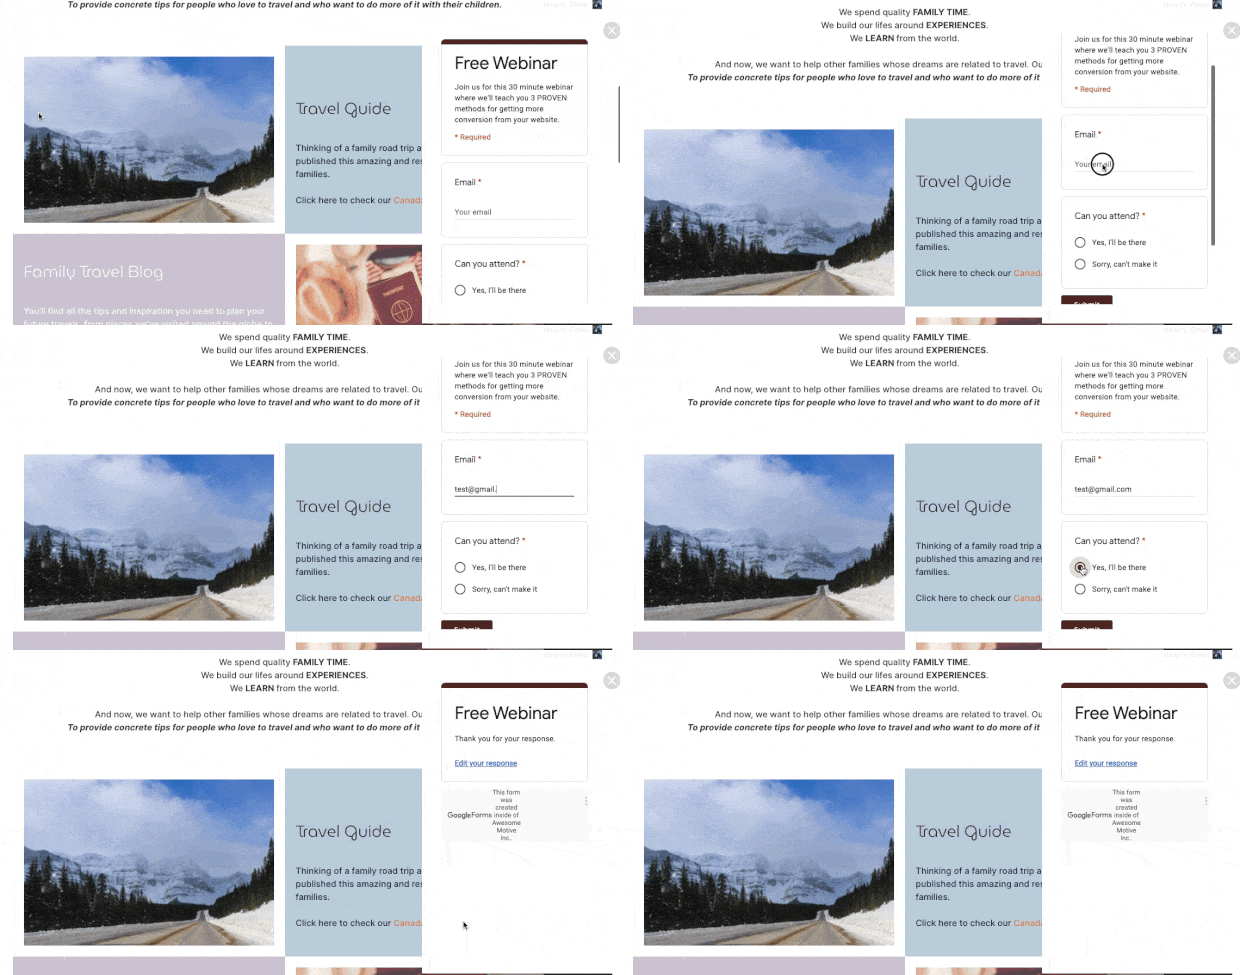
In today’s tutorial, we’ll be making a slide-in campaign with our Google RSVP form:
Want to see it in action for yourself? Click below to start you 100% risk-free OptinMonster trial:
That way, you can follow along with the rest of the tutorial and learn how to effectively promote your Google RSVP form.
Promote Your Google RSVP Form
Step 1) Create Your New OptinMonster Campaign
The first thing you’ll need to do is sign up for your OptinMonster account and start building a campaign.
We won’t get into much detail on how to connect your site with OptinMonster for this tutorial, but you can get started in just a few clicks.
If you’re using WordPress, OptinMonster can be downloaded like any other plugin.
Not using WordPress? No worries. Read this helpful tutorial to learn how to get OptinMonster set up in under 5 minutes.
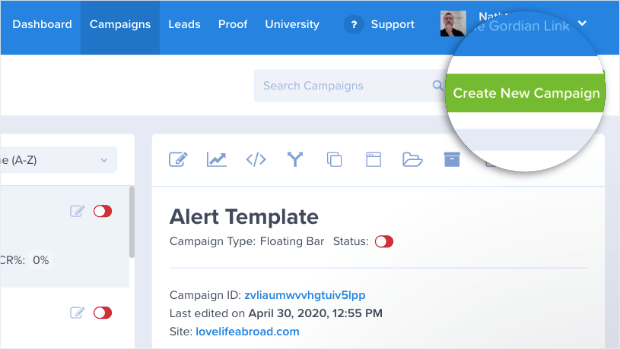
Once you’ve created your account, you’ll be in the OptinMonster dashboard.
Click Create Campaign in the upper right-hand corner of your account:
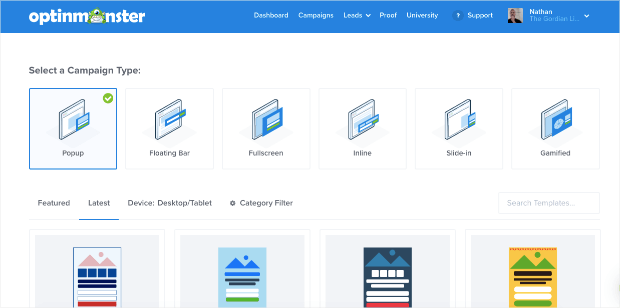
From there, you’ll need to select your campaign type.
OptinMonster offers a variety of campaign types, including:
- Popups
- Floating bars
- Fullscreen campaings
- Inlines
- Slide-ins
- Gamified popups
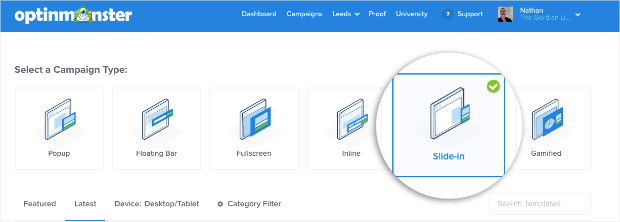
For today’s tutorial, we’ll use a Slide-in campaign:
Next, you’ll need to select your template.
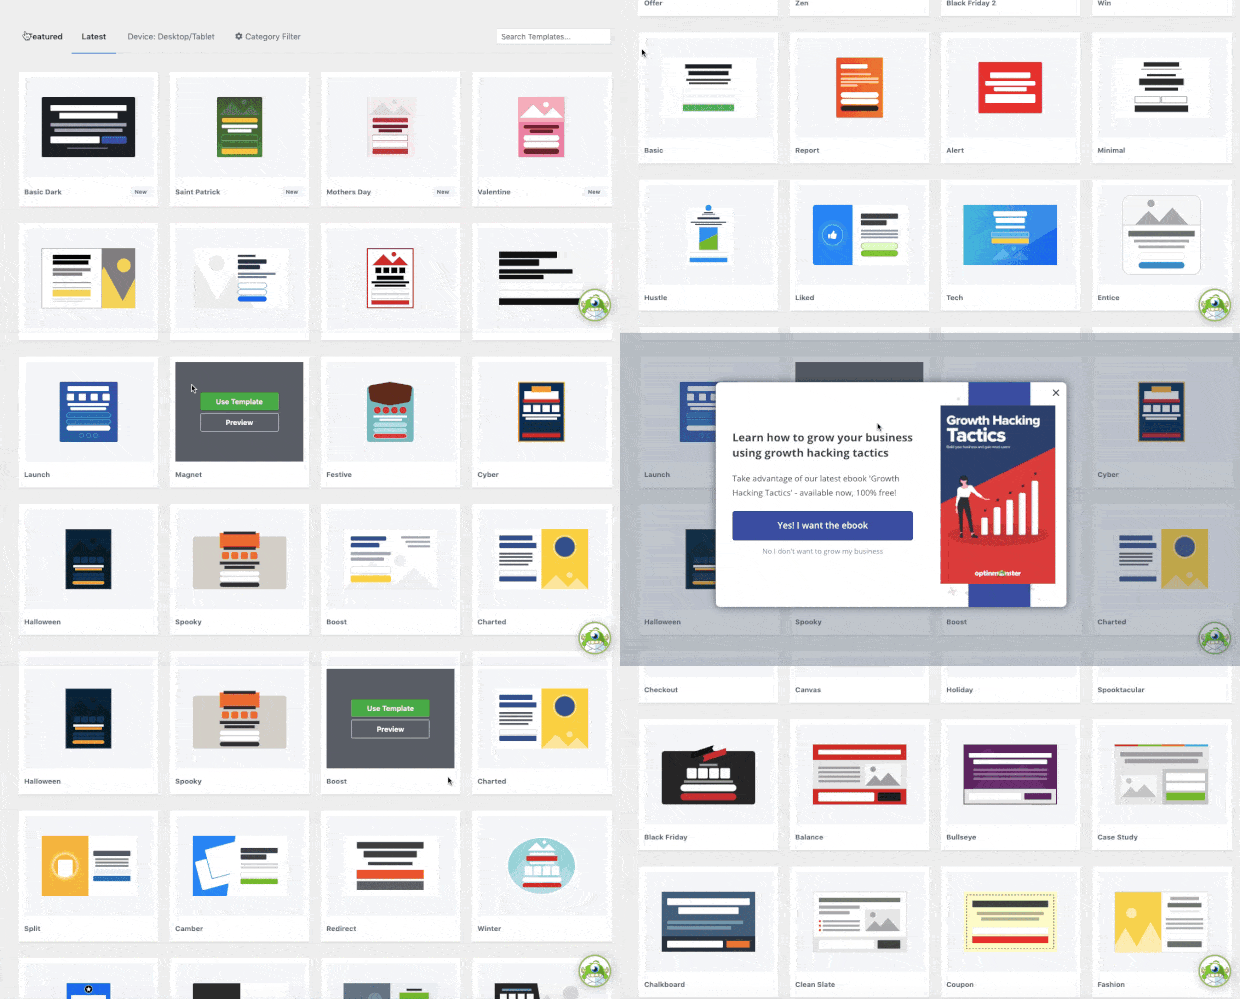
OptinMonster offers over 50 pre-built templates that are designed to save you time, energy, and headaches in the campaign creation process.
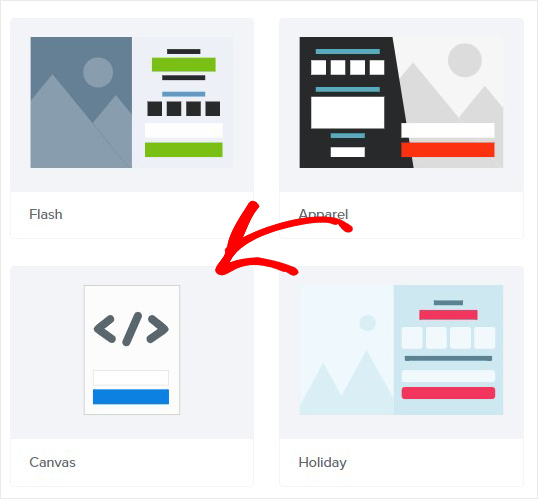
But for today’s tutorial, we’ll use the blank Canvas template:
This is a blank template that will allow you to more easily embed your Google RSVP forms.
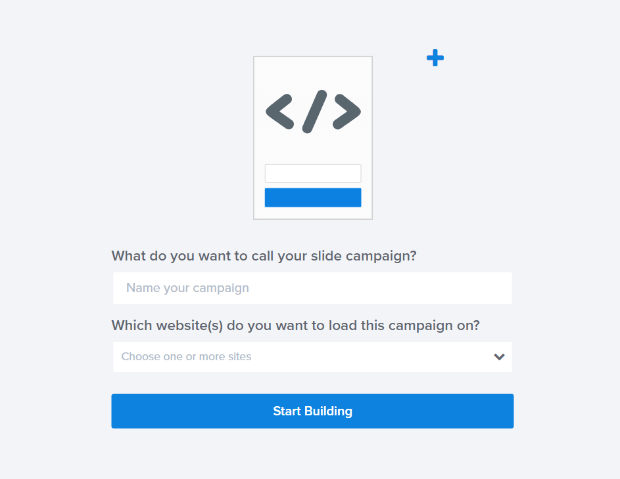
When you’ve selected that, you’ll simply need to enter your campaign’s name (to stay organized), select which website you want the campaign to work on, and click Start Building:
Now you can embed your Google form to your OptinMonster campaign.
Step 2) Design Your Campaign
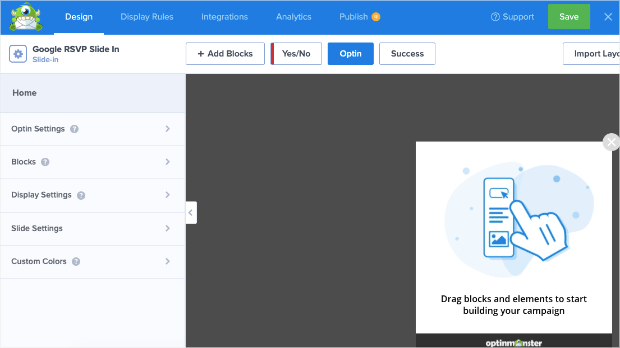
Your campaign should be in your OptinMonster editor. It will look like this:
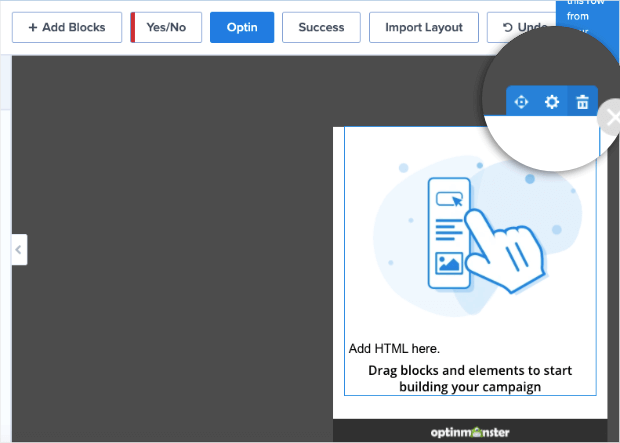
First, you need to locate the trashcan gear wheel for the elements that come with the template:
This will clear out those “filler” elements to your blank canvas so you can add the Google RSVP form’s HTML.
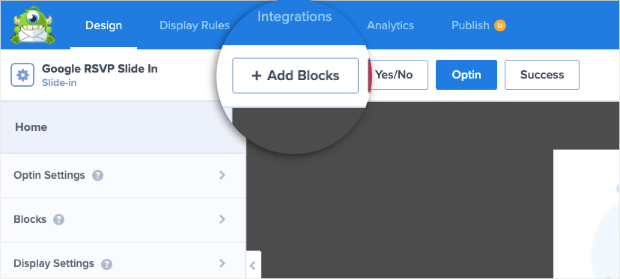
Click + Add Blocks at the top of your editor:
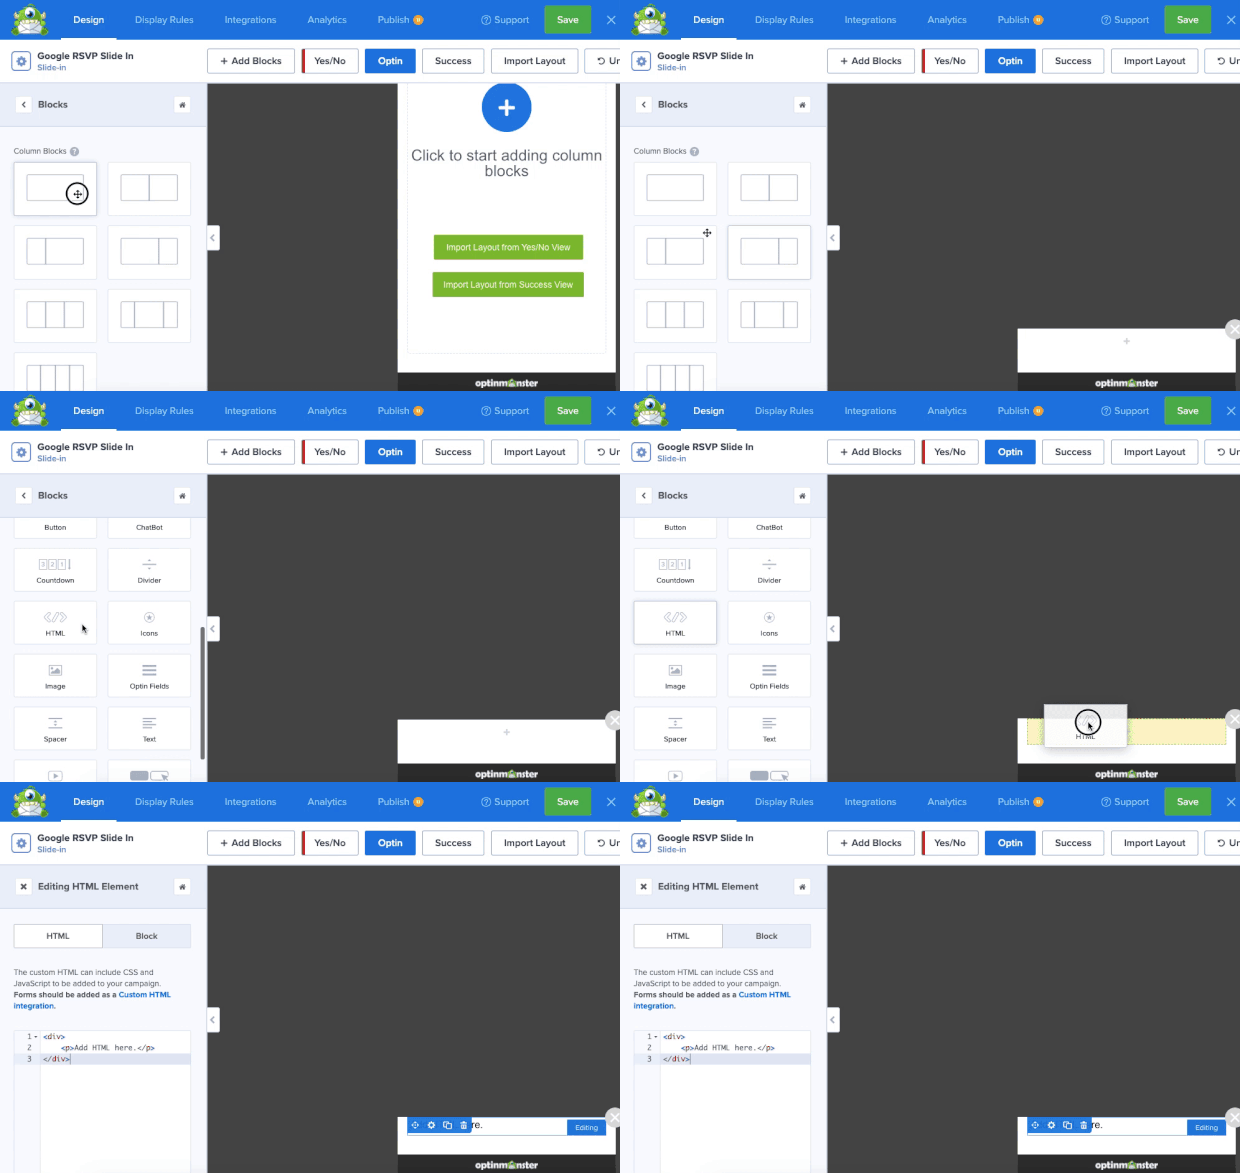
Now you’ll need to locate 2 blocks from the left-hand side menu:
- Single Column
- HTML
When you find these, drag and drop them into the campaign, starting with the single column:
Switch tabs over to your Google RSVP form.
Find the Send button at the top right-hand corner:
This will open a new window with different ways to share your campaign.
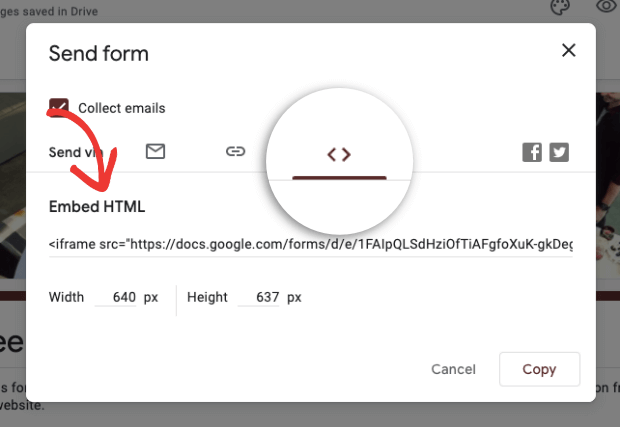
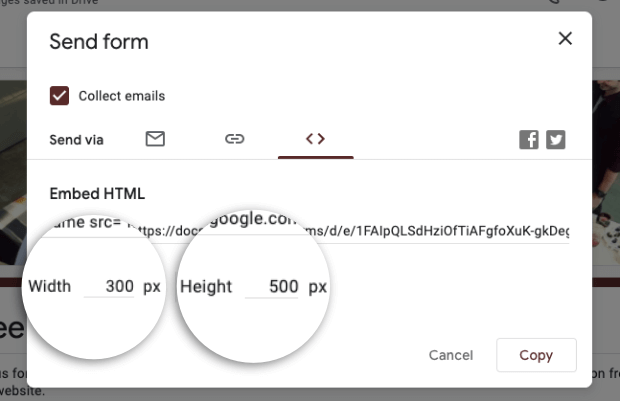
For this tutorial, you’ll need to click the HTML icon that looks like this “<>” and find the embed code below:
You should also change the Width and Height of your Google form depending on the type of campaign you chose.
A popup, for example, can have a larger width and height than a slide-in campaign.
That means for today’s tutorial, we’ll want to reduce both the width and height of our form:
Remember, you can go back and adjust these after you’ve previewed your campaign (and before you go live).
Copy your HTML code and switch back to your OptinMonster editor.
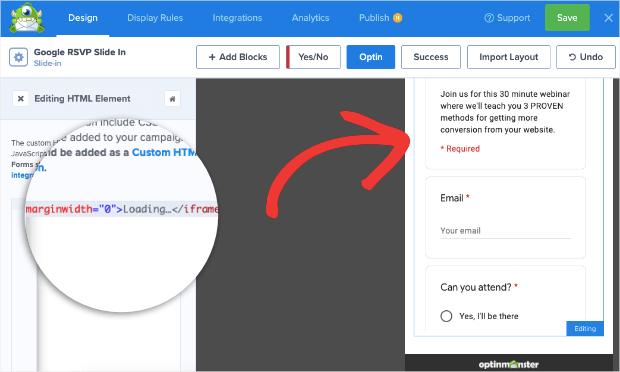
Then click the HTML block you recently added and add your Google RSVP form’s embeddable code into the left-hand side menu.
You’ll instantly see the Google RSVP form load on the right-hand side in the editor:
At this point, you won’t be able to scroll up or down to see the entire form.
But when you preview the campaign, the entire form will appear.
Though we’re not done with the campaign yet, we recommend previewing the campaign to ensure your Google form appears how you want it to.
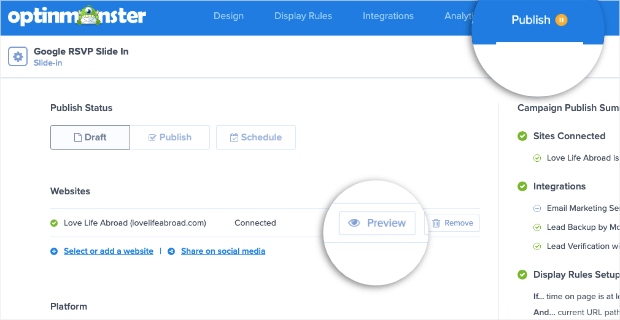
To do so, switch to the Publish tab at the top of your OptinMonster editor. Click Preview:
This gives you the freedom to go back and change your Google RSVP form’s visual settings if needed. You can adjust the Width and Height, change the colors, add or delete fields, and much more.
The form will be automatically saved (through Google) and will change in your OptinMonster preview without needing to update the Google RSVP form HTML.
When you’re satisfied with your campaign, we have one more step before publishing: creating the targeting rules.
Step 3) Configure Your Targeting Rules
One of the biggest advantages of using OptinMonster to promote your Google RSVP form is that you can leverage powerful targeting rules to get more conversions.
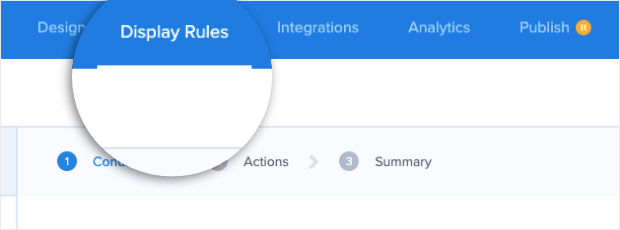
Switch over to the Display Rules tab in your OptinMonster editor:
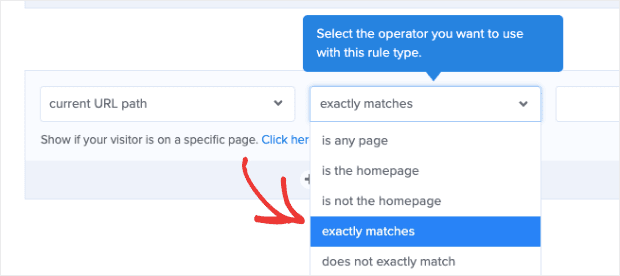
By default, your campaign will have 2 rules:
- Display when time on page is 5 seconds
- Display on any page
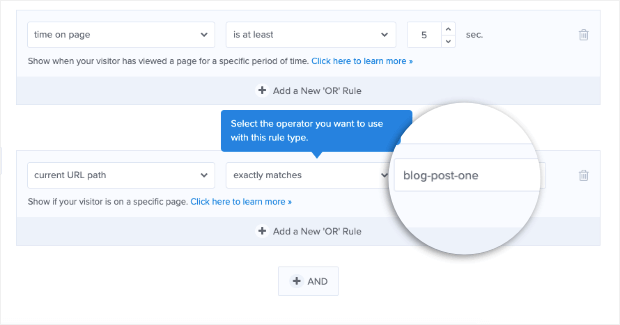
Today, we’ll leave the first condition as it is. But we’ll modify this to show only on specific blog posts.
To do so, click the second display rule’s drop-down menu and click exactly matches:
Then you can add the URL slug of whatever blog post or page you want your Google RSVP form to appear on:
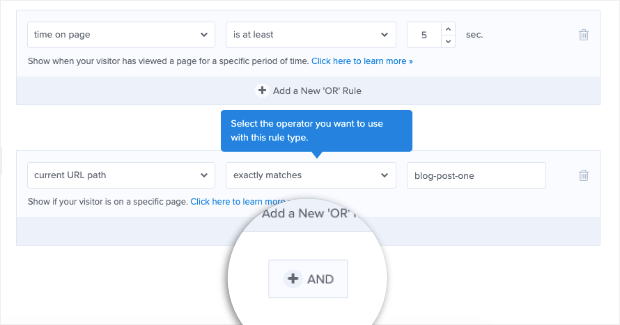
Want to add another page? That’s no problem.
Click the + And button:
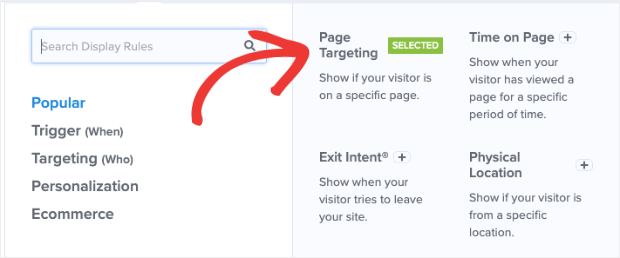
Then search for and select Page Targeting from the display rule menu:
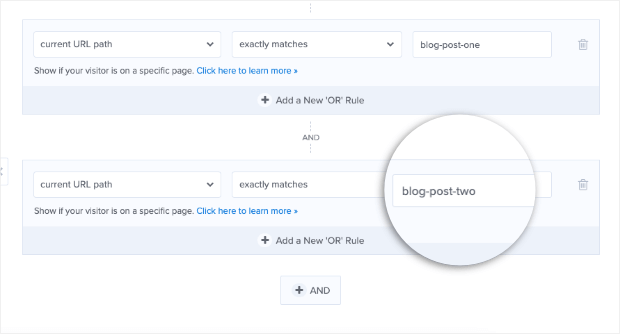
And repeat the steps from above to change your rule’s fields to current URL exactly matches and enter the URL slug from the next blog post or page you want to use:
Now your Google RSVP form will appear on specific locations across our website.
Which you may be wondering, “Why not show it on every page?”
Remember, the goal is to boost conversions, which means you’ll want to show your form to the right people, in the right places, and at the right time in their customer journey.
That means your targeting rules might not look exactly like this tutorial and will change depending on your audience or offers.
So, in some cases, you may want to display your offer on every page; other times, you may want to display your form as people are leaving with OptinMonster’s Exit-Intent® Technology.
The point is that OptinMonster gives you countless options for getting more engagement from these forms.
As a result of using Google’s RSVP form with OptinMonster’s powerful rules, you can expect more reservations for your upcoming event.
Once you’ve configured the perfect settings for your display rules, you’ll be ready to publish your campaign.
Step 4) Publish Your Campaign
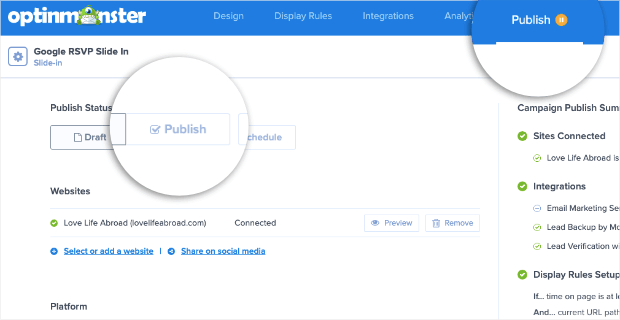
Head over to the Publish tab at the top of your OptinMonster editor and click Publish:
If you’re using WordPress, it’s always a good practice to jump into your OptinMonster dashboard (from your WordPress backend) and ensure that the campaign is switched from Draft to Published, too:
And that’s it! You’ve now learned how to build a Google RSVP form and how to promote it for higher conversions:
Ready to make your own? Be sure to click below to start your 100% risk-free OptinMonster trial today:
We hope you enjoyed this post. If you did, you’ll definitely want to check out the following resources:
- 9 Best Form Builder Plugins to Get More Customer Feedback
- How to Create a WordPress Contact Form
- How to Redirect a Form to Another Page Without Any Coding
These posts will have even more information on how you can use forms to get your customers to take action and grow your business.



Add a Comment