Do you want to create a personalized popup for greeting website visitors from Facebook?
Whether you’re running a Facebook ad campaign or just looking to drive more organic traffic, you can create campaigns targeted specifically to visitors from Facebook with a custom popup.
In fact, providing a personalized experience on your site based on referral traffic is proven to increase customer engagement, sales opportunities, and revenue.
In this tutorial, we’ll walk through the easiest way to create a popup on your site for greeting your visitors from Facebook.
But before we dive in, let’s get clear on why you should use this strategy in the first place.
Why Create a Popup for Visitors From Facebook?
The best thing about creating a custom popup to greet visitors from Facebook is that you’ll be better able to create targeted messages.
There are a few reasons why this approach will increase engagement on your site, including:
- Personalizing your messaging
- Grabbing your audience’s attention
- Boosting conversions and sales
With personalized popups, you can write more engaging “copy” because your offer is based on your visitors’ interests.
“Copy” simply refers to the persuasive language you use to get people to take the actions you want them to.
And the referral source can reveal a lot about your site visitor and their goals. Someone landing on your site from Facebook might have a different motivation for visiting than someone who’s come from LinkedIn.
This will all depend on your current social media strategy and how you use Facebook. But one thing is certainly clear: understanding when and why visitors come from Facebook will have a major impact on your conversion rates.
Put even more simply, a Facebook popup lets you show the right message to your audience.
So, how do you create a popup for visitors from Facebook?
The easiest way to do it is with OptinMonster:
OptinMonster is the best lead generation software for targeting campaigns based on where users are visiting from, Facebook included.
OptinMonster’s referral detection technology feature lets you display personalized campaigns to your site visitors based on traffic source. Plus, everything can be set up in just a few clicks.
This targeting technology detects when visitors have landed on your external marketing campaigns to reach your website.
How does it work?
- You decide which traffic source you want to target
- Then, your popup is triggered when that referrer is identified
- You get new leads and grow your business more quickly
It really is as simple as that.
In fact, the digital marketing agency Whole Whale increased conversions by 100% when they ran a campaign displaying an optin only to visitors from Facebook and Twitter.
Apart from growing your mailing list, you can also use OptinMonster’s referrer detection to:
- Show a targeted discount or offer
- Encourage visitors to like your social media profiles
- Showcase new services that are relevant to that audience
Want to try it out for yourself? Click below to start creating popups for visitors from Facebook today:
Now let’s dive into the tutorial.
How to Create a Popup for Visitors from Facebook
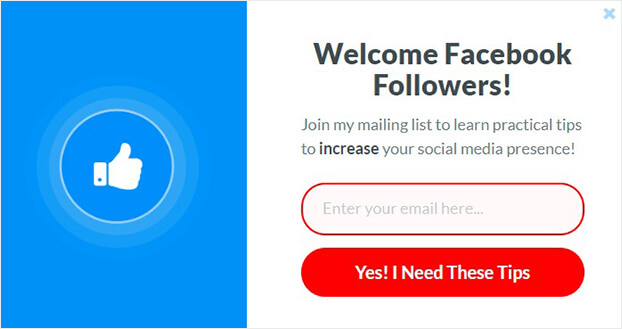
Below, we’ll show you how to easily create a Facebook popup with OptinMonster, step by step. Here’s what we build for today’s demo:
Step 1: Create Campaign
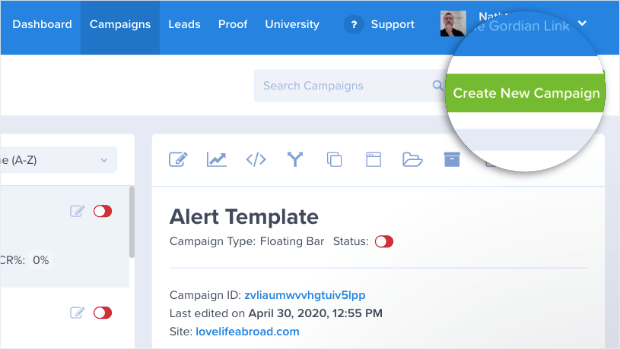
First, we’ll head over to your OptinMonster dashboard.
Click Create New Campaign:
Next, you’ll need to choose your campaign type. We’ll go with Popup:
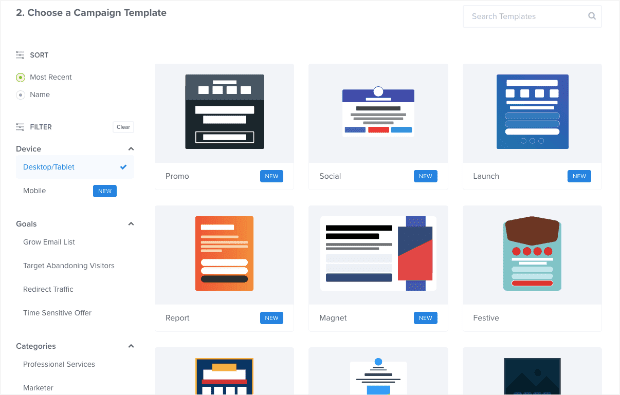
Now, select your campaign template. OptinMonster gives you over 50 pre-built template options to choose from:
You can filter these templates by:
- Device
- Goals
- Categories
- And more…
Plus, each of these templates are totally easy to customize. With OptinMonster’s drag and drop builder, you can create professional-looking templates in minutes.
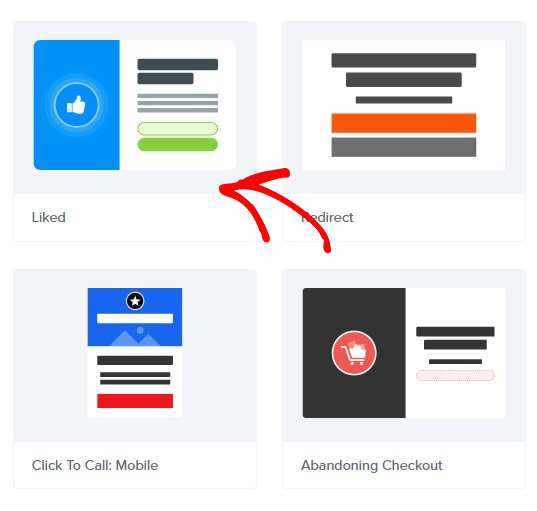
Today, we’ll choose the Liked template because it already has the elements that make it perfect for welcoming an audience from Facebook:
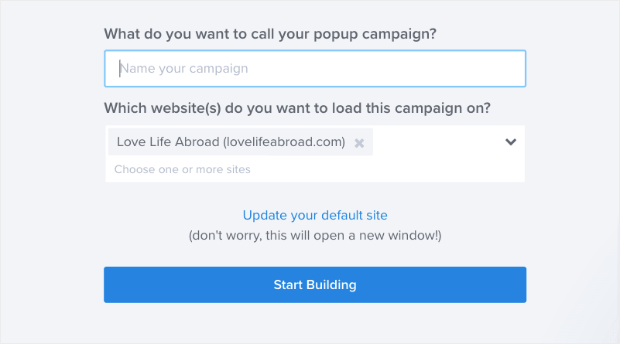
Next, name your campaign and click Start Building.
Now, you’re ready to design your popup.
Step 2: Design Your Facebook Popup
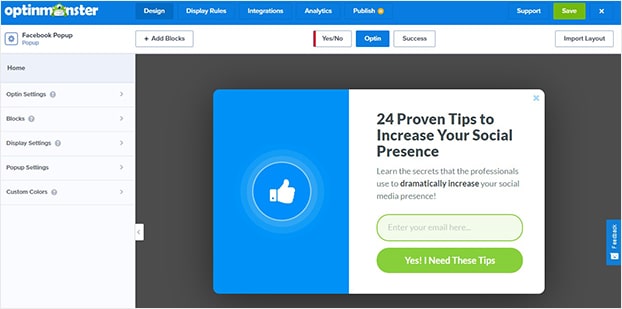
You’ll see your campaign in the OptinMonster builder:
Again, modifying your campaign is easy.
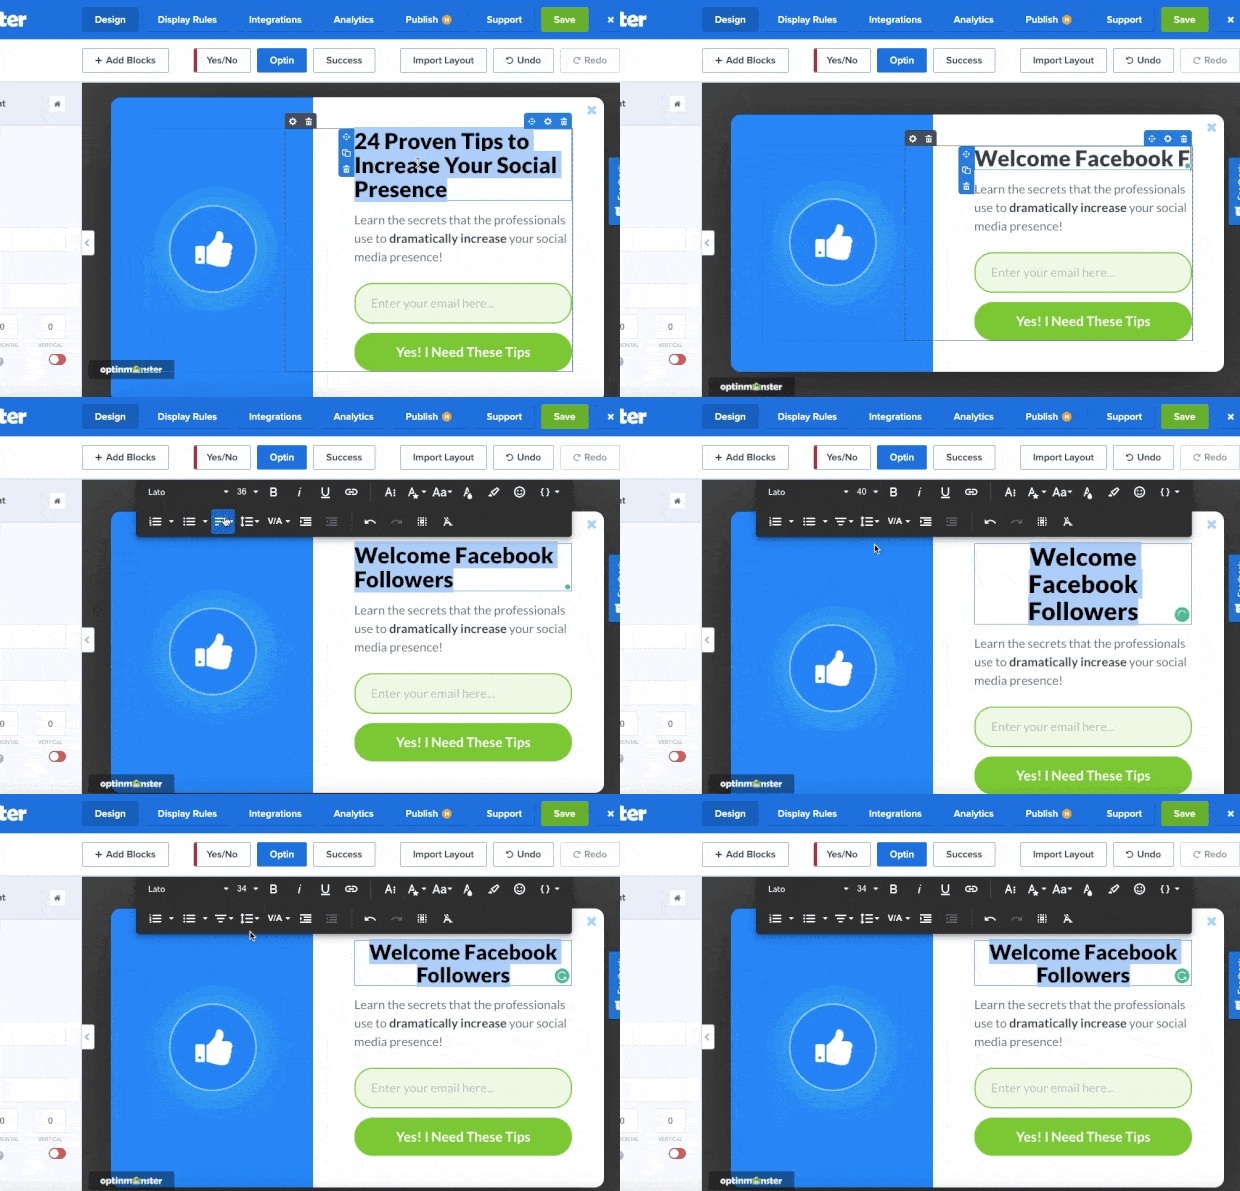
To change your template’s text, you can use OptinMonster’s inline text editor:
This allows you to change your text’s:
- Font-family
- Font-size
- Line height
- Style (bold, italic, and underline)
- Font color
- And much more…
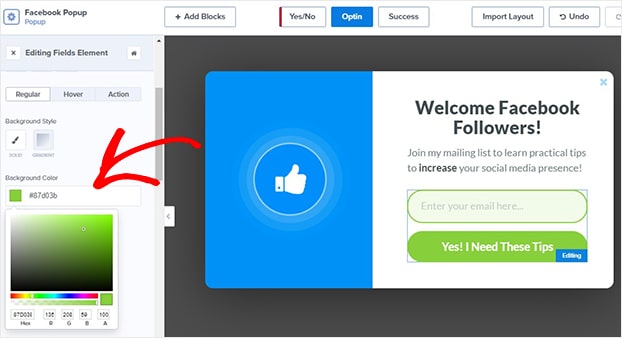
For other changes, you simply need to click on the element you want to modify directly in the builder. Then, you’ll see the editing tools appear on the left.
If we wanted to change the button color, for example, we’d click on the button to pull up the editing tools:
You can repeat this process to make changes to any element to your campaign.
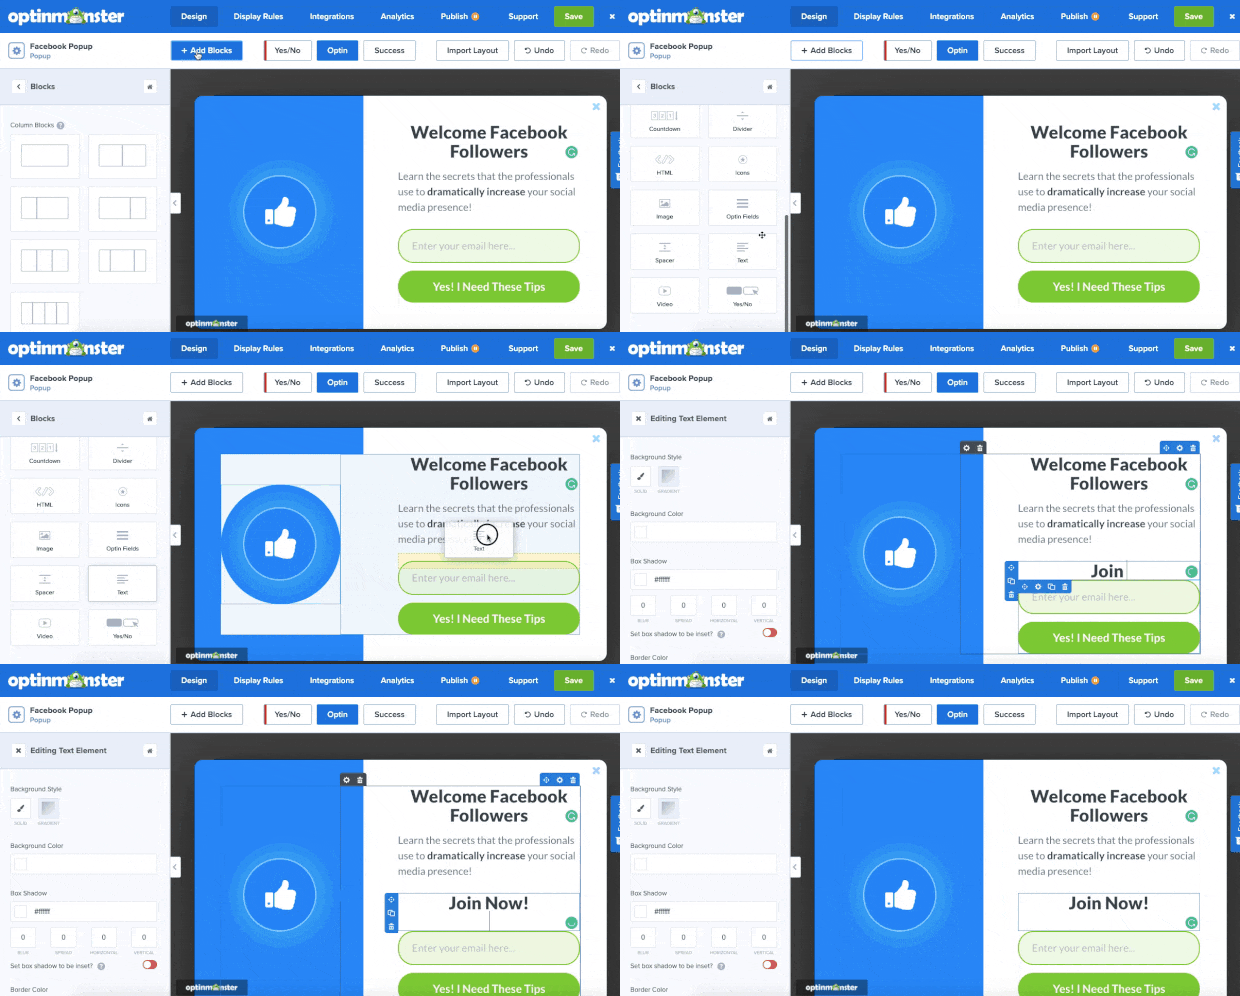
Want to add some features to your Facebook popup? That’s not a problem. With OptinMonster’s drag and drop builder, you can add:
- Video
- Chatbot
- Text
- Custom HTML
- Buttons
- Optin fields
- And much more…
Simply click + Add Blocks at the top of your OptinMonster editor, scroll down in the left-hand side menu, locate the block you want, and drop it into place:
Once you’re happy with the design of your popup, it’s time to display it to your visitors from Facebook.
Step 3: Display Your Facebook Popup
You can set up several powerful campaign triggers in OptinMonster.
A few popular ones include:
- Geo-location targeting gives you the ability to personalize campaigns based on visitor’s location
- Page-level targeting shows campaigns based on the section of your website
- Exit-Intent® Technology to capture abandoning visitors
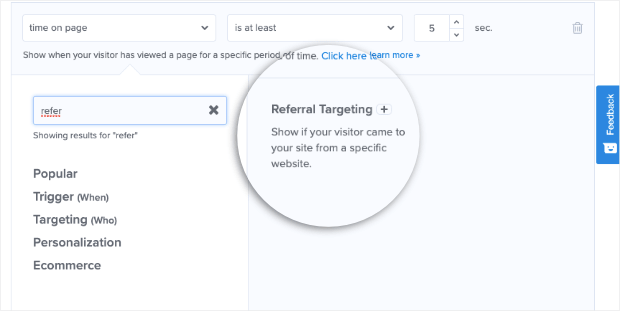
But for this tutorial, we’ll focus on Referral Targeting. And setting up this rule is simple in OptinMonster.
Here’s how to do it:
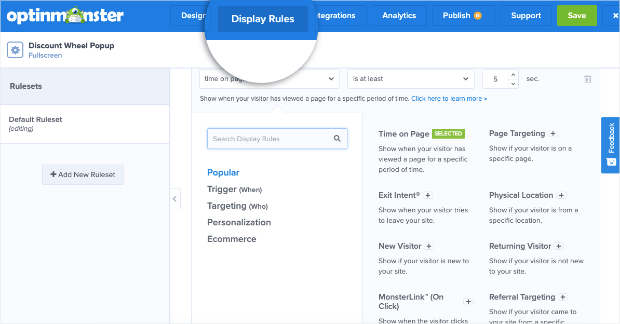
Head to Display Rules at the top of your editor:
Find and select Referral Targeting.
Next, set the rule to referrer URL contains Facebook, like in the example below.
Now, site visitors from Facebook will see this popup when they land on your site.
Step 4: Publish Your Campaign
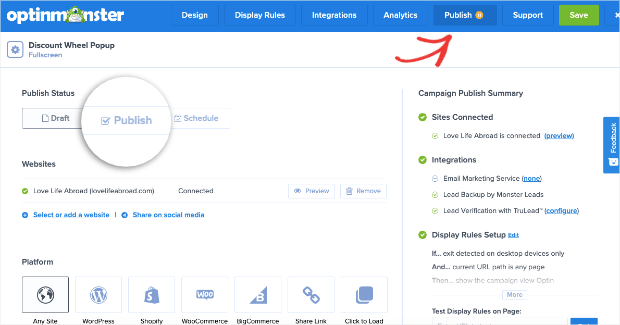
Finally, it’s time to save and publish your campaign.
Select Publish at the top of the campaign editor and change the status from Draft to Publish:
And thats it! Your Facebook popup is now live and ready to go on your site.
We hope you found this tutorial helpful.
Now that you have a targeted popup campaign on your website, your email list should start growing fast.
But if your email list is going to be an asset to your business, you need an email marketing strategy.
For that, check out these articles for proven ways to grow your business with email marketing:
- Beginners Guide to Email Marketing
- 16 Ridiculously Simple Ways to Get More Email Subscribers in Less Than 5 Minutes
- How to Run a Successful Email Marketing Campaign (Step by Step)
Ready to turn your traffic into subscribers and customers? Sign up for OptinMonster today!





Add a Comment