Do you want to add a custom modal popup in Drupal, but you’re struggling to set it up?
Drupal is a popular content management system (CMS) among website builders. It’s used by 2.3% of all websites, which, at first, may not sound like a lot. But Drupal is actually used by more site owners than other competitors such as Magento, Blogger, and Shopify.
One problem some site owners face, though, is that Drupal can sometimes be tough to configure–especially if you don’t consider yourself “tech-savvy.” So doing something simple like setting up a modal popup can end up taking tons of time and energy if you don’t go about it the right way.
That’s why, today, we’re going to teach you how to set up a custom modal popup for Drupal in under 10 minutes.
But first, let’s get clear on what a modal popup is and why you need one for your Drupal site.
What Is a Modal Popup?
Technically speaking, a modal popup is similar to a lightbox popup, but with one crucial difference: the user has to interact with the popup to close it and get back to the original browser.
When you use a traditional lightbox popup, users are typically able to close the new window in two ways. They can either:
- Click the small “X” button in the corner
- Click on the original browser page they were viewing
In either case, the user can remove the popup from their screen without interacting with it.
Modal popups, on the other hand, require the user to engage with the popup before the new window closes.
Now, with that said, let’s be clear: most online marketers and website owners use the terms “modal popup” and “lightbox popup” interchangeably.
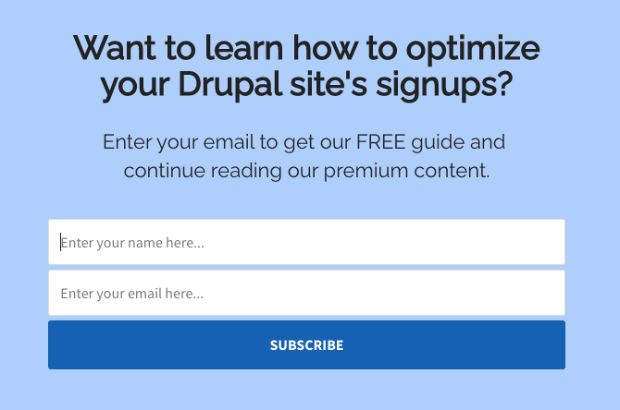
So while they aren’t technically the same thing, they are similar enough that most people don’t split hairs about the difference. Here’s an example of what most people mean when they use the word “modal popup”:
The above image is actually the Drupal popup we’ll be creating in today’s tutorial.
And the good news is that we’ll teach you how to transform any of OptinMonster’s lightbox popups into a modal popup with the flip of a toggle switch!
That way, you can choose the best strategy for your Drupal site.
Popups of any kind can help you grow your business in so many ways. They allow you to present a call to action (CTA) to your site’s traffic in a way that grabs and keeps their attention.
That means you can use popups to:
- Increase sitewide traffic by redirecting users to popular posts
- Verify your user’s age
- Allow users to quickly log into their account on your site
- Grow your email list with a powerful lead magnet
- Suggest related products to your user’s based on purchase or browsing history
And much more.
Plus, if you personalize when and where your popup appears, you can expect even higher conversion rates.
That means popups can help you reach your business goals faster.
Now that you know what modal popups are and why they’re important for your Drupal site, let’s dive into the tutorial.
Adding a Custom Modal Popup to Drupal
For this tutorial, we’ll be creating our popup with OptinMonster:
OptinMonster is the world’s #1 lead generation software. That means we’re the best at getting your site’s traffic to take the actions you want them to.
We do that by helping you build powerful optin campaigns, which are simply messages you show your audience that contain a call to action (CTA). These campaigns can be in the form of popups, floating bars, fullscreen welcome mats, slide-in scroll boxes, and many more.
Plus, OptinMonster helps you personalize when, where, and to whom you show these campaigns. This leads to more people opting into your offer.
Want to learn more about how OptinMonster supports business owners with their company’s growth? Check out this article: How Does OptinMonster Work? 8 Case Studies + 12 Benefits.
Otherwise, sign up for your risk-free OptinMonster account to get started today!
Step 1: Create and Select Your Modal Popup
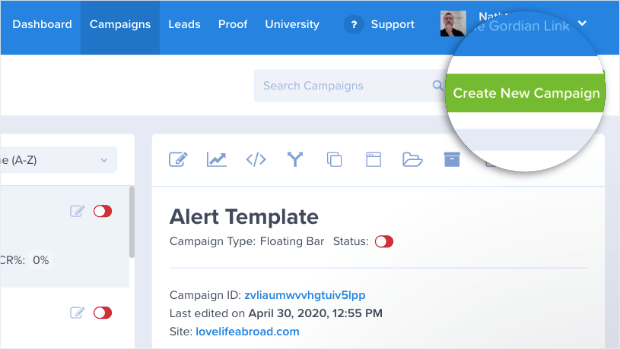
Once you’re in your OptinMonster dashboard, go to the upper right-hand corner and click Create New Campaign:
Now you’ll need to select your campaign type. For today’s tutorial, we’ll choose a Popup:
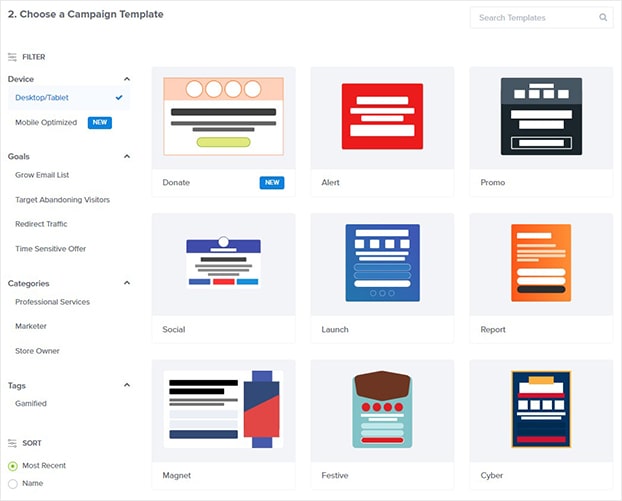
Then you’ll need to select a template for your modal popup:
OptinMonster has over 50 pre-built templates to choose from. This saves you time and energy in the campaign creation process, which you can then put into other areas of your business.
Plus, all of our templates are incredibly easy to modify. Everything can be done with a few clicks or a drag and a drop.
That means you don’t need any coding or design experience to create stunning campaigns in minutes.
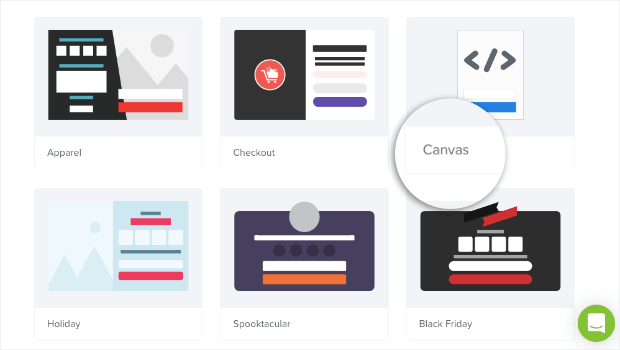
And if you want to create your own modal popup from scratch, that’s no problem. Simply choose the Canvas template:
This will give you a blank popup design that you can use to create your own modal popup. But, again, everything can still be done with a drag and a drop. No coding skills required.
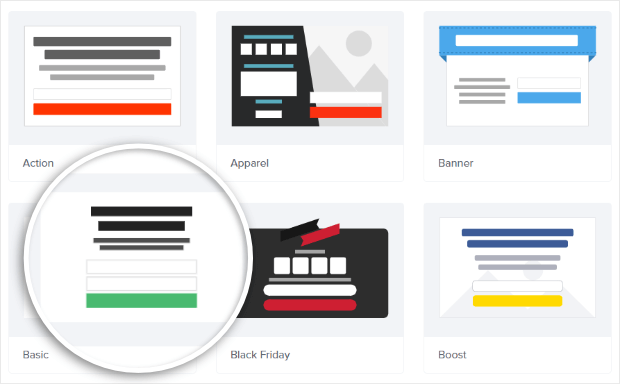
Today, we’re going to use the Basic template:
This is an excellent template for beginners. It’s minimalist in design, leaves room for compelling copy, and can be used for a wide variety of goals (email capture, redirecting to other posts, announcing a product launch, and so on).
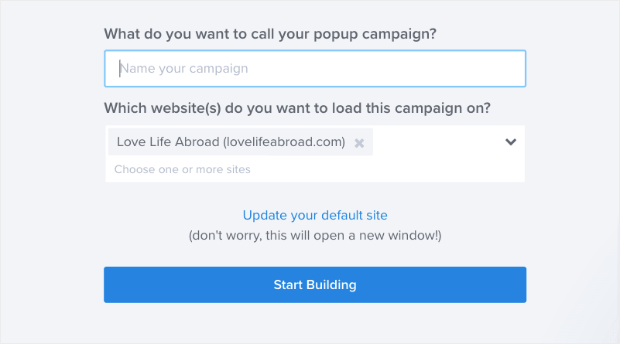
Next, you’ll need to name your campaign, assign it to your Drupal site (that you added while signing up for OptinMonster), and click Start Building:
Step 2: Design Your Drupal Popup
Now your template is in your OptinMonster editor. We won’t get into much detail on how to modify your popup’s design.
The way you design your Drupal popup will depend on what you want to accomplish with your campaign.
But if you’ve never designed a popup with OptinMonster before, no worries. Just head over to this helpful resource on how to create your first OptinMonster campaign.
The only thing you need to know for this tutorial is that all of our campaigns are built with element blocks. You have text blocks, image blocks, video blocks, and many more.
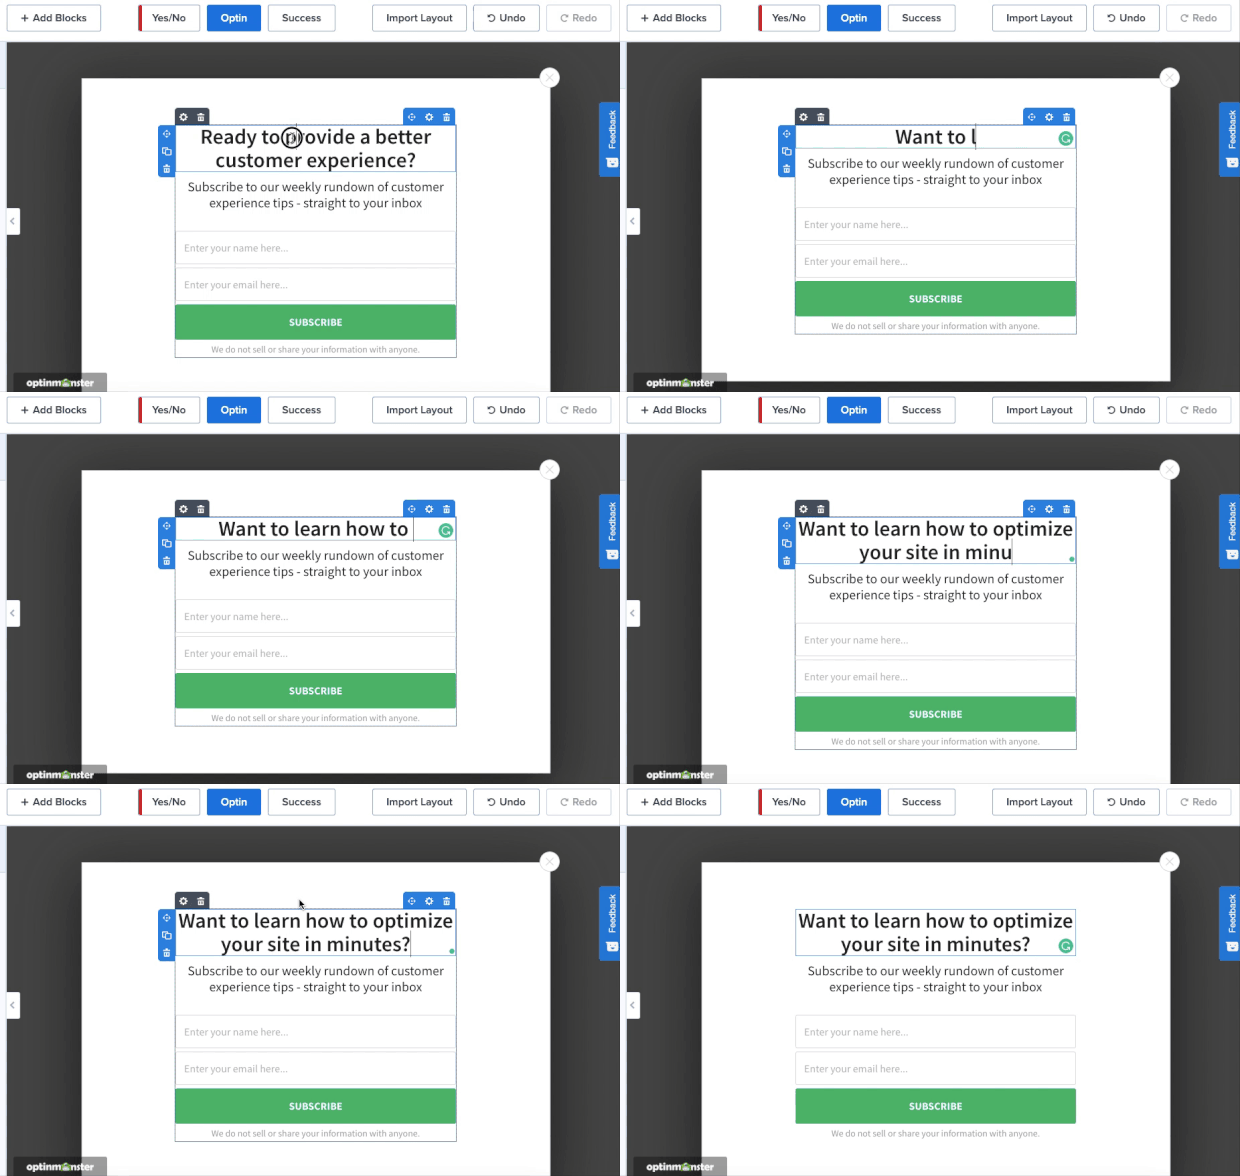
If you want to edit a text block, OptinMonster uses inline editing to make it super easy. All you need to do is click on your text block, and you can change the text directly in your OptinMonster editor:
You can change your font, text size, line height, alignment, and much more with our inline editor.
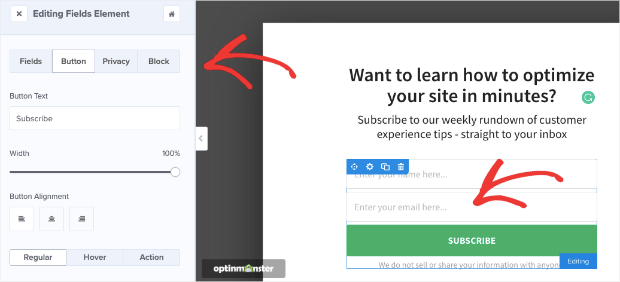
And to change other aspects of your template, that’s easy. Just click on the block you want to change in your editor. Then the editing tools will appear on the left-hand side.
So if you wanted to edit your button block, for example, you would click on it in your editor. Then the button editing tools will be on the left:
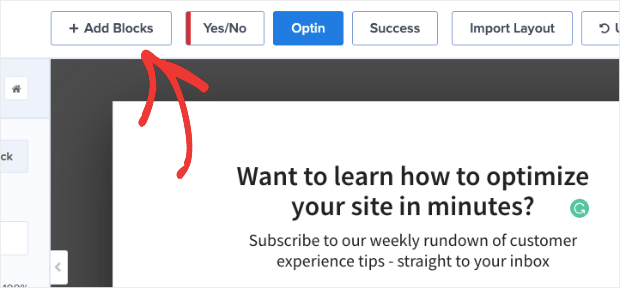
And if you want to add a new block to your modal popup for Drupal, that’s no problem. Click on + Add Blocks at the top of your editing menu:
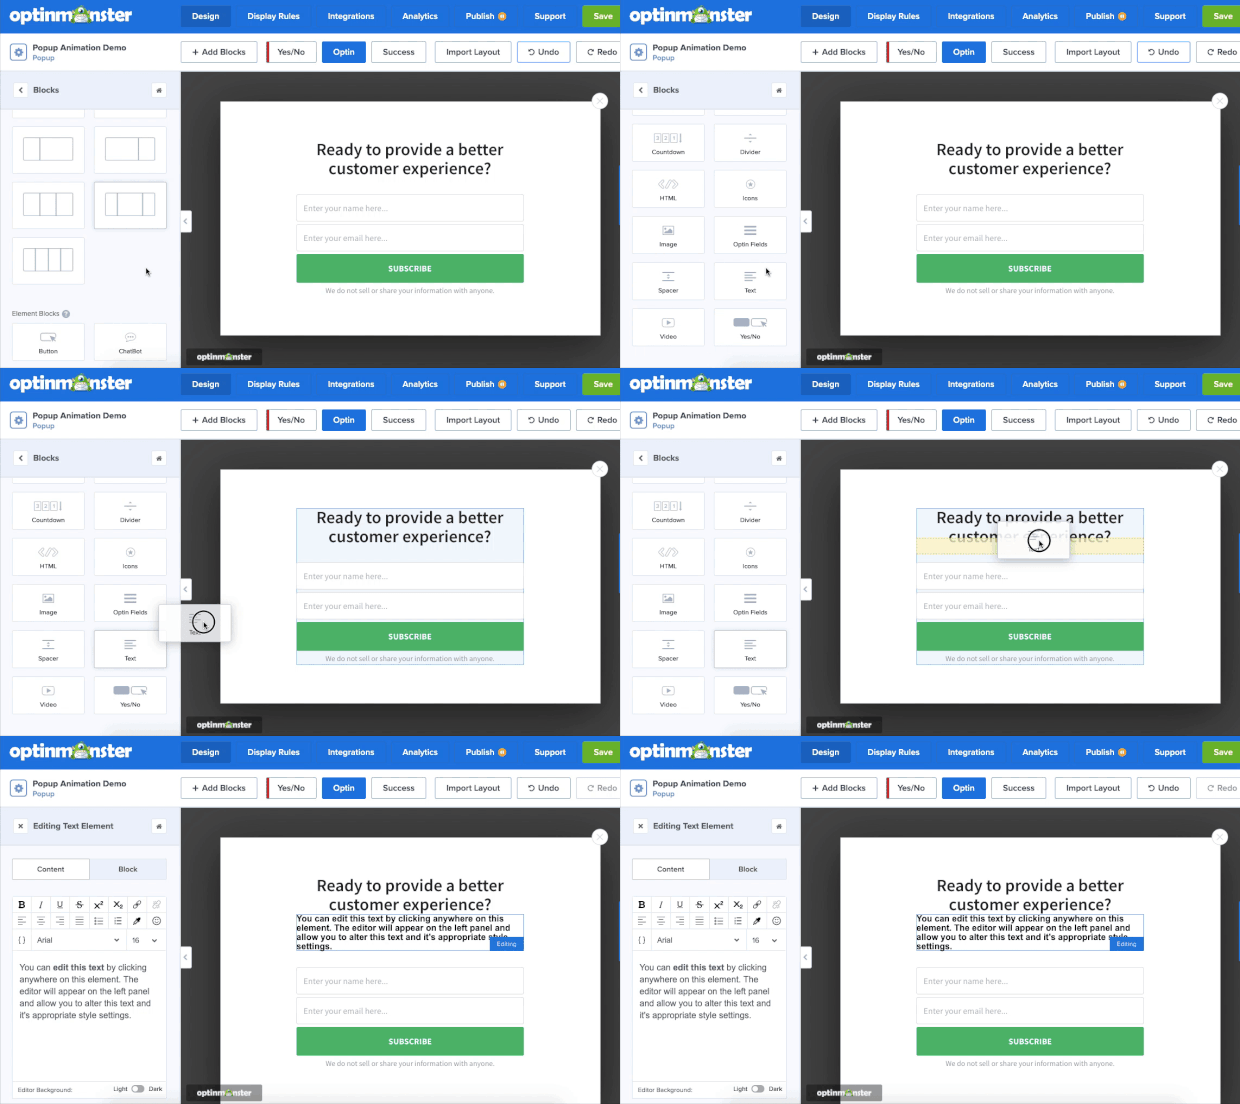
You can scroll down on the left-hand side and find the block element you want to add to your template. Then drag and drop it into place:
And that’s it. Again, customizing your modal popup for Drupal is easy.
The exact design you choose will depend on your popup’s goal and what you want your visitors to do. But, you can make your OptinMonster popup campaign totally custom to your brand’s voice, style, and message.
The last thing we’ll mention is how to turn your standard popup into a modal popup.
Remember, the big difference is that a modal popup requires your user to interact with your message before the window will close. You may use this for verifying a user’s age, requiring a user to log in to their account, or for any reason you want to reach your goals.
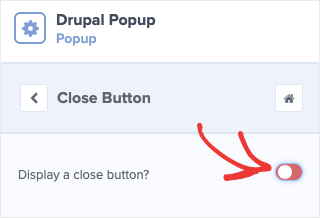
In your editor, click on the “X” close button to pull up the editing tools. Then deactivate this feature by turning the toggle switch to off:
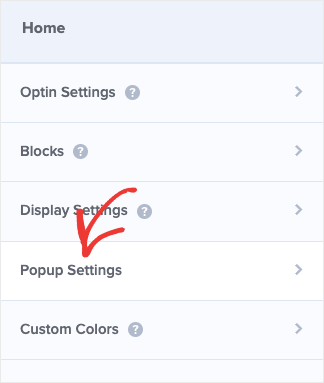
Now click the home icon to navigate back to your home menu. Click Popup Settings:
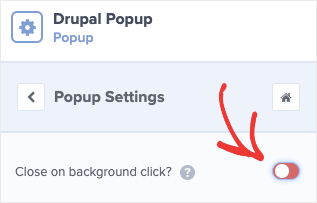
And deactivate the toggle switch next to the question Close on background click?:
Now your users will need to engage with the popup window before they can access the content on the page.
That said, we highly recommend avoiding this in most situations. This is especially true if you’re trying to grow your contact list.
Modal popups are great for getting users to take necessary actions. Again, this could be age verification, logging into an account, or agreeing to companywide terms and conditions.
In most situations, a lightbox popup (in the traditional sense) that allows users to exit the popup if they want to is the best way to go. This still gets you high conversion rates but won’t cause friction for users who just want to browse your Drupal site.
But whether you want to choose a modal popup or a lightbox popup will depend on your specific needs and goals.
Here’s the popup that we designed for today’s tutorial:
This popup is simple, sleek, and will be highly effective with the target audience. Plus, we built it in under 5 minutes.
At this point, you’re ready to set your display rules.
Step 3: Set Your Display Rules
Once your campaign is designed, you’ll want to set some specific display rules to make it appear at just the right time in your customer’s journey.
For that, OptinMonster gives you 2 powerful tools:
- Targets
- Triggers
Targets are rules that depend on basic characteristic information of your site’s traffic. This would be things like what device your user is coming from, where they’re located, which page they’re engaging with, and many more.
Triggers, on the other hand, will show your popup based on the user’s behavior. So you can create a popup if your user is actively leaving your site, for example.
This is called Exit Intent® Technology and is incredibly powerful. In fact, the fitness company Crossrope exploded their email list by over 900% with an exit intent popup.
Other triggers include things like how far your user scrolls down your content, when users become inactive, how long users spend on a certain page, and many more.
You can configure the display rules for your modal popup for Drupal depending on what you’re trying to accomplish.
Today, we’ll create a scroll depth trigger.
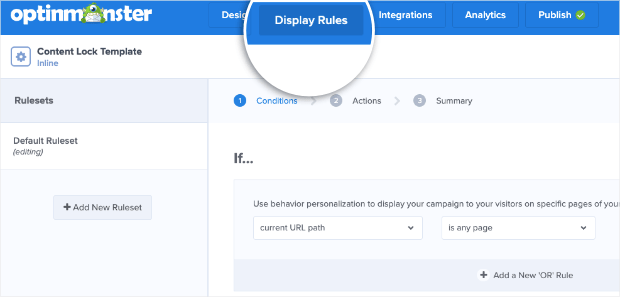
Click Display Rules at the top of your OptinMonster editor:
Your modal popup for Drupal will have 2 default rules:
- Time on page is 5 seconds
- Will appear on any page
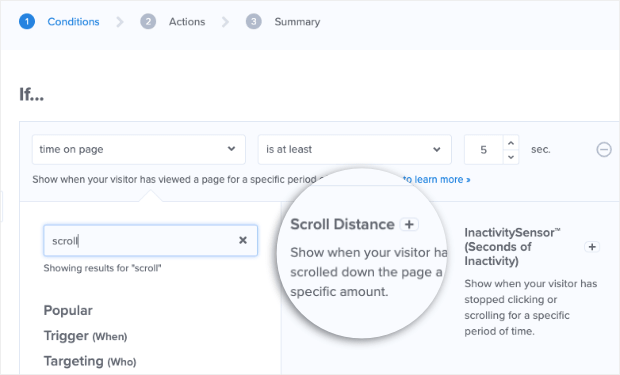
Under the first condition, Time on page, type the word scroll in the search bar and select the rule Scroll Distance:
Now you need to configure your scroll distance setting. You can choose between is at least or is no more than:
And finally, set the percentage of the page that you want to track before triggering your modal popup:
Note that you can set this in terms of percentages or pixels. Whatever you’re more comfortable with.
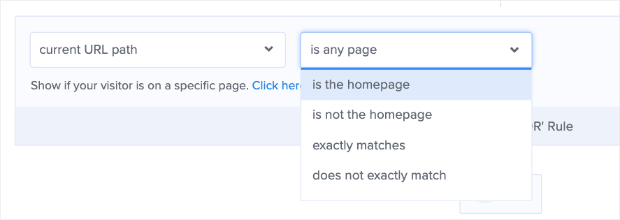
The next default rule for your modal popup will make your campaign appear on every page of your Drupal website. Today, we’ll leave that default condition as is. But you should know that you can easily change this to suit your needs.
Simply click on the rule current URL and select a different option from the drop-down list:
You can add or remove as many rules as you’d like. This makes it possible to create highly targeted modal popups for Drupal.
And the more personalized these campaigns are, the more conversion rates you can expect.
Once your campaign is ready, you’re ready to publish and embed your modal popup on your Drupal site.
Step 4: Connecting OptinMonster With Drupal
Connecting OptinMonster with Drupal is easy. But you should note that for today’s tutorial, we’ll be integrating OptinMonster with Drupal 8.
Go to the top of your OptinMonster dashboard and click Publish:
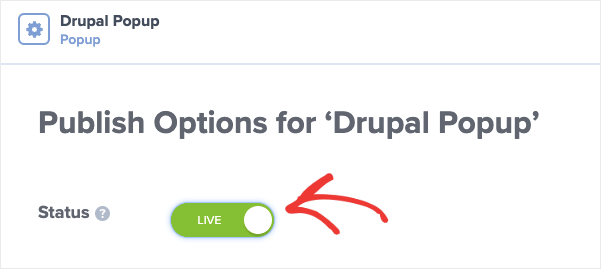
Then switch the toggle to Live to launch your OptinMonster campaign:
Now scroll down the page to find your embed code:
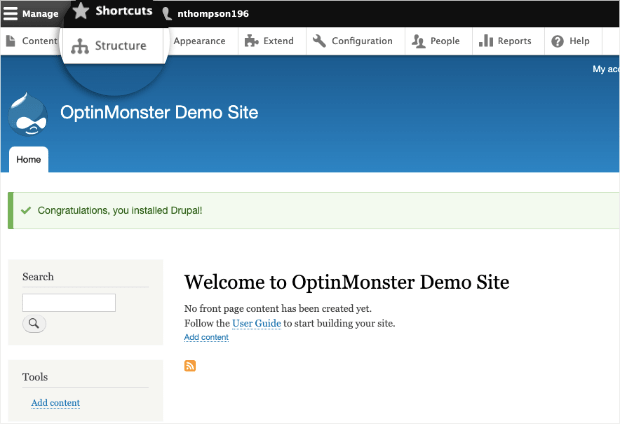
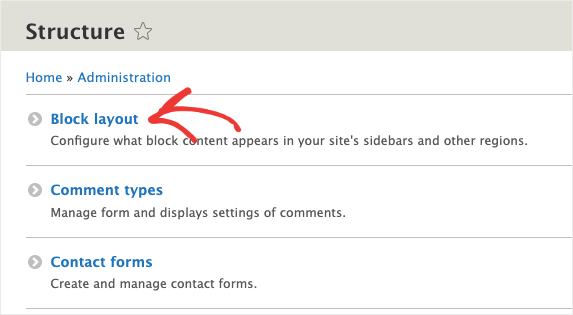
Copy this code and go to your Drupal dashboard. Click Structure from the top admin menu:
Click Block Layout:
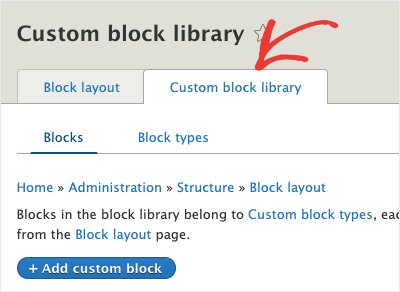
Then click on Custom Block Library:
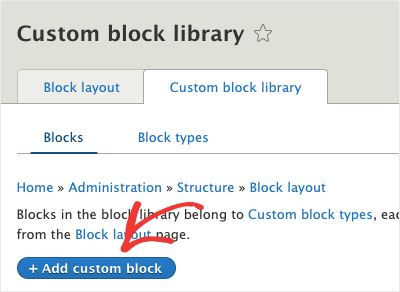
Next, click on + Add custom block:
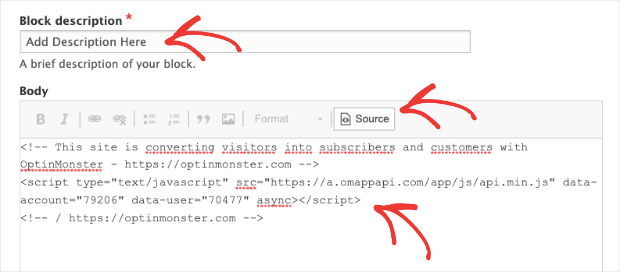
Now you’ll need to do 3 things:
- Add description
- Click Source
- Enter your OptinMonster embed code
Make sure that you click Source BEFORE you enter your campaign’s embed code. Otherwise, the script will appear over your webpage instead of displaying your modal popup.
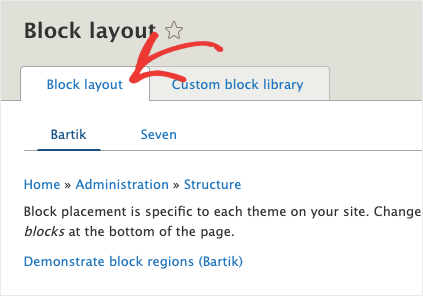
Once you save, go back to your Custom Block Library and click Block Layout:
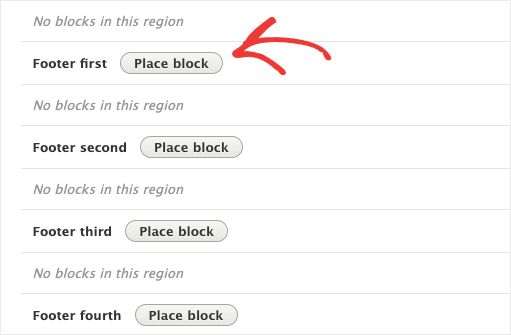
Locate a Footer region. If your theme has multiple footers, that’s ok. You can choose any that you’d like. Click Place Block:
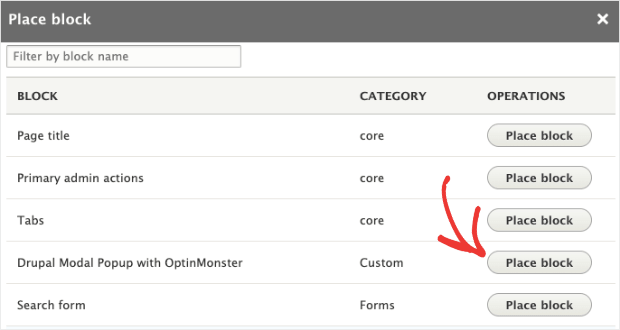
Then click Place block next to the Custom Block you just created:
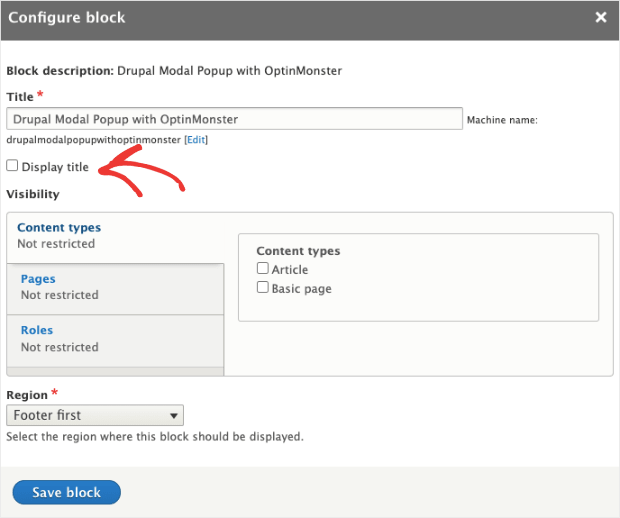
Configure your new block by giving it a title. But be sure that you uncheck the box to Display title before you save:
Then click Save block at the bottom.
And that’s it! Your OptinMonster popup is now ready to go live on your Drupal site.
We hope this article helped you out. If you haven’t built your site yet and you’re looking at ways to do it, we highly recommend you check out this post: How to Make a Small Business Website (2020).
This will help you determine whether Drupal is the right choice for you or whether you’d be better off with another site builder like WordPress.
And if you’re using your modal popup to capture email addresses, you definitely don’t want to miss these posts:
- How to Run a Successful Email Marketing Campaign
- Email Marketing for Beginners: A Step by Step Guide
- How to Create an Effective Email Autoresponder Series
These articles will teach you how to grow leads and monetize the new contact list you gain from your Drupal modal popup.








Add a Comment