Are you looking for the easiest way to create Drip forms in WordPress?
Drip is an incredibly popular email and SMS marketing automation platform. It’s not hard to see why people like it. Drip is lightweight without the high costs of some other marketing platforms.
Even though Drip offers a WordPress plugin, it does have a lot of limitations. For example, you can’t create a form from within WordPress.
So, how can you quickly add a Drip form to WordPress while targeting specific audiences?
Well, we will teach you how to do just that, using a few of our expert tricks.
How to Create Drip Forms in WordPress
The easiest and smartest way to create drip forms in WordPress is through OptinMonster:

OptinMonster is a premium WordPress plugin that lets you create various forms and campaigns with Drip.
You may be wondering, “Why do I need another program when all I want is Drip?”
It comes down to one main reason.
OptinMonster’s easier to set up and run. With OptinMonster’s powerful yet simplistic builder, all of the hard work has been done for you. No more manual integration. Just a few clicks, and your form is live.
Also, we’re using OptinMonster for Drip forms because you can do everything right from your WordPress dashboard.
Nobody wants to be jumping between multiple programs and multiple screens. Marketing is confusing enough at times. So, we are simplifying it for you.
And maybe you are one of those that already know a little bit about OptinMonster and how it’s a great way to design popups to generate leads.
But did you also know you can use it to create inline campaigns?
For today’s tutorial, we’ll be creating an inline form.
Inline forms get you noticed by your most engaged readers and work, especially on content-heavy sites.
These forms are placed inside the content your site’s visitors are reading.
In fact, OptinMonster helped Trading Strategy Guides grow their subscriber’s list by 11,000 using one inline optin form.
If you’d like these same results, get started with your own OptinMonster account now!
So, let’s dive right into today’s step-by-step guide to adding Drip forms to WordPress with OptinMonster.
Step 1: Download and Activate the OptinMonster Plugin
The first thing you need to do is download the OptinMonster plugin. If you already use OptinMonster, go ahead and skip to step 2.
If you are new to OptinMonster, getting it set up in WordPress won’t take long. And we promise it isn’t hard.
First, sign up for your OptinMonster account.
Then, head to your WordPress admin dashboard.
Then, go to Plugins > Add New.
From there, type “OptinMonster” in the search bar. Then, click the Install Now button.
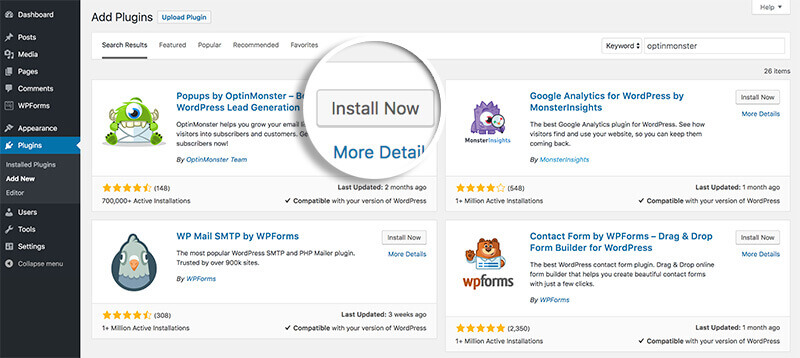
Once the plugin has been installed, click Activate.
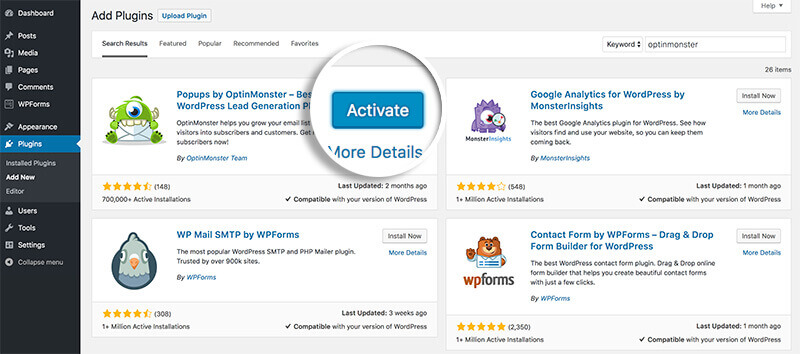
Now, on the left side of your WordPress admin dashboard, find and click on OptinMonster.
This will open the OptinMonster platform. Before we get to your form, we’ll need to finish setting up OptinMonster. So, click Launch the Setup Wizard.
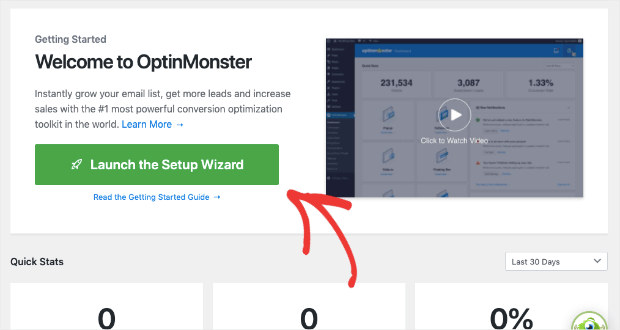
The Setup Wizard will walk you through all of the next steps.
But don’t worry, we’ll follow right along with you. So, click Connect Your Existing Account:
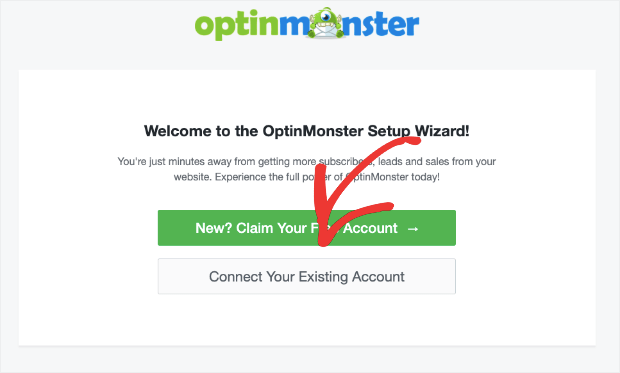
A popup will appear. Click on Connect to WordPress.
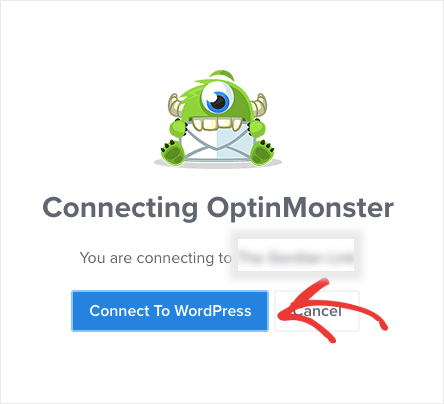
OptinMonster will prompt you to answer a few questions about your business. This is all to help customize the platform to best fit your business.
Basically, it helps us understand you and get you even higher conversions.
Now, it’s time to move on to your Drip form.
Step 2: Pick a Template
Now, let’s create your WordPress Drip form. Well, at least the part that your future customers will see.
First, go to your WordPress admin dashboard and click on OptinMonster > Campaigns. Then, click on Add New at the top of the page.
Then, select Inline as your campaign type.

Next, you’ll be able to choose from over 700 templates created for you by the OptinMonster team.
These templates are expertly designed to make the design process stress-free. Plus, they look great, no matter what device your customers use.
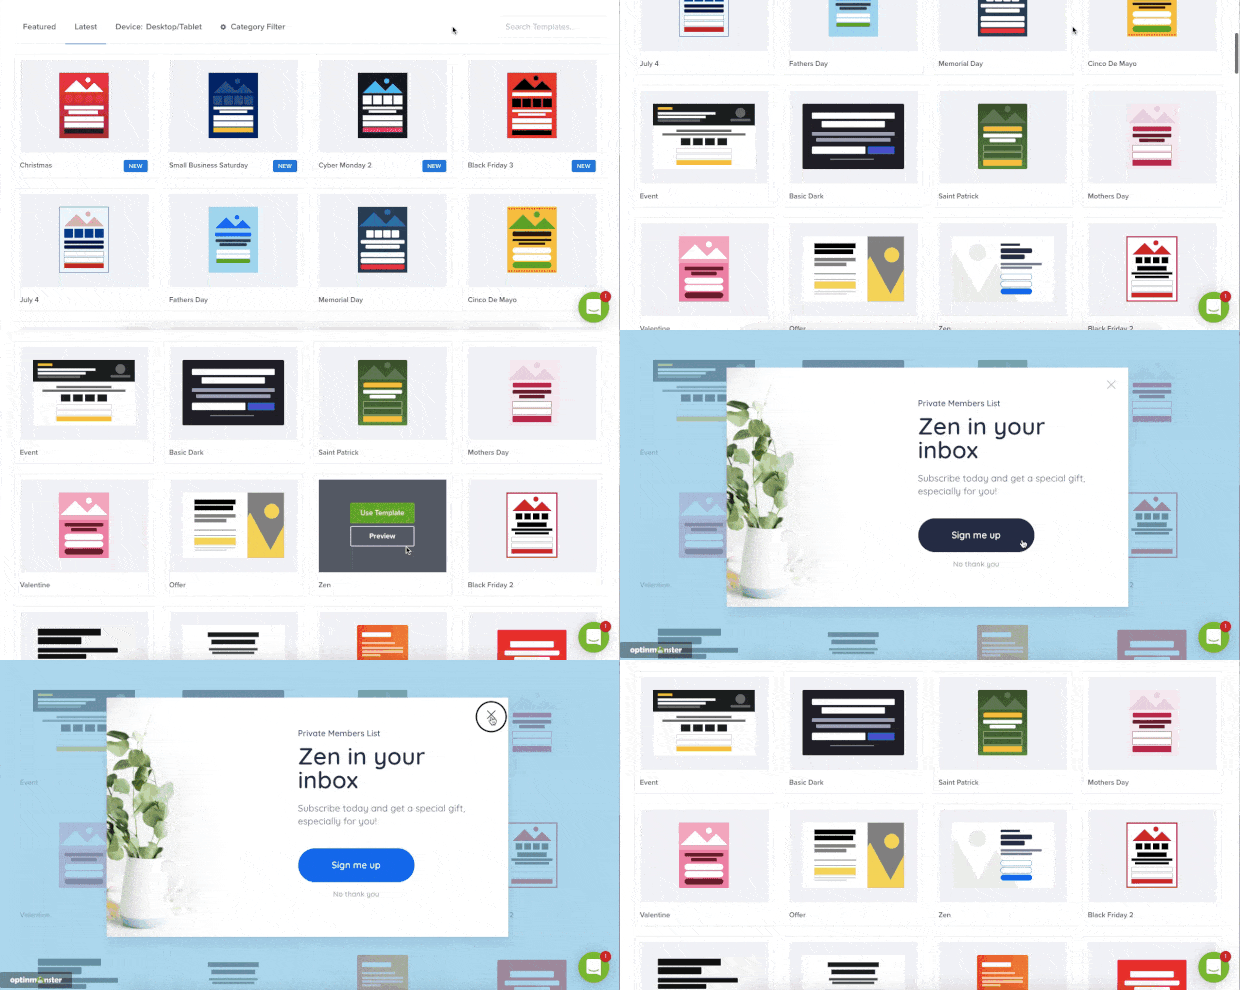
Today, we’ll use the Basic template. The basic template is a great starting point, especially if you want to add many customizations to your form.
Otherwise, the basic template is a no-nonsense design that will still grab people’s attention.

After choosing your template, you’ll be asked to name your campaign.
We recommend that you choose something that describes your intention with this form so you can easily find it in the future.
Once you choose a name, click the Start Building button.
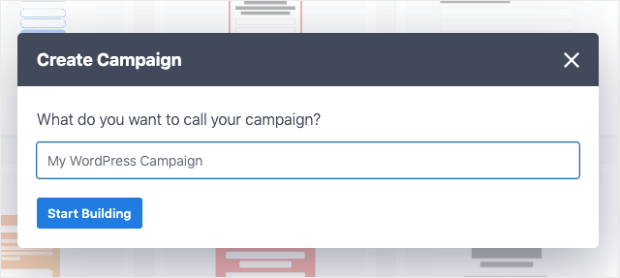
Then, the OptinMonster builder will appear with your template loaded.
Now we are ready to design your campaign.
Step 3: Design Your WordPress Drip Form
In the last step, we picked the basic template. This template does have some wording that comes with the form.
This is absolutely something you’ll want to change to fit your site and brand. Take a few minutes to think about what you want your visitors to do and why they should do it.
Once you have your message in mind, changing the text and other parts of your campaign is extremely easy. Just click on what you want to change.
That’s pretty much it.
Just watch how quickly you can create and customize your own form in OptinMonster’s WordPress builder.
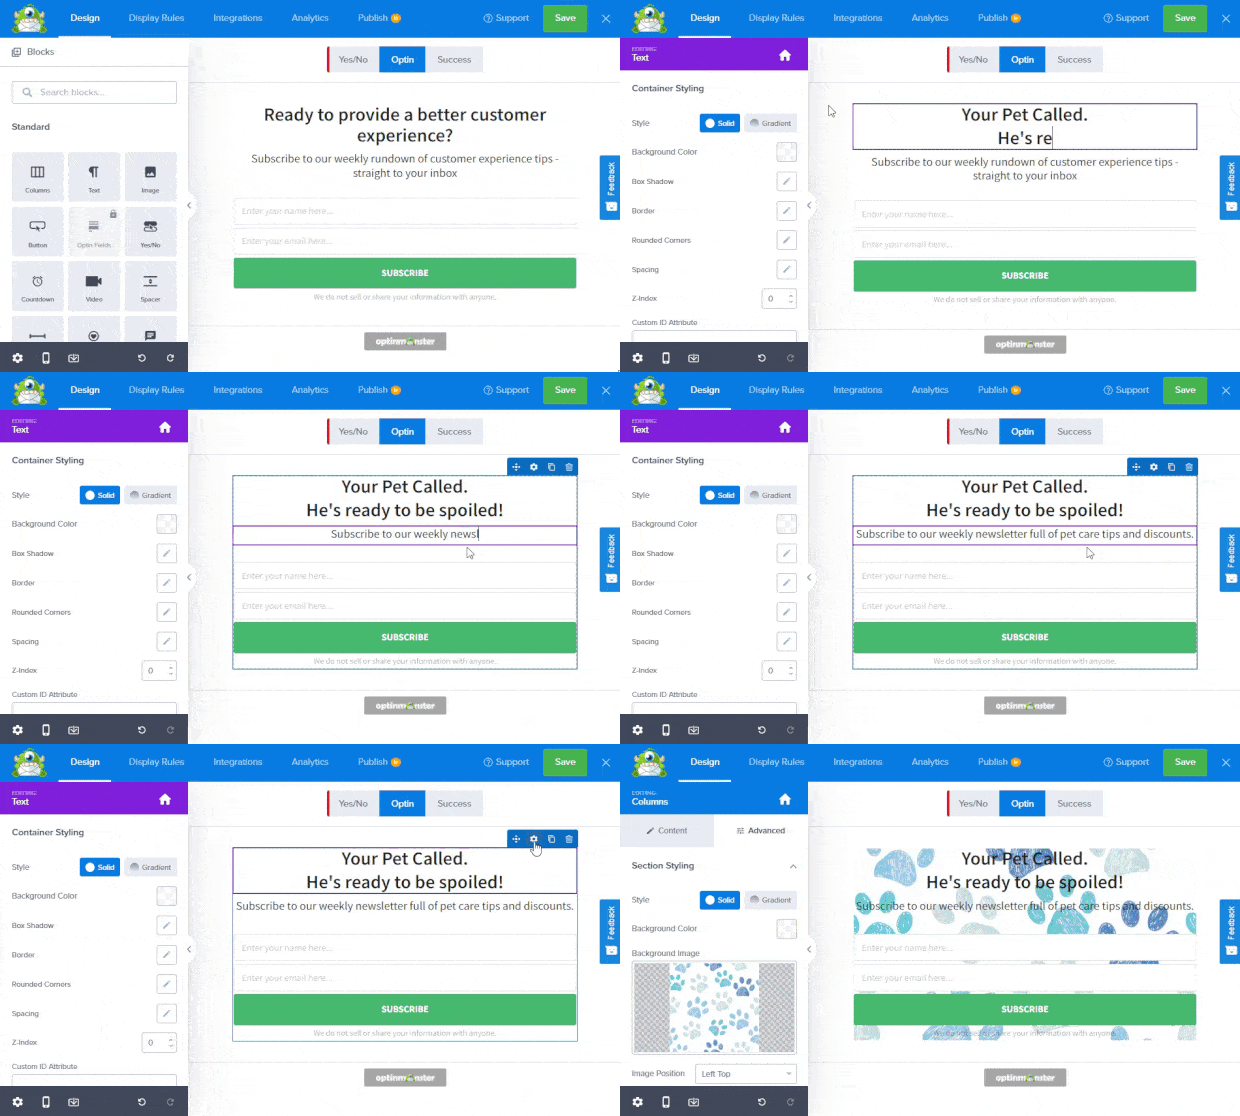
With OptinMonster’s drag and drop editor, you can change pretty much everything about your form. Text size, background color, font- your imagination is your limit.
Oh, and you can add plenty more things to your form, too! OptinMonster lets you do that with a simple drag and drop. You can add elements like:
- Images
- Videos
- Icons
- Countdown times
- And more…
These features are known as Blocks. To add a new block, click on + Add Blocks at the top of the builder.
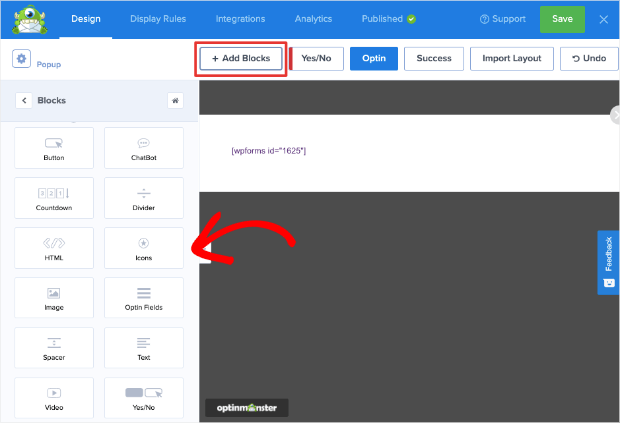
As you can see, the menu on the left has changed and lists all of the boxes you can add to your optin appear. Go ahead and scroll through to find the element you need. Then, just drag and drop it where you’d like it.
Blocks fit perfectly into pre-configured areas on your template. That saves you time (and stress) because you know it will look great, and you don’t need to hire a professional coder or designer to create an eye-catching form.
Once you’ve designed the Drip form for your audience, it’s time to target them.
Step 4: Add Targeting Rules
The more targeted your campaigns are, the more successful they’ll be.
The goal here is to collect as many qualified leads as possible. That’s where OptinMonster’s powerful targeting rules shine.
OptinMonster includes a wide range of targeting rules to give you complete control of who sees your form.
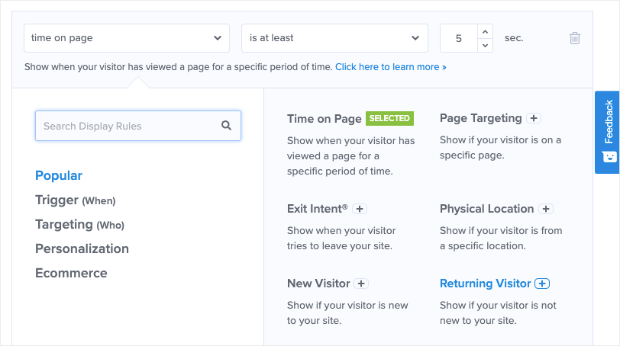
We will be using Page Targeting for this form. Page Targeting will let you name the exact pages your form will display.
For instance, if your inline form is targeted to dog owners, but your site is about care for all pets, you don’t want it to show on a page about cat litter boxes.
OptinMonster’s powerful targeting lets you name the exact pages your form shows.
To change this, click on the Display Rules tab on the top of your screen. The default rule is “current URL path is any page.”
Click on the drop-down arrow next to “is any page” to change it to “exactly matches.”
Then, type in the page you’ll want your form on.
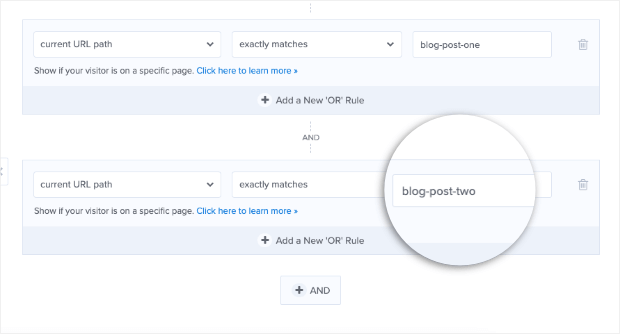
But targeting doesn’t stop there as there are other options to target specific groups of pages.
So, if you want your form to show up on any page with the word “dog” in the URL, you can select contains and add the word “dog” as the qualifier.
You can also use OptinMonster’s behavioral automation rules to entice your customers with more targeted offers via Onsite Followup, Onsite Retargeting, and Cookie Retargeting.
And, to improve the user experience, OptinMonster lets you ensure that visitors don’t have to see the same campaign more than once.
Honestly, there are many display rules, so feel free to explore them and find out what works best for your campaign and site.
Step 5: Connect Your WordPress Form to Drip
Syncing OptinMonster with Drip couldn’t be more simple. First, click on the Integrations tab at the top of your editor.
Then, on the left-hand side menu, click on New Integration.
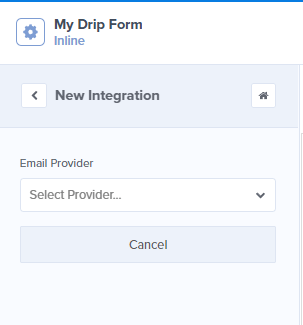
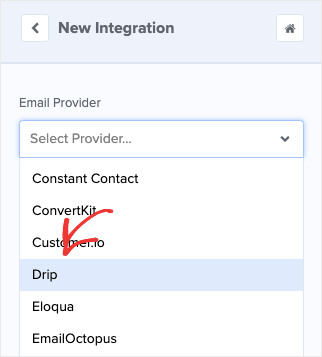
Next, scroll down in the drop-down menu select Drip.
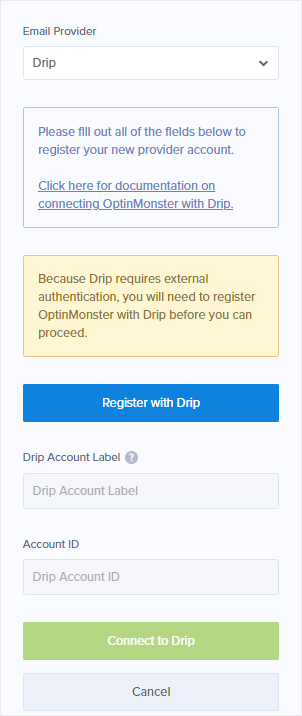
You’ll get a notification that Drip needs external authorization.
For this, you’ll need to log into your Drip account. Then click Register with Drip.
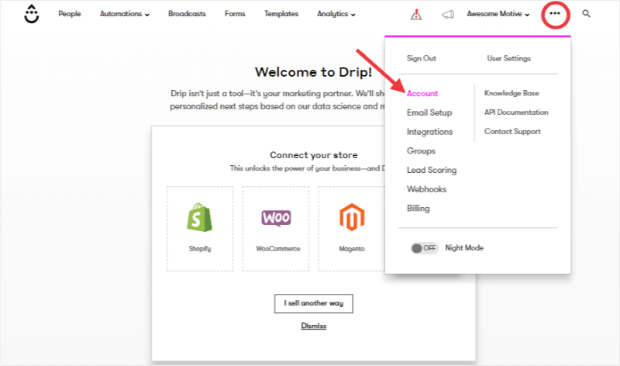
Now, you’ll need to sign in to your Drip account for your Drip Account ID.
To find your Drip Account ID, click on the 3 dots to the right of your account name. Then, select Account from the menu.
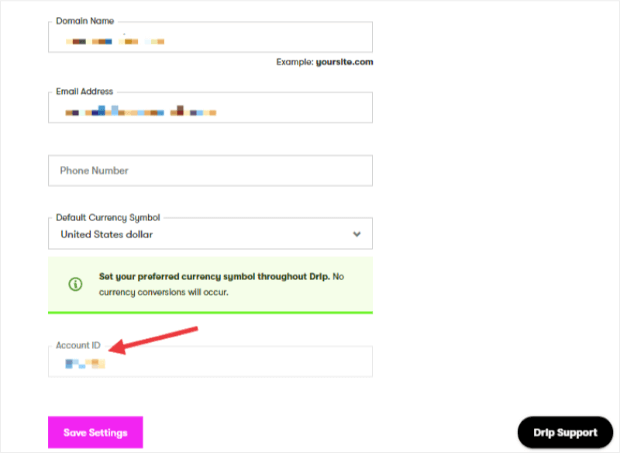
Scroll down on the General Info page, and copy your Account ID.
Now, you’ll return to the OptinMonster Integration tab.
Paste your Account ID in the Account ID field. Plus, create a Drip Account Label. This is just for internal use, so there is no need to stress over what you put here.
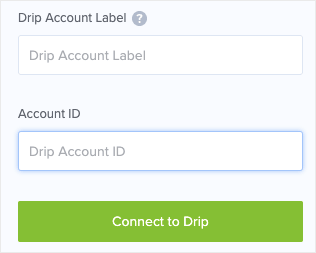
Finally, click Connect to Drip.
Once your Drip account is connected, select the “Email Provider Campaign” you want this form’s leads to.
Then click Save.
And that’s it! Your Drip account is synced with your OptinMonster account.
Don’t worry; you’ll only need to do this step once. Once OptinMonster is set up to talk to Drip, it’s there to stay.
Step 6: Publish Your Drip Form in WordPress
Publishing your Drip form in WordPress is simple. In just a few minutes, it’ll be live on your website.
On the top of your builder, click on the Publish button.

Scroll down this page and ensure that all of your settings are the way you want them. Then, click on Save at the upper right-hand corner of the builder.
Before we publish this, let’s fine-tune where this inline form will show on our page. First, exit the builder (remember to click that save button first) and go back to your WordPress admin dashboard.
If you aren’t already on the OptinMonster tab, go there.
Click on Campaigns. Find the campaign you just created and hover over the text box, and click where it says Output Settings.
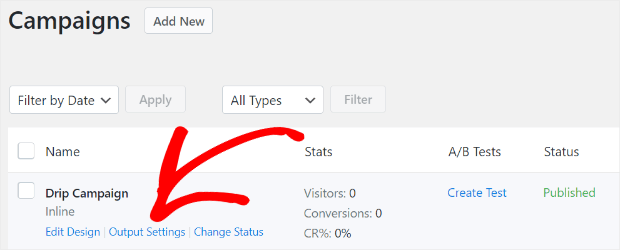
You’ll now see a screen with options to change where your Drip WordPress form will show on your site.
For ease, we recommend clicking on the Automatic option under How should your inline campaign be displayed?
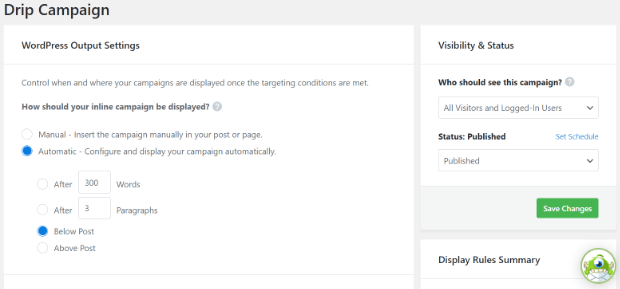
There’s an option to show your form after a set number of words or paragraphs or above or below your post.
Just choose whatever looks best and makes sense to you.
Make sure the Status on the right-hand side is set to Published when you are done. Then, click Save Changes.
And just like that, you have a Drip inline form on your WordPress site!
We hope that you found this tutorial helpful. If you did, you’ll want to check out these other resources:
- Small Business Email Marketing: 7 (Easy) Tips for Growth
- 35 Best Lead Generation Software & Tools for Targeted Leads
- 31 Best Email Automation Tools to Transform Your Business
These articles will give you the tools you need to automate your marketing efforts and show you more tools and trips to grow your business.




Add a Comment