
How to Create a Refer-a-Friend Form Popup (+Template)
Last updated on
by

Do you want to learn how to create a “refer-a-friend” form for your website, but not sure how to get started?
Whether you’re trying to drum up new leads for your services or trying to get more candidates to apply for a job, refer-a-friend forms can be an excellent way to grow your business.
It’s more affordable than most marketing methods and typically attracts better talent than cold emails or paid advertising.
That’s why, in today’s post, we’re going to teach you 2 things:
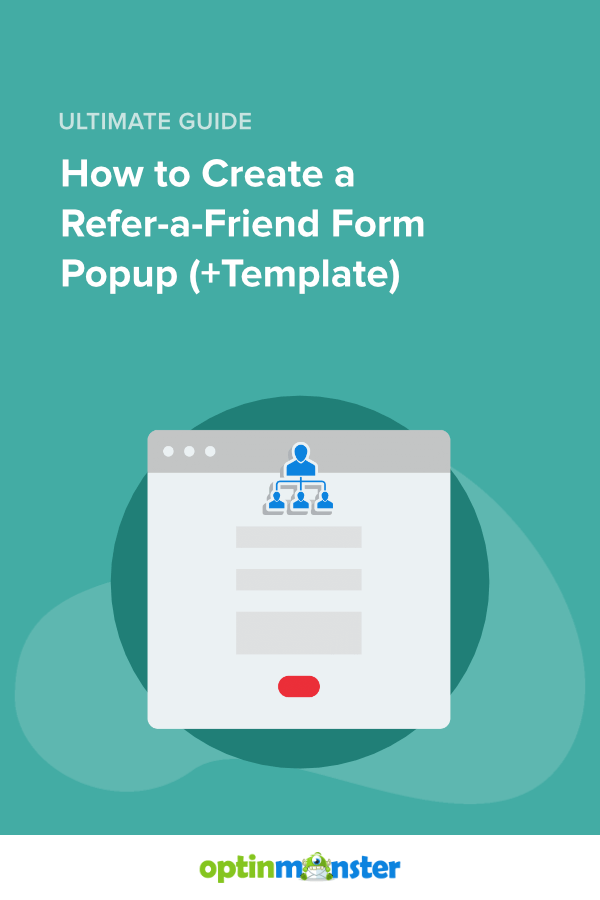
Here’s a glimpse of the campaign we’ll build today:

Before we dive into this 2-part tutorial, though, let’s get clear on why a refer-a-friend form is such a valuable marketing tool.
Why Use Refer-a-Friend Form on Your Site
Whenever you place a call to action (CTA) button across your site, it’s because you’re trying to get more people to do the same thing.
This could be making a purchase, signing up for a webinar, filling out a job application, or any other thing you want a portion of your audience to do.
And while you can invest in marketing strategies to increase the number of people who take action on your site, a refer-a-friend form is low-hanging fruit that many small business owners miss out on.
This is a small form that asks people to, as you might have guessed, refer a friend for whatever service, promotion, product, or event that they just signed up for.
There are many benefits to using a refer-a-friend form, such as:
- Save Money on Marketing Costs: Refer-a-friend forms are a free way to leverage leads you have to gain new ones.
- Generate More Quality Leads: Chances are that your new lead fits your target audience. And THAT means their private network probably includes people in your target audience, too.
- Increase Your Brand’s Online Presence: The more people referring your business to their network, the larger brand awareness you’ll be able to build.
In fact, entire companies like Uber were initially built with word-of-mouth strategies.
You can use the same techniques to build a refer-a-friend form popup to get all these benefits and more.
So, now, let’s turn our attention to how you can create a refer-a-friend form.
How to Create a Refer-a-Friend Form
For this part of the tutorial, we’ll be using WPForms:

WPForms is hands down the best form building plugin for WordPress. It has everything you need to quickly and easily build all kinds of forms, including:
- Contact
- Payment
- Survey
- Newsletter
- Registration
And, of course, refer-a-friend forms. But the best part is that WPForms comes with loads of pre-built templates to save you time and energy in the campaign creation process.
Plus, with a drag and drop builder, you can modify your forms in a matter of minutes. Then you can sync it to your email provider to send automated follow-up campaigns to the person they referred.
This puts your referral strategy on autopilot so you can focus on other ways to grow your business.
Not using WordPress? No worries at all. The basic creation of the “refer-a-friend” form is the same across platforms.
For a free form building tool, you can always use a resource like Google Forms, if needed.
Now let’s see how you can use WPForms to create a refer-a-friend-form.
Step 1: Install and Activate WPForms
First, you’ll need to install and activate WPForms on your website.
From your WordPress admin menu, click Plugins » Add New. Then type ‘WPForms’ in the search bar:

Once you’ve found WPForms, click Install Now:

And after that, click Activate:

Now WPForms will be added to your WordPress site.
Next, you’ll need to enter your license key. From your WordPress dashboard menu, click WPForms » Settings.
Here you’ll be able to enter your license key:

Need to track down your license key? That’s no problem.
You can find that in your WPForms account dashboard:

Then you can copy and paste that key into your WPForms Settings tab in WordPress.
We always suggest upgrading to a paid plan for more in-depth features like:
- Smart conditional logic
- SPAM protection
- 3rd-party marketing integrations
- Increased user support
- And much more…
Plus, paid plans begin at only $49.50/year. Get started with WPForms today!
Step 2: Create Your Refer a Friend Form
Today, we’ll create a multipurpose refer-a-friend form that can be used for a variety of reasons. It will include some basic fields, such as:
- Name of the person being referred
- Email address of the person being referred
- Name of the person referring
- Email address of the person referring
Building this form couldn’t be easier.
And by the end of this tutorial, you’ll also have a general understanding of adding other custom fields to meet your unique needs.
To create a form, go to your WordPress admin menu and click WPForms » Add New.
Then you’ll need to name your new form and click Simple Contact Form:

Note: There are templates for referrals, such as an Employee Referral form template. But you’ll need an upgraded plan for those.
Now your form is in the builder, and you’ll want to make a few modifications.
You’ll see that the form is on the right, and the editing tools are on the left. Click any block on your form to bring up the editing tools:

We’ll want to change the first field box to “Referral’s Name.” To do so, click on the Name block and change the Label on the left-hand side:

Then you’ll do the same thing for the email address. You’ll want to make sure this says “Referral Email Address” to reduce confusion for the person filling out the form:

Notice that there’s a checkbox Required that’s activated by default. We highly recommend leaving this field required to ensure your new lead’s name and email address are entered.
Now we’ll need to add 2 fields to the form:
- Your Name
- Your Email Address
This will help you contact the person making the referral if their new leads engage with your call to action (CTA).
To add any new field to your form, locate it from the Add Fields column. Then drag and drop it into place:

You can do this for both the “Your Name” and “Your Email Address” fields.
Keep in mind you could add other fields to your form, such as:
- Phone number
- LinkedIn profile
- Facebook profile
Or other ways you would be able to reach out to this new reference.
We’ll keep things simple for today, but just know that WPForms allows you to create any kind of form you need.
Next, we’ll want to delete the Comment or Message field that came with the default template. To do so, hover over the block and locate the trash can icon:

Now your form is pretty much complete. You’ll want to connect it to your email service provider to automate a refer-a-friend email sequence.
Step 3: Connect to Your Email Service Provider (ESP)
Form the WPForms builder, click Marketing. Here you’ll see a list of all the email providers you can use. In today’s tutorial, we’ll use Constant Contact:

Constant Contact is one of the best email providers on the market, and we highly recommend checking them out if you don’t have an ESP yet.
Connecting Constant Contact to WPForms is easy, and only requires you to allow WPForms access to your email account.
For more detailed instructions, you can check out this post: How to Connect Constant Contact to WPForms.
Once that’s set up, you’ll need to Save your campaign and grab the shortcode from the Embed button:

You can easily embed WPForms on any page or post of your website. But for the next part of this tutorial, you’ll need the shortcode.
When you click Embed, a new window will appear. Click Use a Shortcode:

Then copy the shortcode that generates:

Now you’re ready to turn your form into a popup to boost engagement across your site.
Make a Refer-a-Friend Form Popup
One of the trickiest parts about using a refer-a-friend form is getting people to fill it out.
To do so, you’ll want to highlight the incentive, make the form easy to fill out, and send a confirmation message that the form has been successfully completed.
For that, there’s no better tool than OptinMonster:

OptinMonster is the #1 lead generation software in the world and the best tool for presenting forms to your audience in an engaging way.
That’s because, as you’ll see, OptinMonster lets you target your refer-a-friend form to get the highest engagement possible.
In fact, today, we’ll teach you 2 distinct ways you can target your audience to get more refer-a-friend form completions.
Want to follow along? Click below to sign up for your risk-free OptinMonster account:
Need some help setting up your OptinMonster account? No worries.
Just check out this helpful resource on how to add OptinMonster to any website.
Once you’re signed up, you’ll be ready to build your refer-a-friend campaign.
Step 1: Select Your Campaign Type and Template
OptinMonster allows you to build all kinds of optin campaigns. These are things you’re already familiar with, like popups, floating bars, fullscreen welcome mats, and more.
To begin, click Create New from the upper right-hand corner of your OptinMonster account:
 - OptinMonster")
Now you’ll need to select your campaign type. For today, we’ll stick with a popup:

From there, you’ll be able to choose from any of our 50+ pre-made templates. These will save you time and energy in the campaign creation process:

All of our templates look great across devices, including mobile, desktop, and tablet.
For today, we’ll go with the Zen template, though feel free to select the one that best fits your brand’s voice and style.
Then you’ll need to name your campaign, assign it to your site, and click Start Building:

Now you’re ready to design your campaign.
Step 2: Design Your Campaign
For this tutorial, we’ll want to use a Yes/No campaign which will give 3 views:
- Yes/No
- Optin form (where you’ll embed your refer-a-friend form)
- Success
We’ll start by activating your Yes/No feature.
In your OptinMonster editor, click the Yes/No button at the top. Then click the toggle switch next to Display a Yes/No view:

Now you can modify this view of your campaign.
Doing so couldn’t be easier. That’s because OptinMonster has an inline text editor that allows you to quickly change any of the text in your campaign.
To do this, click on what you want to modify and type the changes directly in the editor:

With this feature, you can change anything about your text, including:
- Font family
- Font size
- Alignment
- Line height
- Color
- And much more…
This allows you to totally customize your optin campaign.
And if you want to add any features like an image, video, chatbot, or more, you can use the drag and drop editor:

This gives you 100% control over the look and feel of your campaign.
But the best part is that you don’t need any coding skills to create professional and high-converting campaigns in minutes!
We won’t get into much more detail on how to modify your campaign in this tutorial. If you need extra help, you should check out this resource: How to Create Your First Optin Campaign.
Here’s an example of what we built with the Zen template in under 5 minutes:

Now we need to work on the Optin view by embedding the refer-a-friend form we created earlier.
Step 3: Embed Your Refer-a-Friend Form
At the top of your OptinMonster editor, click Optin:

This will take you to your Optin view. You’ll want to delete the content of this view by locating the trashcan icon at the top of the campaign:
![]()
Once you’ve cleared the campaign, you’ll need to add a single column to it:

You can click this block to drag and drop it into your campaign.
From the same editing menu on the left-hand side, scroll down and find the HTML block:

Drag the HTML block into your campaign editor.
Now you’ll want to add your WPForms shortcode in the custom HTML block editor on the left-hand side:

Once you do, your refer-a-friend form appear like so:

But as you can see, we’ll need to style this a bit. That’s because when you embed forms into 3rd-party tools like OptinMonster, the CSS can get removed.
To restore the original look of the form, go to your OptinMonster editor home menu and click Optin Settings:

Then find Custom JavaScript:

Now copy the following snippet of JavaScript code:
And paste it into the Custom JavaScript field box:

Then click on the shortcode in your OptinMonster editor to pull up the tools on the left. Click on Block:

Scroll down so you can adjust the padding and add a bit of spacing around the border of your form.
For this specific form, we added the following padding:
- Top: 25
- Right: 25
- Bottom: 25
- Left: 150

Now our form appears like this:

You can use OptinMonster’s editing tools to make further additions if you’d like.
But, for this tutorial, we’ll keep things simple.
Next, you’ll need to modify your Success view.
Step 4: Modify Your Success View
To change your Success view, click Success at the top of your OptinMonster editor:

You can now change the messaging and campaign using the methods we’ve already covered in this post.
Remember, the goal is to thank your customer and explain what will happen next.
Here’s the example we created for today’s tutorial:

Finally, there’s one last step to complete: targeting your refer-a-friend form.
Step 5: Target Your Campaign
The whole point of using OptinMonster to distribute your refer-a-friend form is to target it to the right users, in the right places, and at just the right time.
There are 2 methods for doing this:
- Adding the popup to a confirmation page when someone signs up for your services
- Showing the campaign to people who have completed another optin form in the past
Let’s quickly show how you can set up both targeting rules.
The first step will be the same for both: click Display Rules at the top of your OptinMonster editor:

Now we can select which method we want for targeting:
Method 1) Add this popup to a confirmation page
The goal of this targeting rule is to get people to refer a friend right after they sign up for your offer.
This is a crucial moment because the person filling out the form has just decided to work with you in some way. That means they’re more likely to suggest it to their friends.
Let’s set up this rule step-by-step.
By default, the first targeting rule is set to Time on Page is at least 5 seconds.
Click the field box that says “is at least” and change it to “is immediate.”

That way, users will see this appear right when they reach the confirmation page of your offer.
For the next rule, we need to use Page Level Targeting. That way, you’ll only show this popup on the confirmation page and nowhere else on your site.
The second rule by default is Current URL Path is any page.
Click “is any page” and change this to “exactly matches“:

Then enter the URL for your confirmation page in the next field box:

Now your refer-a-friend form popup will appear to users who have just signed up for your offer or services.
But let’s say they forget to refer a friend this time, and you want to catch them on their next visit to your site.
Method 2) Display to users who have signed up in the past
The great thing about OptinMonster is that you can display campaigns based on how users have interacted with your optin forms in the past.
So if a user signed up for your offer, but they don’t refer a friend right away, you can still target them in the future.
To do this, click the first default rule Time on Page. This will open up the targeting rule menu:

Then search for and click the rule Has Converted +:

Then select the campaign that you want people to have converted from before the refer-a-friend popup can appear:

You can use the other targeting rules from the first method (Time on Page and Current URL is) to decide where to put this follow-up campaign.
That way, you’re refer-a-friend form popup will appear to users who have already signed up for your offer when they’re visiting specific pages.
And that’s it!
You now have a refer-a-friend popup form on your site with the help of WPForms and OptinMonster:
Again, if you’re not using WordPress, you can use other form builders like Google Forms.
But OptinMonster works with any website and will allow you to embed forms via HTML or shortcodes.
We hope you found this post helpful. If you did, you might also want to check out the following resources:
- 5 Ways to Leverage Your Network for Growth
- Email Marketing Made Simple: A Beginner’s Guide
- How to Run a Successful Email Marketing Campaign
These articles will teach you how to use your network to grow your business.
Plus, they’ll show you how to nurture your new leads into paying clients through email marketing best practices.
Disclosure: Our content is reader-supported. This means if you click on some of our links, then we may earn a commission. We only recommend products that we believe will add value to our readers.

-01 - OptinMonster")


Add a Comment