Are you looking for a quick and easy way to create a custom Marketo popup that converts?
Popups can turn your company’s website into a lead generation machine. But creating a beautiful popup that appears exactly where and when you want isn’t always easy. Customizations might require custom code or expensive software.
The good news is that it doesn’t need to be that way.
By the end of this post, you’ll know exactly how to easily create a custom Marketo popup that will help your business grow.
Why Create a Custom Marketo Popup
Marketo is marketing automation software for high-growth businesses and large enterprises.
It comes with everything you need to create personalized and automated email campaigns.
But do you have a plan to consistently collect emails?
By creating a Marketo popup, you’ll be able to add subscribers to your list automatically. A Marketo popup is a lead capture form that sits on top of your website content. And its goal is to collect information, like email addresses.
Now, if you’re researching Marketo popups, you’re serious about B2B lead generation.
You’ll know B2B typically has longer, more complex sales cycles than B2C.
But no matter if you’re marketing to individuals or other companies, you need to nurture relationships.
And popups are incredibly useful for starting those relationships.
The right kind of popup campaign turns your casual web visitors into happy customers.
With a custom Marketo popup, you can:
- Boost webinar attendance
- Increase free trials
- Drive up demo requests
- …and more.
But how do you create a custom Marketo popup that your site visitors will actually click?
These days, it’s not easy to get people to take action on your site.
Some of your visitors may even have popup blindness, where they’ve conditioned themselves to ignore the popup.
OptinMonster changes all of that because it’s the best lead generation software. It enables you to easily and quickly create eye-catching Marketo popups with a drag and drop builder.
With OptinMonster, you can choose from multiple campaign types, like lightbox popup, fullscreen welcome mat, floating bar, and more.
We help you get eye-catching popups in front of your ideal buyer at just the right time.
Our customers use these features to:
- Grow their email list
- Boost site traffic
- Increase sales
One million sites use OptinMonster to turn their website visitors into subscribers and leads.
Among them are some of the biggest brands in the world.
These are customers like Hubstaff, who increased trial signups by 21%.
And the best part is that it’s so easy.
Without OptinMonster, you might need CSS and jQuery knowledge to create a custom popup.
You can easily create and customize Marketo popups without writing a line of code in our campaign builder.
Today, we’ll create this targeted popup in under 20 minutes:
Let’s walk through the steps to build your custom Marketo popup.
How to Create a Custom Marketo Popup
Before we begin, you’ll need to log into your OptinMonster account.
Don’t have an account yet? You can sign up below. It’s risk-free with our 14-day money-back guarantee.
Let’s begin.
Step 1: Create an OptinMonster Campaign
Once you’ve logged in, you’ll need to click Create New Campaign from your OptinMonster dashboard.
Next, you can choose your campaign type.
Today, we’ll go with Popup.
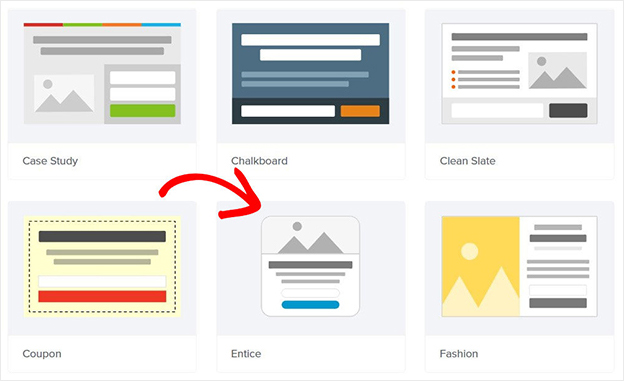
Now, you’ll need to pick your template.
You can filter by campaign goal to narrow your options:
- Grow email list
- Target abandoning visitors
- Redirect traffic
- Time sensitive offer
You can also search for mobile-optimized templates. But all of OptinMonster’s templates are responsive and work great across computer, tablet, and smartphone.
For this tutorial, we’ll go with Entice.
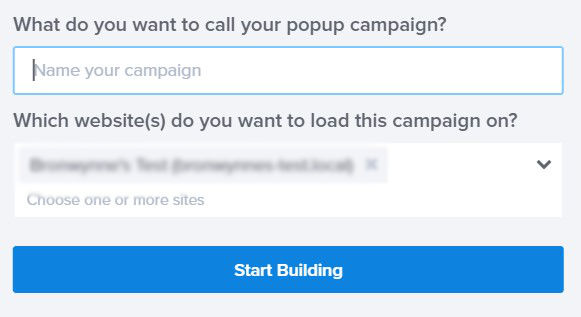
Now, you’ll name your campaign.
Click Start Building to enter the OptinMonster editor.
You’ll now be ready to customize your popup.
Step 2: Design Custom Marketo Popup
OptinMonster’s drag and drop builder lets you change the colors, fonts, and anything else about your popup.
You don’t need coding or design skills to customize your template.
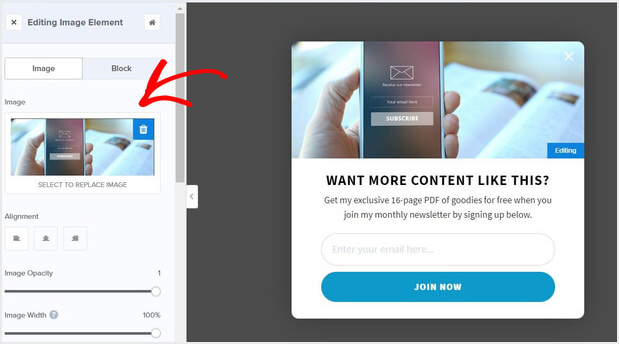
Simply click on any part of your popup to change it. This will bring up the editing tools on the left.
So, to edit the image, click on it. And you’ll see the editing panel on the left. You can now upload your image.
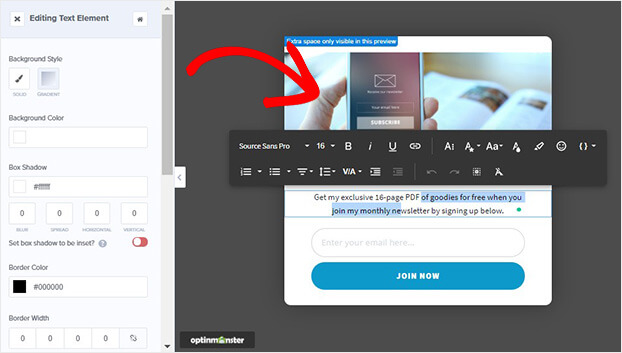
Similarly, you can edit the text by clicking on the text block.
Now, you can adjust the copy and style.
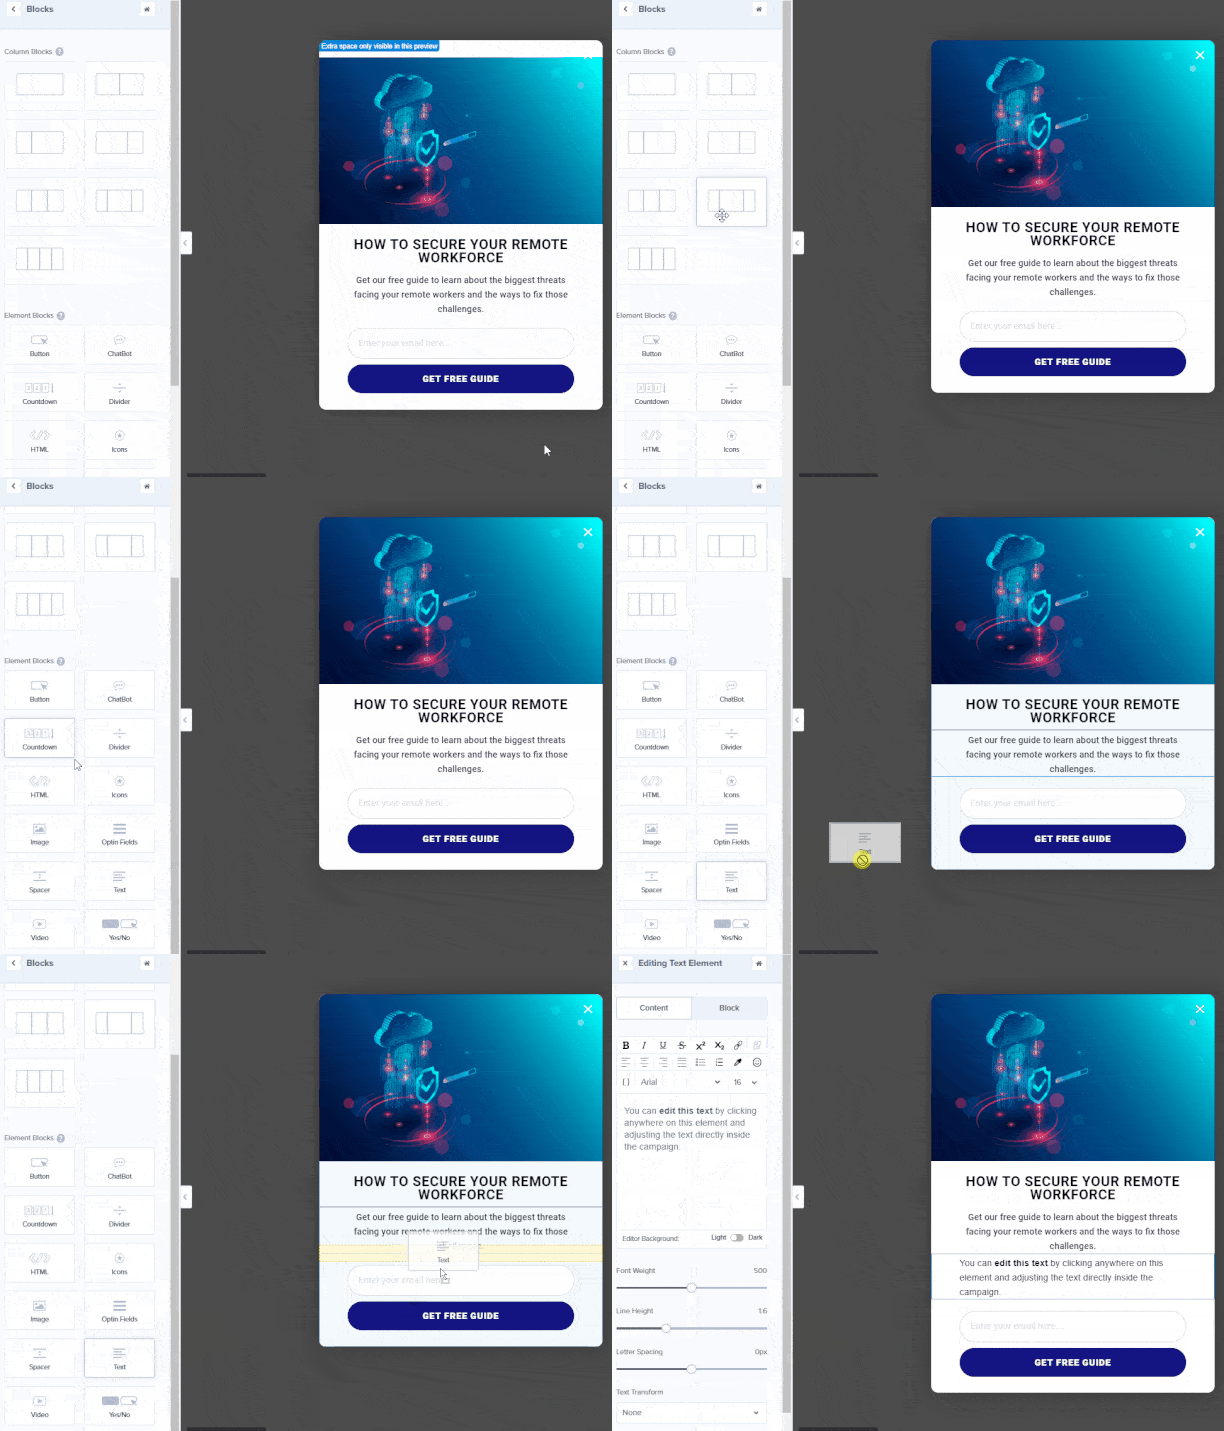
You can also add new blocks to your popup.
Click Add Blocks at the top of the editor.
From here, you can add:
- Video
- Image
- Text
- Icons
And more.
All you need to do is drag and drop the block into place on your popup.
You’ll also be able to control what happens once someone completes your optin.
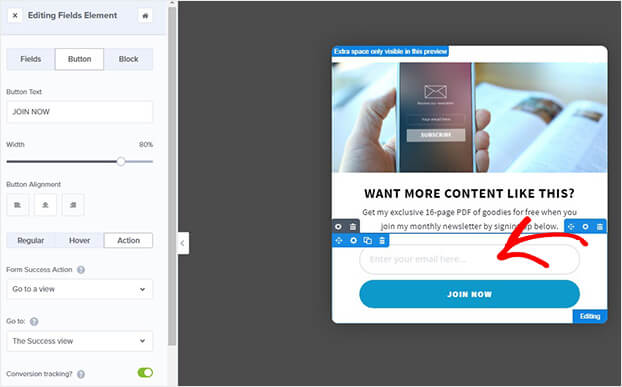
Click on the submit button. From the editing panel on the left, you can customize everything about the button, like the color and text.
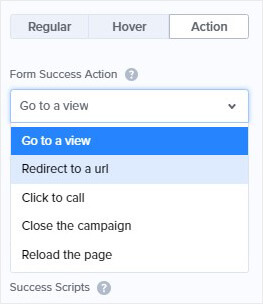
If you select Action, you’ll be able to determine what happens when your subscriber submits your form.
You can choose to:
- Redirect to a different URL
- Close the campaign
- Reload the page
You can trigger OptinMonster’s Success view after they’ve subscribed. This is a screen shown to visitor once they’ve opted into your list.
Learn more in this article: How to Leverage OptinMonster Success Themes
Now, it’s time to display your Marketo popup.
Step 3: Display Custom Marketo Popup
OptinMonster lets you create targeted campaigns in just a few clicks.
Our targeting and trigger rules make sure you’re showing the right offer to the right person at the right time.
Examples of targeting:
- Show targeted messages based on where the visitor is coming from, like from social media or a referring guest blog post
- Tailor campaigns based on the page the visitor is viewing
- Create special popup campaigns for new or returning visitors
You can also use targeting based on geographical location, cookie retargeting, and more.
Examples of triggers:
- Display campaigns to visitors as they’re about to leave your site
- Show campaigns after the visitor has scrolled a percentage of the page
- Display campaigns after the visitor has spent a certain amount of time on the page
Let’s look at two powerful display rules below.
Exit Intent ®
Did you know 70% of your abandoning site visitors will never come back?
An exit popup gives you a final opportunity to get their attention with a highly targeted message right before they leave.
Businesses use OptinMonster’s exit popups to increase conversions between 2 – 4 %.
Rocketbots used exit popups to boost their conversions by up to 33% on some pages. In total, Rocketbots increased the size of their list 680%.
Head over to Display Rules.
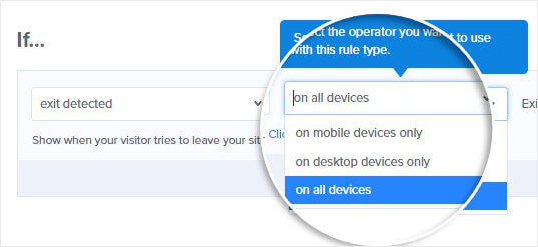
Select Exit Intent®.
Next, you’ll select on which device you’ll display your popup.
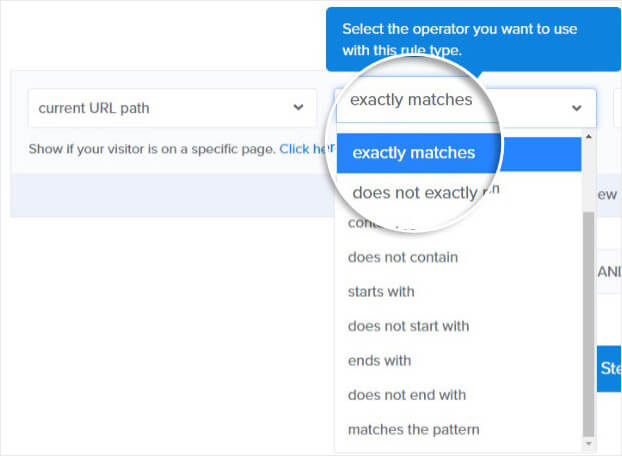
You can fine-tune your targeting by showing your popup only on certain pages with Page Targeting.
Learn more about exit intent in this article: 40 Exit Popup Hacks That Will Grow Your Subscribers and Revenue
Monsterlinks™
Do you want to create a Marketo popup on click?
In OptinMonster, it’s as simple as copying and pasting one line onto your site.
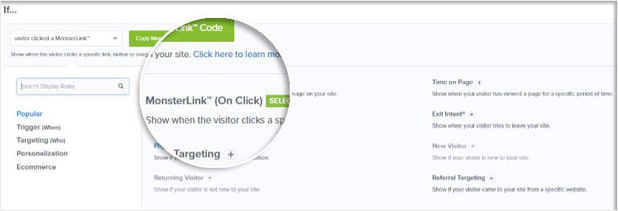
Monsterlinks turns any image or link into a 2-step optin.
Under the Display Rules tab, pick Monsterlinks™(On Click).
Next, copy the code.
Add it to any image or link on your site to create a 2-step optin campaign.
Step 4: Integrate OptinMonster and Marketo
Integrating Marketo with OptinMonster is simple.
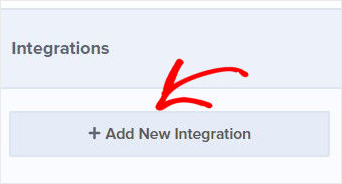
First, head over to Integrations at the top of your editor.
Next, click Add New Integration.
You’ll need to log into your Marketo account and create a custom service.
Follow these instructions to create a custom service.
Save your Client ID and Client Secret to authenticate OptinMonster with Marketo.
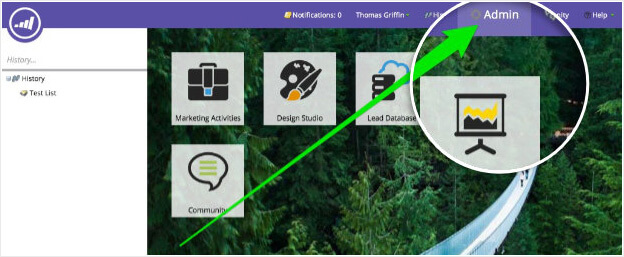
If you’ve already created a custom service, you can find the details in the Admin tab.
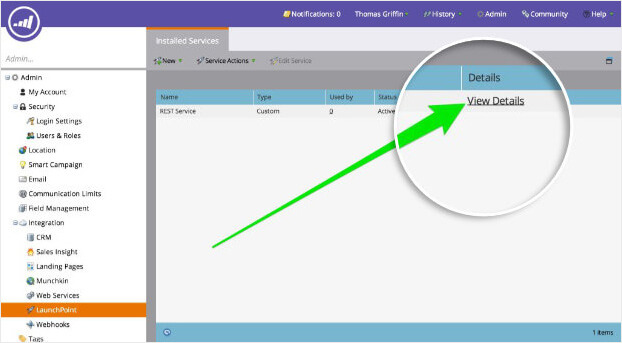
Next, click LaunchPoint from the Integration section of the Admin page.
Now, you’ll see your custom services listed.
Find the custom service you created for OptinMonster and click View Details.
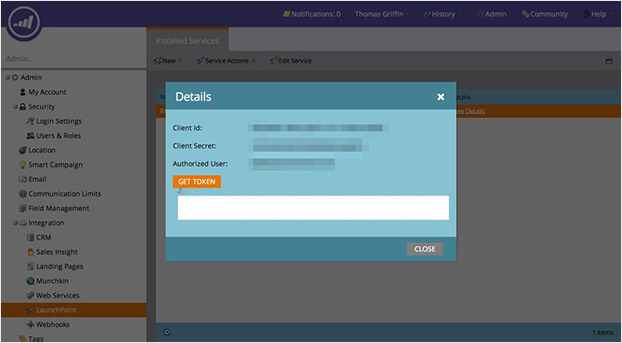
A popup will appear with your Client ID and Client Secret.
Save these codes. You’ll need to add them to your OptinMonster account.
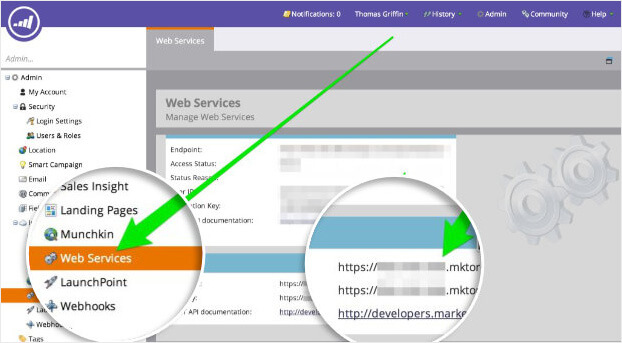
Next, you’ll find your subdomain.
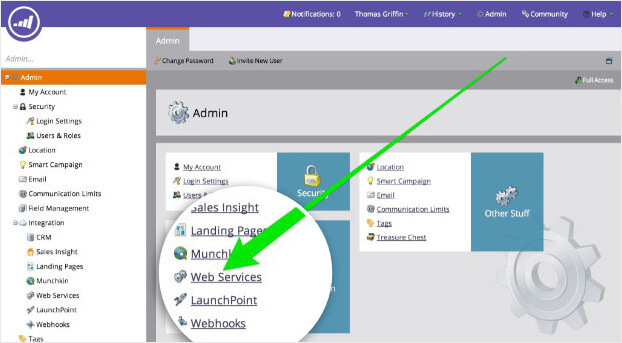
From your Marketo dashboard, navigate to the Admin page. Select Web Services from the left menu.
At the bottom of the page, you’ll see the REST API section.
Copy the subdomain of the endpoint as highlighted in the screenshot.
Don’t include the start of the domain, https://. You don’t need to include the ending .mktorest either. Adding the start and end of the domain will prevent OptinMonster from connecting to your account.
Head back to OptinMonster.
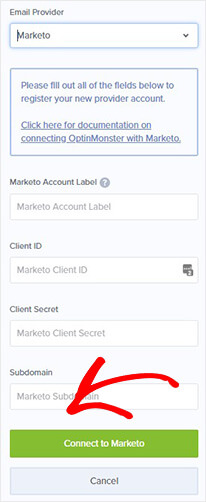
Add the Client ID, Client Secret, and subdomain into the corresponding fields. You’ll also need to create a unique label to make it easy to organize your integrations.
Finally, select the Connect with Marketo button.
All that’s left is to publish your campaign. Now, your new subscribers will be sent directly to your Marketo account.
If you enjoyed learning about how to create a Marketo popup that grows your business, you might like these articles:
- 36 Best Lead Generation Tools to Get More Targeted Leads
- 15 Email Popup Best Practices To Skyrocket Your List
Want to learn more about how OptinMonster can help your business grow? Check out this article: How Does OptinMonster Work (8 Benefits + 12 Case Studies)
Ready to turn your website traffic into subscribers and customers? Get OptinMonster today.










Add a Comment