Are you struggling to figure out how to convert traffic into leads on your website?
An optin campaign is an effective and easy way to convert your website traffic into actual leads.
Sure, it sounds simple, but how does it actually work?
In today’s tutorial, we’re going to teach you how to create an optin campaign that transforms your site’s visitors into email subscribers.
And, over time, you’ll be able to convert those leads into loyal (and paying) customers.
Before we get too far, though, let’s look at what optin campaigns are and why they’re such a powerful way to generate leads.
What Is an Optin Campaign (& Why Use One)?
Optin campaigns are messages you promote across your site to showcase special offers, deals, and products.
In short, they help you collect email addresses from the people visiting your website. That way, you can add it to your marketing email lists.
Even if you haven’t heard the term “optin campaign,” you’ve likely seen them in action. They can be in the form of a:
- Lightbox popup
- Floating bar
- Fullscreen welcome mat
- Gamified spin-to-win wheel
- And many others…
You’ve likely run across lots of these campaigns, too. They look something like this:
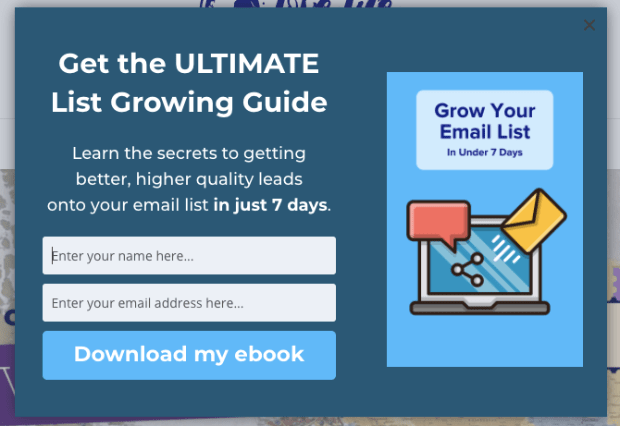
In most cases, though not always, optin campaigns have a simple goal: to grab your visitor’s email address or phone number.
That way, you can continue to market your offers and products as you nurture the relationship over time.
But now, let’s turn our attention to another question that’s likely on your mind: why exactly do you need an optin campaign to convert website visitors into customers and leads?
Well, did you know that most websites capture less than one email for every 200 visitors? That’s a conversion rate of only 0.5%.
So, how do we up that conversion rate and start generating more leads?
The answer is simple: optin campaigns.
There are several advantages to optin campaigns, especially since they can be:
- Targeted at key places around your site.
- Personalized to your user experience
- Leveraged for a wide range of purposes (promoting a webinar, getting app downloads, direct sales, and so on).
OptinMonster has multiple campaign types and designs that can help you create the perfect optin campaign and start turning traffic into leads.
Ready to build one of your own? Let’s get started!
How to Build Your Optin Campaign
As we mentioned before, we’ll be creating campaigns with OptinMonster:
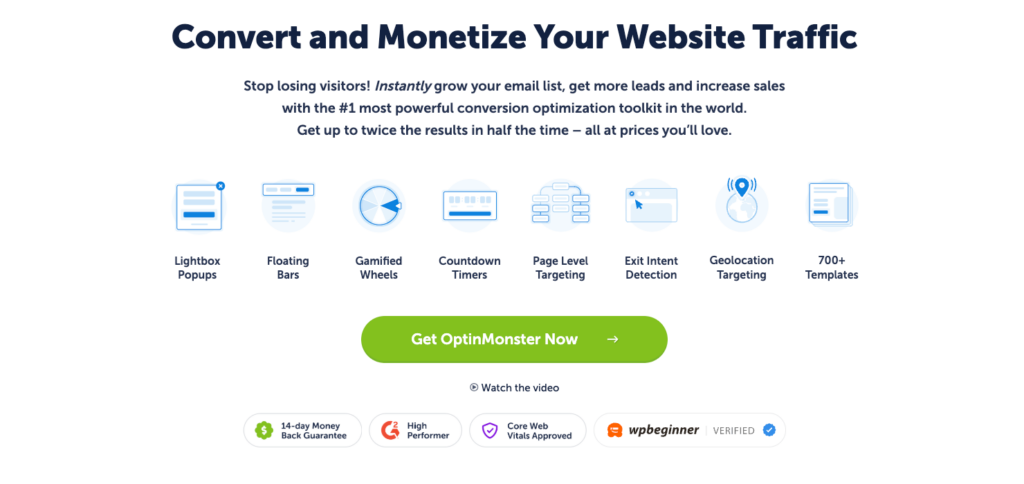
OptinMonster is a powerful and impressive lead generation software that will help you instantly grow your email list.
With OptinMonster, you can create endless combinations of optin campaigns and messages tailored to your site and promotion.
Just imagine being able to create an offer based on how your visitors engage with your brand.
Like showing a unique offer at the moment people are trying to leave your site. That’s the strategy Fastrack used to recover 53% of their abandoning visitors.
Or turning your campaigns into clickable links to share in blog posts, emails, web pages, and more.
That’s how Kinobody was able to convert 73% of its site’s visitors.
OptinMonster lets you do all that and more. That way, you can target the exact people at the exact time in the exact place you want.
Even better? You don’t need to have any technical knowledge. Literally, ANYONE can create a beautiful and functional campaign in no time.
Once you’ve signed up, you’re ready to create your first optin campaign.
Let’s get to today’s tutorial.
Step 1: Choose Your Campaign Type and Template
The first step is deciding which campaign type you’d like on your website. Luckily, there are plenty of options with OptinMonster, including:
- Popup
- Floating Bar
- Fullscreen
- Inline
- Slide-in
- Gamified spin-to-win wheels
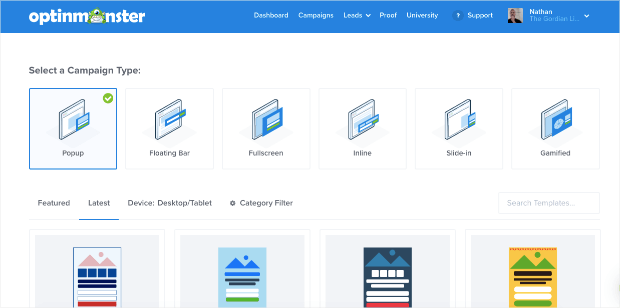
For today’s tutorial, we will select a Popup campaign.
Each campaign type has over 700 templates, so you can find something that works for you and your website:
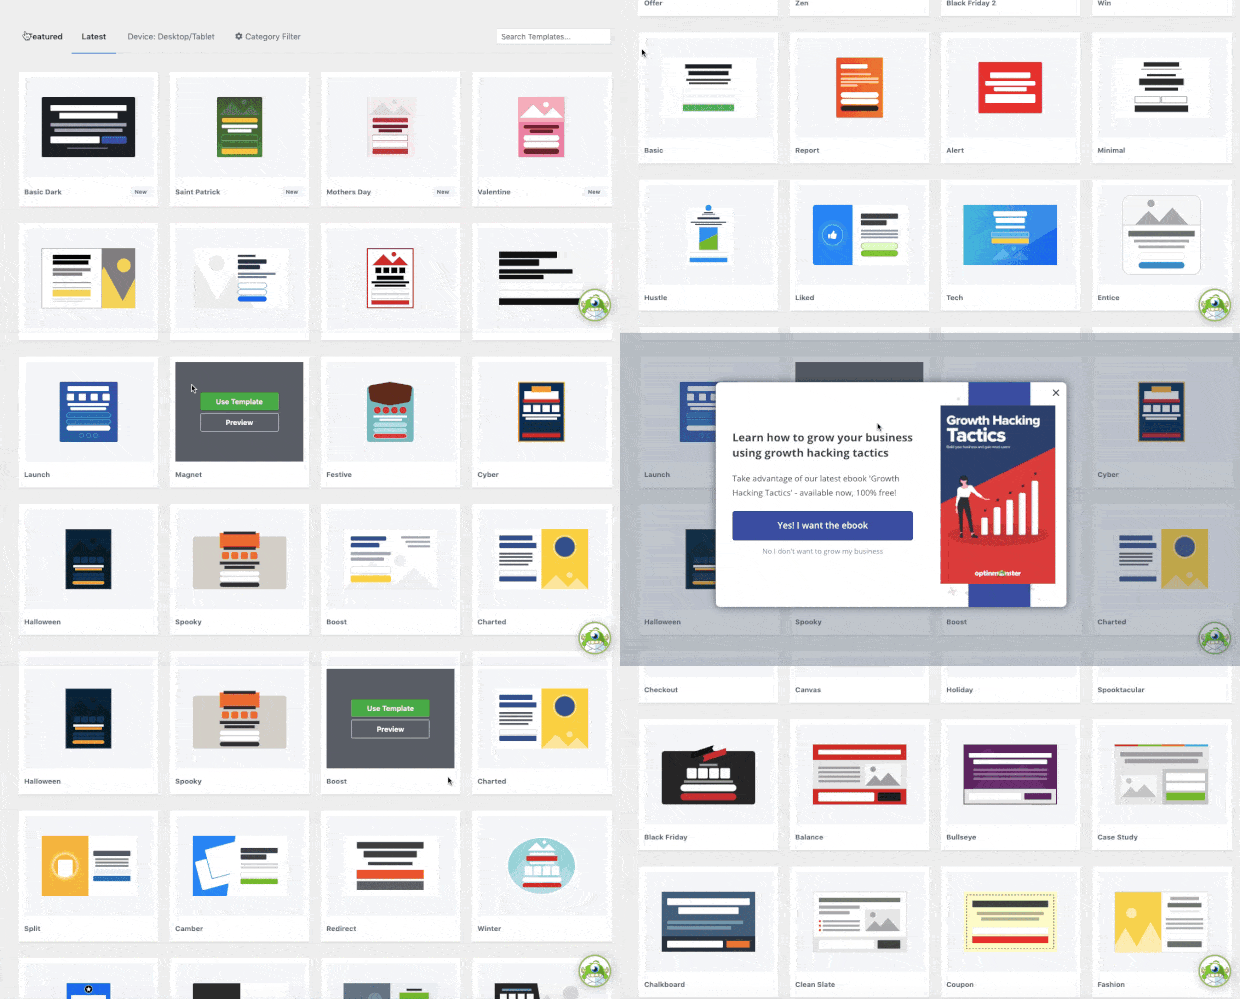
The great thing about templates is that they save you time, energy, and stress in creating the right campaign for your specific needs.
Plus, they’re all mobile-friendly and fully responsive.
These templates from OptinMonster are designed to be ready to go once you make a few customizations for your offer and message.
For today’s tutorial, we’ll select the Basic template:

It’s a great way to get started if it’s your first OptinMonster campaign.
But keep in mind that you can select any option that will work best for YOUR brand.
When you’ve found the perfect template, you’ll now see a prompt to name your campaign. We recommend a descriptive name so you can easily find it on your dashboard later on.
Then, you’re ready to click Start Building:
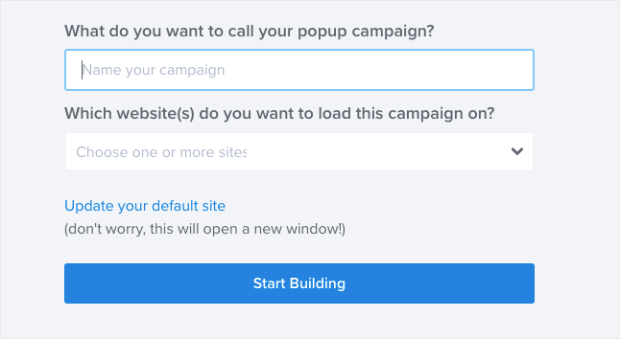
At this point, you’ll be taken to the OptinMonster editor.
Step 2: Design Your Campaign
Now we get into the real fun: designing your campaign.
As you can see, the campaign could be good to go as it already is. But only you know what you want to offer YOUR visitors.
Since this is a drag and drop editor, you don’t need to know any code to design your campaign.
For example, let’s say we want to change the offer to a free one-week meal plan with recipes if your visitor gives you their email.
All you have to do is click where you want to change the text and type away:
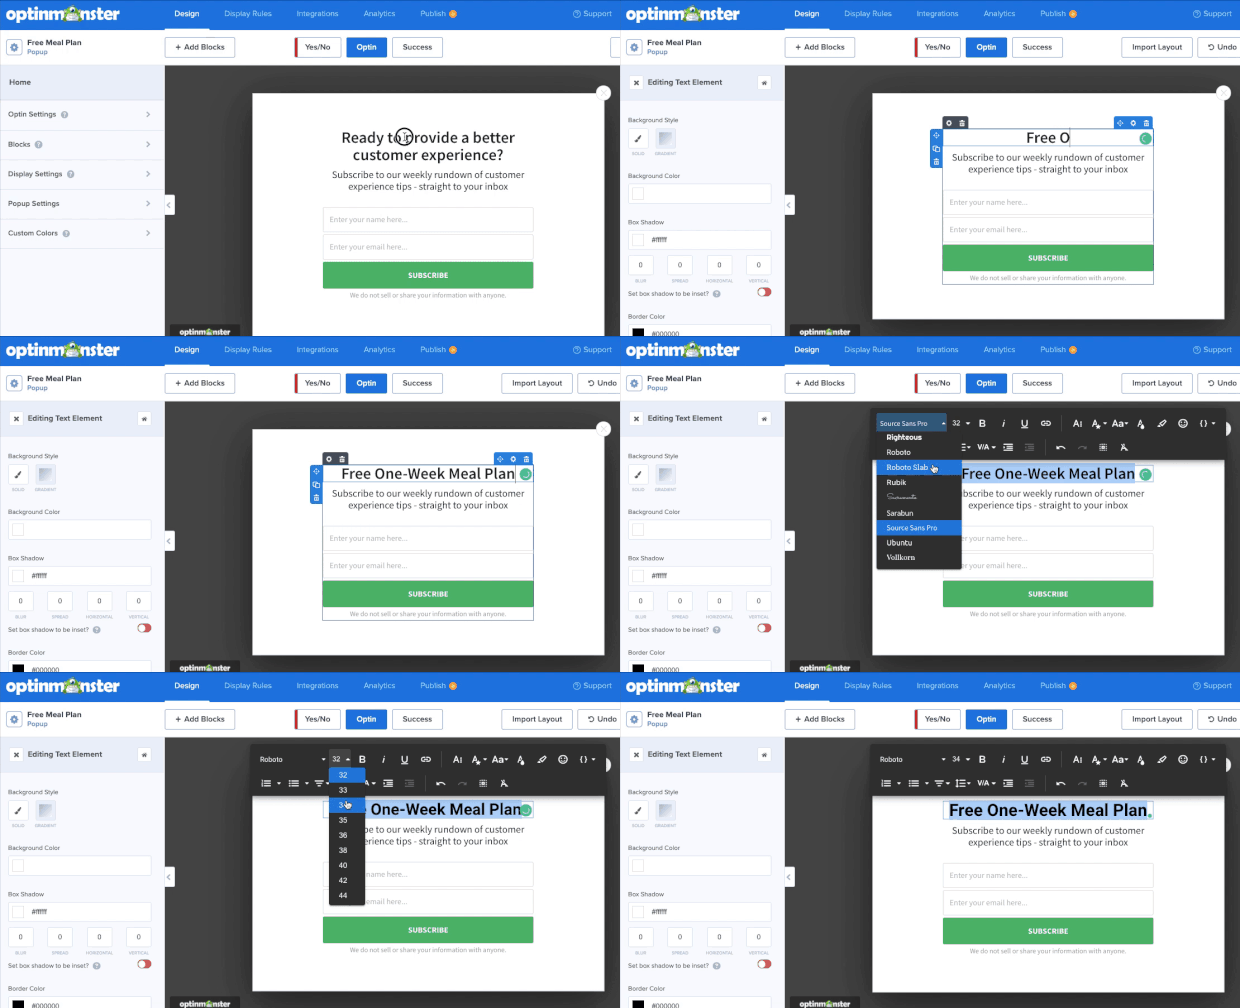
You can also change the font size, font family, font orientation, and so much more.
If you want to change other parts of your campaign, all you have to do is click on an element in your campaign. For example, you can click the call-to-action (CTA) button:
Notice that bar off to the left-hand side of your screen?
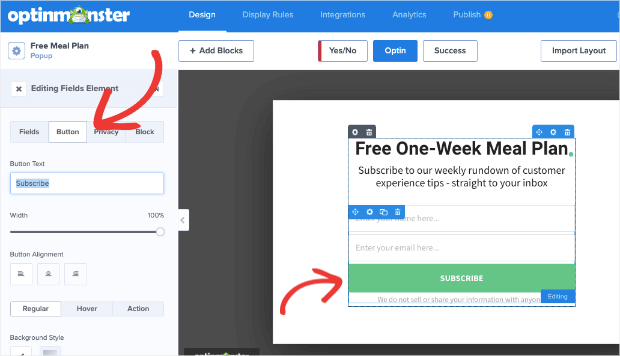
That is where you will find some additional editing tools.
But what if what you have on the template isn’t quite what you want? OptinMonster allows you to add pretty much anything else you may need, such as:
- Videos
- Icons
- Images
- Countdown timers
- ChatBot
- And more…
Plus, if you are an HTML wizard, OptinMonster lets you add that too.
Just click on + Add Blocks to start customizing your optin campaign.
Then scroll through the features you want to add before dragging and dropping it into place:
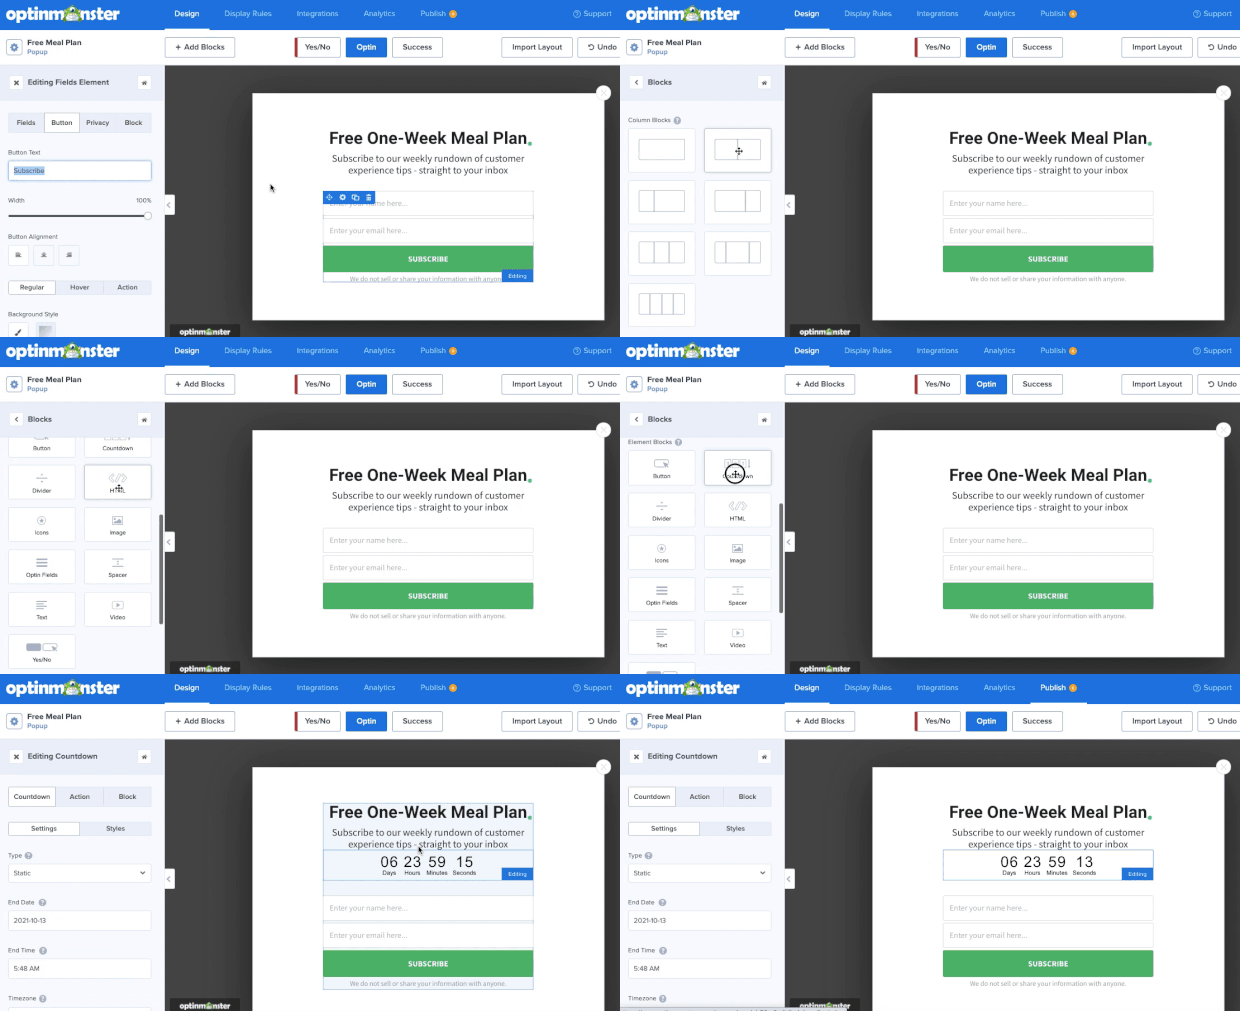
Being able to customize the content on your campaign gives you 100% control over the look, style, and functionality of your campaign.
That way, you can tailor it to YOUR audience and never risk leaving conversions on the table.
Here’s the campaign we built in less than 10 minutes:
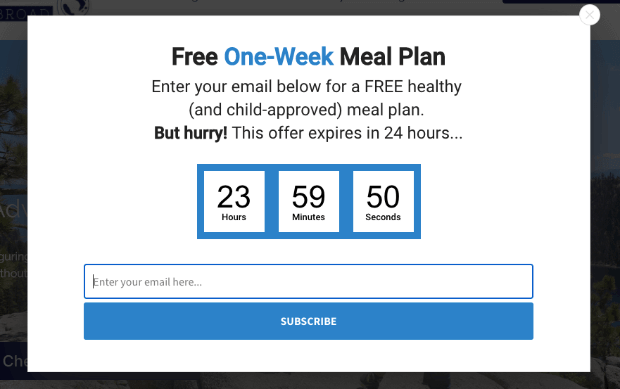
For this tutorial, we are creating a dynamic optin campaign designed to get even MORE conversions than a static optin form.
That means we won’t show it to EVERYONE. Instead, we’ll personalize the user journey by showing this campaign to select visitors.
Let’s decide on what actions will trigger your campaign to appear.
Step 3: Target Your Audience
Let’s take a minute and think of the target audience for your campaign. Which of your visitors do you want to convert into leads?
After all, getting this campaign in front of the right audience is a big step towards converting your traffic.
Luckily, OptinMonster’s display rules are a powerful way to do just that. There are many options to trigger your campaign, but let’s just go over a few of them:
- Exit-Intent® Technology: Recover abandoning visitors to transform them into subscribers and customers.
- Page-Level Targeting: Customize your campaigns based on the page or section of your website.
- Geo-Location Targeting: Personalize campaigns based on visitor’s location.
- OnSite Retargeting®: Keep visitors engaged by showing fresh offers to returning users.
These are only a handful of OptinMonster’s targeting rules, and there are many others to customize your campaign to your needs.
Now, we are ready to set up the rules to target your audience. Go to the Display Rules tab at the top of your editor.
By default, OptinMonster has two rules in place:
- Time on page is at least 5 seconds
- Current URL path is any page
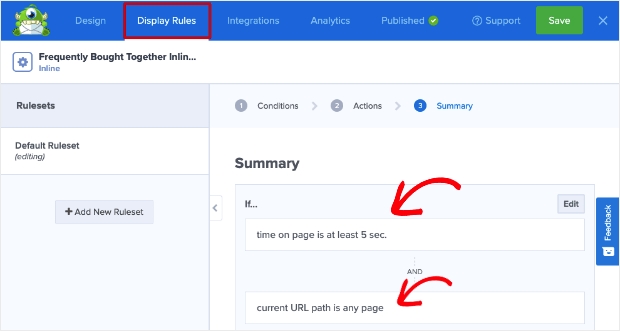
Let’s change the first rule.
Click Time on Page, and the display rule menu will appear:
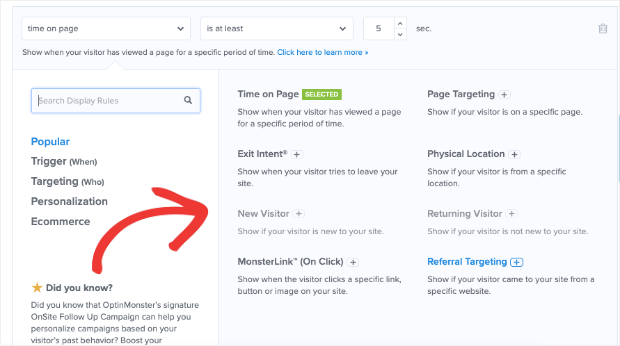
Today, we’ll make this a campaign that targets visitors that are actively leaving your site.
This is what we call an exit-intent popup.
To set this up, find the display rule Exit Intent®:
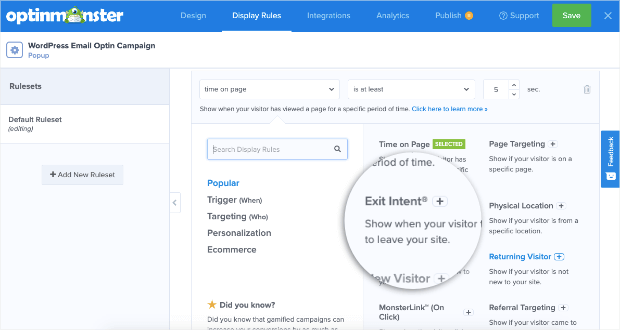
As you can see, you can now personalize this rule by configuring the device you want it to appear on, as well as the Exit Intent® Sensitivity:
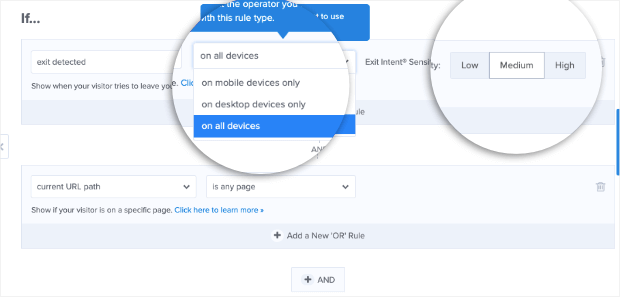
The sensitivity level will determine just how quickly your popup will appear as your visitors leave the browser screen.
On mobile devices, there is no mouse to help us determine just when a visitor is about to leave your site.
The sensitivity rule for mobile devices will determine what action OptinMonster will look for from your visitors:
- Low or Medium: triggers the campaign when your visitor scrolls up the page with their thumb on mobile.
- High: attempts to trigger when your visitor clicks the back button OR scrolls up the page (whichever happens first).
Now you have an exit-intent popup ready to convert your traffic into leads.
You should continue to play around with the different display rules to find out what works best for you and your visitors.
Once that’s all done, it’s time to sync your campaign with your email provider.
Step 4: Sync Your ESP
One thing to remember before you start your campaign is that you need to have an email service provider (ESP) ready to go.
After all, you need to send your leads somewhere!
OptinMonster does have a default option that saves your list called Monster Leads.
However, you’re probably already working with an ESP, so we will show you how to sync OptinMonster with them.
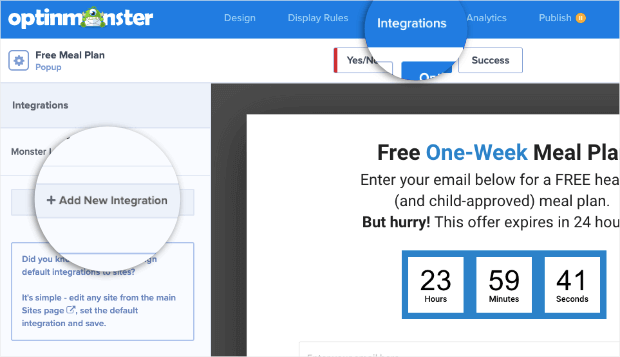
Click on the Integrations tab at the top of the editing area.
Next, click on + Add New Integration:
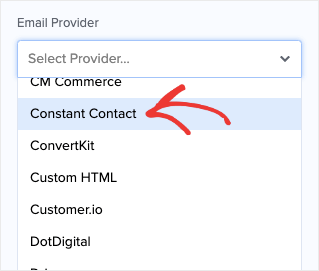
Then select your ESP from the drop-down menu:
The New Integration wizard will ask you for the information it needs to connect your campaign to your provider.
For most of them, you will just need to copy and paste the API key from your ESP to finish the setup.
If OptinMonster needs any other information to integrate with your email service, it will prompt you for that information.
As you can see, OptinMonster is compatible with many different email providers. But if you don’t see your ESP on the list, there’s no need to worry.
This helpful article will walk you through how to connect OptinMonster to ANY email provider with webhooks.
OptinMonster will walk you through how to sync to any ESP on the list, so the guesswork is taken care of for you!
Once that’s completed, your optin campaign will send your leads directly to your email provider.
All we have to do now is publish your campaign.
Step 5: Publish Your Campaign
Again, we’ll go to the top of the editor. This time, click on the Publish tab.
Here, you can preview your campaign, double-check your display rules, and find out how to get it on your website’s platform:
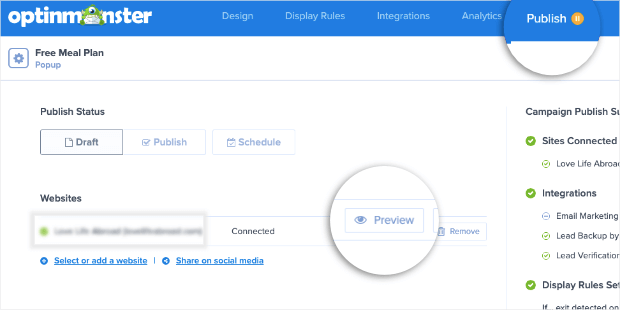
When you are ready to go, all you have to do is change the status of the post from Draft to Publish:
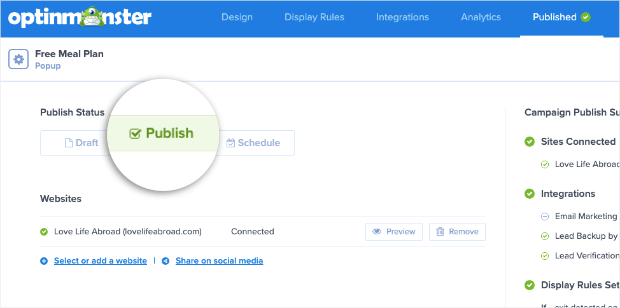
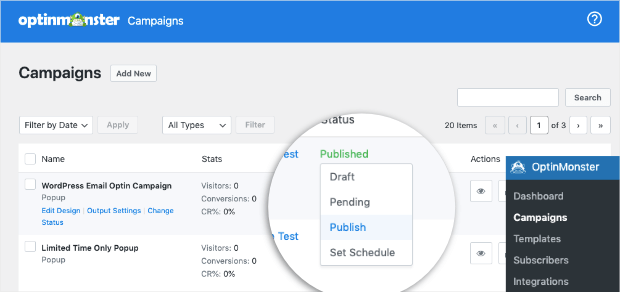
If you’re using WordPress, we always recommend making sure your campaign’s status has changed, too.
For that, go to OptinMonster » Campaigns from your WordPress dashboard.
Then change your post’s status from Pending to Published:
Now you know how to convert traffic into leads.
Before long, you will see that visitor-to-lead conversion rate take off!
We hope that you found this tutorial useful. If you did, you’ll want to check out these resources:
- Best Email Marketing Automation Tools to Transform Your Business
- Proven Methods to Get More Email Subscribers Today
- Email Popup Examples (& Best Practices) to Explode Your List
These articles have even more information to help you grow your email list and keep converting that traffic into more (and better) leads.



Add a Comment