Do you want to connect Brevo to WPForms, but you’re not sure where to get started?
Brevo is one of the most popular email marketing providers (ESPs) around–and for good reason.
It’s a powerful and affordable option for small businesses to start email marketing. Plus, it’s a scalable platform, so it can still help as you grow your company.
One of the best ways to grow your email list is using WPForms, a WordPress form builder plugin that allows you to create professional forms in minutes.
So, today, we’re going to teach you how to combine these two tools and connect Brevo to WPForms.
From there, we’ll teach you how you can get even higher conversion rates by setting up targeted optin forms for your site (and connect those forms to Brevo, as well).
Ready to get started? Let’s dive into the tutorial.
How to Connect Brevo to WPForms
For this tutorial, we’re working with WPForms:

WPForms is hands down the best form building plugin for WordPress. It allows you to create a number of different forms for your site, such as:
- Contact
- Payment
- Survey
- Newsletter
- Registration
- And much more…
Plus, it has a drag and drop form builder, which means you don’t need any technical experience to set anything up.
Instead, anyone can create professional and advanced forms in minutes.
To boost engagement, you can use WPForm’s conditional logic. This makes your forms more dynamic and will show questions depending on how the user responded to the previous ones.
So rather than showing a form with 30 questions (only some of which apply), you can make shorter, sleeker forms that increase submissions.
There are also other advanced features to this plugin, including:
- Multi-page forms
- Spam protection
- File uploads
- Payment integrations
- Entry management
- Notifications
- And more…
Want to see it in action for yourself? Get started with WPForms today!
But while all of these features are great, that’s not why you’re here. Because what you REALLY want to know is how to sync your forms with Brevo.
Fortunately, connecting Brevo to WPForms couldn’t be easier.
Before anything, you’ll need to make sure you have WPForms installed on your website. If you don’t have it already, you can find it by going to Plugins » Add New:
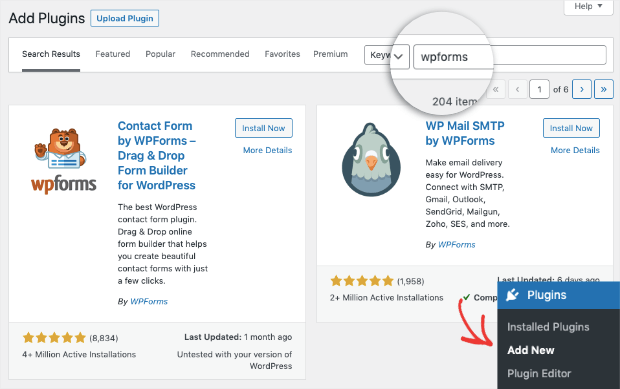
From there, you can install WPForms like any other plugin on your WordPress site.
Need a little more help? No worries. Check out this resource on how to install a WordPress plugin (3 methods).
Once it’s set up, you’re ready to create your first form and connect it with Brevo.
Step 1) Create Your First Form
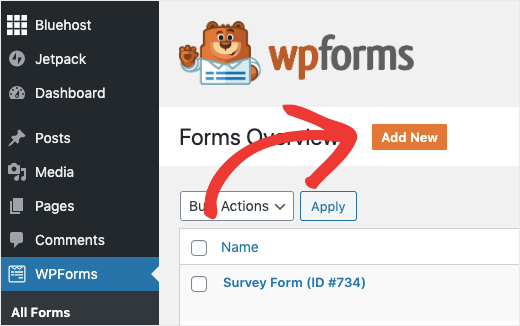
In your left-hand side WordPress admin menu, click WPForms. Then at the top of the page, you’ll see a button that says Add New.
Click that button to start building a new form:
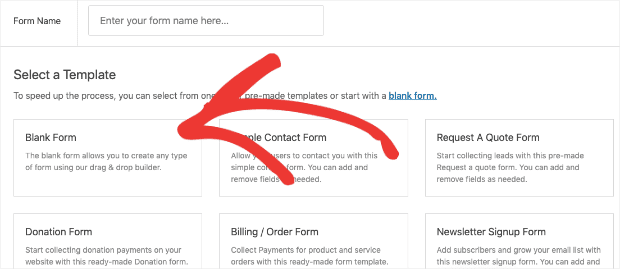
Next, you’ll need to select a template.
The option you choose will depend on what type of form you’re trying to build. Today we’ll be using the Blank Form template:
But you should know that WPForms makes it easy to create any kind of form you need for your website.
And if you want a jumpstart with a specific form (like a contact or payment form), WPForm has templates and addons that save you time, energy, and headaches as you go through the process.
Once you’ve given your new form a name and selected the template you want, you can start customizing your form.
Step 2) Design Your Form
WPForms makes it incredibly easy to make the perfect form for your site.
That’s because you can add new form fields in seconds with WPForm’s drag and drop builder.
This also means that you don’t need to know any code or have any technical experience to create professional and high-converting forms.
To add a new feature to your form, simply drag it from the left-hand side menu and drop it into your form editor on the right:
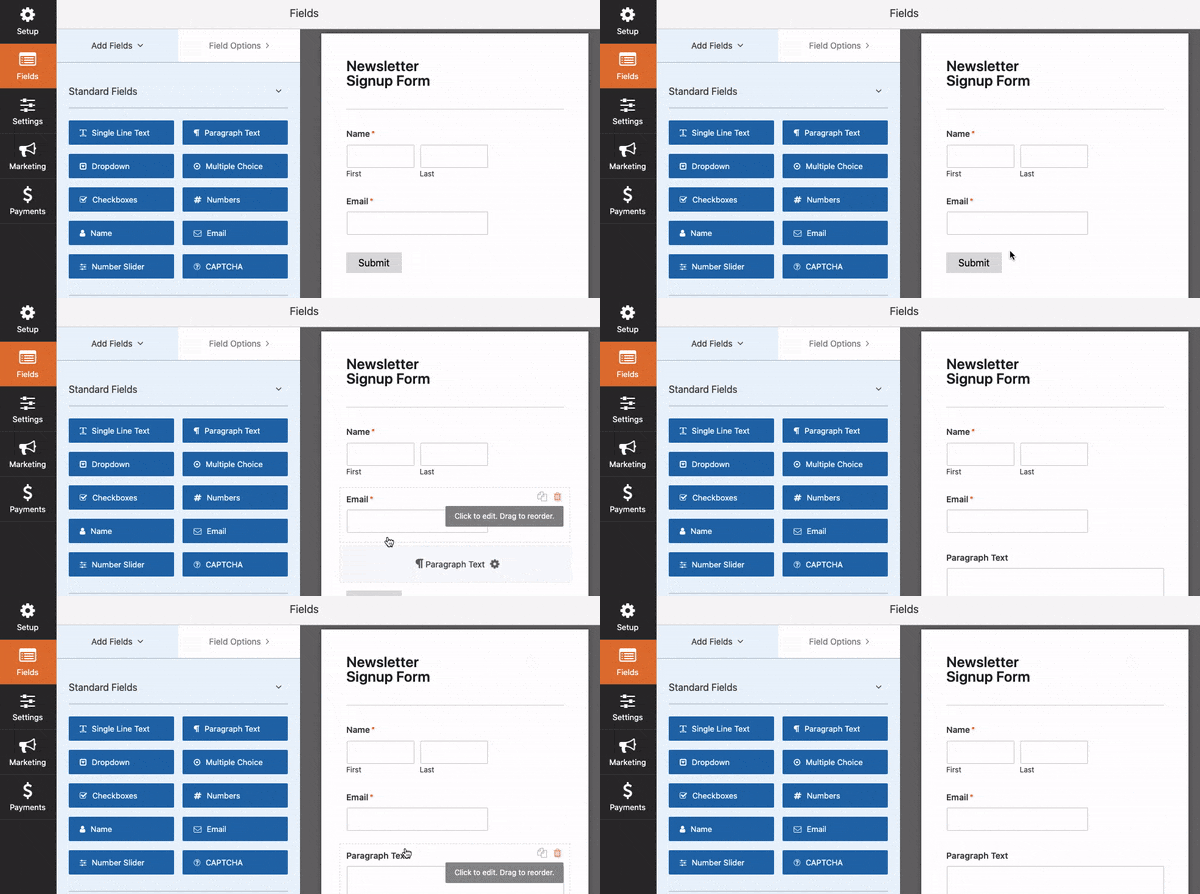
With WPForms, you have quick access to 3 types of fields:
- Standard fields
- Fancy fields
- Payment fields
These 3 options each have various features and functions that you can add to your form.
In the Fancy Fields box, for example, you can add things such as:
- Phone field boxes
- Passwords
- CAPTCHA
- Likert scales
- Star ratings
- Signatures
- And much more…
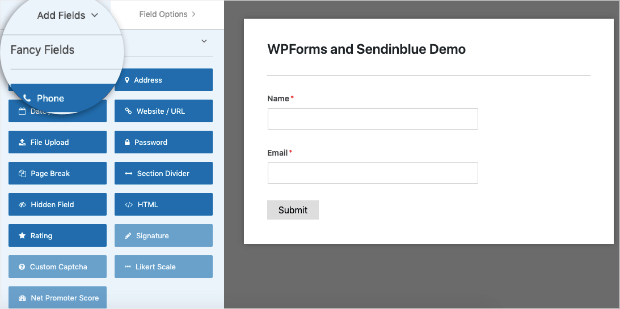
Some of these fields require a paid plan, so we always recommending upgrading your WPForms account if you’re still using the free plugin.
Once you’ve designed the perfect form to reach your marketing or sales goal, it’s time to connect the form to Brevo.
Step 3) Connect Brevo to WPForms
On the left-hand side menu of your WPForms editor, click Marketing. Scroll down to find the Sendinblue (now Brevo) integration:
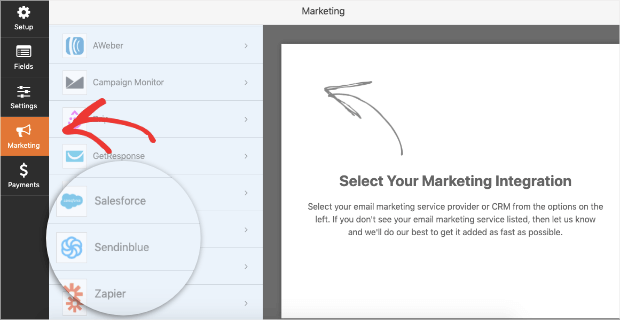
Keep in mind that to connect with Brevo, you’ll need a Plus plan or higher with WPForms.
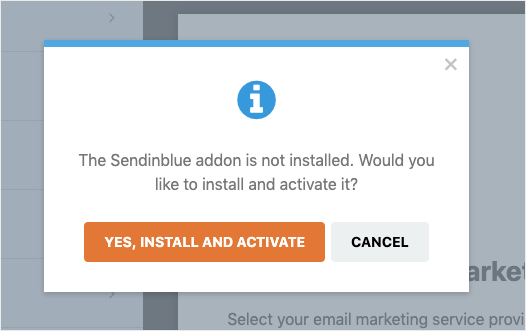
If it’s your first time setting up Brevo, you’ll need to click Yes, Install and Activate:
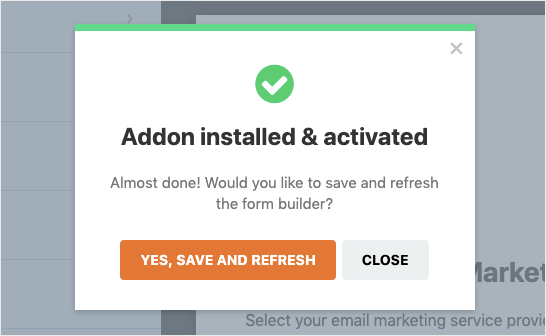
When the addon is installed and activated, you’ll need to click Yes, Save and refresh:
Now the Sendinblue (now Brevo) integration will be available:
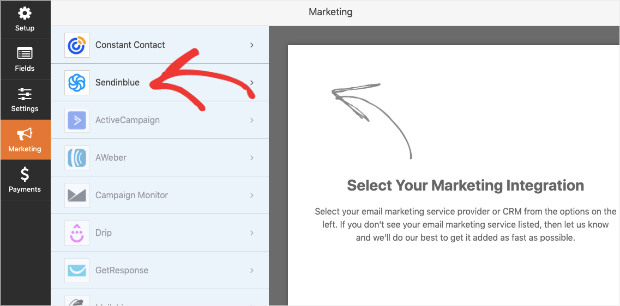
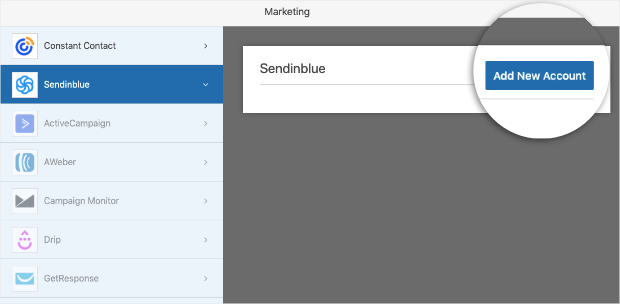
When you click on that, you’ll want to click Add New Account in the WPForms editor:
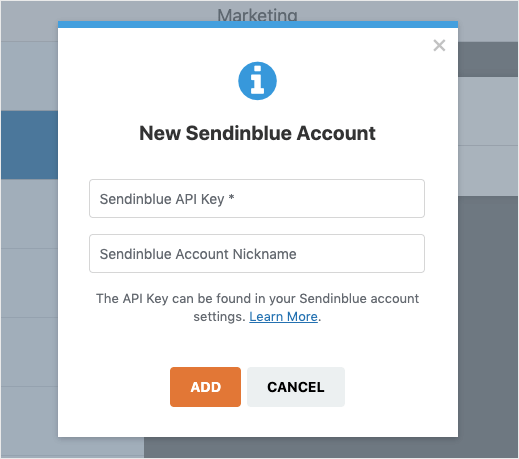
Then you’ll simply add your Brevo API key (from your Brevo account dashboard), give your account a nickname to stay organized, and click Add:
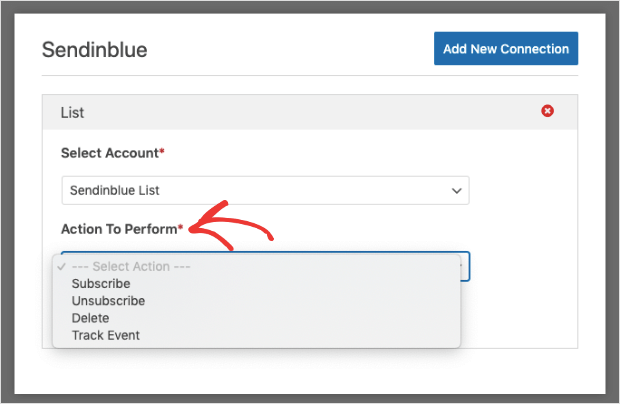
And that’s it! Your Brevo account is now connected to WPForms. From here, you’ll have a few fields to configure, including what action you want Brevo to complete based on the form users are filling out:
But one of the problems many small businesses have is growing their list at a quicker pace.
So let’s turn our attention to growing your Brevo email list.
How to Grow Your Brevo List
So far, we’ve looked at how to connect Brevo with WPForms. And while every site should use WPForms to get more email subscribers, it might not be the only tool you want to use.
In fact, when it comes to growing an email list, you should be using as many tools at your disposal to get new leads FAST.
For that, there’s no better solution than OptinMonster:
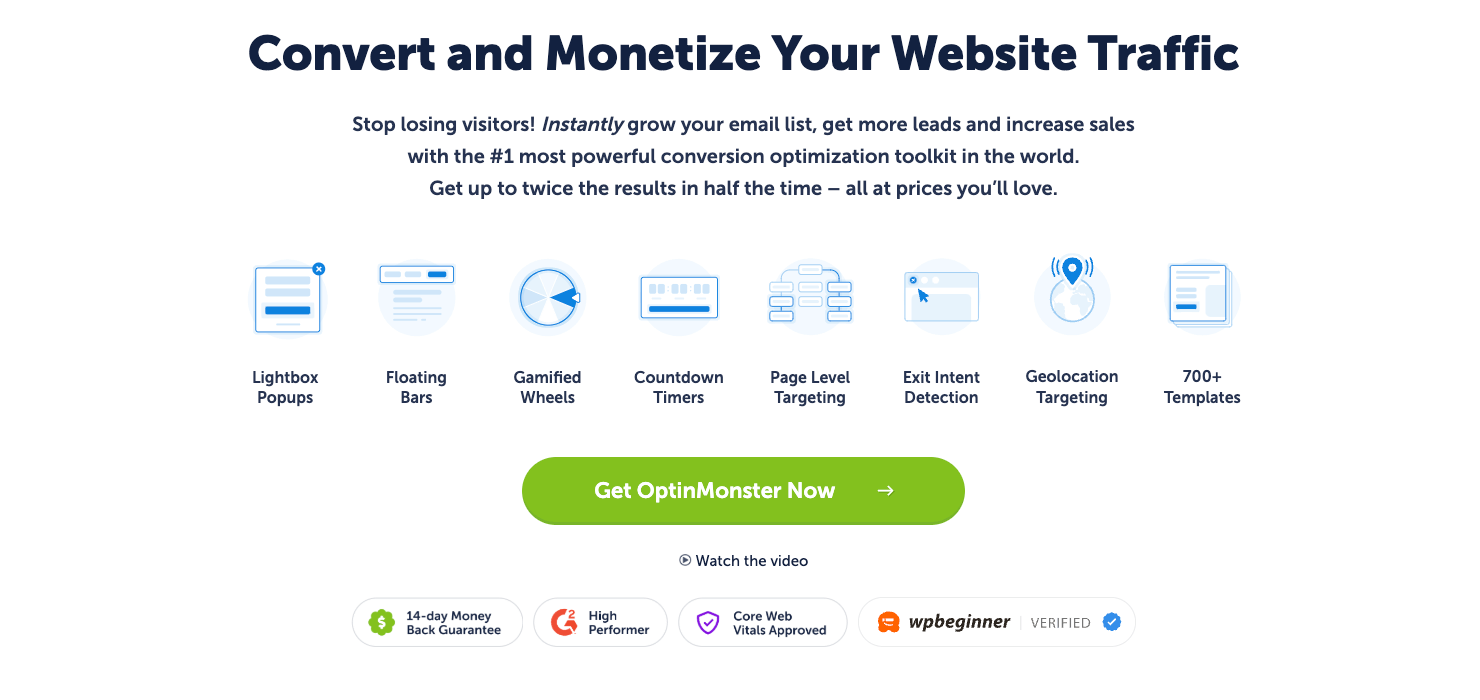
OptinMonster is a premium lead generation plugin for WordPress. It lets anyone quickly and easily create stunning “optin campaigns” in a matter of minutes.
Optin campaigns are tools to grow your email list that you’re likely already familiar with. These include things like popups, floating bars, spin-to-win wheels, and more.
When you combine these campaigns with a lead magnet (a tempting offer made for your target audience), you’ll see signups to your forms drastically increase.
Here’s how it works…
Everything starts by selecting one of OptinMonster’s 700+ pre-made templates:
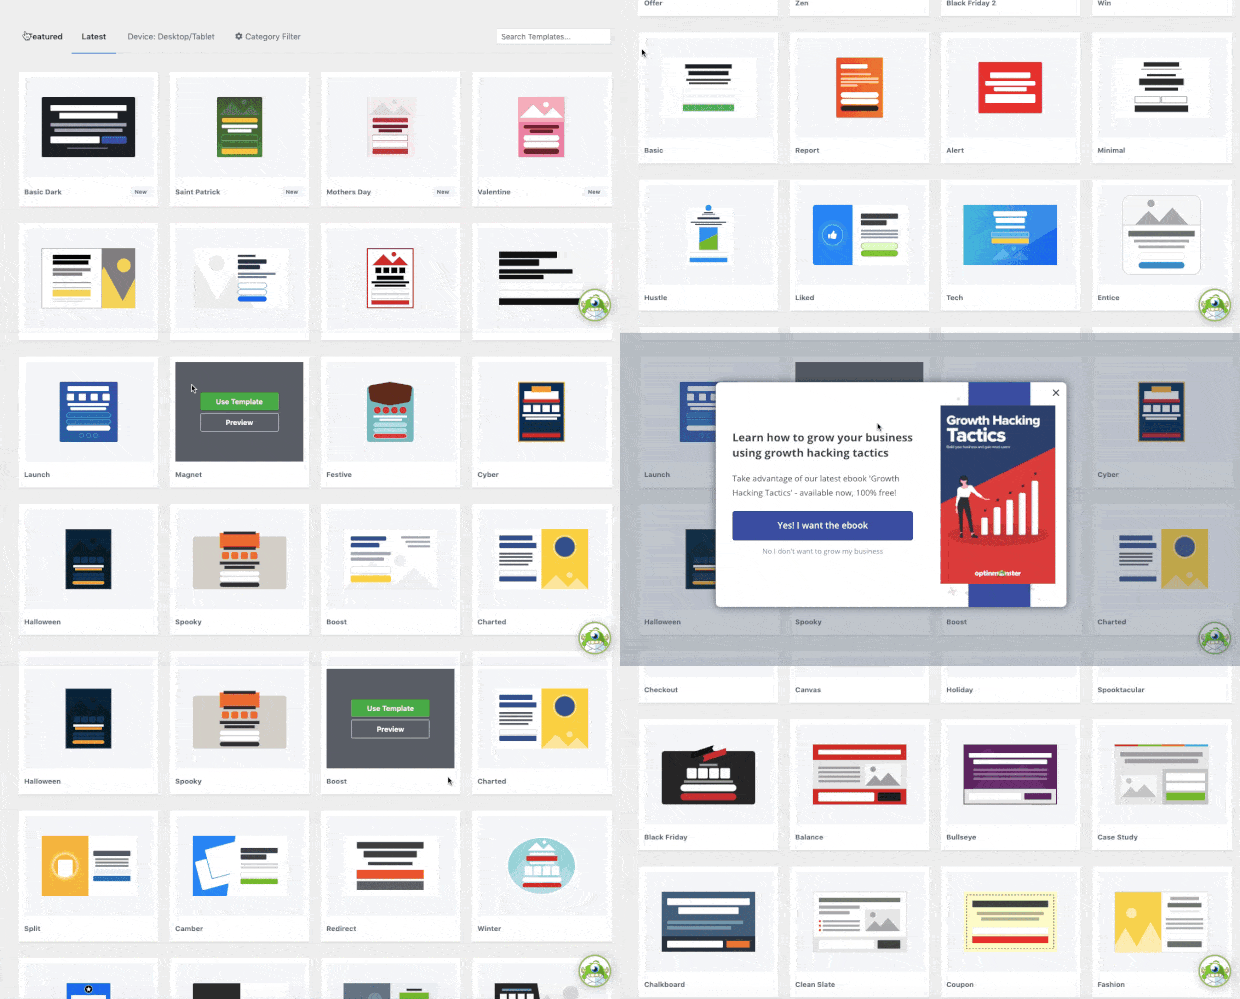
These are designed to save you time in the campaign creation process. Plus, they look great out of the box on mobile, desktop, and tablet devices.
From there, you’ll likely want to make some modifications to the template to personalize your offer.
OptinMonster uses an inline text editor, so you can change your messaging directly on the campaign:

And while all of our templates come with the basic functions you’d need to grow your subscribers, we understand that all companies have a unique marketing strategy.
That’s why OptinMonster makes it easy to add new functions to your campaign, like:
- Buttons
- Countdown timers
- Images
- Videos
- Chatbots
- Custom HTML
- And much more…
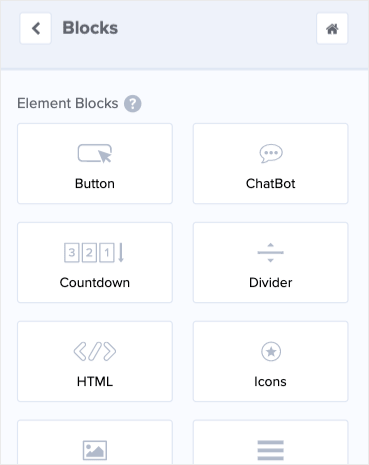
Any of these features can be added to your signup forms with a drag and drop:
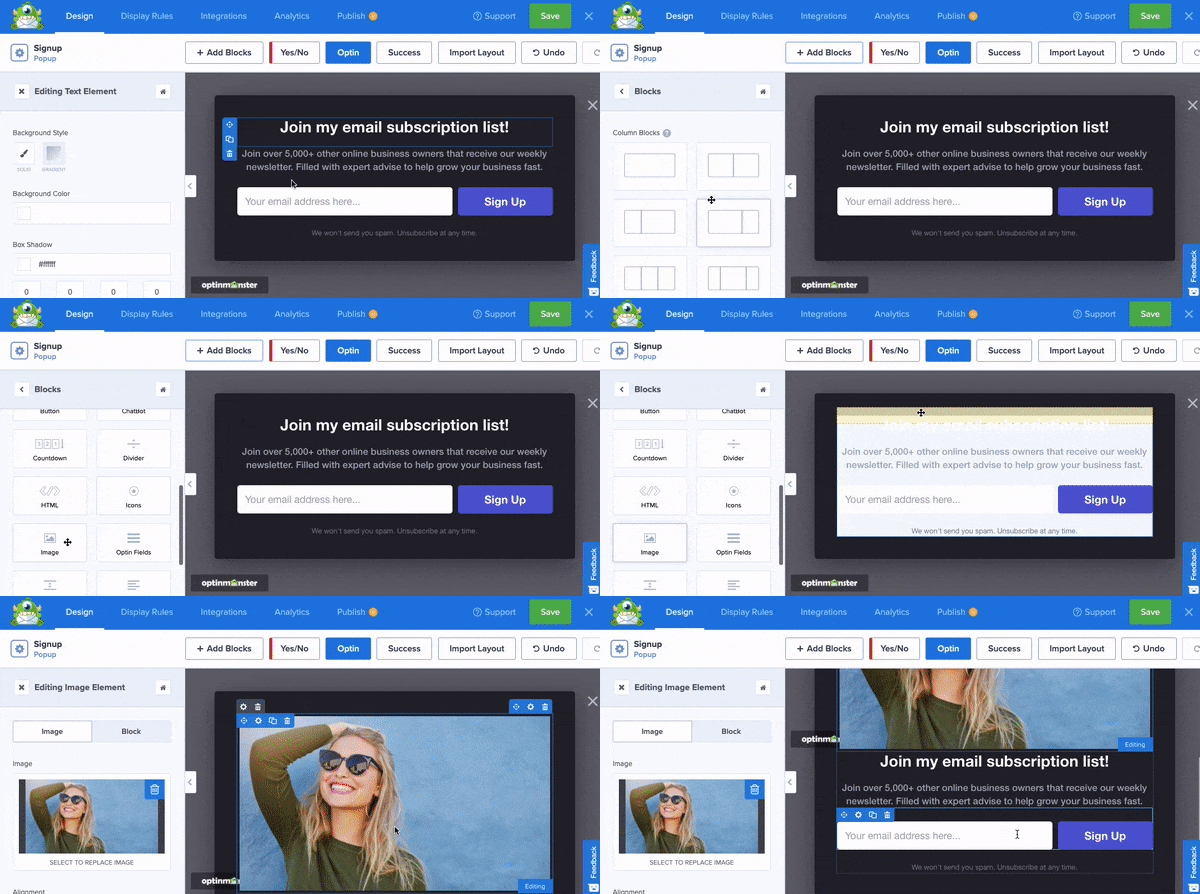
And since these features are created in “blocks,” everything falls neatly into place.
That means you don’t need to be a professional designer to create stunning and high-converting campaigns in minutes.
From there, you take 100% control over who sees these campaigns and when by using OptinMonster’s targeting rules.
Some of the more popular rules include:
- Exit-Intent® Technology: Show campaigns to users who are actively abandoning your website.
- OnSite Follow Ups®: Display fresh campaigns to returning visitors to avoid ‘popup fatigue.’
- Geolocation: Target users based on their physical location to personalize the user experience (UX).
These are just a few of your options, though there are many others.
And they’re the same strategies companies like Fastrack used to recover 53% of its abandoning users.
Or how Shotkit adds 40+ NEW leads to its list each day.
But the best part is that you can easily connect these forms to Brevo using our Integrations tab:
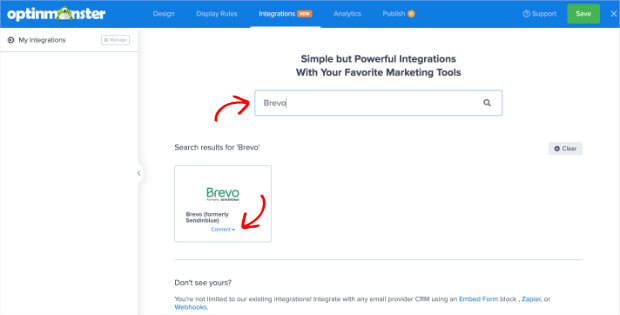
Then you can add tags to your new leads and send them to the right email sequence.
This throws your email marketing strategy on autopilot and allows you to focus on other areas of your business.
Ready to get started? Click below to being your 100% risk-free OptinMonster account today:
And that’s all for today! We looked at how to connect Brevo to WPForms in under 5 minutes.
We also saw how you can use OptinMonster to grow your email list with targeted optin campaigns.
If you found this post helpful, you’d likely benefit from the following resources:
- Email Marketing Made Simple: A Beginner’s Guide
- How to Run a Successful Email Marketing Campaign
- Best Email Marketing Automation Tools to Transform Your Business
These articles will have everything you need to create successful email campaigns once you’ve grown your list with Brevo.



Add a Comment