Do you want to add a Facebook activity feed to your website but not sure where to start?
Facebook is one of the best assets for modern online stores and content marketers. It allows you to reach and engage with an audience of over 2.5 billion people, making it an invaluable resource for building your brand’s online presence.
And while many marketers keep their activity on Facebook exclusive to that platform, the most clever ones know you can maximize your efforts by adding Facebook feeds to your website.
This leverages your site’s traffic to help grow your social presence. Then, as your Facebook activity gets more engagement, you can use that channel to send even more people back to your website for special offers, discounts, sales, and more.
In the end, both your website AND your Facebook page work together to scale your business.
That’s why, in today’s post, we’re going to show you how to add a Facebook activity feed to your website.
Let’s dive straight into the tutorial.
Add a Facebook Activity Feed to Your Website
The exact steps for adding a Facebook activity feed to your website will vary depending on which platform you’re using.
If you’re comfortable editing your site’s code, then you can always rely on Facebook’s own tool, Page Plugin:
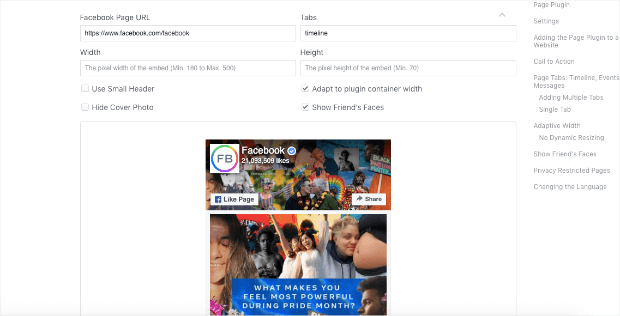
This allows you to enter your Facebook URL, select the width and height of how the feed displays on your site, and a few other configuration options.
Then you’ll simply generate a code snippet and add that to your site’s source code.
This can be a great resource for people comfortable with diving under the hood of their website.
But what about those who aren’t comfortable with editing code? Or what about those who want more control over their activity feed’s design?
If you’re a WordPress user, then you’re in luck!
That’s because there are tools that make it easy to add a Facebook activity feed to your WordPress site in seconds without needing to work with any code at all.
Plus, these plugins give you more customization options to work with. That means you can have your Facebook activity feed match your brand’s look and style, so it blends in with your website.
Today, we’ll be working with the best social media plugin on the market, Smash Balloon:
Smash Balloon is the world’s leading social media feed plugin for WordPress and makes it ridiculously easy to add a Facebook activity feed to your website.
Plus, Smash Balloon works with other social media platforms, such as:
- YouTube
- Facebook groups
As you’ll see, this tool gives you more control over how your activity feed is displayed to your audience, so you can make it match your brand’s style.
And since it comes with over a dozen pre-built feed layouts, you won’t ever have to touch any code.
If you’re serious about growing your online presence through social media, then you’ll definitely want to start using Smash Balloon today.
Ready to add a Facebook activity feed to your website? Let’s dive into the tutorial.
Step 1) Smash Balloon’s Social Feed Bundle (Optional)
The first thing you’ll want to do is sign up for your Smash Balloon account.
We highly recommend purchasing the Social Feeds + the Social Media Bundle. This gives you access to:
- Instagram Feed Pro
- Custom Twitter Feeds Pro
- Feeds for YouTube Pro
- Custom Facebook Feed Pro
- All Facebook extensions
Plus, you have priority support to help you identify and fix issues FAST. But if you’re on a budget, you can also click here to purchase the Custom Facebook Feed Pro individual plugin.
Once you’ve signed up for your account, you’ll need to download the plugin and locate the license key.
You can do both of those from the Downloads tab in your Smash Balloon account:
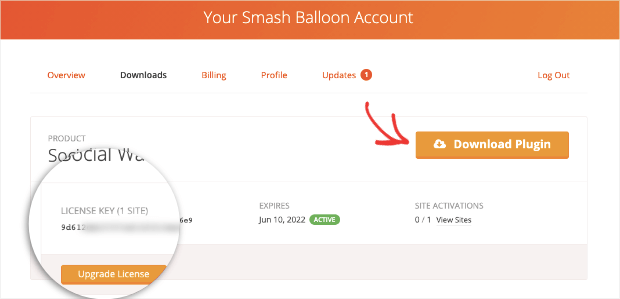
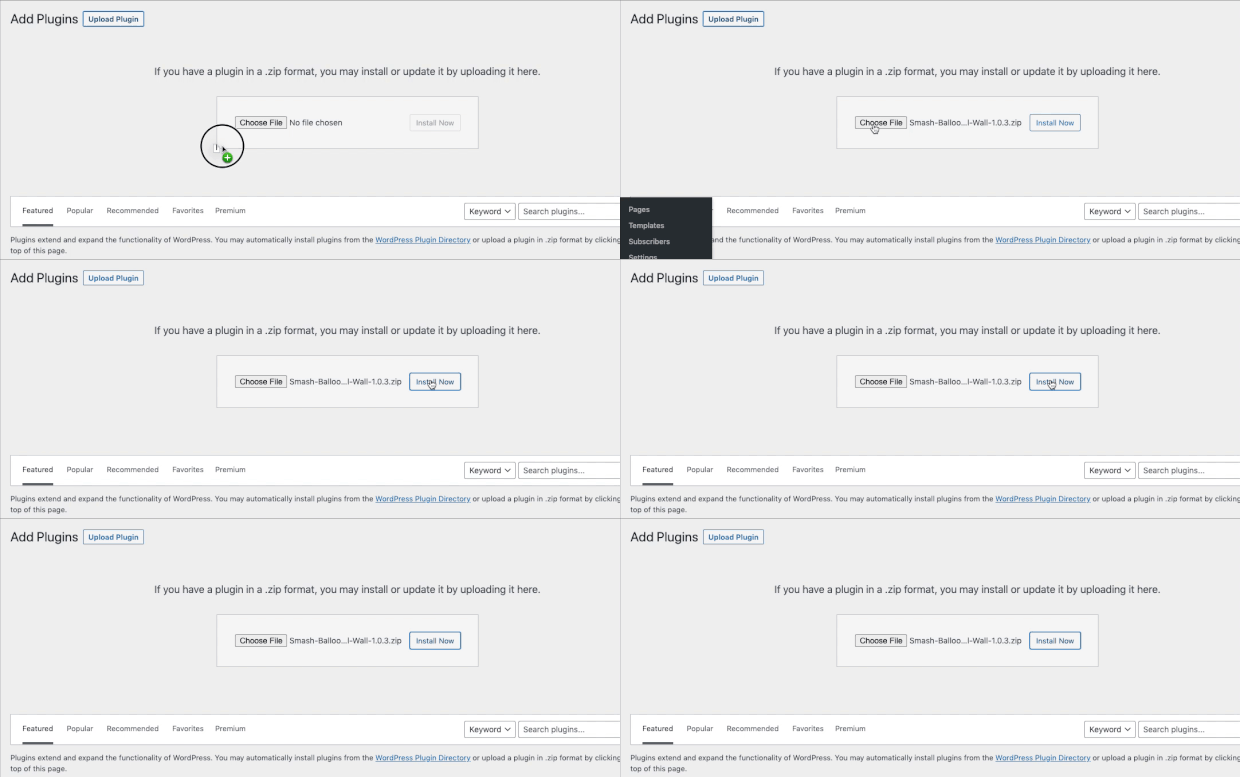
Then head over to Plugins » Add New in your WordPress site’s admin menu. Next, click Upload Plugin at the top of the page:
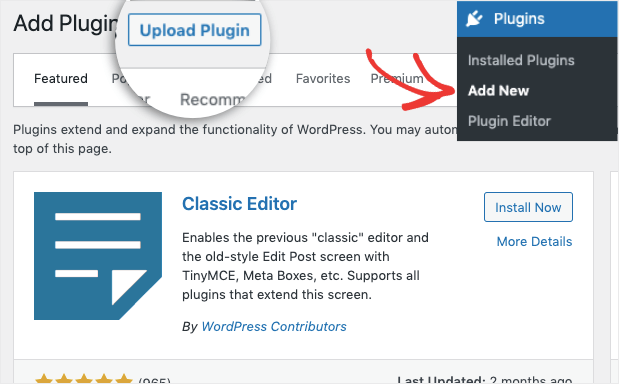
Then drag and drop your Smash Balloon plugin file over where it says Choose File (or manually select the file by clicking that button).
After that, click Install Now:
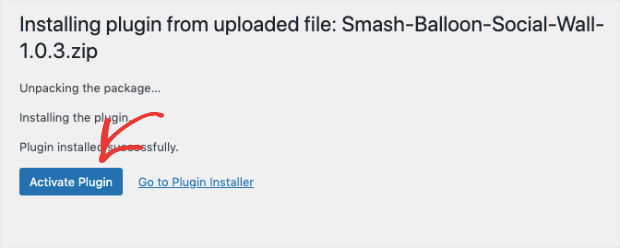
You’ll be redirected to another screen once the plugin is installed. Click Activate Plugin:
If you purchased the Smash Balloon bundle, you’d be able to activate and download the Facebook Feed Pro plugin for free:
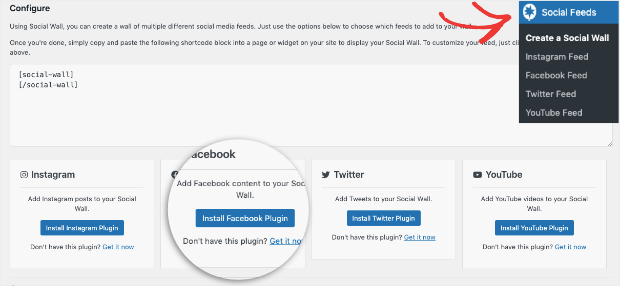
But let’s also look at how you’d go about downloading this plugin individually, if necessary.
Step 2) Add the Facebook Feed Pro Plugin
Again, we recommend purchasing the Social Wall + Social Media Bundle if you want access to more platforms than just Facebook.
However, if you just want to add the custom Facebook activity feed for your site, that’s no problem.
You can start your account by signing up here.
When you purchase the plugin, you’ll grab your license key and plugin download from the Downloads tab of your Smash Balloon account:
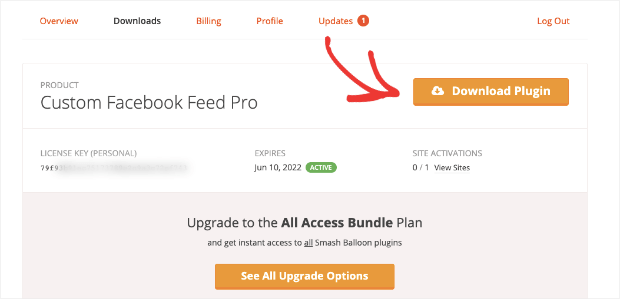
When you have the download file, you can upload it to your WordPress site the same way we covered in the last step.
Head to Plugins » Add New and click Upload at the top of the screen:

Then drag and drop your Custom Facebook Feed Pro plugin (or select the file manually):

When that’s done, be sure to Activate the plugin to get started.
Then you’ll simply need to connect the Smash Balloon plugin with your Facebook account.
Step 3) Connect Smash Balloon to Facebook
Once you have your Social Wall and Custom Facebook Feed Pro plugins installed, you’re just a few clicks away from having a Facebook activity feed added to your site.
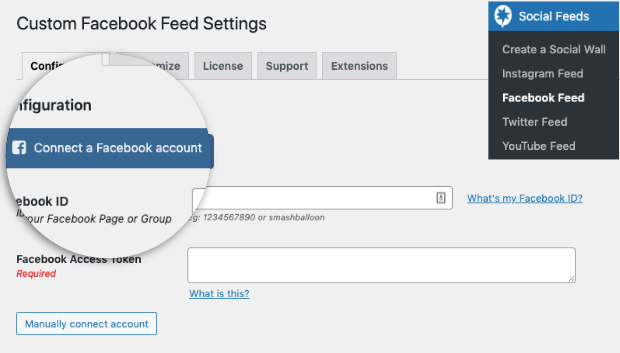
From your WordPress admin dashboard, click Social Feeds » Facebook Feed.
Make sure you’re logged in to Facebook in a separate browser tab. Then in your WordPress dashboard, click Connect a Facebook Account:
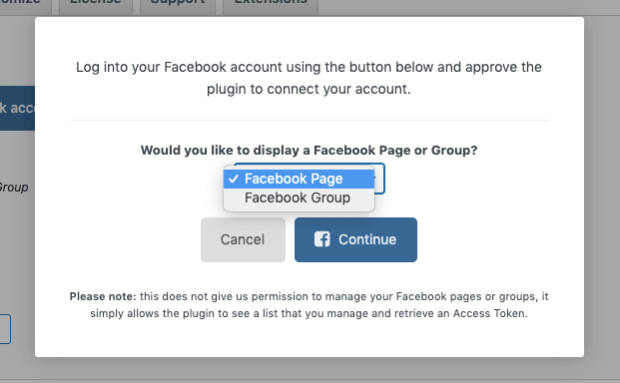
You’ll see a popup appear asking you to decide between displaying a Facebook Page or a Facebook Group.
Select the option you want and click Continue:
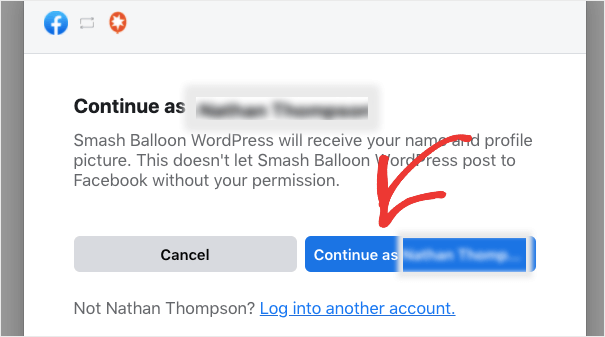
Your Facebook page will appear with a prompt asking you to allow Smash Balloon access to your account. Click Continue as [Your Name]:
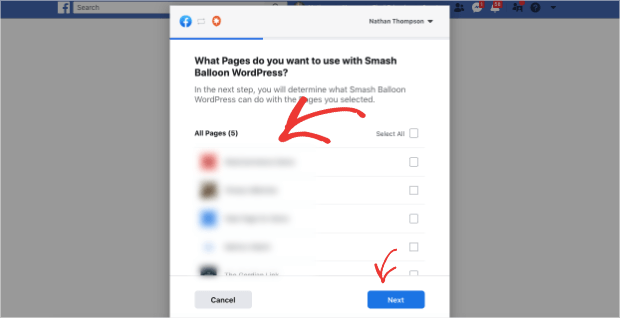
Then select the page that you want Smash Balloon to connect with. Once you’ve selected the pages, click Next:
Finally, you’ll need to allow Smash Balloon access to features of your Facebook account. You can enable or disable the following options:
- Show a list of Pages you manage
- Read content posted on the page
- Manage accounts, settings, and webhooks for a Page
- Read user content on your page
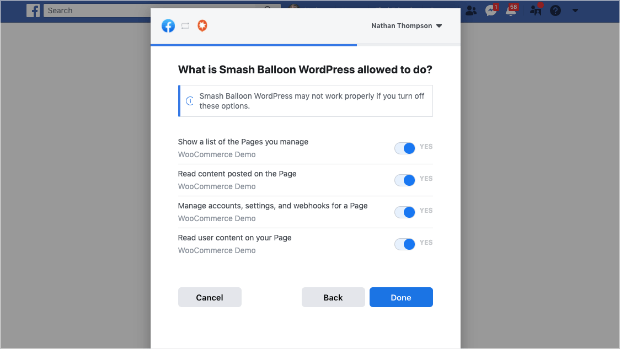
All of these options are enabled by default, and we recommend leaving them that way.
When you’ve selected the options that suit your needs best, click Done.
You’ll be redirected back to your WordPress admin dashboard, where you’ll confirm the page you selected on Facebook is the one you want to display on your WordPress site.
Click Connect All once you’ve selected the right pages:
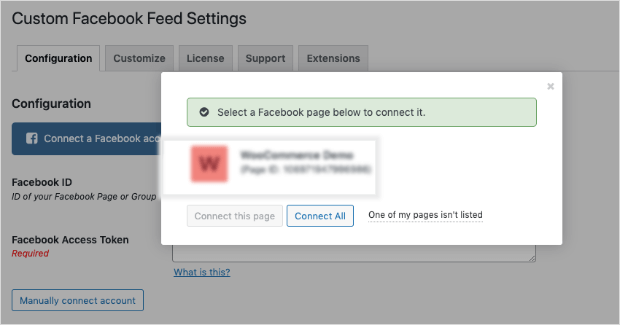
At this point, all that’s left is customizing your Facebook activity feed and embedding the shortcode onto the pages or posts where you want them to appear.
Step 4) Customize Your Activity Feed
Smash Balloon gives you a ton of options to modify your activity feed’s look and style.
Head to the Customize tab in your Smash Balloon dashboard (in WordPress).
This gives you several areas to customize, including:
- General
- Post Layout
- Style Posts
- Misc
- Custom Text/Translate
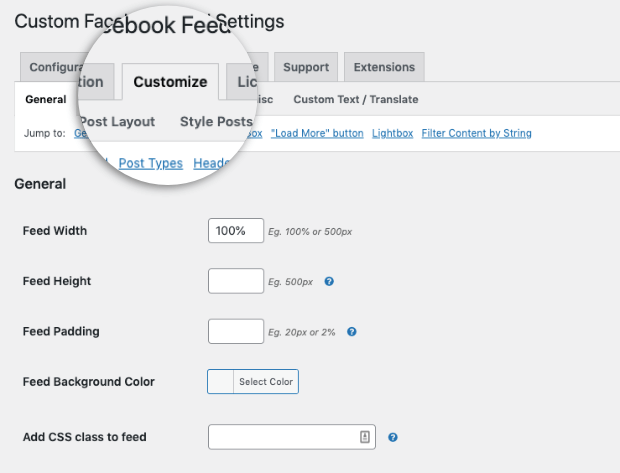
These options give you control over how your activity feed appears on your website.
We won’t have time to get into all the customization options in this resource.
As a quick overview, the General settings are where you’ll customize how your Facebook feed looks. As you can see in the image above, you can configure options like:
- Width
- Height
- Padding
- Background color
- And more…
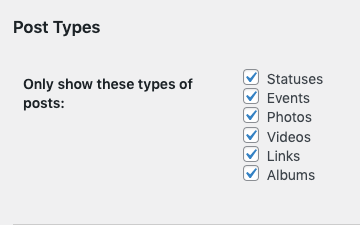
We should also mention that you can select specific post types to display, such as:
- Statuses
- Events
- Photos
- Videos
- Links
- Albums
There are two things you’ll definitely want to look for, though, including:
1) Selecting Your Post Layout: You have 3 options for your feed’s layout:
- Thumbnail
- Half-width
- Full-width
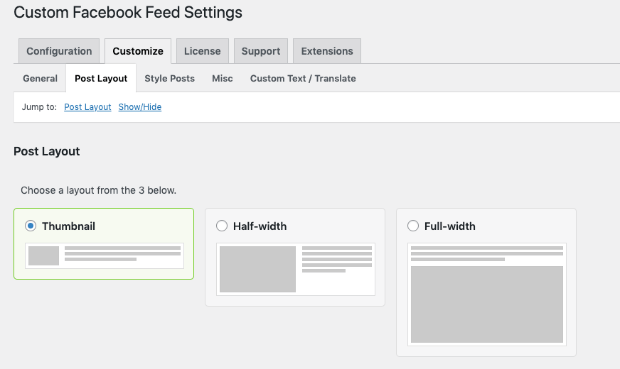
2) Style of Your Post: Here, you have 2 options:
- Regular
- Boxed
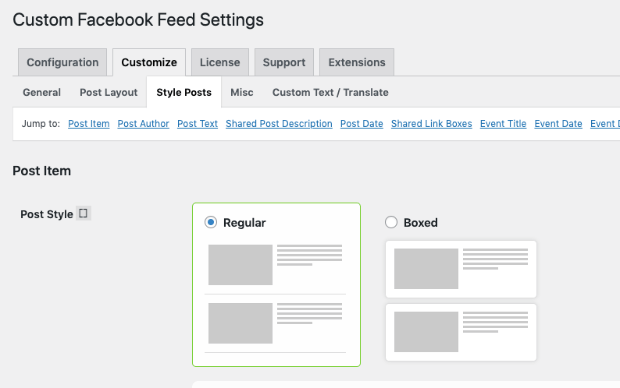
These styling options give you more control over how your Facebook activity appears on your site.
You might want to consider testing these options over time to see which style gets you the highest engagement rates for your site.
Once you’ve customized your Facebook activity feed, all that’s left is to embed the feed on your posts or pages.
Step 5) Embed Your Facebook Activity Feed
You have 2 options for adding your Facebook activity feed to your site:
- Add them to posts or pages
- Add them to your site’s sidebar
Let’s quickly look at how you can accomplish both of these tasks.
1) Add Facebook Feed to Posts or Pages
Smash Balloon makes it incredibly simple to add your Facebook feed to pages or posts on your WordPress site.
If you’re using the Gutenburg block edit, you can simply select the Facebook Feed block to insert your feed:
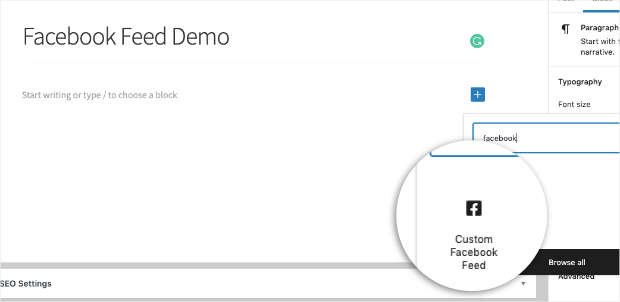
This will give you a preview of your Facebook feed where you can publish it directly.
Still using the Classic editor? Not a problem.
In your Social Feed menu (in WordPress), your Facebook feed will generate a shortcode:
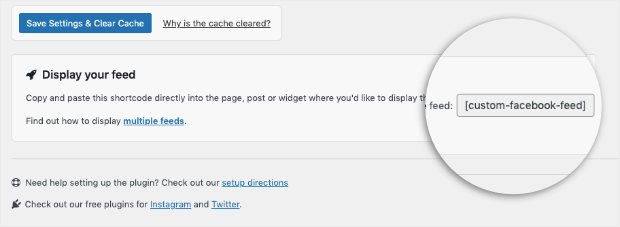
Then you can embed this shortcode on any of your posts or pages, just like you’d add any other shortcode.
But in some cases, you might want to add your Facebook feed to the sidebar on every page of your site. Let’s quickly look at how to accomplish that.
2) Add Facebook Feed to WordPress Sidebar
In WordPress, go to Appearance » Widgets. Scroll down until you find the Text widget.
Select Sidebar and click Add Widget:
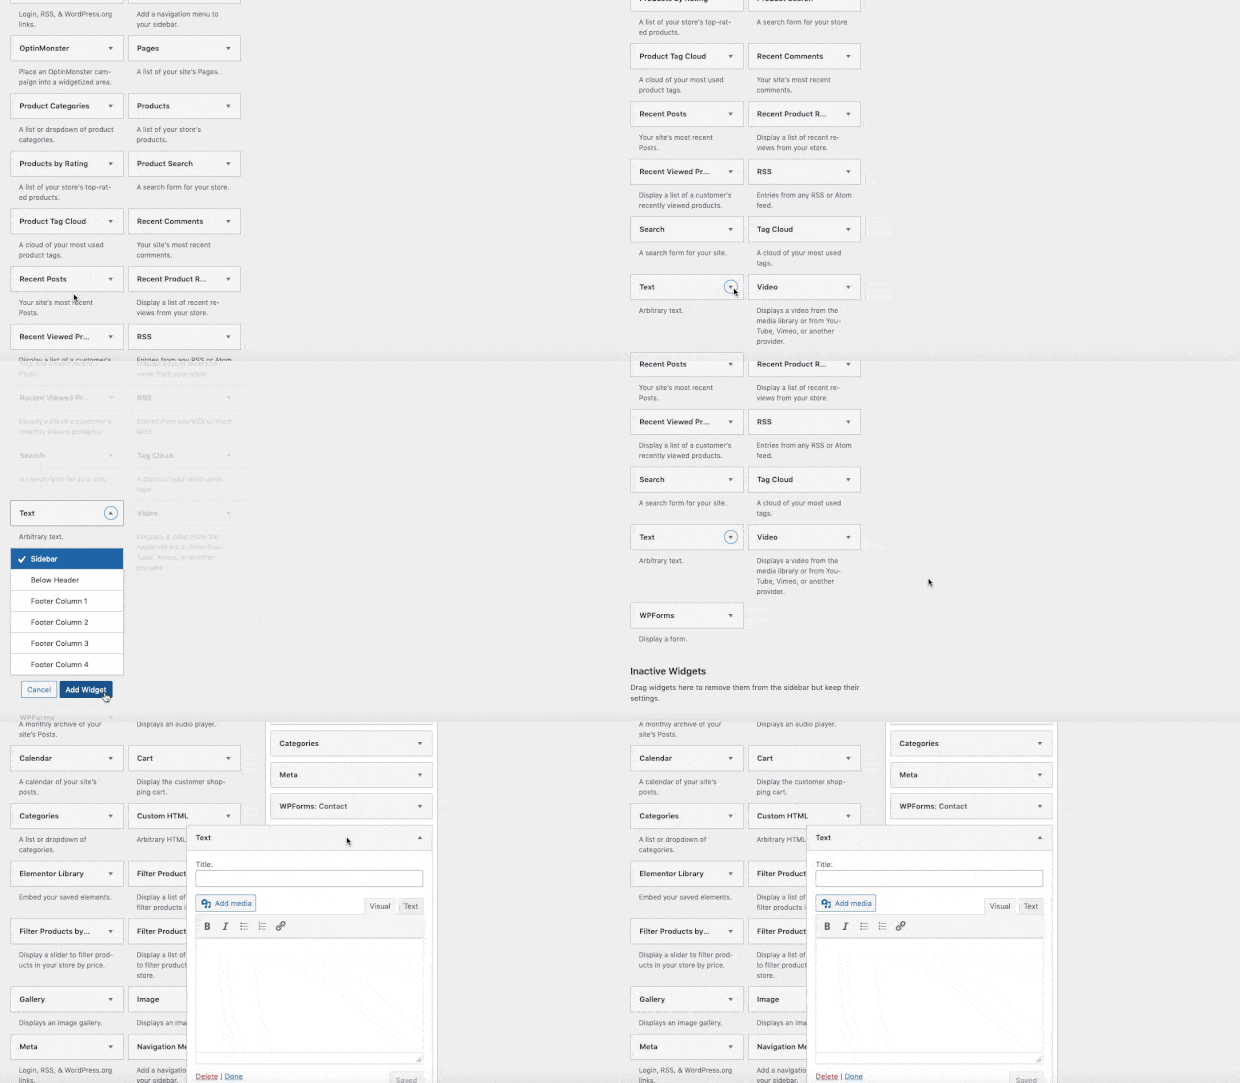
Then when you scroll back up to your widget options, you can name your sidebar widget and add your Smash Balloon Facebook feed’s shortcode:
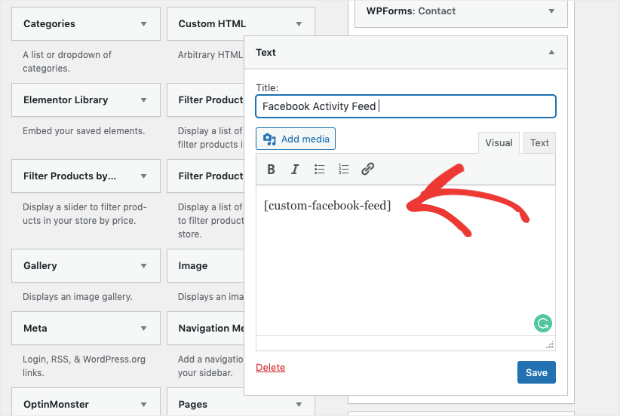
Then click Save.
And that’s it! You now have a Facebook activity feed up and running where you’d like on your site.
Again, this can be done in just a few minutes, with zero coding skills required.
Plus, you can add this feed to any page or post on your site. Or you can add it to the sidebar of your entire site in just a few clicks.
Want to give it a shot for yourself? Click here to sign up for Smash Balloon today!
We hope you enjoyed this tutorial. If you did, then you’ll definitely want to check out the following resources:
- How to Create a “Like Us” Popup in Under 5 Minutes
- The Ultimate Guide to Getting Free Traffic from Facebook
- How to Greet Visitors With a Popup from Facebook
These resources will give you more information on how you can use Facebook to engage your audience and grow your business.



Add a Comment