Want to track your conversions using Google Analytics, but not sure where to start? Google Analytics can be intimidating if you are new to it, but it doesn’t have to be complicated. All you need to get started are the basics. In this post, we’ll share how to track your conversions in Google Analytics, step-by-step.
“Analytics.” That can be a scary-sounding word. Many people assume that analytics are only something that technology gurus with multiple degrees can interpret. However, we’re here to tell you that analyzing your website data doesn’t have to be scary or confusing.
In fact, thanks to some free and premium tools (such as Google Analytics + MonsterInsights or OptinMonster), gaining relevant insights into what’s working and what’s not is actually quite effortless.
In just a few simple steps, you can set up your Google Analytics account and create conversion goals so that you can track your email list signups and understand what’s driving your success, or holding you back.
Let’s dig in!
Setting Up Your Google Analytics Account
Let’s begin with your Google Analytics account. If you don’t have an account, then this is the first place to start. If you already have a Google Analytics account, just skip over the first two steps below and start at Step 3. You can also switch from Universal Analytics to Google Analytics 4 with just a few clicks.
Here are some simple steps to follow to get up and running with Google Analytics…
Step 1: Create a Google Account
In order to use Google Analytics, you need to have a Google account. If you already have a primary Google account such as Gmail, YouTube, or Google Drive, then you’ll want to set up your Google Analytics account under the same name. Otherwise, you’ll need to create a new one.
Step 2: Sign Up for Google Analytics
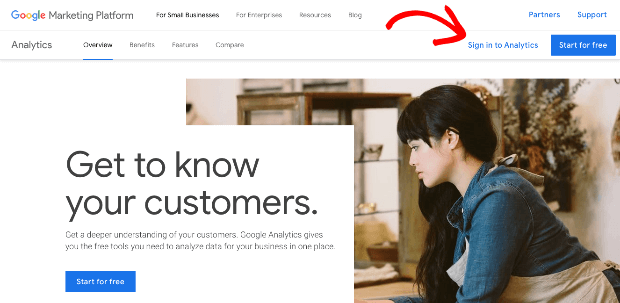
Once you have a Google account, you’ll need to sign into Google Analytics.
On the next page, click on the ‘Set up for free’ button.
This will open up the setup instructions that you can follow.
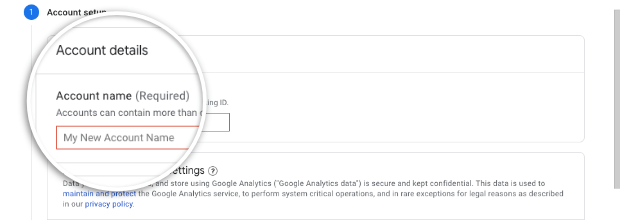
Step 3: Add an Account Name
First, you’ll need to enter an account name. This will become your parent account under which you can add multiple websites or properties.
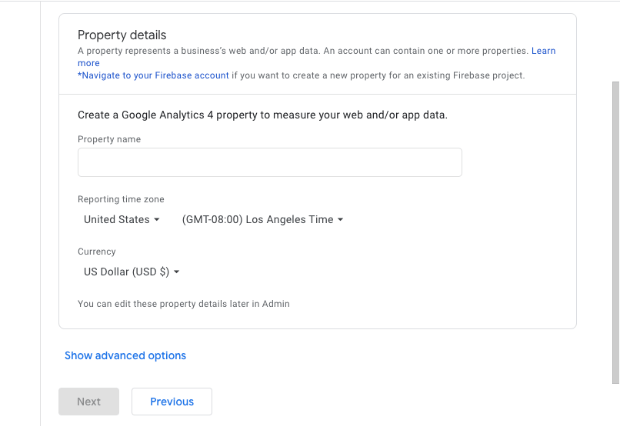
Step 4: Add Property Details
On the next page, you can add your property name which is your business or website name.
After that, select your time zone and currency and then click on the ‘Next’ button to complete this step.
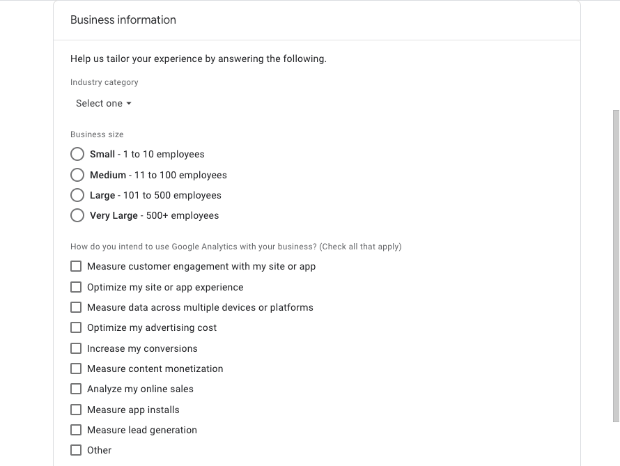
Step 5: Add Business Information
Google lets you select your business information such as your category and size. You can also tell Google what you plan on measuring or tracking. This will help Google tailor the data according to your business needs.
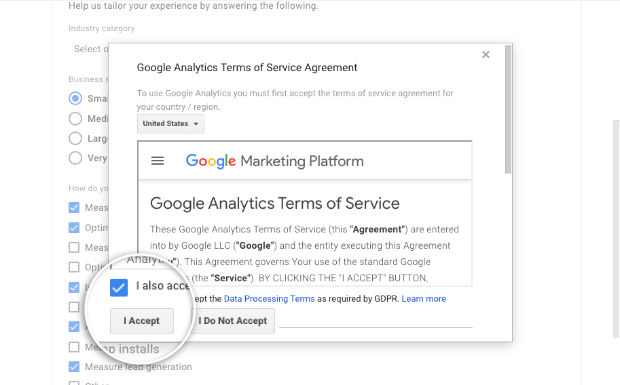
Once that’s done, you simply need to agree to the terms of service agreement. Tick the two checkboxes and then scroll to the bottom to find the ‘I Accept’ button.
Step 6: Set up a Data Stream
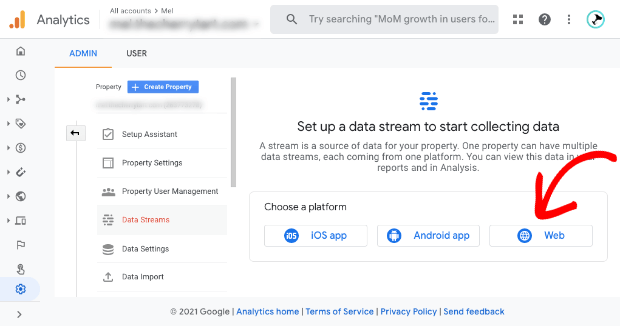
Once you accept the terms, the Google Analytics dashboard will open. Here, you’ll need to set up a data stream to start collecting data.
Select the ‘Web’ option to add your website to Google Analytics.
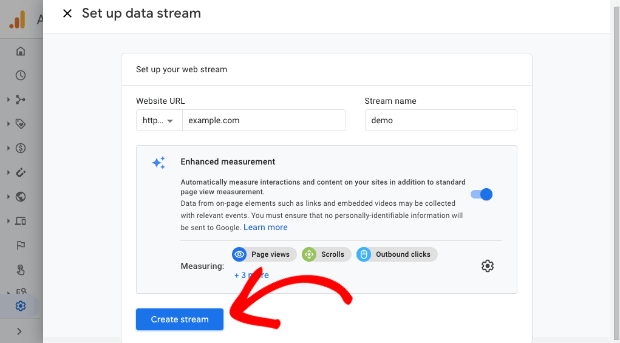
Next, you can enter your website’s URL and a stream name and then click on the ‘Create Stream’ button.
Step 7: Add Tracking Code to WordPress
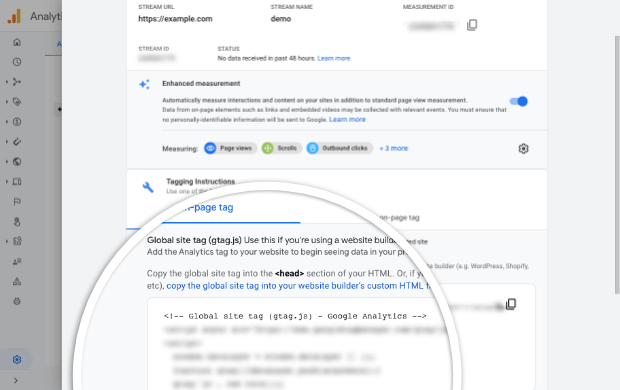
Now, you’ll see a measurement ID and stream ID for your property.
Google also creates a tracking code which you’ll need to add to your website’s theme.
Under the Tagging instructions section, open the Global Site Tag tab and then copy this tracking code.
You’ll need to paste this code into the header of your WordPress theme. This means you have to modify your WordPress files which is risky. A slight misstep could leave you with a broken website.
Instead, you can add the tracking code to your site using MonsterInsights. It’s easier, faster, and safer.
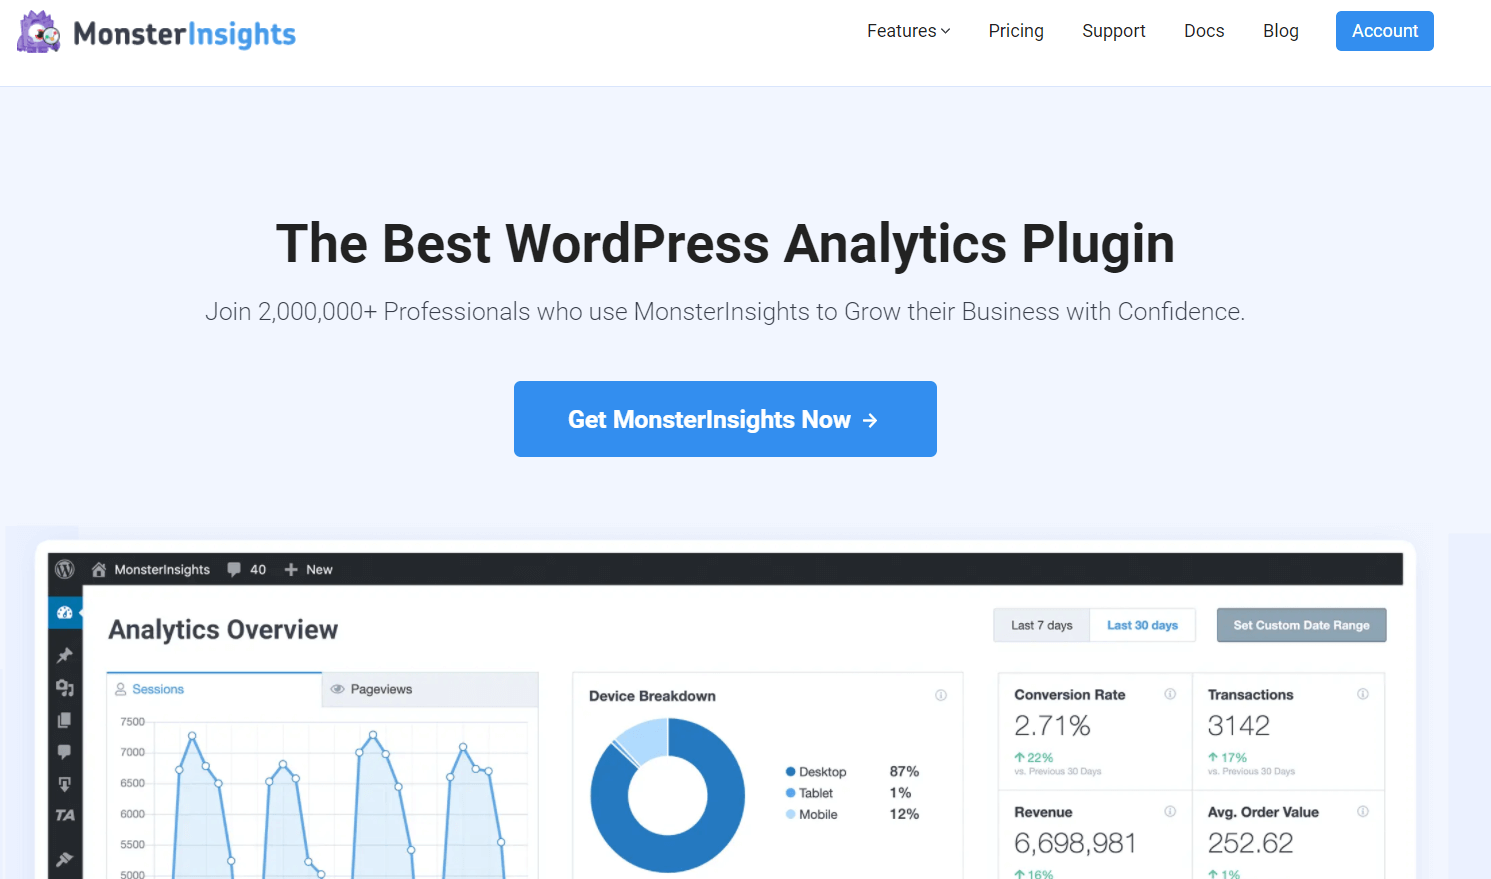
MonsterInsights is the most powerful Google Analytics plugin for WordPress. It not only makes it easy to connect to Google Analytics but also turns complex data into valuable insights. So you can get all the data you need in easy-to-understand reports right inside your WordPress dashboard.
See our MonsterInsights review to see why we think it’s the best Google Analytics tool for WordPress.
To get started, you simply need to install and activate MonsterInsights on your site like you would any WordPress plugin.
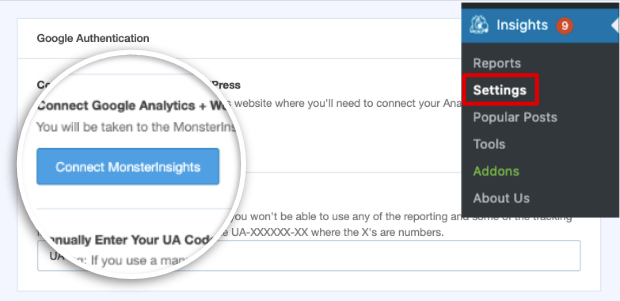
Next, navigate to the Insights » Settings tab in your WordPress dashboard.
Then click on the Connect MonsterInsights button.
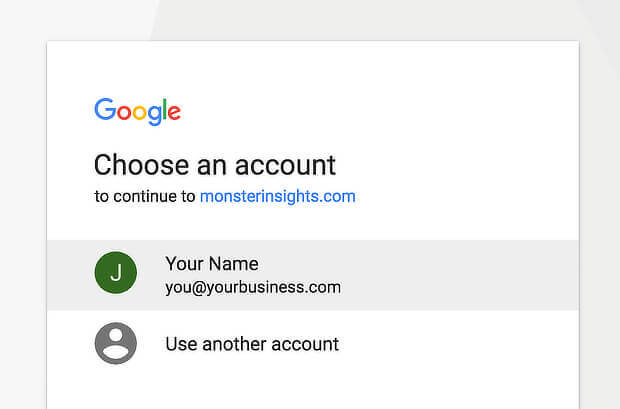
You’ll see a dialog box pop up that looks like this, so you can select the Google account you want to use:
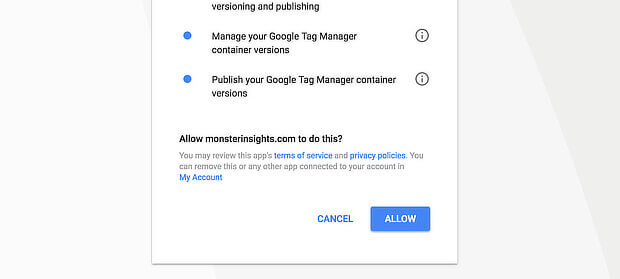
Click on the blue Allow button so MonsterInsights can access your Google Analytics data.
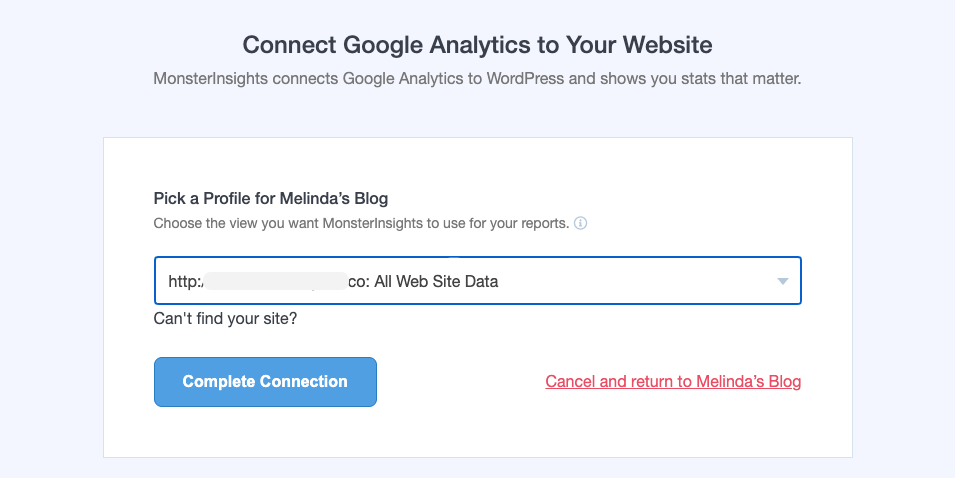
Choose the Google Analytics website profile you want to authenticate with MonsterInsights.
The last step is to finish the authentication process by clicking the Complete Connection button. And you’re all set.
If you’re switching from Universal Analytics to Google Analytics 4, check out this Google Analytics 4 glossary to help you “translate” terms.
How to Set Up Conversion Goals
Now that you’ve successfully installed Google Analytics on your website, you may be feeling a little (or a lot!) overwhelmed by the sheer complexity of it. Well, you are in good company. That’s why so many people insert a tracking code onto their websites and then call it quits.
Why is Google Analytics so complex? Well, it’s pretty powerful stuff.
“The problem is that an ‘out of the box’ Google Analytics implementation will only get you so far,” SEO expert Glenn Gabe explains. “Sure, you’ll get the basics, but that won’t necessarily help you glean insights that can boost ROI.”
So the bottom line is, you’re going to have to do a bit of your own setup. However, once you do, you will be able to gather some golden insights.
While there are plenty of aspects of Google Analytics that you don’t need to learn or master at this point, you absolutely must familiarize yourself with conversion goals.
You can do a variety of things with conversion goals, but because so many of you have asked us about how to track marketing campaigns – and because list building is so crucial to the success of any business online – we are going to focus on tracking email list signups.
Don’t worry – it’s actually pretty simple once you know how to do it. Let’s take a look…
Step 1: Create a New Goal
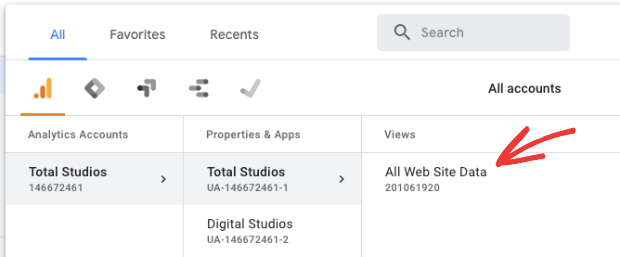
First, on the Google Analytics dashboard, you’ll see ‘All Website Data’ on the top-left corner. Click on it to open a menu, like so.
Select your site and select the ‘All Web Site Data’ option.
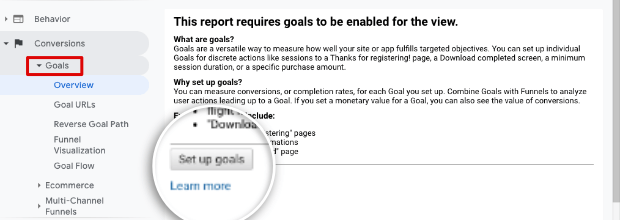
Next, from the taskbar on the left, select the Conversions » Goals tab.
Now, you can create a goal by clicking on the ‘Set up Goals’ button.
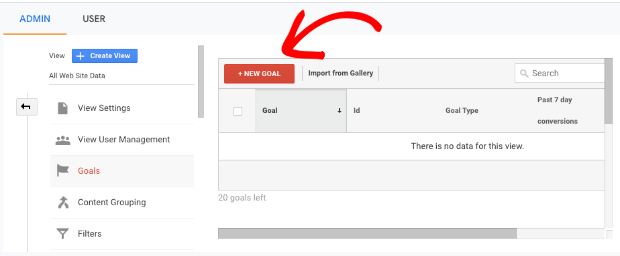
This will open up the Goals page where you can click the red + New Goal button.
Step 2: Choose Goal Setup
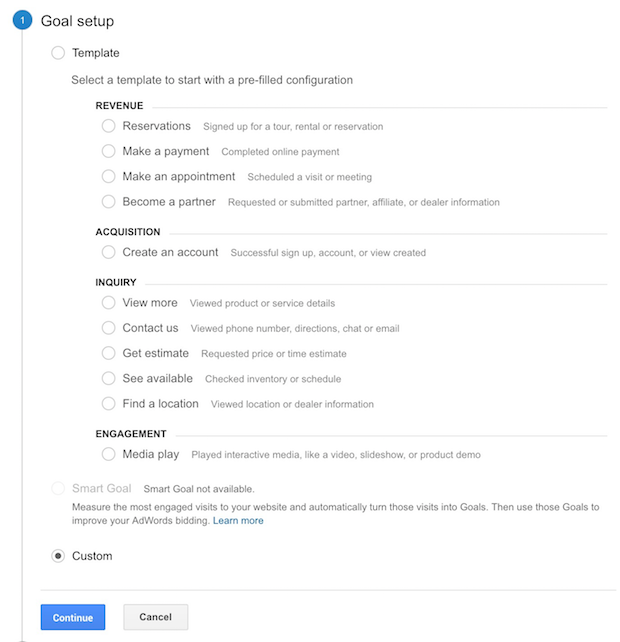
Next, under Goal setup, select the Custom radio button at the very bottom of all the options and click Continue.
Step 3: Enter Goal Description
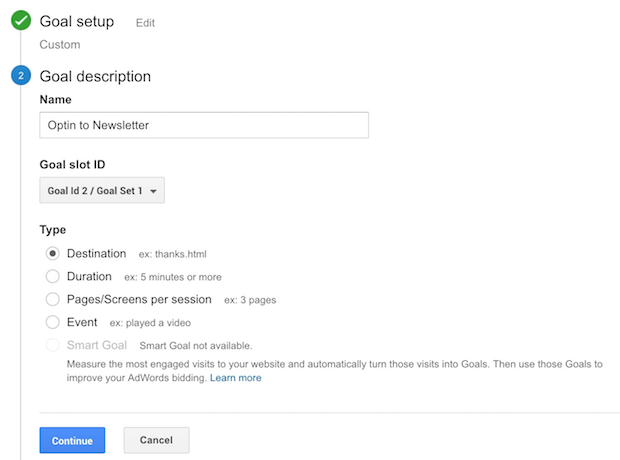
You’ll be prompted to create a name for your goal and choose the type. Enter any name that will help you to remember the conversion you are tracking and select Destination as the type. Then hit the Continue button.
Step 4: Enter Goal Details
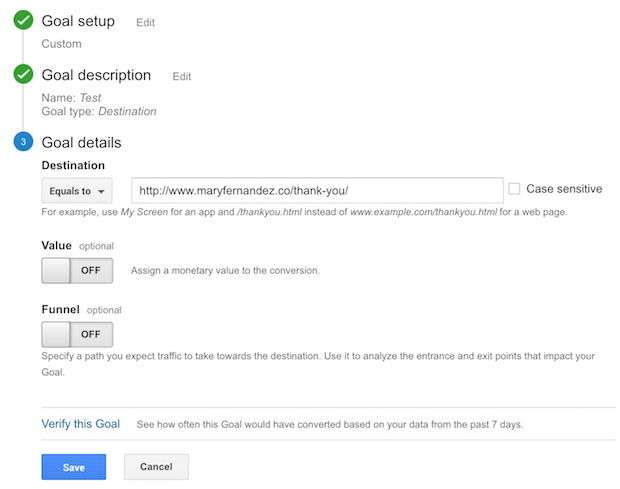
Next, you’ll need to enter the URL for your thank you page: this is the page that a new subscriber sees just after they opt in. Type it into the Destination field.
Optionally, you can also toggle Value on to enter a monetary value to the conversion. Do this if you know how much each email lead is worth to you. (For instance, if you know that the average lifetime value of a customer is $1,000, and your average customer acquisition rate is 1%, then each lead would be worth $10.)
The Funnel option is usually more useful if you are tracking a conversion that happens further down your funnel (such as a sale), so we are going to skip that for now.
Then, hit Save.
Step 5: Start Recording
As soon as a goal is created, Google Analytics will begin recording data. Now all you have to do is wait.
(You can always pause a goal by changing the recording status to off.)
Step 6: View Your Data
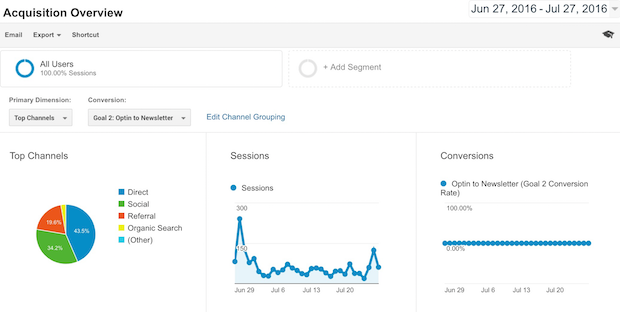
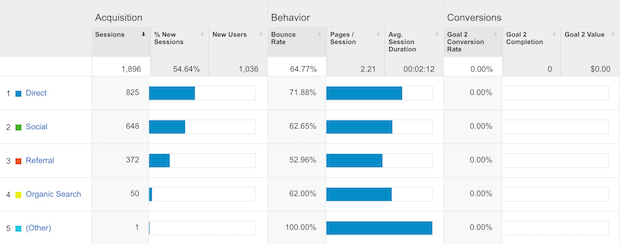
Because you’ve only just started tracking your website, there won’t be any data to show. However, you can view your data by going to Acquisition » Overview and selecting your new goal under the Conversion dropdown menu.
This will allow you to see your top channels which are your top sources of traffic. You will also be able to see a graph of your sessions, which is how many times someone has visited your site (each session can include multiple page views).
What you’ll want to look at is your conversion rate in the third section of columns on the right-hand side:
This will allow you to see which channels are giving you the highest conversion rates. And, if you’ve specified a monetary value to your leads, you will be able to see that total number in the rightmost column.
You can use all of this information to determine which channels you should focus your attention on.
You can also change the dates in the upper right-hand corner to view the specific window of time that you are interested in.
The only downside to conversion goals is that, if you have multiple marketing campaigns, you’ll have to create a separate conversion goal to track each one. You’ll also have to make sure that each campaign has its own separate thank you page, otherwise, you won’t be able to differentiate your conversion goals.
However, if you have OptinMonster, there is a much easier way to use Google Analytics to track conversion rates on each of your individual marketing campaigns. (More on that in the next section.)
Using Google Analytics + OptinMonster
If you’re using OptinMonster, tracking conversions on your campaigns is super easy. You don’t have to create any conversion goals inside Google Analytics, and you don’t even have to use a thank you page if you don’t want to.
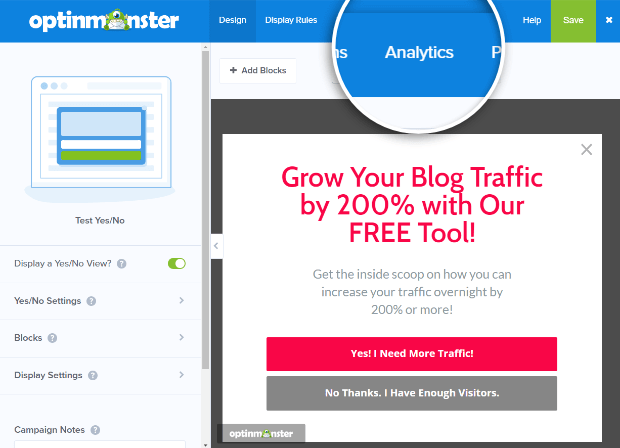
To start using OptinMonster and Google Analytics together, go to the Analytics tab from your edit screen in OptinMonster:
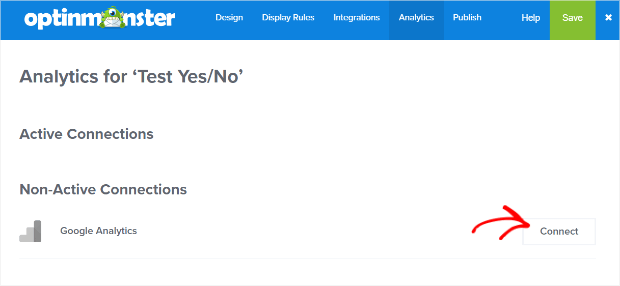
You’ll see Google Analytics listed under Non-Active Connections. Click the Connect button to connect.
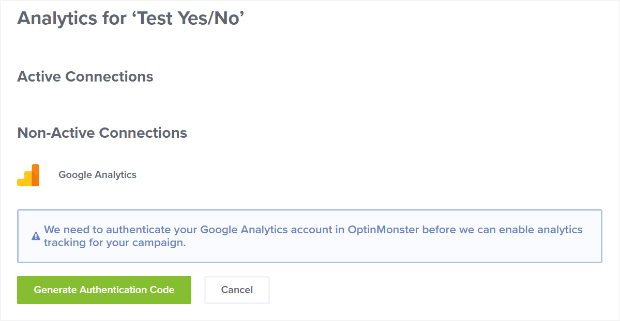
In the screen that comes up, click the green Generate Authentication Code button.
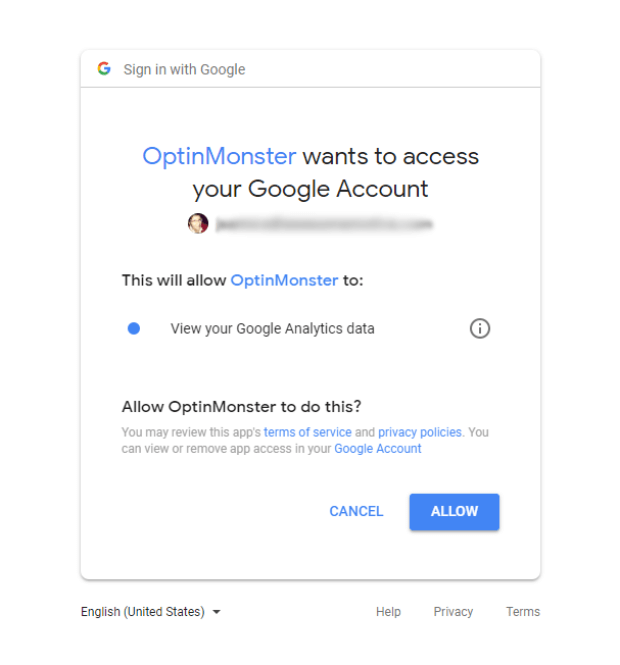
A new browser tab will open up to ask you if you will allow OptinMonster to view your Google Analytics data. Click the blue Allow button.
Next, it will give you a code. Copy this code, and then go back to the browser tab with your OptinMonster edit screen.
Paste the code into the Authentication Code field. Then, give your Google Analytics account a name in the Account Label (just pick a name that will help you remember which account you are connecting to). Hit the green Next button.
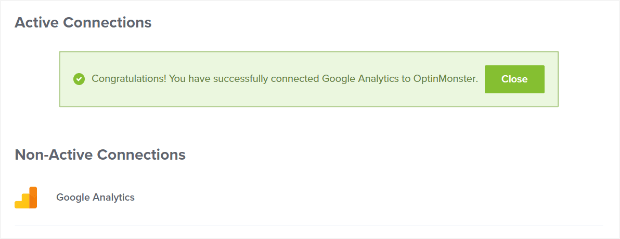
You should see this success message after clicking Next:
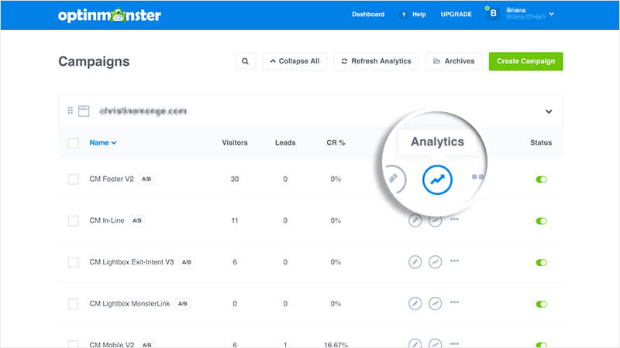
Now you will be able to collect data from Google Analytics and view your conversion rate right from within your OptinMonster account by clicking on the analytics icon next to your optin form:
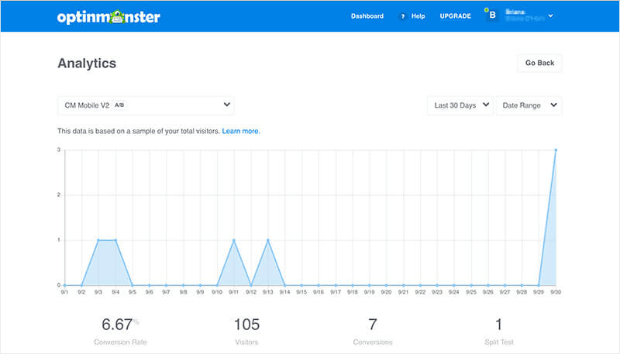
After acquiring a bit of data, you will be able to view a report for each of your optin forms that looks something like this:
That’s it! We hope this article has helped you to learn how to use Google Analytics to track your conversions.
Wrapping Up
Google Analytics can seem intimidating at first due to all the options available, but it’s actually pretty simple once you know what data to focus on.
Creating conversion goals allows you to view the data that’s really important: your email list conversion rates. Or, you can simply integrate OptinMonster with your Google Analytics account in a few clicks and start gathering conversion data on each of your optin forms right away.
If you enjoyed this article, you may also want to find out how to get actionable insights with a custom Google Analytics dashboard, and how to get lead magnet ideas with Google Analytics.
Want to know how people behave on your website when they see or interact with your OptinMonster campaigns, as compared to other visitors? It’s easier than you might think! Check out our tutorial on How to Analyze the Effects of OptinMonster Campaigns on User Behavior.








Add a Comment