Do you want to learn how to master retargeting ads for Shopify to drive more sales at a lower cost?
Ad retargeting is one of the most efficient ways to grow your business. Not only does it bring your online store more leads, but it also lowers your average cost-per-click (CPC).
That means getting more conversions out of the budget you’re currently working with.
So, today, we’re going to explain 3 actionable strategies for optimizing your retargeting ads for Shopify.
- What Is Ad Retargeting (& Why Does It Matter)?
- How to Set Up a Facebook (Meta) Pixel
- How to Optimize Retargeting Ads for Shopify
What Is Ad Retargeting (& Why Does It Matter)?
Retargeting is a broad term that’s used by lots of different platforms. It refers to showing an advertisement to someone who has already interacted with (or has become aware of) your brand.
It’s usually a straightforward process that looks like this:
- Step 1) You install a small piece of tracking code on your website. This is provided by your pay-per-click (PPC) platform and is most commonly known as a “pixel.”
- Step 2) Someone visits or engages with your website in some way but then leaves before making a purchase.
- Step 3) The same visitor later sees an advertisement for your Shopify store from your PPC platform.
- Step 4) They click the ad, get taken back to your site, and you generate more revenue.
But what makes retargeting such an effective strategy? Because you’re showing ads specifically to people who’ve shown a high interest in your brand.
That means you can TOTALLY personalize your messaging to increase conversions.
In a moment, we’re going to explain how to optimize retargeting ads for Shopify. But first, let’s learn how to connect a Facebook pixel for your Shopify store.
How to Set Up a Facebook (Meta) Pixel
Before you can start running retargeting ads for Shopify, you’ll need to set up a Facebook (Meta) Pixel. This pixel tracks visitor behavior on your site and helps you show ads to people who have already interacted with your store.
Below, we’ll walk you through the basics of setting up a Facebook Pixel on Shopify. If you’re using WordPress for your blog or landing pages, we’ll also link to a detailed guide for adding the pixel to WordPress.
Already have that figured out? No worries. You can jump straight to our tips on retargeting ads for Shopify.
Step 1: Create a Facebook Pixel
- Log in to your Meta Business Suite and go to All Tools » Events Manager.
- Click + Connect Data Sources, select Web, and then click Connect.
- Name your pixel and enter your website URL.
- Choose Meta Pixel only as your connection method.
- Click Create Pixel and copy the pixel ID.
For full instructions, see WPBeginner’s guide to installing a Facebook Pixel.
Step 2: Add the Pixel to Your Shopify Store
Once you have created your pixel, follow these steps to install it in Shopify:
- In your Shopify admin, go to Settings » Apps and sales channels.
- Click Facebook & Instagram, then select Open sales channel.
- Click Settings, then go to Share data settings.
- Toggle Enable data sharing to On.
- Choose your data-sharing level (Standard, Enhanced, or Maximum).
- Select your Meta Pixel from the list or click Create new.
- Click Confirm to save your changes.
For more details, visit Shopify’s Meta Pixel setup guide.
How to Optimize Retargeting Ads for Shopify
In the past, you may have read the same old generic tips for optimizing retargeting ads. These tips usually involve things like:
- Determine who your audience is
- Display related products to current customers based on their purchase history
- Find the right length of time for your Shopify retargeting campaign
- Create a lookalike audience from your current customer base
And more. And while this is all great advice, we wanted to teach you 3 totally unique ways to optimize your retargeting ads with OptinMonster:
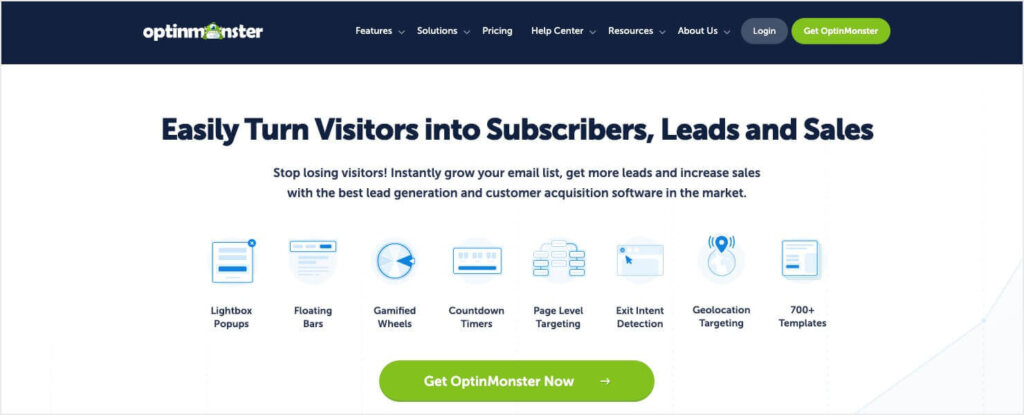
OptinMonster is hands down the best way to increase conversions from your retargeting ad campaigns. That’s because this tool syncs perfectly with your advertising strategy in a way that grows your email list AND drives more revenue.
OptinMonster allows you to quickly and easily create professional “optin campaigns” in a matter of minutes. These campaigns include things you’re familiar with like popups, floating bars, fullscreen welcome mats, and more.
Plus, OptinMonster has over 700+ pre-built templates, which you can customize in minutes in the easy drag-and-drop builder:
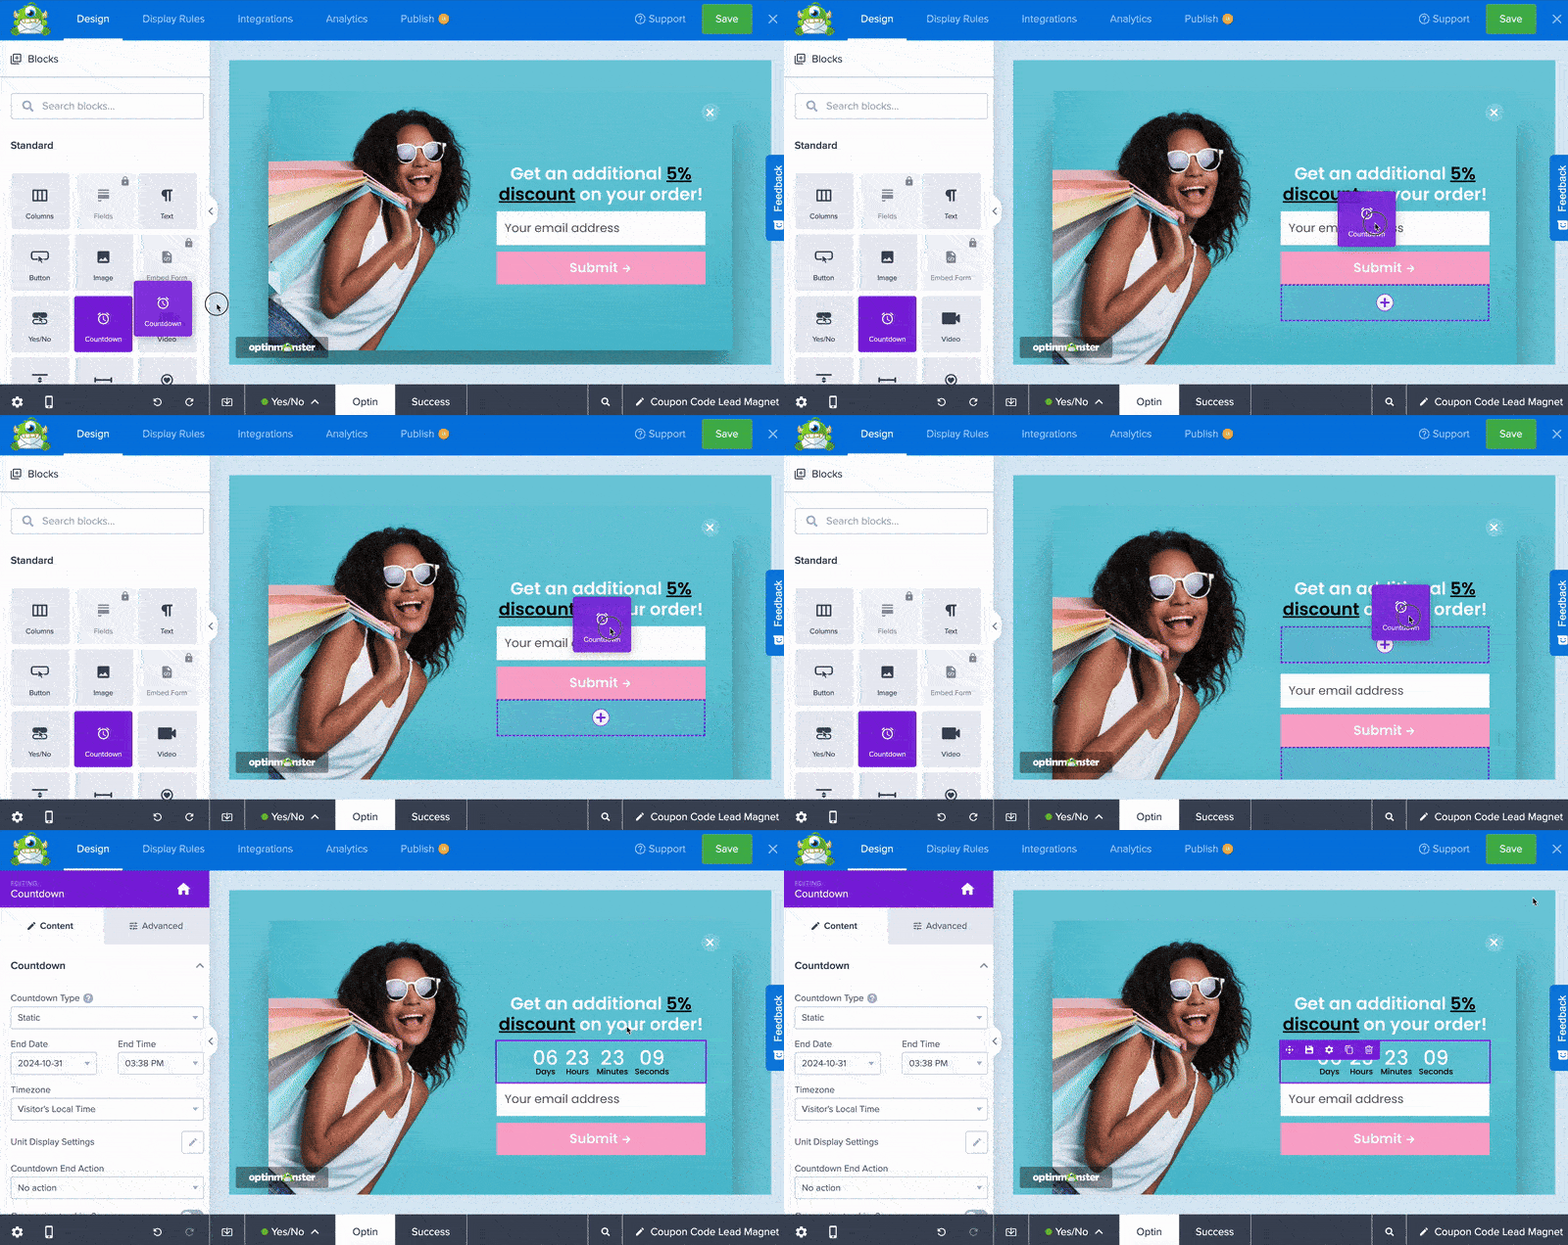
This personalization will be one of the biggest conversion boosters for your Shopify retargeting strategy.
As a general rule, the more personal you can make your messaging, the higher conversions you can expect.
Here’s an example of a popup built with OptinMonster in under 5 minutes:

Once your campaign is complete, you’ll have access to the most advanced targeting rules on the market. This will complement your PPC strategy as you show each of your optin campaigns to the most relevant parts of your audience.
A few popular targeting rules include:
- Exit Intent® Technology: Show campaigns to users who are actively leaving your website.
- Geo-Location Targeting: Display campaigns to people based on where they’re physically located.
- Page-Level Targeting: Create campaigns for specific pages or sections of your site to increase conversions.
- Onsite Retargeting®: Show fresh campaigns to returning visitors to prevent “popup fatigue.”
These are just a few examples of OptinMonster’s targeting rules and triggers, though there are many others.
But now for the big question: do these targeting rules work? In short, YES!
Just check out some of these success stories OptinMonster clients have shared:
- How Fastrack recovers 53% of their visitors with exit-intent popups
- Shotkit adds 40+ NEW leads per day with OptinMonster
You can achieve the same massive results by clicking below and starting your 100% risk-free OptinMonster account today:
BONUS: Done-For-You Campaign Setup ($297 value)
Our conversion experts will design 1 free campaign for you to get maximum results – absolutely FREE! Click here to get started →[/alert]
Now let’s see how the right lead generation tool can help you optimize retargeting ads for Shopify.
1. Add Pixels to Your Popups
Earlier, we mentioned how you’d need to add a tracking pixel to your Shopify site to start ad retargeting.
But why not take things a step further? You can add these same pixels to your optin campaigns to track how users engage with your offers.
Doing so is easy. You’d simply copy and paste your pixel in the Success Scripts section of your editor and make sure that Conversion Tracking is flipped to On:
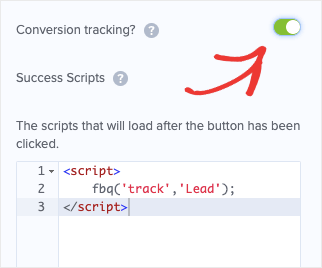
How will this help retarget your ads? This lets your PPC network know when someone positively engages with the optin campaigns across your Shopify store.
This is HUGE because, for most retargeting campaigns, you’ll be showing ads to people who’ve visited your website.
But now, you can show ads to people who’ve actually engaged with the offers presented in your online store. That makes them extra warm leads and the perfect candidates to see your retargeting ads.
As a result, you can expect higher conversions and sales.
2. Mirror (and Personalize) the Your Ad Copy
Another way to optimize your Shopify retargeting ads is to make sure the language used in your advertisement matches the optin campaigns shown across your site.
This is important for several reasons. Not only does it look more professional, but it’s a great way of keeping the customer experience totally personalized.
So rather than your site’s visitors thinking they’re another metric in your marketing funnel, they’ll feel like a genuinely valued customer.
How can you do this? It’s easier than you might think.
You can simply make sure the persuasive language in your ads (called “copy”) matches the language in your optin campaigns.
Imagine, for example, you created a Facebook ad for a luxury watch that said:
No, you can’t stop time.
Click here to learn what you CAN do.
This shows up in someone’s Facebook feed, and the person gets curious. When they click the ad, they head to your Shopify store and land on the watch’s product page.
Then, a few seconds later, they get a special offer with language that mirrors the original ad–only this time it also offers a coupon:
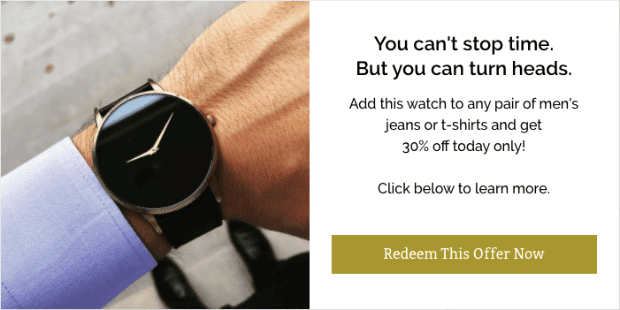
In this particular example, 3 things are happening to boost sales. You are:
- Creating a unique user experience (UX) by making your sales copy match throughout the customer journey
- Providing users with a discount to incentivize a direct sale
- Upselling related products by adding a purchase condition to the discount
This is just one example of how you can mirror your ad’s language to increase sales from your Shopify store. There are obviously tons of other ways you can do this.
But by using consistent copy throughout your ads and optin campaigns, you’ll create a more consistent and effective sales funnel for your retargeting ads.
3. Add an Exit-Intent Popup to Your Landing Pages
The last tip is straightforward but an absolute “must.” This involves adding an exit-intent popup to your product’s landing page.
Exit-intent popups are a great way of capturing visitors as they’re actively leaving your website. This is incredibly important because it usually takes people several visits to your site to make a purchase.
Which is exactly why you’re retargeting them in the first place.
But even when people come to your site from a Facebook retargeting ad, they still might not be ready to pull out their credit card (even if they’ve put things in their shopping cart).
At the very least, you’ll want to use this opportunity to get their email address. For that, nothing works better than an exit-intent popup with a special offer or coupon:

The example above is from Shockbyte, which more than doubled their sales conversions with that exit-intent popup and others like it.
The point is that OptinMonster Exit-Intent® Technology is the perfect way to capture abandoning visitors to make sure you’re getting the most out of your Shopify retargeting strategy.
And that’s all for now! These have been 3 unique and actionable tips for optimizing retargeting ads for Shopify to see a larger return on investment (ROI):
BONUS: Done-For-You Campaign Setup ($297 value)
Our conversion experts will design 1 free campaign for you to get maximum results – absolutely FREE! Click here to get started →[/alert]
We hope you found this post helpful. If you did, you might want to check out these other Shopify resources:
- 33 Best Apps to Increase Shopify Sales
- Shopify SEO Guide: Your Step-By-Step Guide to Rank #1
- 7 Best Cart Recovery Apps for Shopify to Boost Sales
These articles will have everything you need to drive even more revenue from your Shopify store.



Add a Comment