
How to Create an Exit-Intent Popup For Shopify
Last updated on
by

Do you want to add an exit-intent popup in Shopify?
Exit-intent popups are a super effective way to reengage visitors before they abandon your site. They can boost your conversion rates and increase sales without disrupting your user experience.
In this article, we’ll show you the easiest way to add a Shopify exit-intent popup.
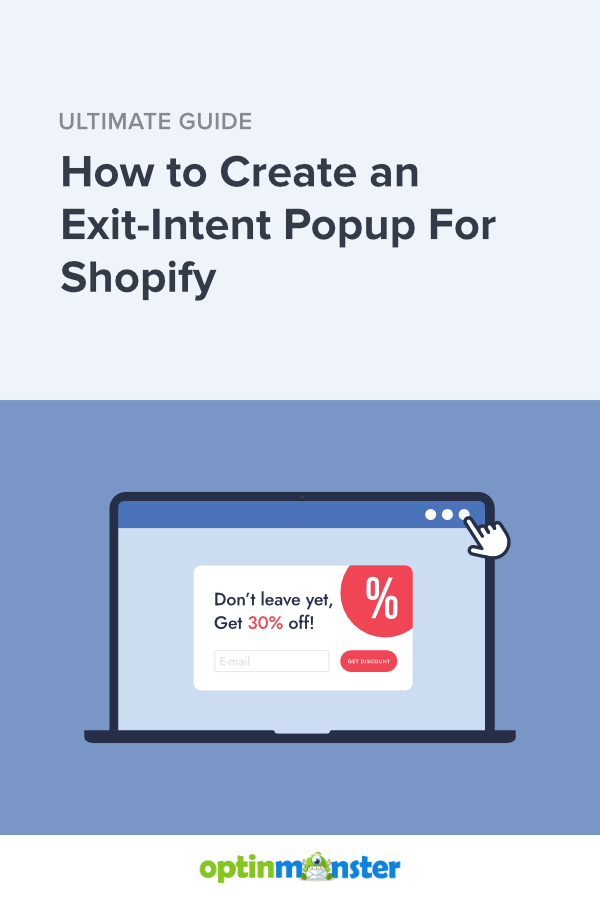
What Is An Exit-Intent Popup?
Exit-intent popups are a type of website popup that appears when the user is about to leave your Shopify store. The main purpose of an exit-intent popup is simply to convince the visitor to stay on the page. There may be a secondary purpose, such as lead generation, reducing bounce rate, or increasing your average order value.
You can add exit-intent popups anywhere in your online store from product pages to checkout pages. The message, call-to-action, and design of an exit-intent popup depends on the page.
For example, a blog post exit-intent popup might offer a free lead magnet for new subscribers. By contrast, an abandoned cart popup could show a discount code or free shipping to reduce shopping cart abandonment. A/B testing can help you find the best messaging for your popups.
You can see some of the best Shopify exit popup examples in our gallery.
Do Exit-Intent Popups Work?
Yes, exit-intent actually works!
We know that 70% of website visitors never return after leaving a site. That’s a lot of missed opportunities to convert a subscriber or customer! Exit-intent popups can convert an additional 2-4% of your visitors into email subscribers or paying customers.
Let’s look at some real examples.
Did you know that 54% of abandoning shoppers will finish checking out if offered a lower price? With this in mind, Crossrope used exit-intent popups to recover 7.65% of abandoning shoppers.

Even if visitors don’t buy right away, exit-intent can help you grow your email list. That way you can continue nurturing those leads over time. SnackNation used exit-intent popups to add 1,200 new emails to their list, and converted 15-20 qualified leads, every single week. Imagine that effect over time!

How Do Exit Popups Increase Conversions?
You may be wondering what’s so special about exit-intent popups that make them so good at boosting your conversion rate.
The best exit-intent technology can detect abandoning visitors through behaviors like lack of scrolling or cursor movement toward the browser bar.
Because they only appear when exit-intent is detected, these popups are less disruptive and more user-friendly than regular popups. They don’t annoy the visitor while they’re still browsing, so exit-intent popups are more likely to convert.
Exit popups can be more targeted in their messaging. If you understand why visitors leave your store before buying, you can create special offers to keep them around.
For example, if someone’s leaving your website without buying, that’s definitely not the time for a popup upsell. Instead, you might offer them coupon codes for free shipping or a gift with purchase. You could also try showing a cross-sell in case a different item might be more interesting.
To make your exit-intent popup designs more effective, you can harness the Zeigarnik effect and create 2-step optins. The Zeigarnik effect is the tendency for people to continue a process that they’ve already started. When visitors say Yes to the first step, they’re primed to say Yes to the next step of subscribing or buying.
 - OptinMonster")
To learn more, check out our list of exit-popup hacks you can use for your eCommerce store.
Now, let’s learn how to add exit-intent popups in Shopify.
How Do I Add Exit-Intent Popups on Shopify?
The easiest way to create a Shopify exit-intent popup is with OptinMonster.

OptinMonster is the best Shopify popup app for boosting your conversion rates. You can use OptinMonster to reduce your cart abandonment rate and grow your email marketing list with leads to nurture.
OptinMonster can make all kinds of popup forms, including product recommendations, surveys, coupon wheels, and more.
With OptinMonster’s popup templates and Playbooks, you can have an exit-intent popup, welcome mat, slide-in, floating bar, or inline optin form ready to go in minutes, not hours.

Every campaign can be turned into a 2-step optin, either in the drag-and-drop builder or using MonsterLinks™ to pop your campaigns up from any link or image on your website.
Finally, OptinMonster has powerful display rules that you can add to your exit-intent popups. These display rules include page-level targeting, geolocation, and a whole suite of Shopify-specific targeting rules.

You can use the same OptinMonster account on Shopify, WordPress, Magento, and other popular eCommerce business platforms.
If you like learning from video, check out this full tutorial on how to add an exit popup in Shopify.
For step-by-step written instructions with images, keep reading!
Step 1: Install OptinMonster for Shopify
First, you need to sign up for an OptinMonster plan. To use exit-intent on Shopify, you’ll need a Growth plan. Stay logged into your OptinMonster account so Shopify can connect automatically.

Once that’s done, it’s time to install the OptinMonster Shopify app. Log into your Shopify account and click on Apps. You’ll see a popup listing any apps you already have installed. Type in OptinMonsterin the entry field and then click Search for “OptinMonster” in the Shopify App Store.

This will open a new window with your search results. Look for OptinMonster Email Popups and click on it.

Next, click on Add App.

You’ll be prompted to check the permissions requested by the OptinMonster app. When you’re ready, click Install App.

Shopify will connect automatically with your OptinMonster account. Now you’re ready to create your exit-intent popup!
Step 2: Build Your Shopify Exit-Intent Pop Up
Now that you have the OptinMonster Shopify app installed, you can create all your popups and other campaigns in the OptinMonster app. Your designs will sync automatically with Shopify.
Go ahead and log into the OptinMonster app and click Create New Campaign.

For this tutorial, we’ll use a template. Click on Templates to see the template gallery.

Make sure you have Popup selected under campaign type.

Check out the template library and choose one that you like. We’ll be using the Black Friday 3 template. Click Use Template.

Give your campaign a name and choose your Shopify site from the dropdown menu of websites. You can use OptinMonster on multiple sites, depending on which plan you choose. Click Start Building to enter the popup builder.

The campaign builder is very easy to use, even for beginners. You just click on any element to edit it. For example, select the text to change the messaging and font style.

You can turn the 2-step optin on or off in the footer menu.

The footer is also where you can toggle between the Optin view and the Success view. Make sure you’ve customized all the views to your liking before you publish the popup.

You can add other elements like countdown timers, images, and even video by dragging the appropriate Block from the left pane.
Step 3: Display Your Exit-Intent Popup on Shopify
Once you have your campaign the way you like, it’s time to set the display rules. Click on the Display Rules in the header. Then click on the dropdown to bring up the list of display rules.

Search for or click on Exit Intent.

You can adjust the settings for device type and sensitivity as needed. If you’d like to show the exit-intent popup only on certain Shopify pages, add an AND rule then click on eCommerce. Choose from the Shopify display rules.

You can also target first time visitors, referred traffic, and more.
Step 4: Connect Your Email Service Provider
Now, let’s connect OptinMonster to your email service provider (ESP). That way, you can collect emails automatically and even send an email autoresponder series to welcome new subscribers.
Click the Integrations tab in the header menu, then click Add New Integration.

Find your email service provider in the list. OptinMonster integrates with all kinds of marketing tools, including Mailchimp, Klaviyo, Constant Contact, and more.
Each ESP is a little different, so we’ve provided full documentation for connecting if you get stuck.
We’re almost done! Just one more step to go.
Step 5: Publish Your Shopify Exit-Intent Popup
Finally, click on the Publish tab in the header menu. Change the publish status from Draft to Publish.

Double-check that your Shopify site is listed under Websites and that the display rules are set the way you want. When everything looks right, click Save in the upper right corner.
Congratulations! You just published an exit-intent popup in Shopify!
Are Exit-Intent Popups Worth It?
As you can see, it’s pretty easy to add an exit-intent popup to Shopify using OptinMonster.
These powerful popups can boost your conversion rates by 2-4%, all day every day without any further input from you.
So we’d say exit-intent popups are definitely worth it!
We hope you enjoyed this tutorial. For more ways to grow your Shopify business, check out our list of the best Shopify apps for increasing sales.
If you like this article, please follow us on Facebook and Twitter for more free articles.
Disclosure: Our content is reader-supported. This means if you click on some of our links, then we may earn a commission. We only recommend products that we believe will add value to our readers.

-01 - OptinMonster")


Add a Comment