Looking for an easy way to add a custom WordPress search form?
Search forms help visitors find the content on your website. It makes content discoverability easy, which in fact boosts user experience on your website.
In this tutorial, we’ll show how you can easily create a custom WordPress search form in just a few steps.
Why Do You Need A Custom Search Form?
Search is one of the primary ways visitors navigate the Internet. Visitors who find what they need quickly are more likely to stay on your site. Visitors who stick around can then join your email list, purchase a product, or take some other step in your sales funnel.
Unfortunately, the regular search function on WordPress only searches post titles and content. Custom fields, product details, and other important information are completely ignored. The default search function also can’t search by category and subcategory.
All of this other post information could help your visitors find their way through your site better and reduce your bounce rate. So how do we get this data into WordPress search?
The solution is to create a custom search form. We’ll show you how in the next section.
Creating a Custom WordPress Search Form
SearchWP is the best WordPress search plugin. It’s easy to use and comes with powerful search features missing in the default WordPress search widget.
SearchWP plugin replaces the default WordPress search widget and easily integrates with popular themes and page builders without any extra effort needed.
It’s the most advanced search plugin available, and more than 30,000 business owners use SearchWP on their websites.
Here are some of the vital features that make SearchWP stand out from the competition:
- Live Search Results: Live search results make it easier to see all the matching results in the same place without navigating to a different search results page.
- Autocomplete Search: SearchWP offers to autocomplete search feature similar to Google and Bing search engines.
- Custom Fields Support: You can search for the matching results within custom fields missing in the default WordPress search widget.
- Search Algorithm: Create a customizable search engine that displays results based on your inclusion and exclusion rules.
- Search Analytics and insights: Get complete access to the analytics reports and check what visitors search for.
And many more.
Let’s get started with the actual steps to add a custom WordPress search form.
Step 1: Add the SearchWP Plugin
Our first step is to set up the SearchWP plugin.
For that, you need to visit the plugin pricing page and signup for an account. SearchWP is available in three different pricing plans.
We’ll be opting for the SearchWP Pro plan because it unlocks many powerful extension plugins.
Once you select the plan, go ahead and complete the purchase process.
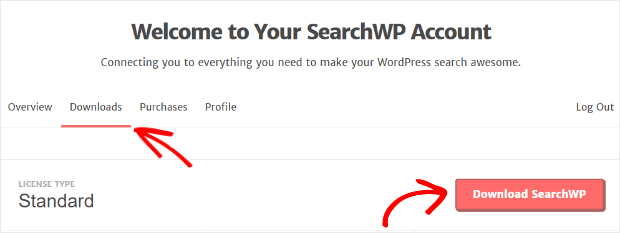
Next, log in to your SearchWP account and click on Download SearchWP. Now you can install the plugin on your website and activate it.
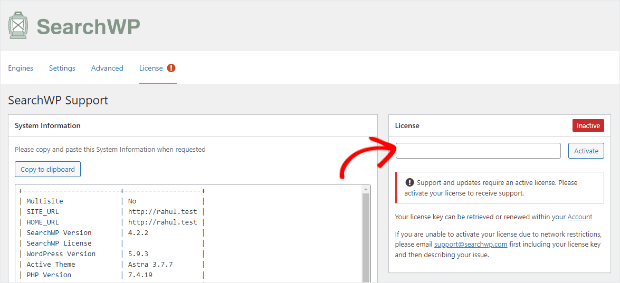
It’s time to activate the license key.
Navigate to Settings » License and enter your license key.
Click on the Activate button.
Next, we can move on to downloading the SearchWP Shortcode extension.
Step 2: Install the SearchWP Shortcode Extension
SearchWP plugin provides shortcodes for adding search forms on your website. Shortcodes simplify adding a search form, and anyone without technical knowledge can easily follow this method.
Let’s go ahead and install the SearchWP Shortcode Extension plugin.
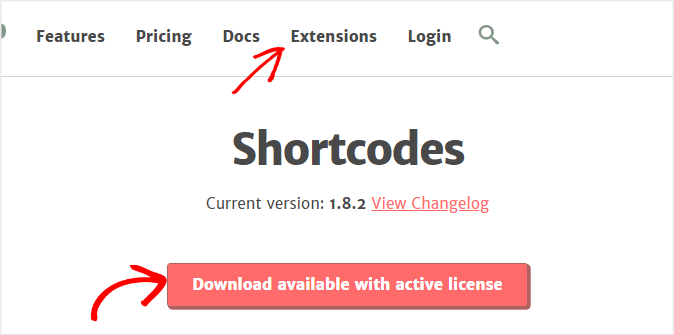
You can download the extension from your account by going to the Extensions menu.
Scroll down on the page and click on the Shortcodes plugin.
Next, click on the Download available with active license button.
Now, you can install and activate the extension plugin like installing any other plugin.
That’s it.
We can go ahead and create your first SearchWP search engine.
Step 3: Create a Search Engine
SearchWP allows you to create a customizable search engine. You’re in complete control to display the search results and even rank them in a specific order.
Let’s proceed to build your first search engine.
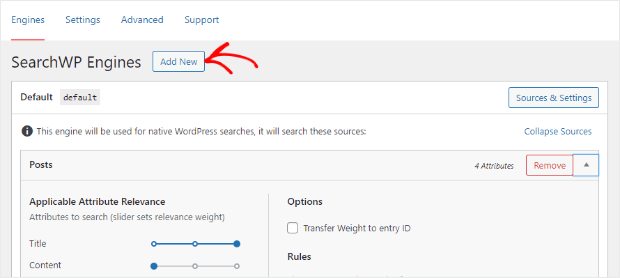
Navigate to the SearchWP menu » Settings » Engines and click on the Add New button.
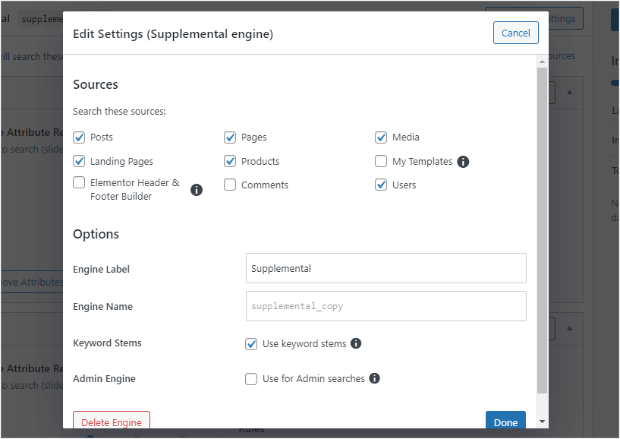
This will create a new search engine called supplemental. You can easily change the name by going to Sources & Settings.
Here, you can select the sources like posts, pages, custom post types, taxonomies, comments, and so on. SearchWP will try finding the matching results in these places whenever a visitor searches for something.
There’s also something called Keywords Stems, which is selected by default. Keyword Stems look for word matching results even if the exact words are not found on your website.
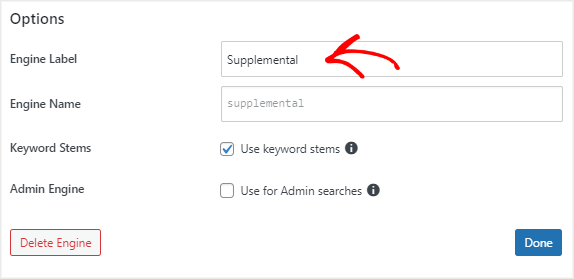
You can change the search engine name by entering your preferred name in the Engine label field. We’ll keep it untouched for the sake of this tutorial.
Click on the Done button once you’ve configured the settings.
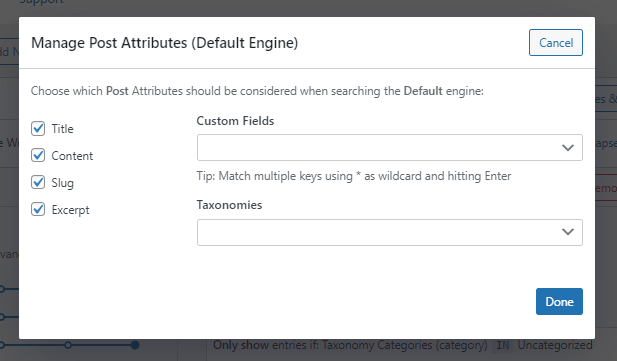
Next, we need to specify the attributes of your search engine. Attributes refer to the title of a post, excerpt, slug, and the content part.
Go ahead and click on the Add/Remove Attributes button. It will open a popup wherein you can check the post attributes.
Click Done once you select the attributes.
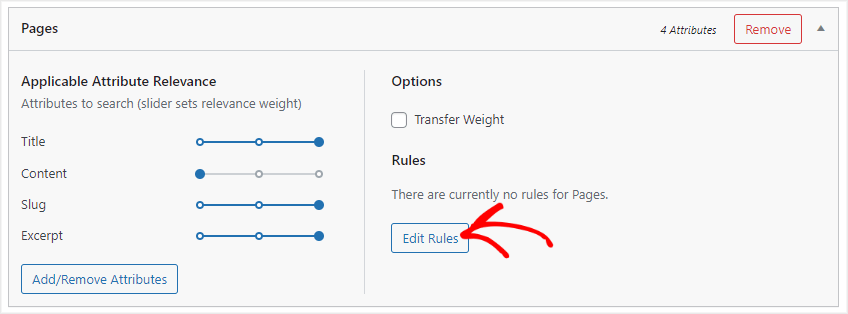
If you want to add some specific search rules, you can use the Edit Rules feature. This feature helps you determine the inclusion and exclusion rules for search terms.
For example, you can create rules for searching only in specific taxonomies like categories and tags or posts published within a particular date range.
While setting the conditions for search results, you might have noticed the sliders available in the settings. These sliders set the search relevancy and display results as per the relevancy range.
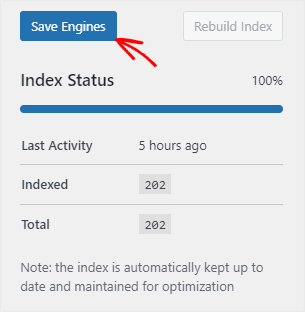
Finally, you can click on Save Engines to save your engine.
Step 4: Add the Search Form to Your Website
The last step is to add the search form shortcode to your website.
You can add the search code within posts, pages, navigation menu, and sidebar.
Let’s add the search form on a post or a page.
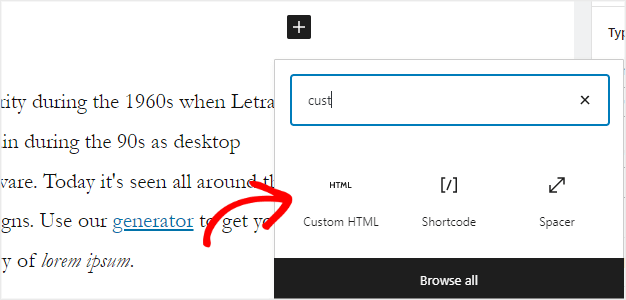
Open the post where you want to add the search form. Click on the + Add icon to add an HTML block.
Copy the following code in the custom HTML block.
[searchwp_search_form engine="custom" var="searchvar" button_text="Custom Search"]

<div class="search-results-wrapper">
[searchwp_search_results engine="custom" var="searchvar" posts_per_page=4]
<h2>[searchwp_search_result_link direct="true"]</h2>
[searchwp_search_result_excerpt]
[/searchwp_search_results]
</div>

<div class="no-search-results-found">
[searchwp_search_results_none]
No results found, please search again.
[/searchwp_search_results_none]
</div>

<div class="search-results-pagination">
[searchwp_search_results_pagination direction="prev" link_text="Previous" var="searchvar" engine="custom"]
[searchwp_search_results_pagination direction="next" link_text="Next" var="searchvar" engine="custom"]
</div>
Click on the Publish or Update button to save the changes.
Open the post, and you should see the newly added search form.
Here’s how it looks in the front.
It’s time to check the working of the form.
For example, we’ll search for WooCommerce.
After performing the search, we received all the matching results in just a few seconds.
That’s it.
You’ve successfully added a custom WordPress search form to your website.
Since SearchWP offers plenty of extension plugins, you can check more details about the integrations and easily extend the core functionality of the search form.
We hope you liked this easy to follow tutorial. If you did, don’t forget to check the below articles to improve the search features on your business website.
- How to Add a Custom Search Bar to WordPress (Step by Step)
- SearchWP Review: Is It the Best WordPress Search Plugin?
- 15 Best WordPress Search Plugins for Your Site (Compared)
What are you waiting for? Get started with SearchWP today!
If you liked this tutorial, follow us on Facebook and Twitter for more free WordPress tutorials.






Add a Comment