Do you need to learn how to create a popup subscription button?
Popup subscription buttons are a simple and effective way to grow your email list and get messages to your target audience.
So, if you want to convert traffic over to your list, this is a smart way to go.
But how exactly does the setup work, especially if you’re not very technical OR strapped for time?
In today’s tutorial, we’ll show you how to create a popup subscription button in under 5 minutes within ANY text-based content.
But first, let’s get clear on what a popup subscription button is and why they’re so crucial to your marketing strategy.
What Is a Popup Subscription Button?
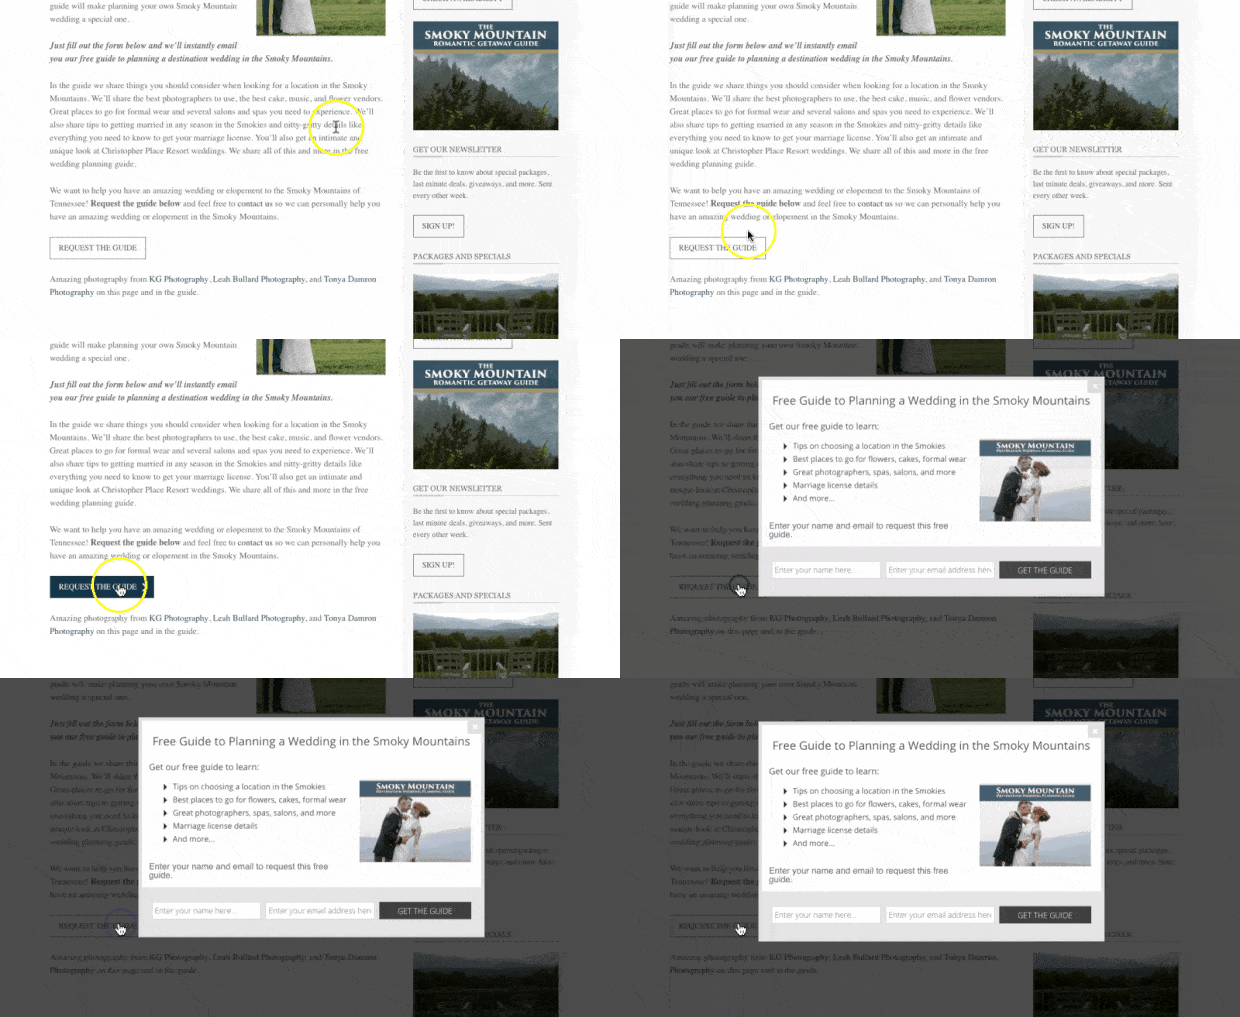
A popup subscription button is a specific link or button that triggers an “optin campaign” to appear.
Here’s what that looks like in practice:
These campaigns are things like popups, floating bars, slide-in scroll boxes, and more. They’re typically used to capture your visitor’s email address.
But that’s not ALWAYS the case.
In fact, popup subscription buttons can help you accomplish multiple goals:
- Boost your email list
- Create waitlists for upcoming products
- Energize and excite your visitors (so they finish the subscription process)
- And more…
Wait, how in the world can someone be excited and energized to give you their email address?
This is thanks to something called the Zeigarnik Effect, a psychological principle that says when people start a process, they’re more likely to finish it.
You can leverage this trick to get more people to finish opting into your offers.
When they click the button or link, they’ll be more likely to finish signing up for your offer than if you’d randomly shown them a generic popup.
As a result, you get more conversions and a better user experience (UX).
So, with that in mind, you’re now probably wondering, “How do we create a subscription button?”
Let’s take a look at the process step-by-step.
How to Create a Popup Subscription Button
The best way to create a popup subscription button is by using OptinMonster:
OptinMonster is your best solution for creating a popup subscription box and multiple other campaigns for your website.
Why? OptinMonster comes with over 50 pre-built and ready-to-go templates to help you get a campaign from your brain to your site in under 5 minutes.
These are the same tools that Kinobody used to covert 73% of their visitors (with a combination of MonsterLink™ and a popup subscription box).
Kinobody was incredibly innovative because they used multiple subscription boxes to segment their visitors in tailored email lists, making your lists more targeted.
We will get into MonsterLinks™ in more depth later in this tutorial.
For now, we will start creating a popup subscription button with OptinMonster.
Ready to follow along? Just click below to start your 100% risk-free OptinMonster account today:
Step 1: Choose Your Campaign and Template
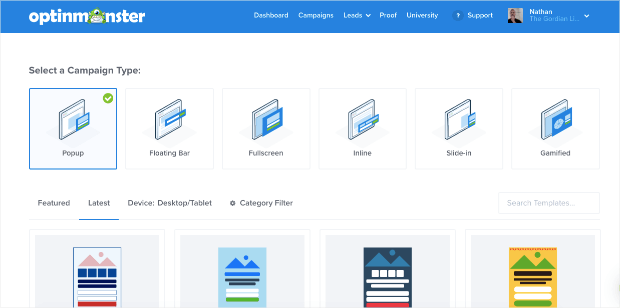
To get started, let’s take a look at the different campaigns available through OptinMonster.
There are plenty of options, and you will find one to suit any website your message you may have to share:
- Popup
- Floating Bar
- Fullscreen
- Inline
- Slide-In
- Gamified
Not only are there multiple campaign types, but there are multiple design options to help make creating your popup subscription button a breeze.
So whether it is a promotion for a holiday, offering a free giveaway, or whatever you want to accomplish, OptinMonster has the template and design for you.
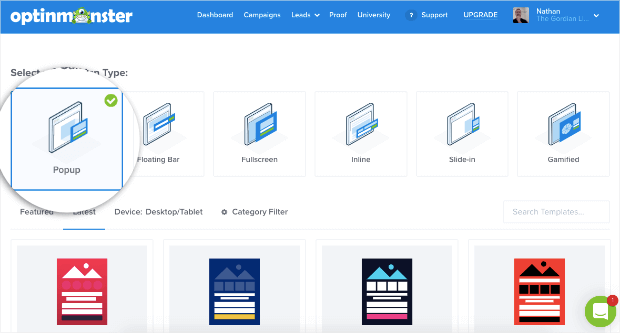
For today’s tutorial, we’ll select a popup campaign:
Next, you’ll need to select one of OptinMonster’s custom templates.
These templates were designed so that, if you’d like, you can use them just as is.
But, as you’ll see, designing your campaign couldn’t be easier.
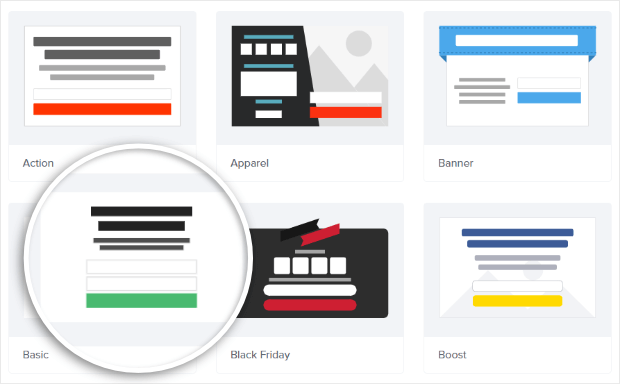
For today, we’ll go with the Basic template:
This is a stripped-down choice that doesn’t require a lot of modifications. But it also leaves you plenty of room for modifications if you choose.
In other words, it’s a great option if you’re just starting out.
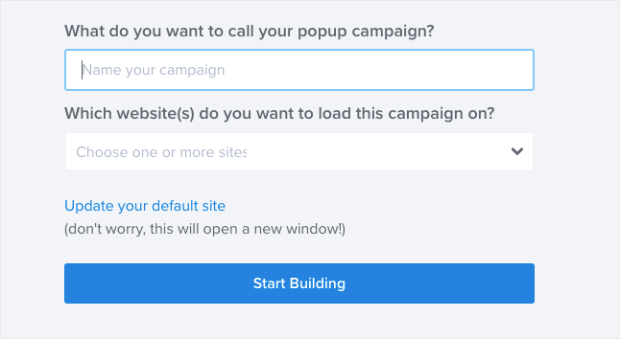
Once you find your template and select a base design, you’ll need to give your campaign a name and click Start Building:
In the next steps, we will go over how to customize and add some additional functionality to the templates if you need it.
Step 2: Design Your Campaign
Our next step is to design the campaign. This campaign template could be published just as it is with no modifications needed.
However, you will want to tailor your message to your visitors for the best results.
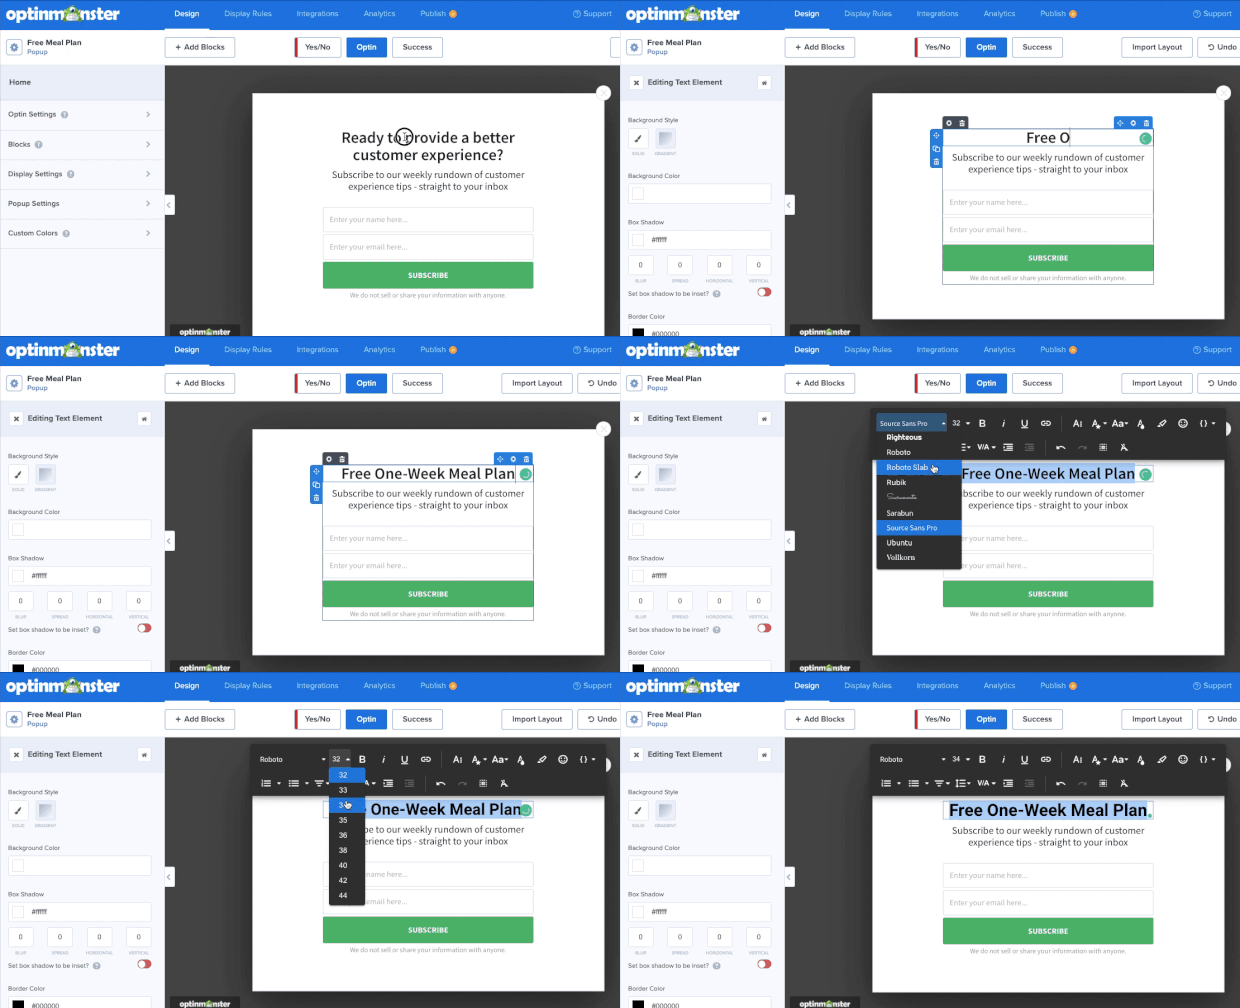
OptinMonster is a drag and drop editor, which makes it simple to change colors, fonts, images, layouts, and more.
All you have to do is click where you want to make a change, and you can make the edits directly in the builder:
And changing other elements on your template is just as easy.
Whenever you want to make a modification, all you need to do is click the element you want to change. Then the editing tools would appear in the left-hand side menu.
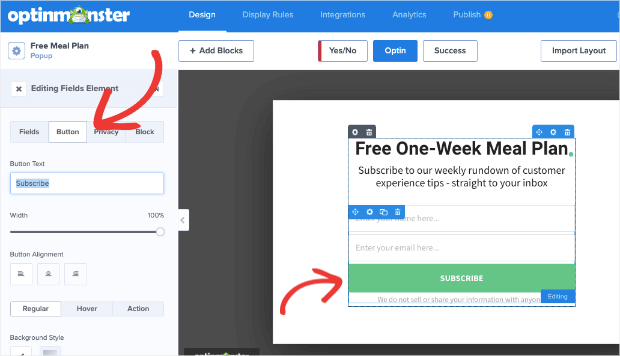
Let’s say we wanted to change the call to action (CTA) button, for example. We would simply click on it and make the modifications on the left:
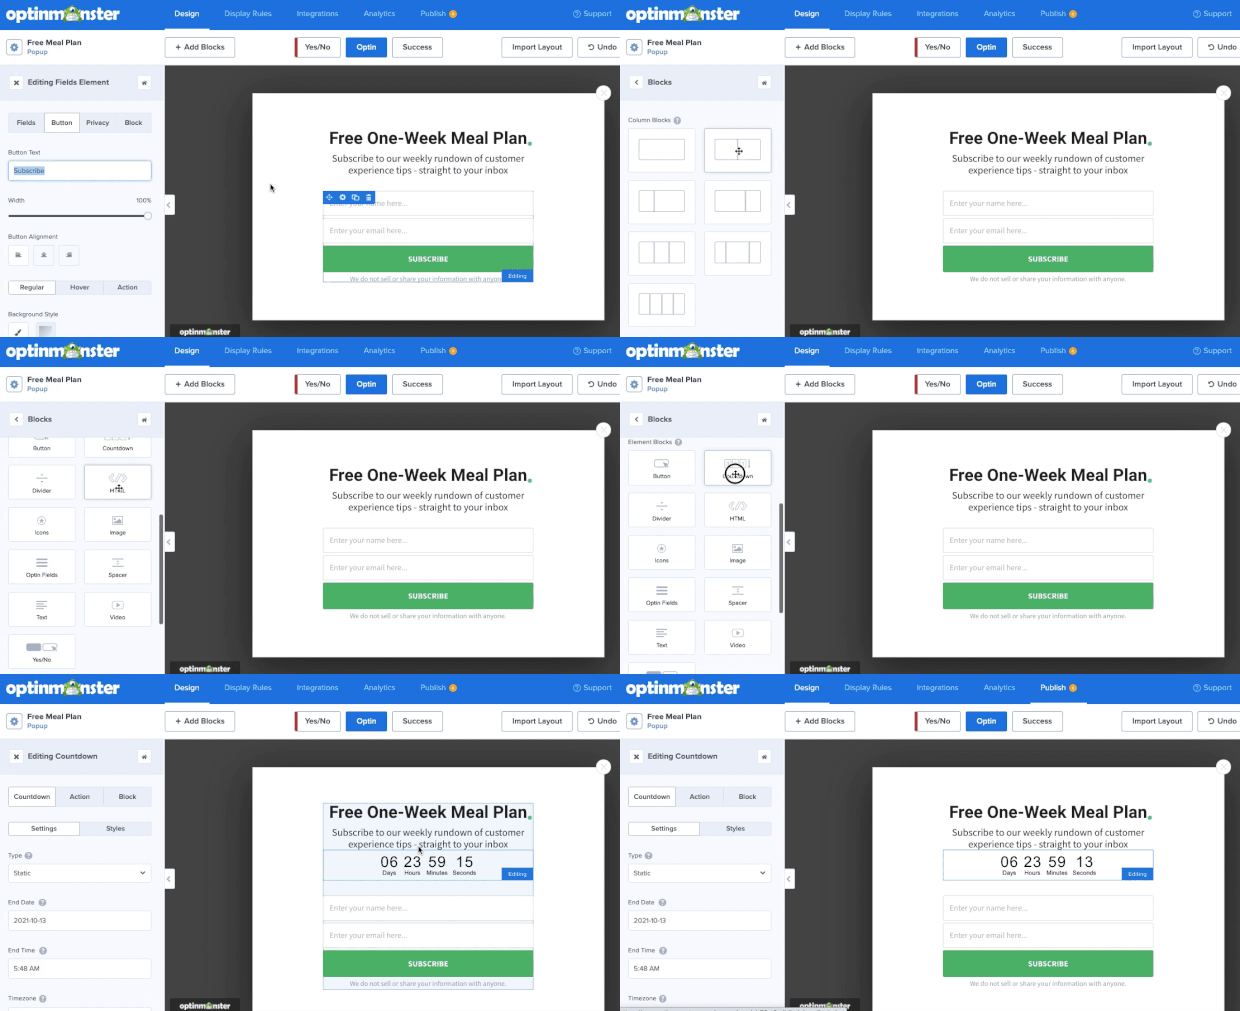
But what if you need to add something else other than just a photo and some text? Well, OptinMonster makes that simple too. You can add elements like:
- Videos
- Icons
- Countdown timers
- ChatBot
- And more…
To get started, click on + Add Blocks to begin customizing your popup subscription box.
Then you can find the element you want to drag and drop it into place:
And since all of these functions come in Blocks, they’ll fall neatly into pre-configured areas.
That means you don’t need to be a professional coder or have design experience to make stunning campaigns FAST.
At the top of the builder screen, you will notice options to design the optin screen and a success screen.
Be sure you customize both so you have a uniform look for the campaign.
The optin screen is where your visitor will input their email address.
When OptinMonster successfully collects that email, the success screen will let your visitor know they have signed up for your list.
For this tutorial, we want our popup subscription box to appear when your visitor clicks on a specific piece of text.
Let’s go over how we can make that happen.
Step 3: Target Your Audience
Before this next step, carefully think about the text you want to use to trigger this subscription box.
For example, you could use a call to action button, text in your email copy, as a link in a push notification, and much more.
But the goal always stays the same: we want to make sure this reaches the exact visitors you are trying to target.
To get your popup subscription box to appear, we’ll be using a MonsterLink™.
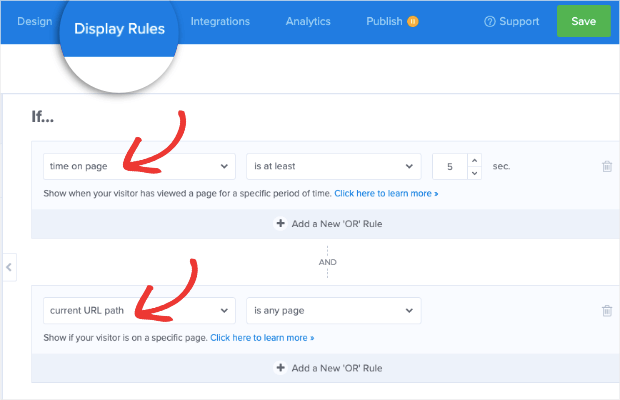
To start creating your MonsterLink™, navigate to the Display Rules tab.
Under the Conditions panel, you have 2 rules by default:
- Time on page is 5 seconds
- Current URL path is any page
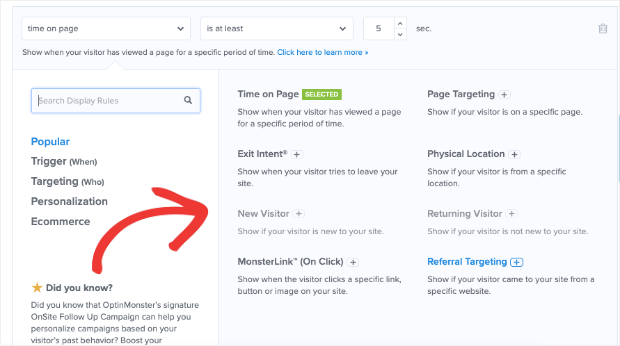
Click on Time on Page to pull up the display rules menu:
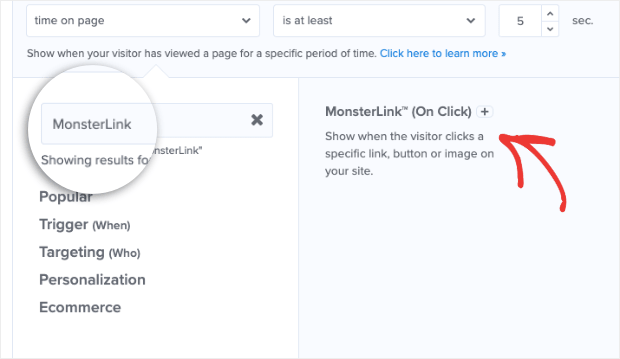
Find and click MonsterLink™:
Now, you will need to add your MonsterLink™ to your website.
To do that, click on the green button that says “Copy MonsterLink™ Code.”
The link will come out as raw HTML code that looks something like this:
<a href=”https://app.monstercampaigns.com/c/kbuldwxvlgmbnymoekkl/” target=”_blank” rel=”noopener noreferrer”>Subscribe Now!</a>
But if you’re using a modern editor, you’ll only need the URL:
https://app.monstercampaigns.com/c/kbuldwxvlgmbnymoekkl/
Then you can copy and paste that URL the same way you’d attach ANY website to an anchor text or CTA button.
If you need more help, this article will give you more direction on how to use a MonsterLink™.
Now that it is all set up on your website and within OptinMonster, it is time to start collecting emails from your visitors.
Step 4: Integrate Your ESP
In this step, we’ll tell OptinMonster what to do with the emails your popup subscription box collects. To do that, you will need to have an Email Service Provider (ESP).
If you don’t have one, don’t worry.
OptinMonster does have a default option that saves your list called Monster Leads.
This will independently store all of your new leads, which you can import into an email list later if needed.
Or, you can check out this list of the 7 best email marketing services. That will have the resources you need to find the right ESP for YOUR unique needs.
However, if you already have an email provider, we’ll teach you how to sync it with OptinMonster.
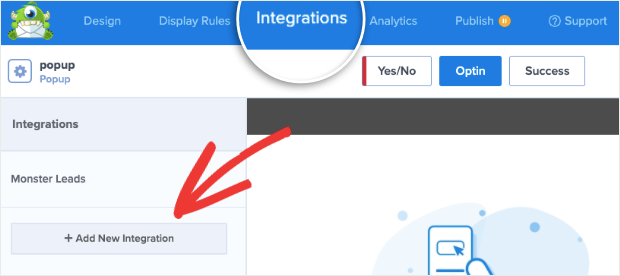
Click on the Integrations tab at the top of the editing screen.
Then click on + Add New Integration:
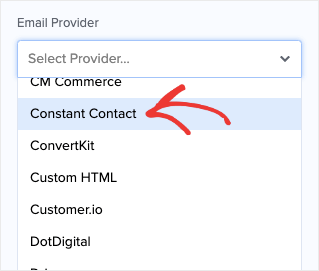
Scroll down the list until you find your ESP:
OptinMonster will walk you through the steps to get everything hooked up.
For most providers, all you need to do is copy and paste your API key.
But OptinMonster will prompt you if it needs any other information to send your leads to the right list.
You probably noticed that OptinMonster works with many different providers.
If your’s isn’t on the list, don’t worry.
This article will walk you through how to sync OptinMonster to ANY email provider.
We are almost done. The last step is to publish your campaign.
Step 5: Publish Your Campaign
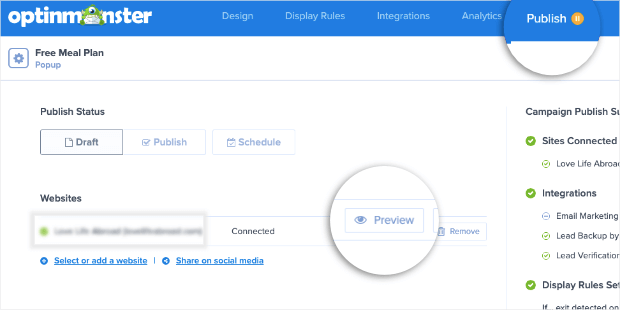
Go back to the top of the editor and click on Publish.
Now you can preview your campaign and make sure it looks good on your site.
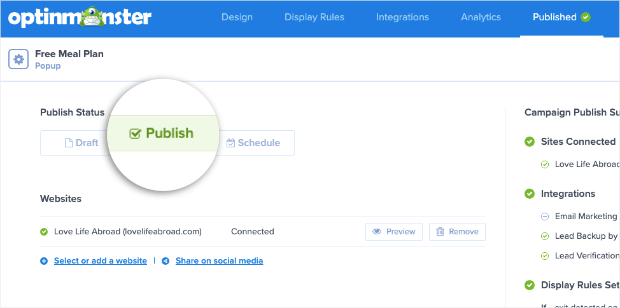
Once you’re done, feel free to flip the status of the post from Draft to Publish:
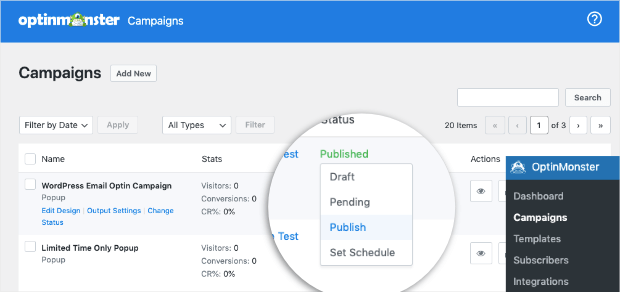
We also recommend WordPress users verify their campaign’s status in OptinMonster » Campaigns.
Then checking that the campaign status has switched from Pending to Publish:
Congratulations, you have published your popup subscription button!
Now that you know how to create a popup subscription button, be prepared to see that leads list skyrocket.
We hope that you found this tutorial useful. If you did, you’ll want to check out these resources:
- 25 Email Popup Examples (& Best Practices) to Explode Your List
- What Is Email Automation? (+31 Tools to Transform Your Business)
- How to Add Email Signup to Shopify to Grow Your List
These articles will have even more resources that you can use to grow your list and add new leads to your sales funnel today!




Add a Comment