Do you want to add a search bar to your WordPress website?
A search bar makes it easy for visitors to discover the right content they’re looking for on your website. WordPress provides a default search bar, but when it comes to discoverability, it lacks all the bells and whistles you get with a custom search bar.
In this article, we’ll show you step by step how to add a custom search bar to your WordPress website the easy way.
Why Do You Need a Custom Search Bar?
A search bar is an essential feature for your website that lets your visitors easily find the right content. No matter what website you manage, visitors may feel lost if they cannot find what they’re looking for.
With the help of a search bar, visitors can type in the keywords and get matching search results in seconds. It keeps them engaged with your content, and you also get to know what they’re exactly searching for.
Once you know the exact search terms, you can create content around those topics and improve your marketing strategy to grow your business.
By default, WordPress also offers a search widget. But it lacks powerful searching features and doesn’t find content in taxonomies like tags and categories.
Adding any search bar is not enough. If you want to enhance your website search possibilities, consider a premium version of SearchWP.
SearchWP is installed on more than 30,000 websites and offers the best search features like:
- Autocomplete Search: Add an autocomplete search feature like the Google search engine.
- Live Search Results: WordPress opens the search results on a new page. SearchWP provides advanced Ajax search so visitors can see search results without redirecting to other pages.
- On-site Search Activity Insights: Easily check what visitors are searching on your website and produce content around the search.
- WooCommerce Integration: SearchWP WooCommerce addon supports indexing product attributes like categories, tags, and shipping classes to make product search faster.
- Custom Fields Support: The default WordPress search widget excludes the custom fields from the search results. SearchWP supports search custom fields.
And many more.
It’s time to check the steps for adding a search bar to your WordPress website.
How to Add a Search Bar to WordPress Website
There are a few different ways to add a custom search bar in your website sidebar, navigation header, and other widget areas.
In this article, you’ll see how to add a search bar to your website sidebar in 3 easy steps.
Step 1: Install the SearchWP Plugin
The first step is to install the SearchWP plugin.
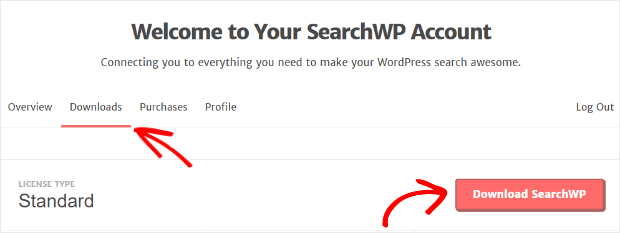
Visit the SearchWP pricing page and select a plan that works best for you. After you complete the checkout process, log into your SearchWP account.
Head over to the Downloads Tab and click on the Download SearchWP button.
Click on the Download SearchWP button and copy your license key.
Once the download is complete, you can upload the plugin and click on the Activate button.
If you’re installing a plugin for the first time, check out this guide on how to install a WordPress plugin.
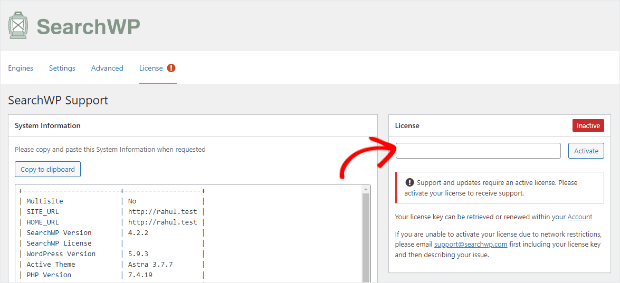
Next, go to the License tab.
Enter your license key and click on Activate.
Once you activate the plugin, you can move to the next step.
Step 2: Set Up Your Search Engine
SearchWP offers advanced settings for customizing the search results.
To start configuring the settings, click on the Settings tab from the SearchWP menu.
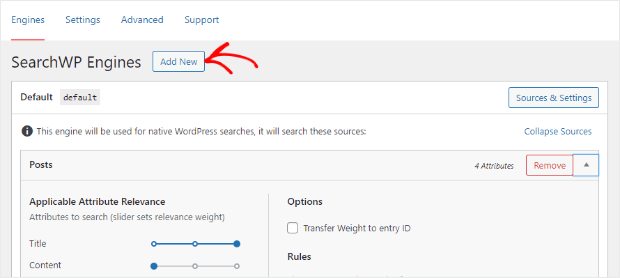
You can edit the default search settings or create a new search engine. You can even add multiple search engine settings to cater the searches in different locations of your website.
For creating a new search engine, click on Add New.
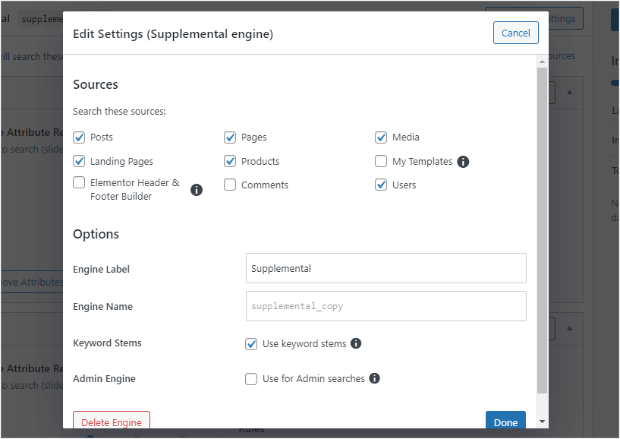
You’ll get prompted to select the list of sources in the next step.
Click on the Source & Settings button.
You’ll see a popup for choosing from sources like posts, pages, media files, landing pages, and comments. After selecting the options, you can check the additional checkbox for keyword stems.
Click on the Done button once you’re done selecting the settings.
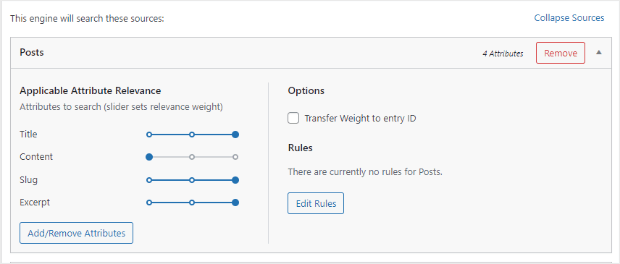
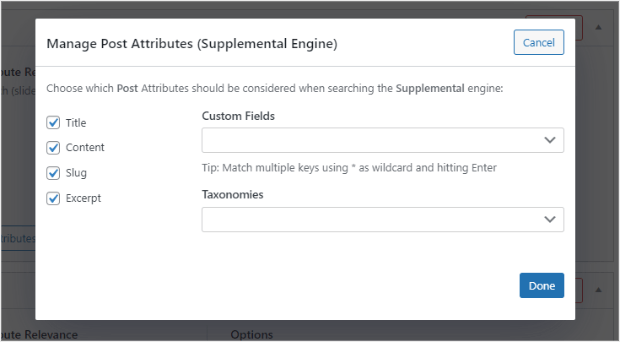
It’s time to check the Add/Remove Attributes.
You’ll see a popup with a list of attributes. By default, SearchWP will look for the title, content, slug, and description results.
You can easily remove any attribute by unchecking the button and adding attributes by clicking on the Custom Fields and Taxonomies dropdown button.
Once you’ve finished selecting the attributes, click on Done.
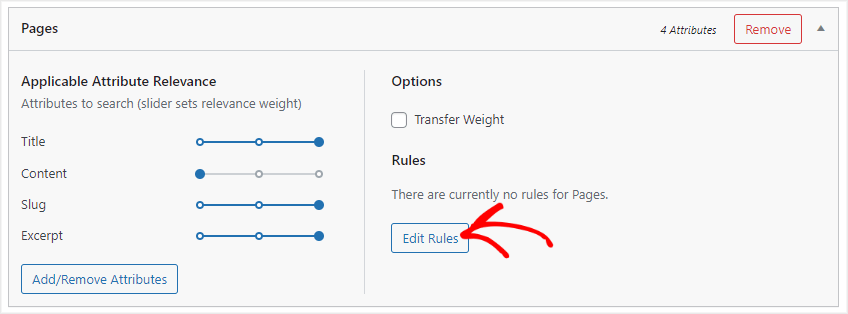
SearchWP also provides the settings to add specific rules to your search engine.
To do this, click Edit Rules.
Next, you can click on Add Rule to add specific rule settings.
Here you can set rules for search results and date settings.
We’re moving to our final step for customizing the search engine. Next, you can adjust the search engine values.
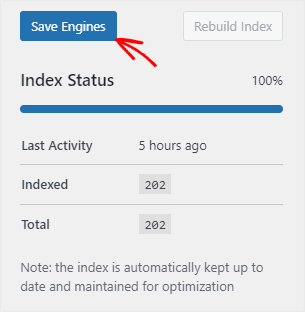
After setting your sources, attributes and adjusting the relevance, click on Save Engines.
The last step is to add this new search bar to your website.
Step 3: Display the Search Bar on Your Website
With SearchWP, you can add the newly created search widget anywhere on the website. Most websites add search bars either in the sidebar or in the header.
In this tutorial, let’s see how to add the search widget to your sidebar.
From your admin dashboard, navigate to Appearance » Widgets.
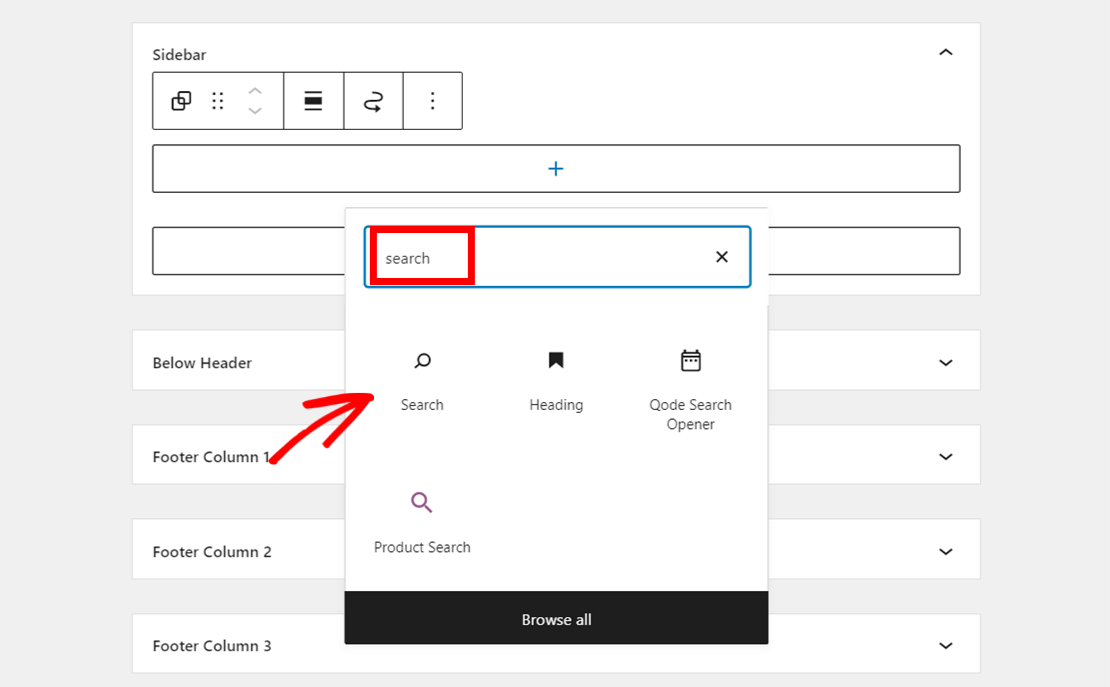
Choose where you wish to add the search widget and click the + icon. We’ll go with the sidebar area for now.
Type in search, and you’ll see the search block.
Click on the Update button in the top right corner to save the changes.
That’s it!
You’ve added the search bar in the sidebar of your website.
Visitors can now use this search box to find the content on your website and get relevant results.
If you liked this tutorial, check out the below articles for making your website more engaging and conversion optimized:
- How to Write a Great Headline That Drives Clicks (Step by Step)
- How to Easily Create a Contact Form Popup in WordPress
- How to Create a Popup Subscription Button (in under 5 Minutes)
Ready to add search bar to your website?







Add a Comment