Do you want to offer (BOGO)”Buy One Get One” deals on your WordPress store?
BOGO deals are a great way to attract customers, increase sales, and boost revenue.
In this tutorial, we’ll show you the easiest way to add a buy one get one deal to your WordPress site.
Adding a “Buy One, Get One Free” Plugin
Buy One Get One (BOGO) deals are a proven technique used by retailers for ages to appeal to consumers. Retailers across the globe have seen a lot of success with BOGO promotions.
- Studies show that shoppers are more likely to participate in BOGO promotions
- It moves inventory faster while maintaining profitability
- It helps make more sales in a short period of time
Using a BOGO plugin is the easiest way to offer BOGO deals on your site.
With a good BOGO supported plugin, you can offer BOGO deals with single products, groups of products, or product categories. Take a look at a few examples:
- Single products: buy one pair of shoes and get another pair free
- Groups of products: buy any jeans, t-shirt, or jacket, and get any belt, purse, or hat
- Product categories: buy any item from the formal wear category and get one item from the accessories category
Now, let’s look at how you can offer a buy one get one free deal in WordPress.
How to Add Buy One Get One Deals to WordPress
The best way to offer a Buy One, Get One Free deal in WordPress is by using the Advanced Coupons plugin. It allows you to easily offer advanced coupons in WordPress to increase your sales.
Advanced Coupons is flexible, so you can set up your deals exactly the way you want.
Let’s begin.
Step 1: Install the Advanced Coupons Plugin
First, you need to download and activate the Advanced Coupons plugin.
Check out this article if you need help adding a plugin to your WordPress site: How to Install a WordPress Plugin – Step by Step for Beginners
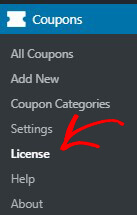
Once you have installed the plugin, click Coupons » Licence from your WordPress dashboard.
Add your license key and activation email. Then click Activate Key.
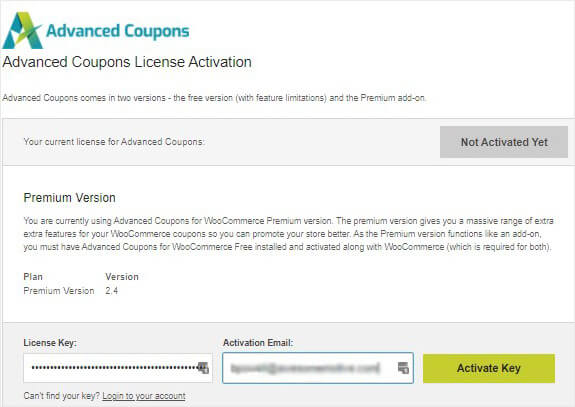
Now, you’re all set to create your BOGO deal.
Step 2: Create a New BOGO Coupon
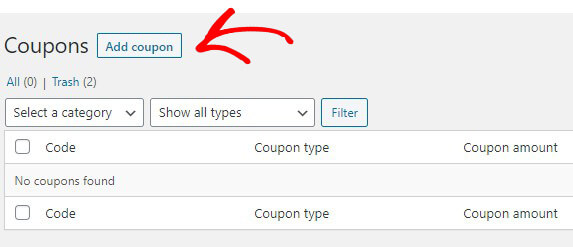
From your WordPress dashboard, click WooCommerce » Coupons.
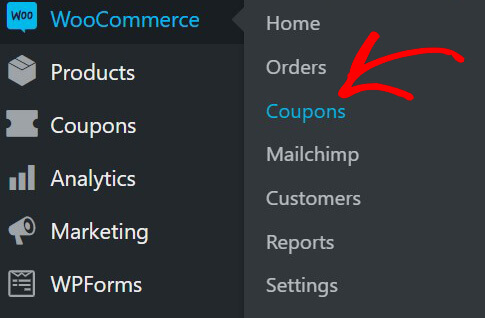
Click Add Coupon.
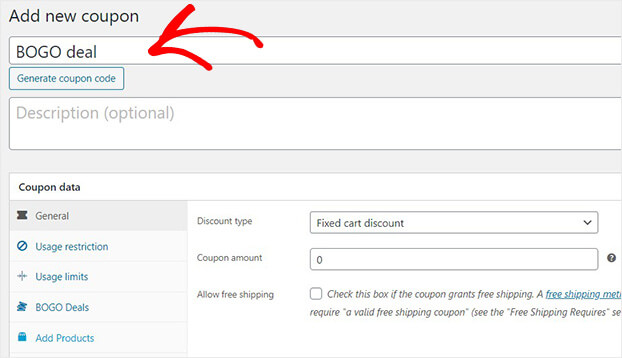
Next, you’ll need to name your new coupon. This is the code customers will need to enter during checkout in order to redeem the discount.
Step 3: Select Your Buy One Get One Free Trigger
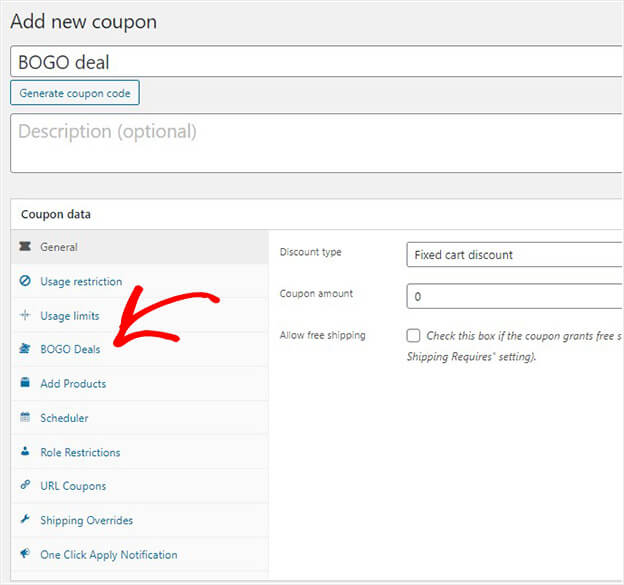
Next, scroll down to the Coupon data screen.
Find and select the BOGO Deals tab.
In this next screen, you will see two dropdowns that will control how your BOGO deal works.
- Select Trigger Type: this activates the deal
- Select Apply Type: this is what people get as part of the deal
In this step, we will focus on the Select Trigger Type.
A trigger refers to the conditions that need to be met for the deal to be activated.
There are three ways to activate your BOGO deal:
- Specific products: the shopper must have a specific product in their cart to trigger the deal
- Any combination of products: the shopper may have any combination of products as long as they meet the quantity threshold
- Product categories: the shopper can have any products from specified categories
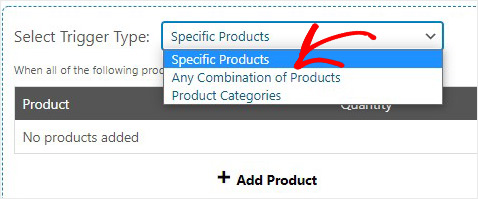
Once you’ve selected your trigger, you will need to add your products.
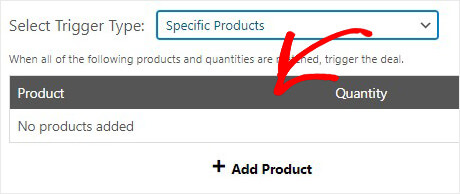
Next, you can determine how the coupon will be applied.
Step 4: Set the Trigger Type for Specific Products
Now, let’s look at the Apply Type trigger.
In other words, you’ll define what the shopper gets once the deal has been triggered.
Again, your options include:
- Specific Products: customer gets specific products at specific quantities
- Any Combination of Products: shopper can choose from any combination of the defined products
- Product categories: the shopper can select from a range of products in defined categories
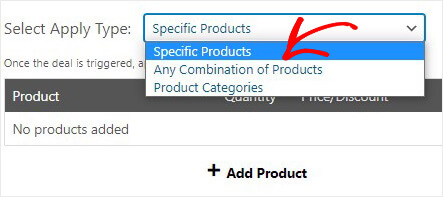
The great thing about Advanced Coupons is its flexibility. So, for instance, you can either discount a product 100% or offer a partial discount.
For this tutorial, we will offer a 100% free deal that will be automatically be applied at checkout.
Next, you will see the Additional Settings menu.
First, you’ll need to choose whether you want your deal to be applied once or repeatedly.
Let’s say your shopper gets one t-shit free for every t-shirt they buy.
If you choose Once, your shopper only get one free t-shirt no matter how many t-shirts they buy. But, if you set this to Repeatedly, the coupon will grant a new t-shirt for every t-shirt purchased.

Step 5: Create Your First BOGO Notification
Now, choose a message to let your customer know they have triggered a deal and what they need to do to redeem the offer.
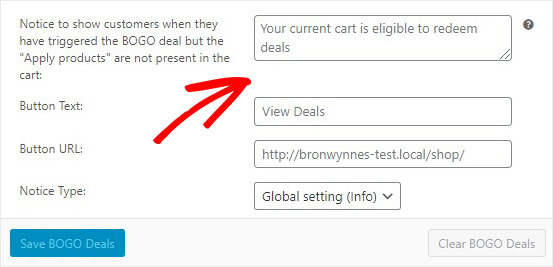
In sum, a BOGO notification tells your customer what they need to do to qualify for the deal.
You’ll be able to edit:
- Notification text: explain they’ve activated the deal and what they need to add to claim the discount
- Button text: the button your shopper needs to click to claim the deal. For example, “Claim my deal.”
- Button URL: this should direct the shopper to where they can claim the deal, like the product category page
That’s it. Now you know the easiest way to add buy one get free deals to WordPress.
If you want to boost your sales and revenue, check out these resources:
- The Ultimate eCommerce Optimization Guide: Steps to Instantly Boost Revenue
- eCommerce Popup Examples That Actually Convert
Now, you’re ready to create a buy one get free deal to boost your WooCommerce sales.




Add a Comment