Are you trying to learn how to add a bottom right corner popup in WordPress?
Popups remain one of the best ways of growing your email list and sending messages to your target audience.
But, in some cases, a traditional lightbox popup can harm the user experience (UX) if not properly placed (or timed) across your site.
The good news is that popups come in all shapes and sizes.
That’s why, today, we’re going to teach you how to add a bottom right corner popup in WordPress.
These campaigns are called “slide-in scrolls boxes” and they’re highly effective at boosting conversions.
Plus, everything can be done in minutes with ZERO coding skills required.
Ready to get started? Let’s dive into the tutorial.
How to Make a Slide-in Scroll Box
The best way to create a high-converting slide-in campaign (appearing on the bottom right-hand corner of your site) is by using OptinMonster:
OptinMonster is a premium WordPress plugin and your best bet for creating slide-in scroll box campaigns.
That’s because this tool comes with over 50 pre-built templates that help you get started FAST.
And with a codeless drag and drop builder, you won’t need any technical skills to build professional and high-converting campaigns in minutes.
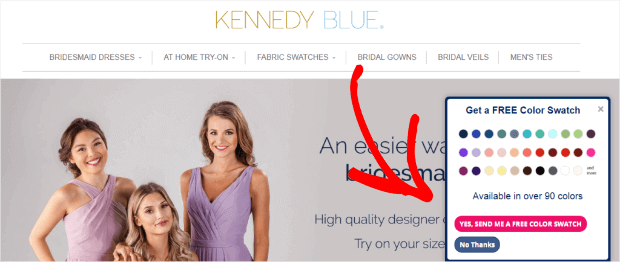
That means you can make stunning slide-in boxes like this:
This is one of the many campaigns Kennedy Blue used to increase sales by over 50%.
A big reason behind the success of OptinMonster’s campaign is its advanced targeting rules that help you to display the right popup at the best times across your site.
In fact, this tool helps you to trigger slide-in boxes based on the following:
- Audience behavior
- Demographics
- Engagement with your site
- And more…
We’ll cover the targeting rules in more depth later.
For now, it’s important to know that OptinMonster gives you MORE ways to generate leads from your site’s traffic than any competitor on the market.
Ready to see it in action for yourself? Click below to start your 100% risk-free OptinMonster account right now:
Now, let’s start creating slide-in scroll boxes with OptinMonster.
Step 1) Install OptinMonster
The first thing you need to do is to add the OptinMonster plugin to your WordPress site.
To get started, pick your OptinMonster subscription and sign up for your 100% risk-free account.
From there, you can easily add the OptinMonster plugin to WordPress like you’d add any other plugin.
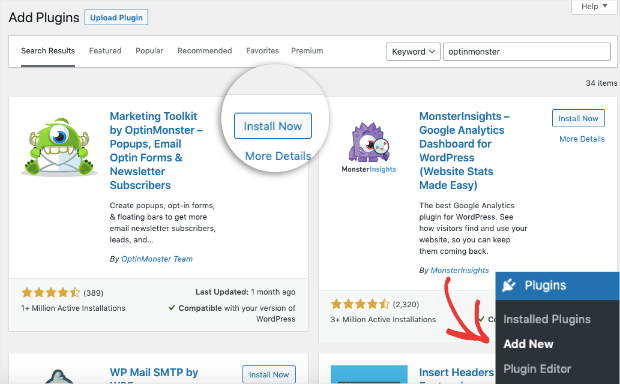
Just click Plugins » Add New from your WordPress admin menu.
Then search for OptinMonster in the repository. When you’ve found OptinMonster, click Install Now:
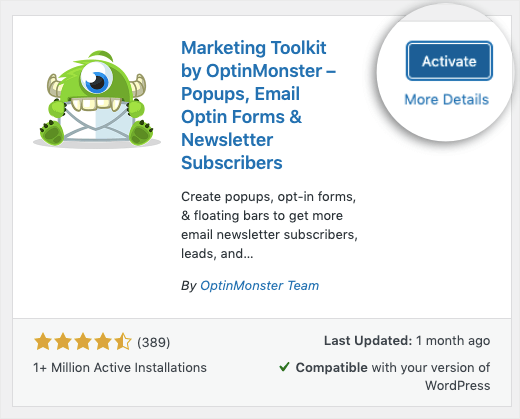
When the plugin has installed, click Activate:
You can then use the setup wizard to connect your WordPress site with OptinMonster.
Need a bit more help? No worries!
Check out this detailed guide: How to Integrate OptinMonster With Your WordPress Site.
Once OptinMonster is officially installed, you can quickly get started creating your campaigns.
Step 2: Create Your First Campaign
If you followed the setup wizard, you’ll be ready to make your first campaign.
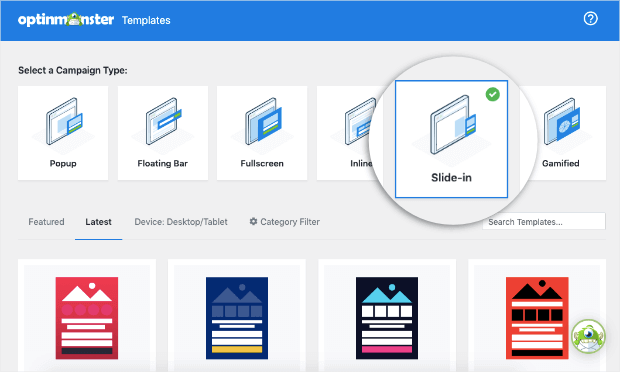
You’ll be able to choose from the following campaign types:
- Popup
- Floating bar
- Fullscreen welcome mat
- Inline
- Slide-in
- Gamified
For today’s tutorial, we want a popup to appear on the bottom right-hand corner on our WordPress site.
That means we’ll select a Slide-in campaign:
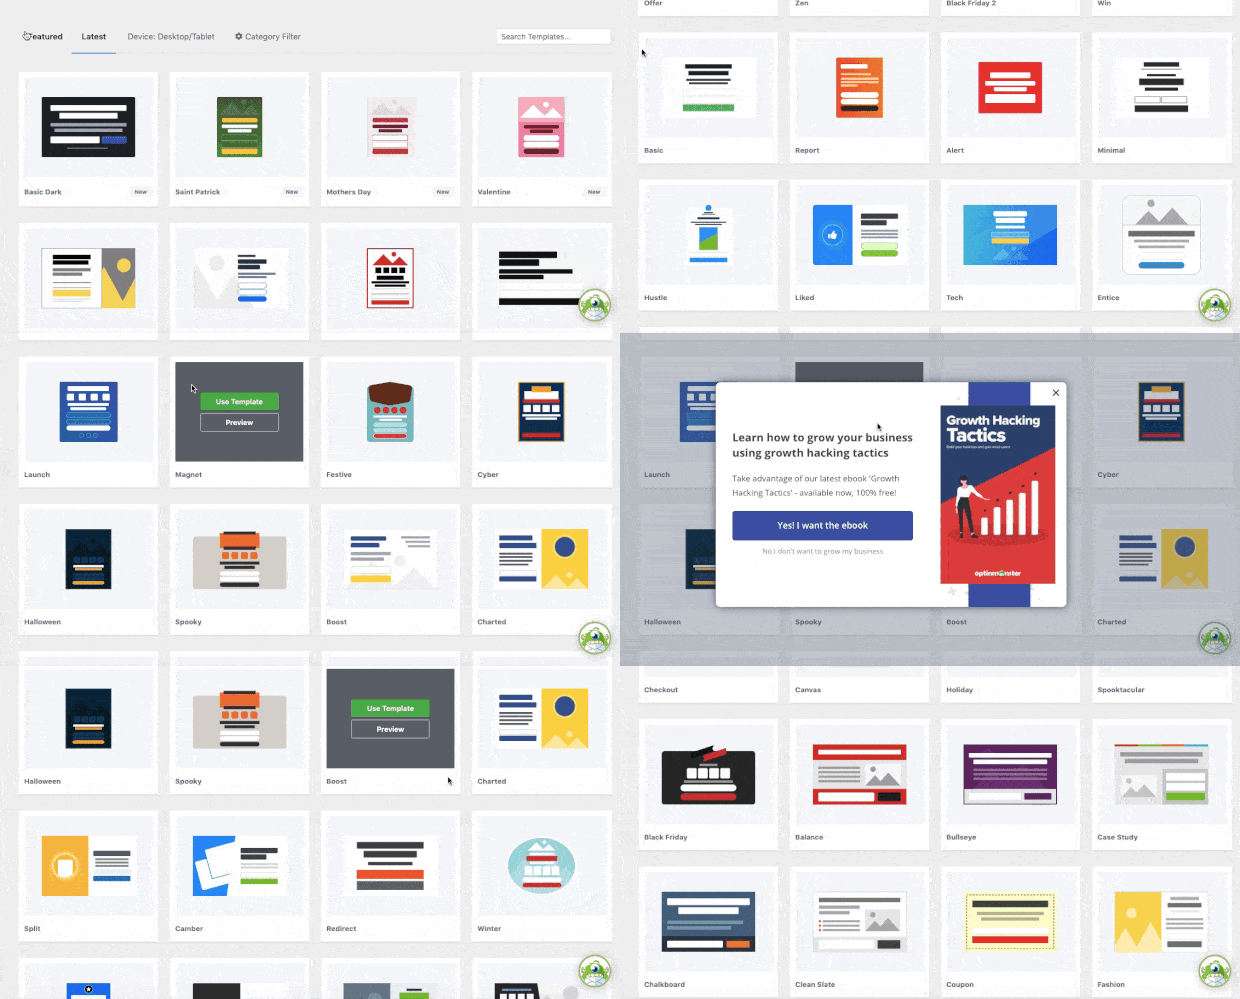
Next, you’ll need to select your campaign’s template.
OptinMonster has over 100 templates you can choose from that look and function great out of the box:
These templates are pre-designed so you can save more time in the campaign creation process.
You’ll be able to preview the campaign that most closely fits your brand to get a head start. From there, as you’ll see, modifications can be made in seconds.
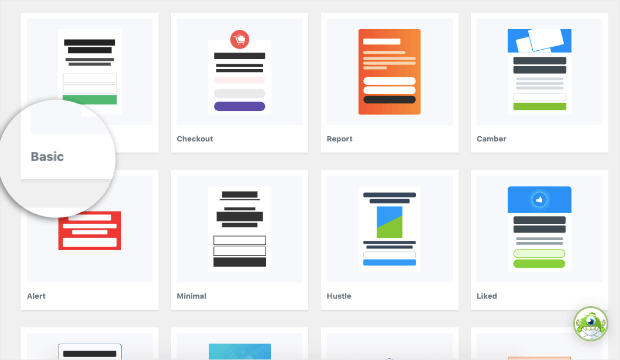
For today’s tutorial, we’re going to select the Basic template:
This is a minimalist design that’s a great place to begin if this is your first OptinMonster campaign.
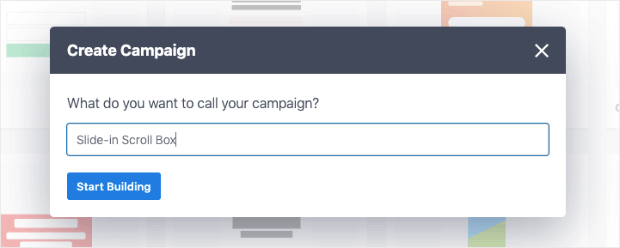
Now you’ll need to give your campaign a name and click Start Building:
Then your campaign will appear in OptinMonster’s builder.
Step 3) Design Your Campaign
As we mentioned earlier, OptinMonster uses a drag and drop builder, which means you don’t need ANY coding experience at all.
Instead, everything about your campaign can be modified in just a few clicks.
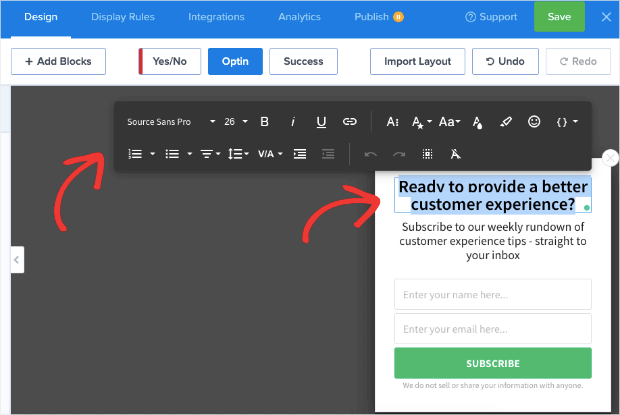
If you want to change the headline or subheading text, for example, you just need to highlight the text you want to modify.
Then you can write new text directly on your template in the OptinMonster editor. Plus, you’ll be able to control things like:
- Font
- Font size
- Color
- Styling (bold, underlined, or italics)
- Line height
- And much more…
This allows you to perfectly tailor YOUR messaging to YOUR target audience.
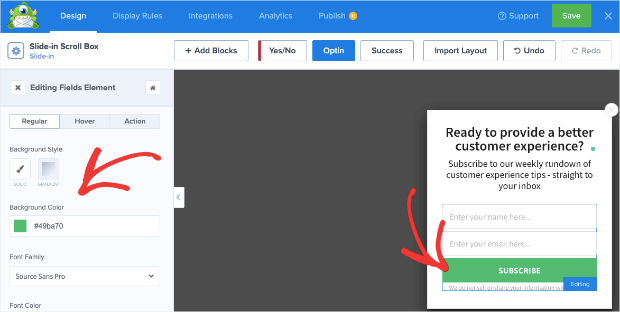
And if you want to change any other element of your slide-in scroll box popup, you can simply click on it in your editor.
This will pull up the editing tools on the left-hand side where you can finalize those changes.
Let’s say, for example, you wanted a different color for your call to action (CTA) button. All you’d need to do is click the button in your editor to have the tools appear in the left-hand side menu:
But what if you wanted to add a new feature to your popup?
OptinMonster lets you totally customize the look, style, and functionality of your campaign.
You can add custom features like:
- Buttons
- Text
- Images
- Videos
- HTML
- Icons
- Dividers
- And more…
These features come in pre-made Blocks, and they stack nicely into place in your template.
That means you don’t need professional design skills to make stunning campaigns FAST.
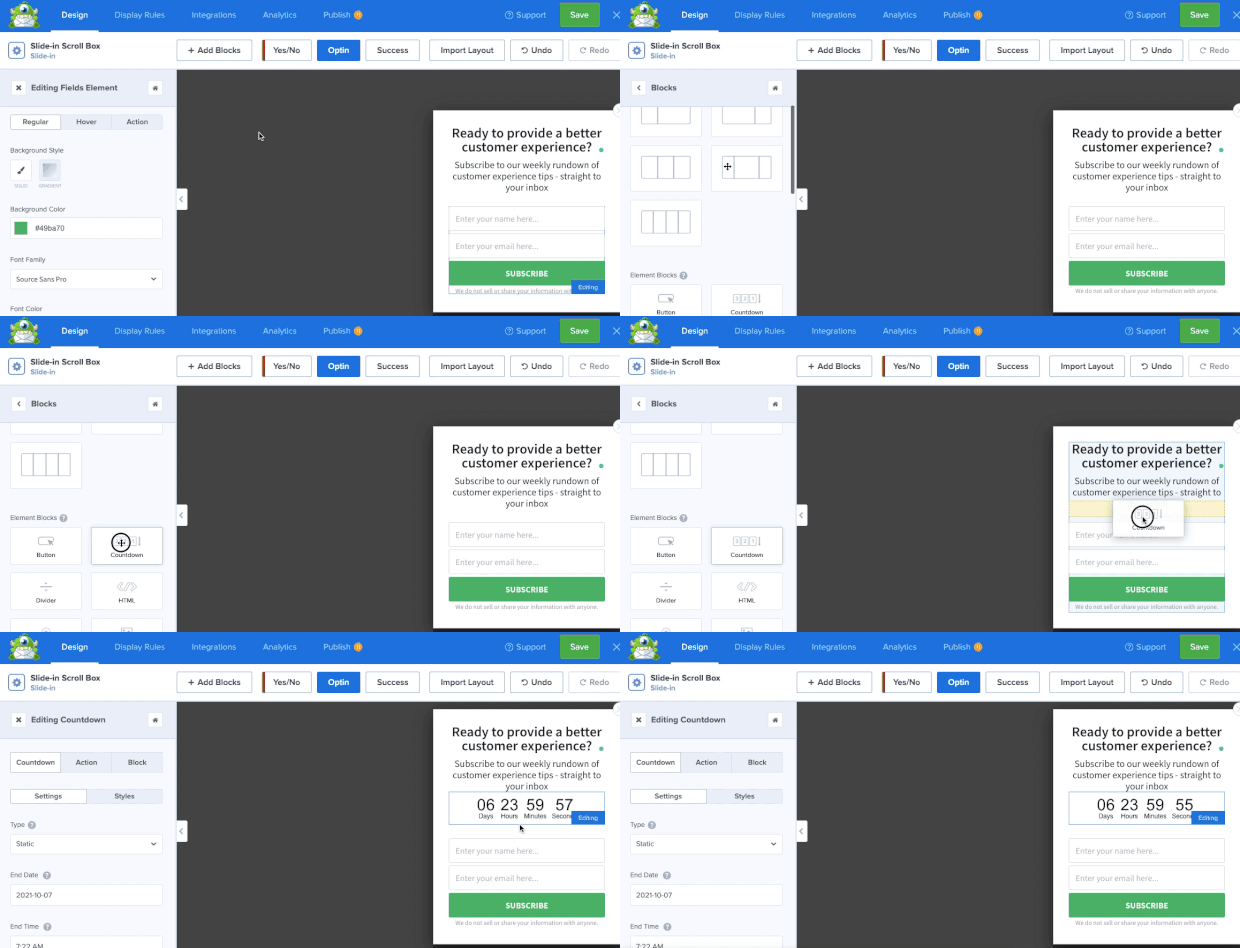
To make these additions, click + Add Blocks at the top of your OptinMonster editor.
Then select the block you want and drop it into place:
With these tools, you’ll have everything you need to build the perfect campaign for your WordPress site.
And since this popup will appear in the bottom right-hand corner in WordPress, it won’t interrupt your visitor’s browsing experience.
In other words, you now have a non-intrusive popup that can be targeted to your specific audience.
And while on that topic, let’s move to our next step: setting up your campaign’s targeting rules.
Step 4) Set Your Campaign’s Triggers
One of the biggest factors in getting higher conversions from your campaigns is showing it to the right people, in the right places, and at just the right times in their customer journey.
For that, you’ll need to determine when, where, and to whom your slide-in scroll box popup appears.
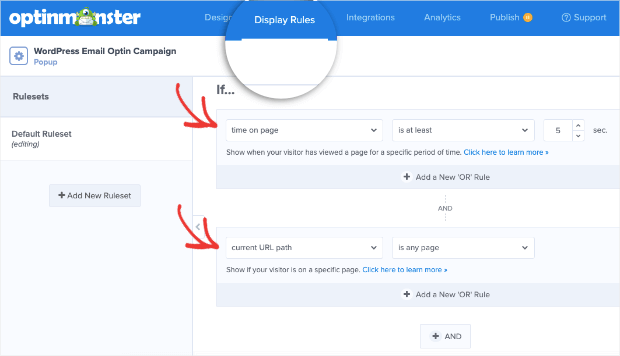
At the top of your OptinMonster editor, click Display Rules.
You’ll now see that 2 rules are in place by default:
- Time on page is 5 seconds
- Current URL path is any page
Many OptinMonster users find that the default rules are the best place to start.
Then, over time, they’ll A/B test different triggers to optimize their results.
But you should know that you can quickly change both or either of these rules. Plus, you have TONS of other options that let you personalize your user’s journey.
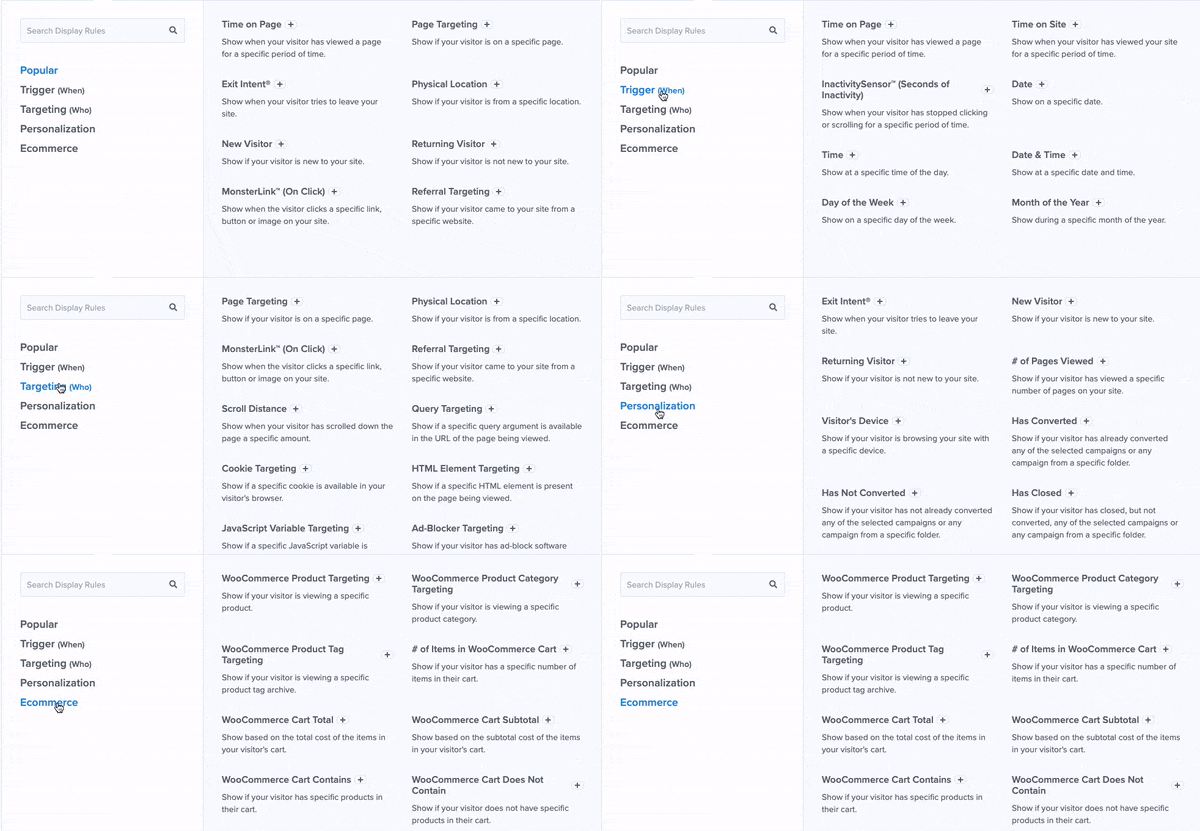
When you click on either of these rules, a menu will appear where you can scroll through the different targeting options:
You’ll want to play with these rules to see which ones are most effective at reaching your audience.
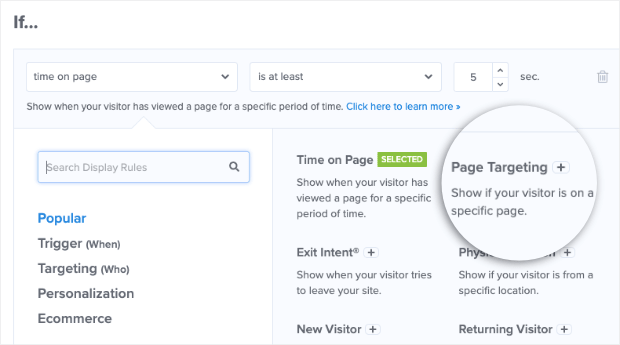
One of the most popular rules, however, is Page Targeting:
This is already set as your second default rule: current URL path.
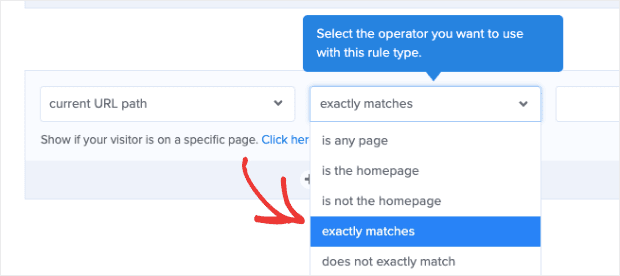
You can change the condition from is any page to more specific areas on your site:
This is perfect for making sure your offers or lead magnet are related to the on-page content your visitors are reading.
This level of personalization is guaranteed to get you higher conversions in less time.
When you’ve determined which targeting rules you’ll use for this campaign, we’ll need to sync your email service provider (ESP).
That way, any new leads you capture with your bottom right-hand corner popup will go where you need them to.
Step 5) Sync Your ESP
OptinMonster integrates with 30+ of the most popular email providers on the market.
And the best part is that you can set everything up in a few clicks.
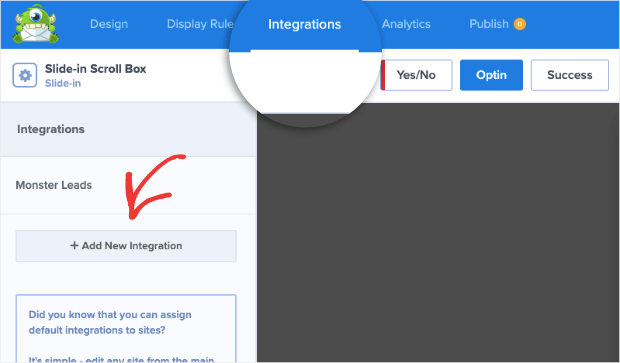
Head to the Integrations tab at the top of your OptinMonster editor.
Then click + Add New Integration:
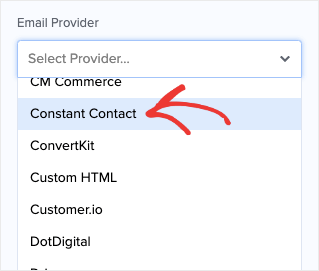
Select your ESP from the drop-down menu:
In most cases, you’ll need to copy and paste the API key from your email provider’s account.
Then you’ll be able to integrate OptinMonster with your ESP so your new leads go to the right lists.
This allows you to leverage email marketing best practices to nurture those leads into loyal customers.
Don’t see your ESP on the list? That’s not a problem.
Check out this helpful tutorial on how to connect OptinMonster with ANY email provider using webhooks.
Now there’s only one step left: publishing your slide-in campaign.
Step 6) Publish Your Campaign
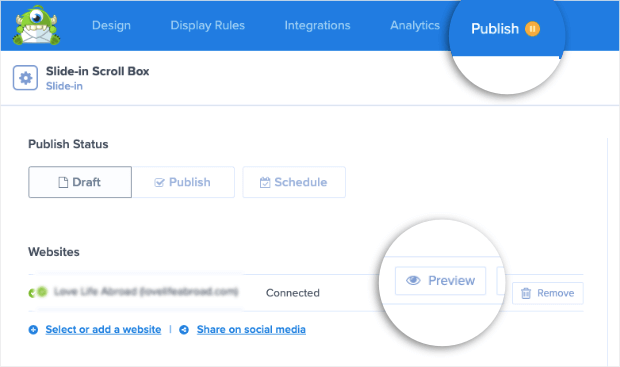
Click the Publish tab at the top of your OptinMonster editor.
You can now preview your campaign:
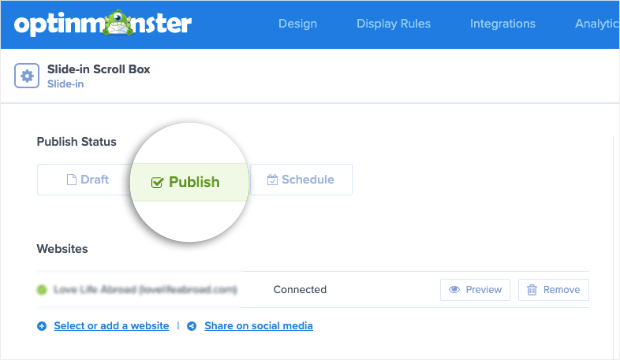
And when you’re satisfied with the results, you can flip the tab from Draft to Publish:
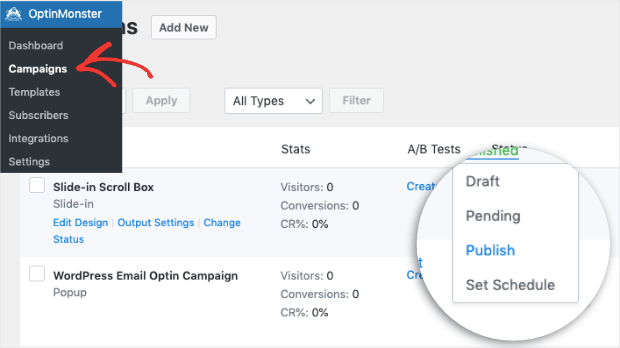
Finally, you should go back to your campaign list from your WordPress dashboard.
You can do that by clicking OptinMonster » Campaigns.
This is to verify that the status of your post has been switched from Draft to Published in your site’s backend.
And that’s it! You now have a bottom right corner popup in WordPress that’s targeted to YOUR audience.
Were you just following along, but now you’re ready to put theory into action? Click below to start your 100% risk-free OptinMonster account today:
We hope you found this tutorial helpful. If you did, you’ll definitely want to check out the following resources:
- 11 High-Converting Ways to Use Slide-in Scroll Boxes
- 6 Reasons Why Popups & Slide-Ins Don’t Work (& How to Do Them RIGHT!)
- Scroll Trigger Boxes: 11 Hacks You Need to Know for Higher Conversions
These articles will have even more information on how you can use slide-in scroll boxes to BOOST conversions and sales fast!




Add a Comment