Do you want to add Mailchimp to your Weebly website?
By integrating Mailchimp, you can send automated email marketing campaigns to subscribers or users on your site. Mailchimp doesn’t offer a direct integration link for Weebly sites, but there’s an easy way to work around this.
In this guide, we’ll show you 2 easy ways to integrate Mailchimp with Weebly:
But first, let’s take a quick look at why OptinMonster is the best tool for this job.
The Best Way to Add Mailchimp to Weebly
Mailchimp is one of the most popular email marketing services. It’s grown into an all-in-one marketing tool and offers tons of integration options for various website platforms. But sadly, Weebly isn’t one of them.
Having said that, you can still integrate Mailchimp with Weebly.
First, you can create a Mailchimp form and embed it in Weebly. But this is a simple option that lacks many features you’ll need if you want to make the integration effective and actually see results.
Instead, OptinMonster offers a feature-rich integration that lets you create high-converting lead generation campaigns for your Weebly site.
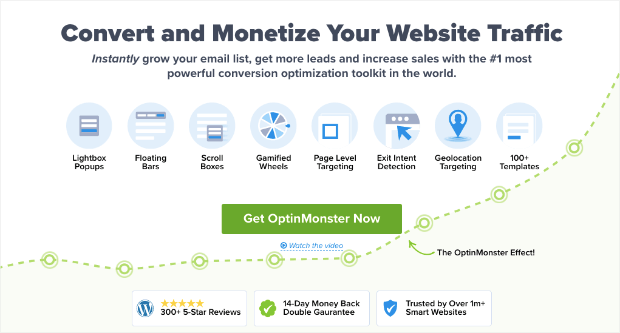
OptinMonster is the most powerful lead generation tool on the market. It makes it easy to build your email subscriber list, optimize conversion rates, and grow your business.
You can connect your Weebly site to Mailchimp in just a few clicks. Then, you can create stunning lead generation campaigns such as popups, inline forms, slide-ins, and floating bars.
And when integrated with Mailchimp, anyone who subscribes to your email campaigns on your Weebly site will automatically be added to your Mailchimp subscriber list.
You can then set up automated email marketing sequences to be sent out to subscribers.
Plus, with OptinMonster, you’ll get access to email marketing and lead generation features that the native Mailchimp form doesn’t have.
For instance, OptinMonster comes with 50+ beautiful templates to design your lead generation campaign in minutes.
And the drag and drop builder makes it really easy to customize everything about the campaign so you can match your brand and website theme.
Another thing to bear in mind is that the Mailchimp form is standardized, so visitors will likely see the same form on other websites. It’s also harder to customize the forms as the Mailchimp form builder has limited options.
That means it may not be effective in getting visitors to convert into subscribers and leads (since you’ll display the same form to every visitor).
This is where OptinMonster really shines with its powerful targeting features. You can create different campaigns and control who sees them on your site.
That means you can target your audience based on their behavior, interests, and activity on your Weebly site.
You can use triggers like Exit-Intent® that detect when a visitor is leaving your site and display a subscribe option to get them to signup before they go.
Or you can target specific pages on your site and show a signup form based on what they’re interested in reading.
In this way, you’ll be able to maximize your conversion rate and grow your Mailchimp subscriber list faster.
In a nutshell, OptinMonster has everything your need to build your email list with Mailchimp, automate your marketing campaigns, and grow your Weebly business.
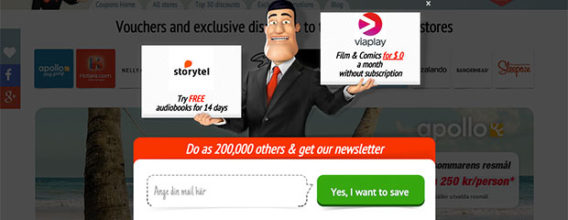
Check out how Kampanjjakt increased conversions by 800% with lightbox popups that sent collected data directly to Mailchimp.
Want to see the same results for your Weebly site?
Now that we’ve seen the tools you need, let’s look at the easier method for integrating Mailchimp with Weebly.
Add MailChimp in Weebly Using OptinMonster
Integrating OptinMonster campaigns with Mailchimp is quick and easy. Then you can create and add stunning lead generation campaigns to your Weebly website.
Here’s what you can expect when you use OptinMonster:
- 50+ eye-catching templates design to convert visitors
- Easy to use drag and drop builder to customize your designs
- Seamless integration with Mailchimp in 3 clicks
- Add campaigns to Weebly directly from the OptinMonster dashboard
- Powerful targeting features and campaign triggers to segment audiences and personalize experiences
- Manage multiple campaigns with ease
Let’s get started.
Step 1: Create a Lead Generation Campaign
If you aren’t already using OptinMonster, the first step you’ll need to take is to sign up for OptinMonster.
Then, you can log in to the OptinMonster dashboard and create a new campaign.
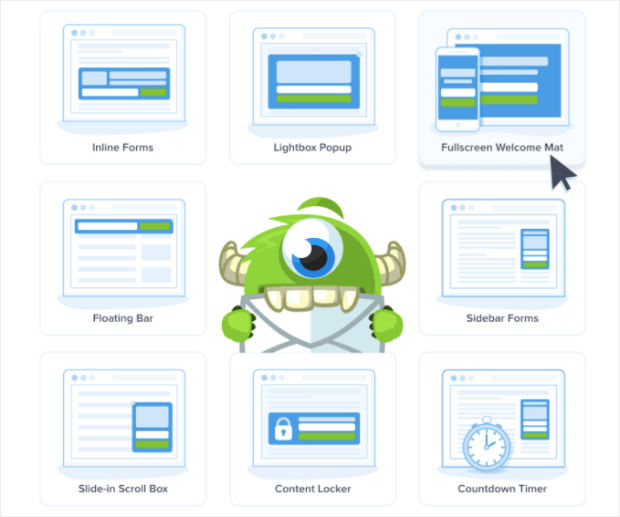
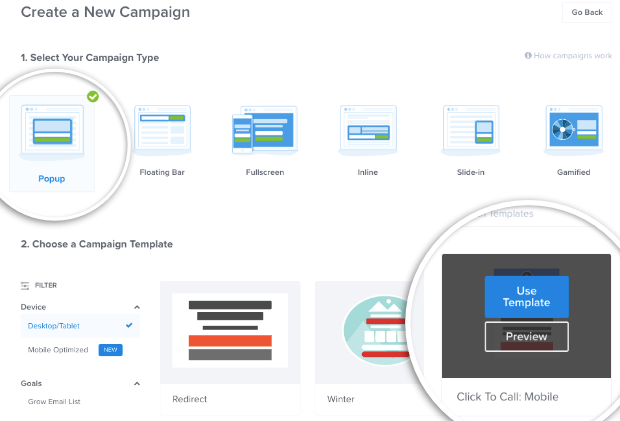
Next, you can select the campaign type such as a popup, floating bar, fullscreen, inline, slide-in, or gamified wheel.
We recommend using inline forms to display a signup form to your Weebly visitors.
OptinMonster also lets you select a readymade template, or you can choose the ‘Canvas’ design to start from scratch.
You can hover over any template to find an option to preview a sample of it. And when you’ve picked the right one, you simply need to hover over it again and click the ‘Use Template’ button.
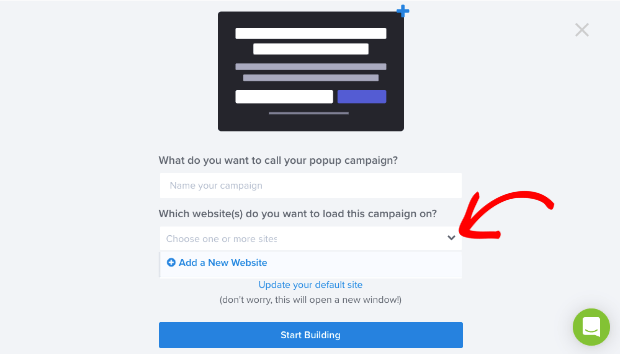
Next, you’ll need to add a name for your campaign and then add your website.
Enter your site name and site domain URL and click on the ‘Start Building’ button. This will open the campaign builder, where you can customize the popup to your liking.
You’ll find options to change the font, color, image, and optin fields.
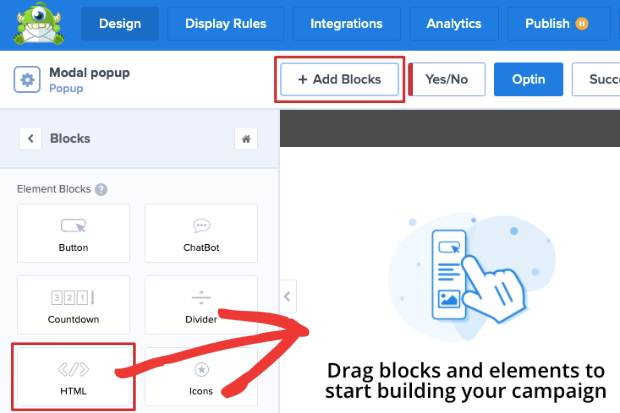
You can add more blocks using the ‘Add Block’ button and then dragging and dropping the desired blocks from the left menu into your campaign preview.
You can add Yes/No or optin fields to your campaign to give visitors an option to sign up. OptinMonster also has cool features like a countdown timer to add a sense of urgency to your campaigns.
If you want to remove a block, select it and use the trash bin icon to delete it.
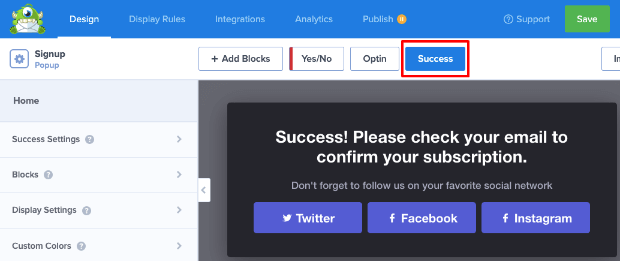
Once you’re happy with your campaign, switch over to the ‘Success’ tab and customize the message to be displayed to visitors that sign up.
Now that you’ve completed designing your campaign, you can determine when and where your lead generation campaign will appear.
Step 2: Set Up Display Rules
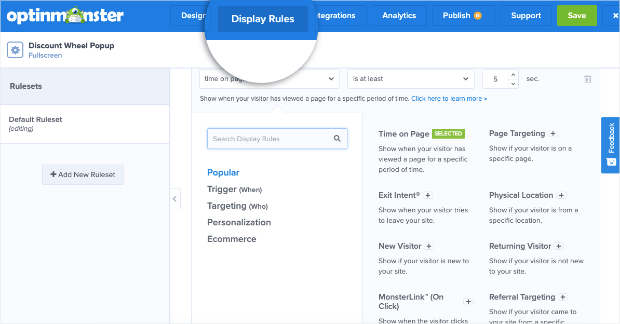
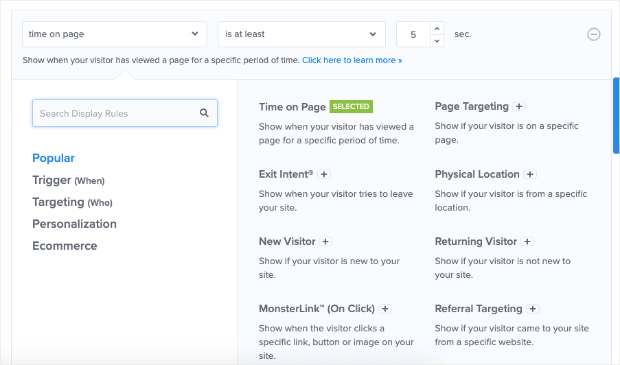
To control where, when, and to whom the campaign appears, open the ‘Display Rules’ tab.
Here, you’ll see different options such as Exit-Intent®, time spent on-page, new or returning visitors, and even eCommerce-specific targets.
By default, OptinMonster displays the campaign when a visitor has spent 5 seconds on your page.
But you can select the display rule that works best for your campaign. For example, f you have a local business, you can select ‘Physical Location’ so only people from your area or city can subscribe.
You can also choose to display your campaign only to new visitors or to those who are returning.
We’ll choose Exit-Intent® because we want to target visitors who abandon their browsing session and leave the site.
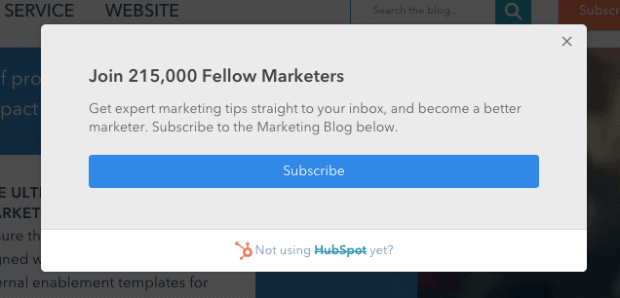
This will display our inline form with an option for them to become a subscriber so they can get marketing tips and updates when we publish new content, like this:
And with that, your campaign is ready to be integrated with Mailchimp.
Step 3: Integrate with Mailchimp
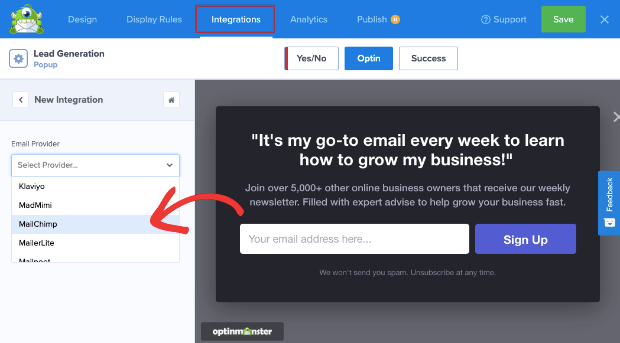
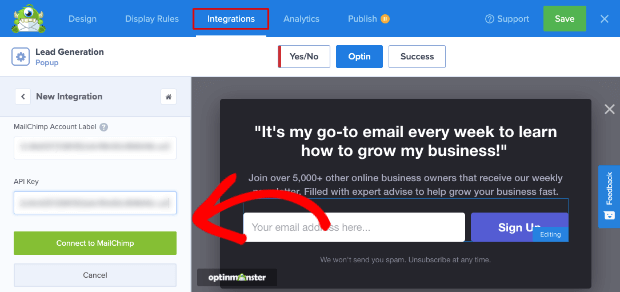
To integrate OptinMonster campaigns with Mailchimp, you need to switch over to the Integrations tab in the top menu. And from the dropdown ‘Email Provider’ menu on the left, select the Mailchimp integration.
When you’ve done that, the options to integrate Mailchimp will appear. First, you’ll need to enter an API key.
Step 4: Fetch Your Mailchimp API Key
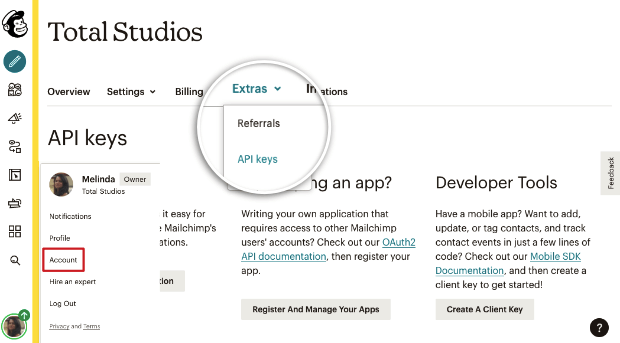
To get your API key, go back to your Mailchimp dashboard. Here, select your account icon at the bottom left of the screen and then choose the Account » Extras » API keys page:
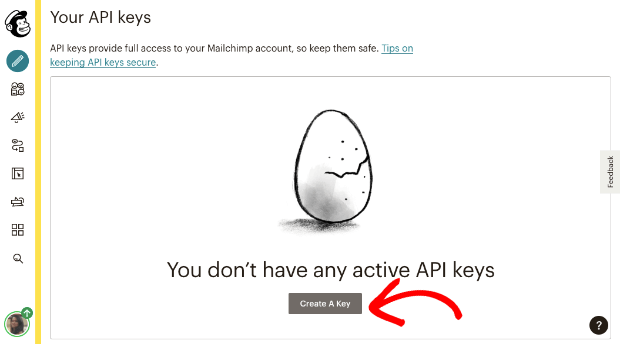
Here, you can create a new API key.
Mailchimp will do the work for you and generate an API key. All you have to do is copy this key and head back to the OptinMonster dashboard.
Step 5: Complete Mailchimp Connection
Now, you can paste the Mailchimp API key in the field provided in the OptinMonster dashboard, like so:
Then click on the ‘Connect to Mailchimp’ button.
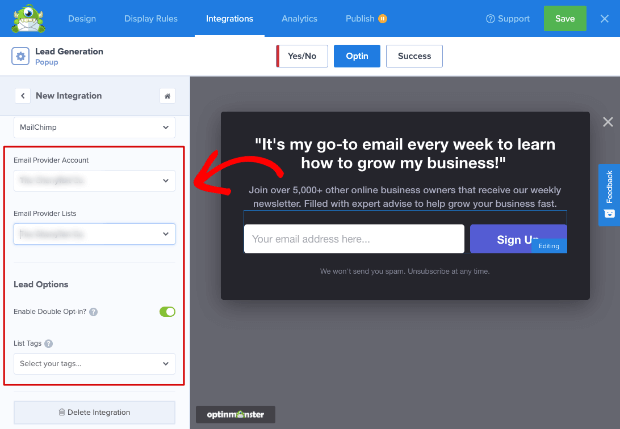
Now you’ll see your email provider account and lists. If you have multiple Mailchimp accounts or audience lists, then you’ll need to select the ones you want.
Step 6: Publish Your Campaign on Weebly
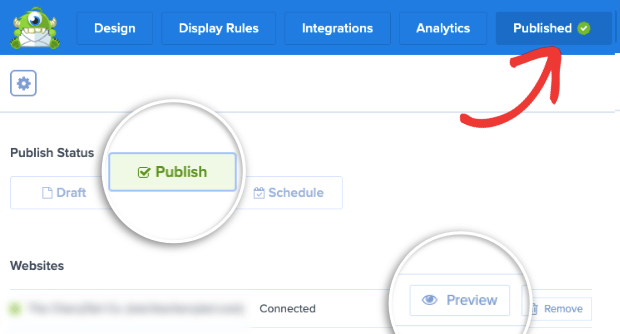
Now your campaign is ready to be published on your Weebly site. To do this, open the ‘Publish’ tab on your OptinMonster dashboard.
You can preview your campaign to see what it would look like first. When you’re ready, hit the ‘Publish’ button to make your campaign live.
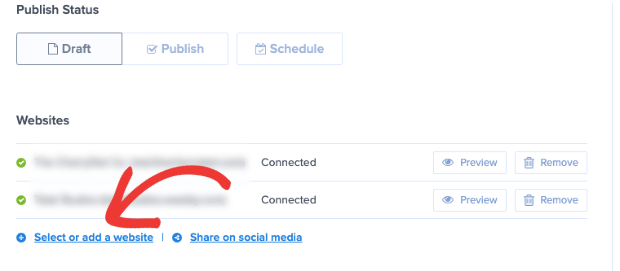
In case you haven’t added your Weebly site yet, you can do so on this page as well. Under the ‘Publish Status’ section, you’ll see an option to ‘Select or add a website’.
Simply click on it, and enter your Weebly site’s name and URL:
Your lead generation campaign will appear on your Weebly website based on the display rules you set.
Haven’t connected your Weebly site yet? No worries.
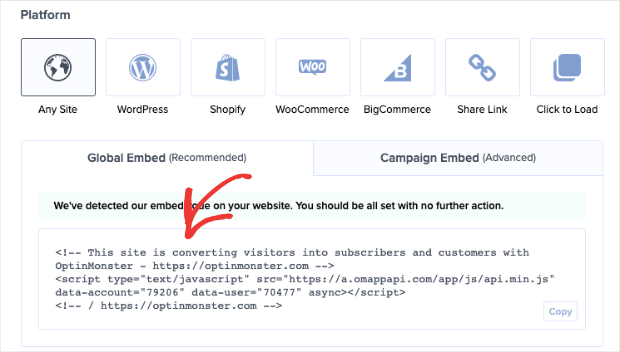
OptinMonster gives you the universal embed code on the same publishing page:
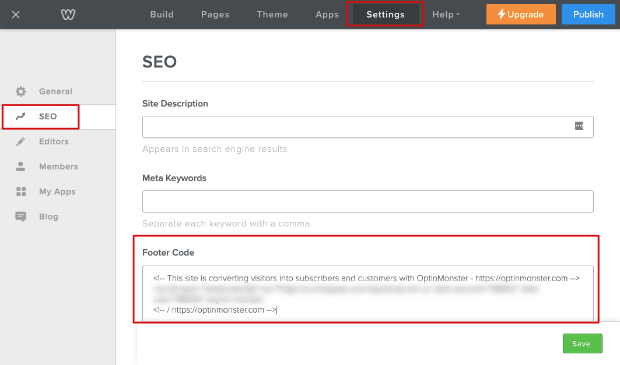
Copy this code and head over to your Weebly website. Here, you need to open the Settings » SEO page.
In the Footer Code field, paste the embed code and then use the ‘Save’ button to store it.
That’s it! You’ve successfully added your lead generation campaign to Weebly with the Mailchimp integration.
This means you can add multiple campaigns to target different types of visitors that come to your site.
And you don’t have to display the same popup to everyone. Instead, you can show relevant and personalized offers to visitors based on their activity, behavior, and interests.
And with the Mailchimp integration, your subscribers will automatically be added to your audience list.
You can even automate your emails in Mailchimp to welcome new subscribers. This will reduce your admin work, optimize results, and help you grow your business.
Ready to integrate Mailchimp with Weebly using OptinMonster?
Now let’s look at another method for how you can connect a Mailchimp form in Weebly.
Add a Mailchimp Form in Weebly
Another way to add Mailchimp to Weebly is to create a form within the Mailchimp dashboard and then embed it on your site.
This will give you a standard signup form on your site, so visitors have the option to subscribe to your newsletters.
But keep in mind, these forms aren’t very helpful in getting visitors to sign up for your emails. It provides them with an option to sign up, but most visitors need more personalized offers to hand over their email addresses.
If you want better features like high-converting templates, easy customizations, powerful targeting options, and campaign analytics, you’ll want to use the OptinMonster integration for that.
To set up a simple Mailchimp form on Weebly, follow the steps below.
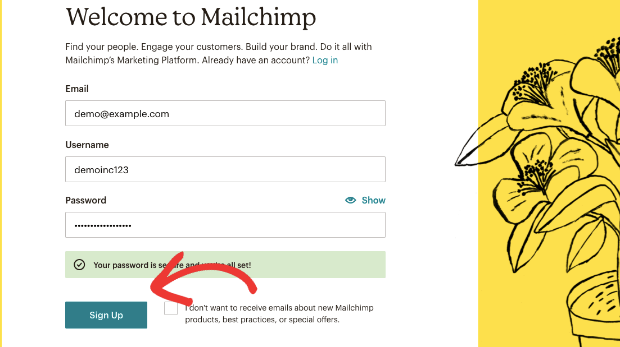
Step 1: Sign up for Mailchimp
You most likely already have a Mailchimp account, but just in case you don’t, you’ll need to sign up.
You can get started for free or sign up for a paid plan. Simply add your name, email address, and password to create an account.
Once you’re signed up, the Mailchimp dashboard will open. This is where you can create emails, forms, and landing pages.
Step 2: Create a Sign Up Form
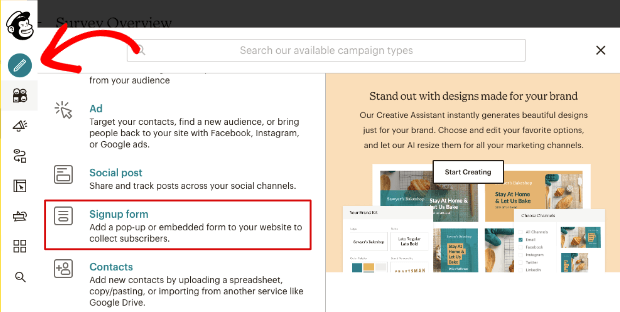
From the menu on the left of your Mailchimp dashboard, select the Create icon. This will open up a list of things you can create with Mailchimp.
You’ll want to select the Signup Form option.
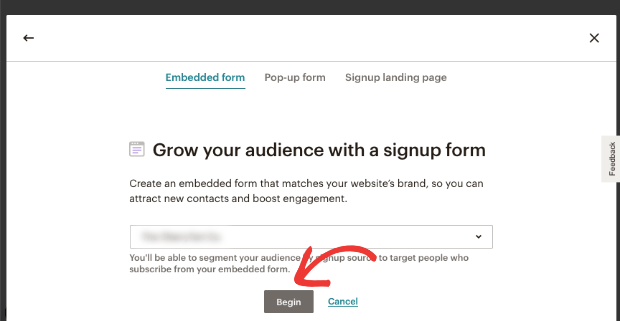
Then select your site and click on the ‘Begin’ button.
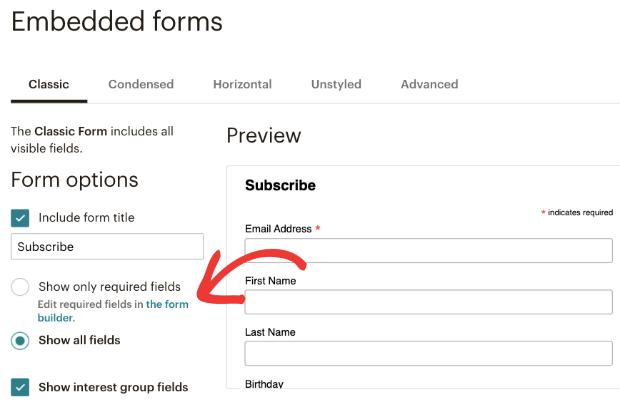
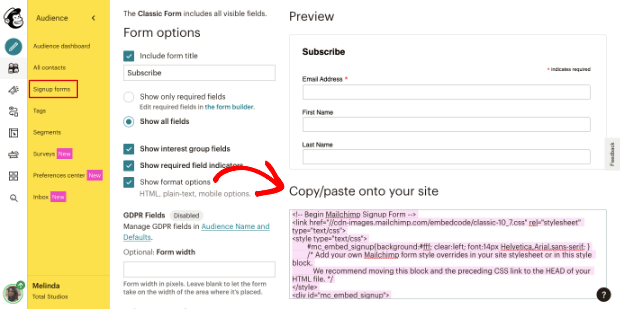
On the next page, you’ll see a preview of the form.
You can customize the form using the form builder which you can access under the Form Options » Show only required fields section. You’ll see a green link to the form builder.
When you’re happy with your form, you can embed it on your Weebly site. To do this, copy the embed code of your Mailchimp form.
You can find it on the same page that shows you a preview of your form.
Step 3: Add Mailchimp Form to Weebly
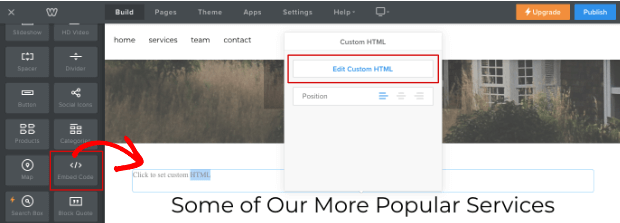
On your Weebly website, you’ll need to edit the page where you would like to embed the form.
From the taskbar on the left, add the ‘Embed Code’ block by dragging and dropping it onto your page.
When you select the block, a menu will open up where you can select the ‘Edit Custom HTML’ option.
Now, you can paste the embed code you copied earlier, and Weebly will generate a preview of your form as it would appear on your website.
All that’s left to do is publish or update your page. With that, you’ve successfully added a Mailchimp form to your Weebly site.
We hope this tutorial helped you add Mailchimp to Weebly. If you found this post helpful, you may also be interested in:
- Small Business Email Marketing: 7 (Easy) Tips for Growth
- Best Email Marketing Automation Tools to Transform Your Business
- Email Segmentation Tips You Need to Use Now
These articles will give you deeper insights into email marketing and how to use it to skyrocket business growth.








Add a Comment