OptinMonster’s drag-and-drop builder makes it super simple to create beautiful campaigns for your website without needing a web developer.
This overview will cover the major views, the vital sub-menus, and everything you’ll need to get started.
Check out our Creating Your First Campaign guide to learn how to design your campaign within the OptinMonster Builder.
Design View
OptinMonster’s Design View has been created with ease of use and customization in mind. The screen is separated into two major sections: live Preview and your selections of views on the right and your view-related menu and settings on the left.
- General Navigation Bar (top bar)
- Blocks and Settings (left pane)
- Live Preview (right pane)
- Control Toolbar (bottom footer)

Live Preview
In the live preview Area, you can point-and-click any area you’ve added blocks (more on that below) so that you can edit the wording (aka: “copy”) of your campaigns. This can mean changing an image, a tagline, the placeholder value for the fields, and more. When you click on the block, the menu on the left will update so that you can make your changes.
Blocks and Settings
In the left panel you’ll find blocks you can add to your campaign, and the configuration settings available for individual elements as you customize the design.
Control Toolbar
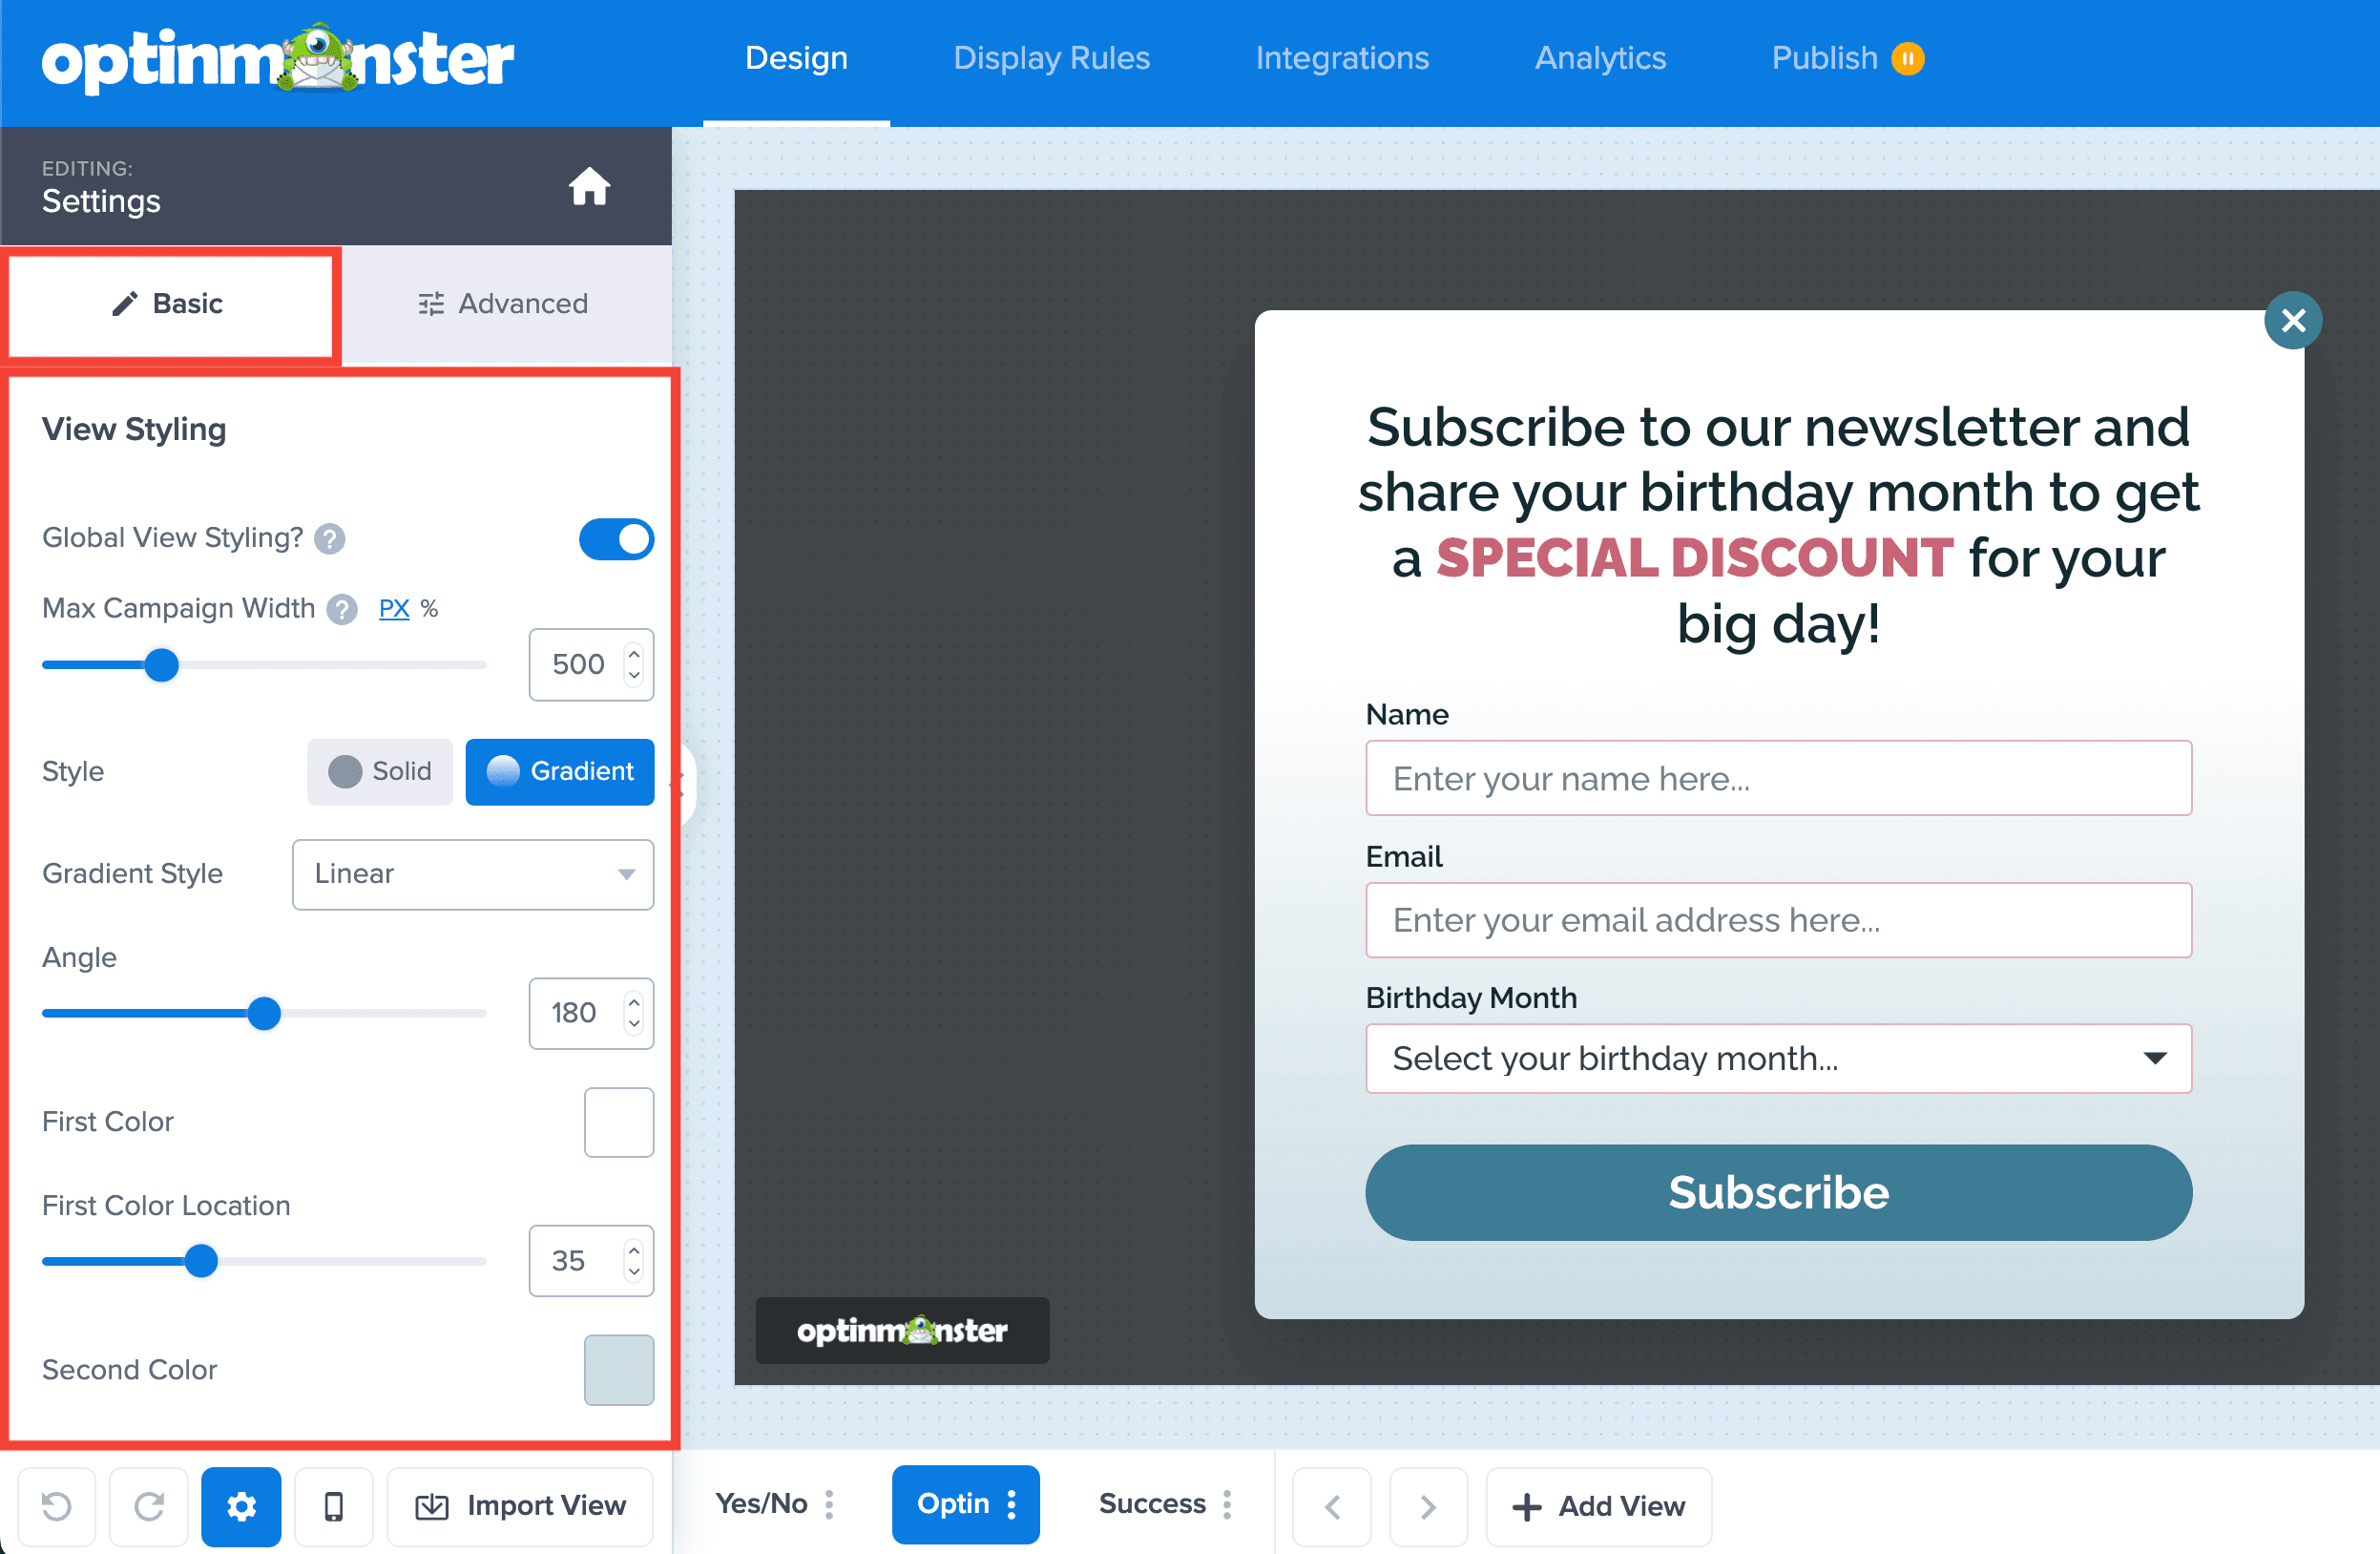
Campaign Settings
The Control Toolbar contains the campaign settings link. Select the gear icon to open the Campaign Settings in the left pane of the builder.

Basic Tab
- View Styling – this section contains the general design settings for your campaign, like the campaign width, background settings, and close button styling.
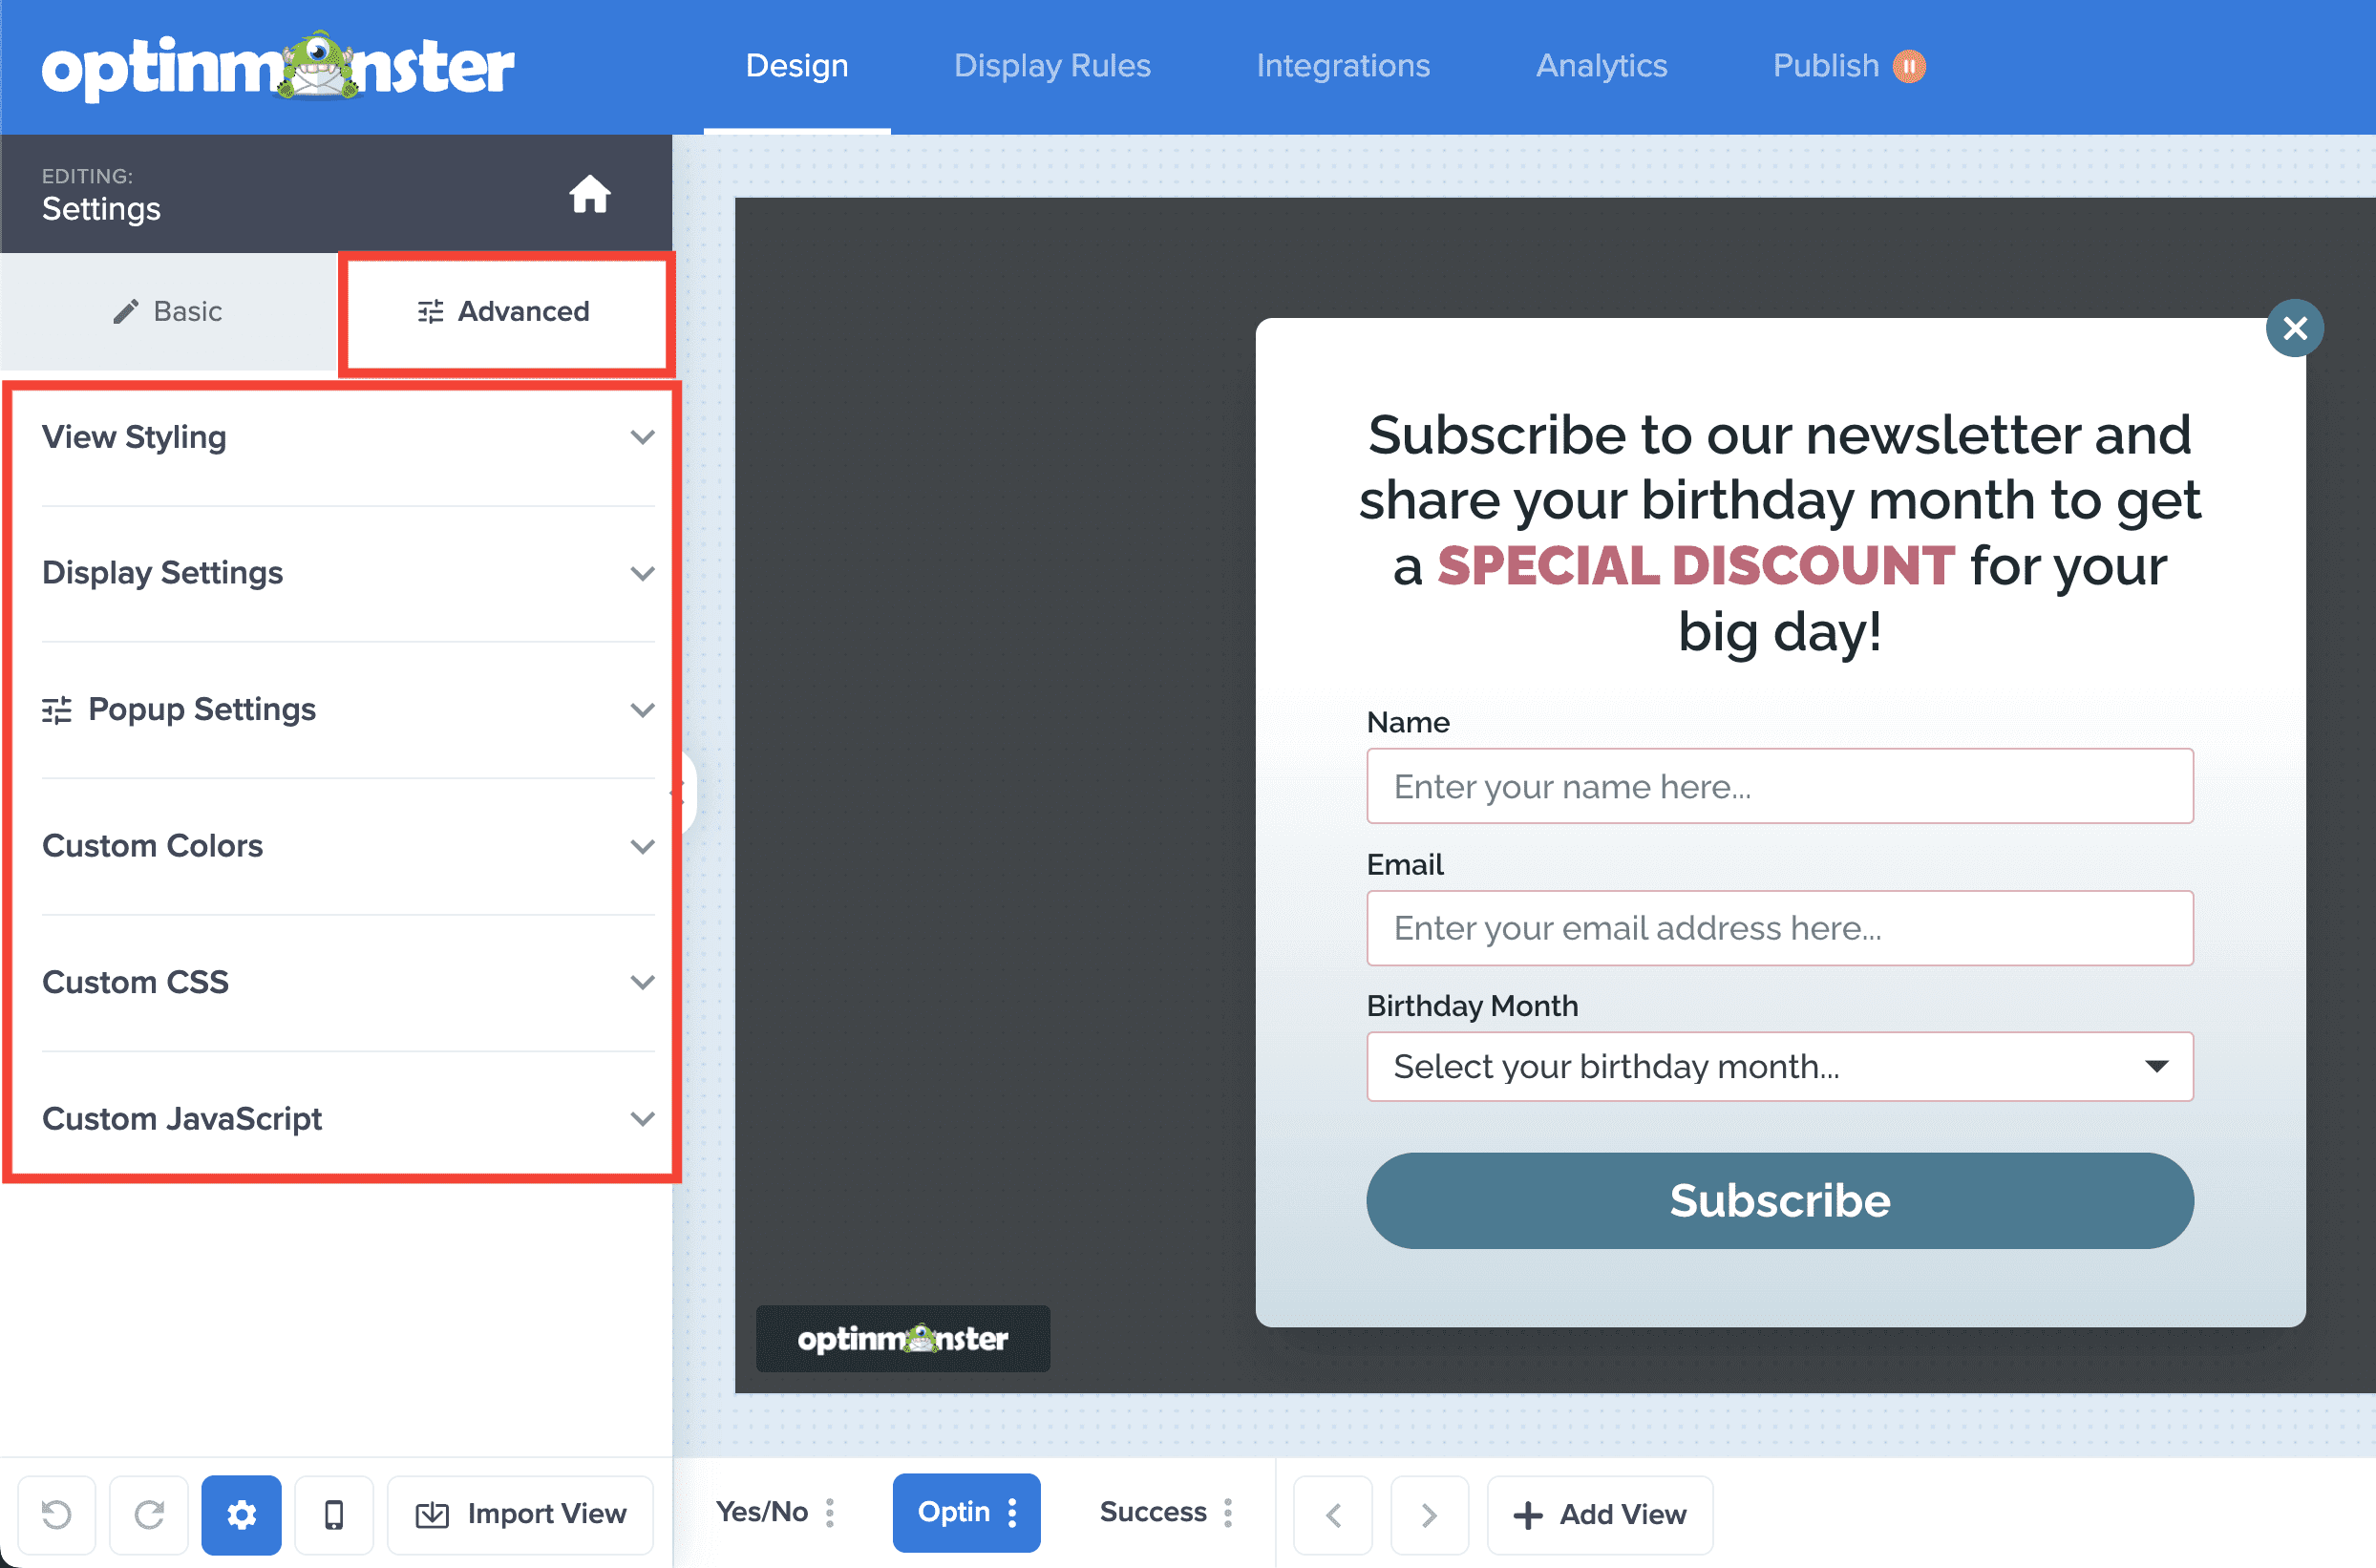
Advanced Tab
- View Styling – more advanced settings are available for the general design of the campaign including box-shadow, border, rounded corners, spacing (margin/padding), and close button styles.
- Display Settings – you can control the campaign’s namespace, enable/disable the powered-by link, and enable/disable webfonts.
- Campaign Type Settings – more advanced options specific to the type of campaign you are designing.
- Custom Colors – add, edit, and use custom color profiles.
- Custom CSS – add custom CSS to your campaign.
- Custom Javascript – add custom Javascript to your campaign.
Mobile Preview
Want to see how your design will look on small mobile screens? Toggle the Mobile Preview option in the Control Toolbar.

Undo / Redo
You can also Undo or Redo actions from the Control Toolbar in the builder.

Import View
You can import designs from another view or campaign using the Import View option in the Control Toolbar.

Campaign Views
In the Control Toolbar at the bottom of the screen, you’ll find the options to switch between campaign views (Yes/No, Optin, Success or any custom view you’ve added).

- Yes/No – When using the Yes/No view, this type of campaign is also commonly called a 2-Step Campaign. These can be used to show a Yes Button, which when clicked shows a Optin Form (i.e.: the “Optin View” below) or it could have another functionality like redirecting a user to another page. Learn more about Yes/No campaigns here.
- Optin – The Optin View is normally used to show your optin form, collecting at least an email address. This view can also be used with Custom HTML integration instead where you can include specialized forms or other content.
- Success – This view is normally shown after someone successfully signs up on your optin form when connected via OptinMonster’s native Integrations.
- Add View Button – Allows you to add multiple views to the campaign, going beyond just the default Yes/No, Optin and Success views.
- Left/Right Arrows – Allows you to navigate between views when multiple views are present and not all are visible on the screen.
Campaign Details
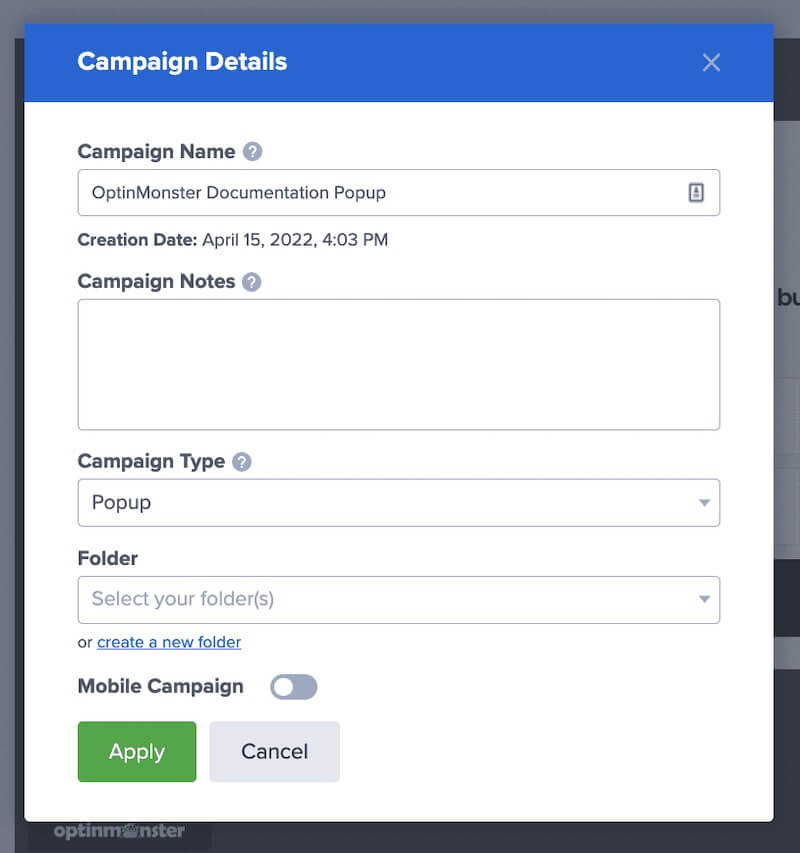
Want to edit the Campaign Name, add or edit Notes, change the Campaign Type, assign to a Folder, or enable Mobile-Only? Select the Campaign Details option in the Control Toolbar to access those options.

A popup modal will open for you to edit the Campaign Details.
Display Rules View
A campaign has “rulesets” and “rules.” A single ruleset can include ” AND ” and “OR” rules.

Under the Display Rules View, there are two main sections:
Rulesets
A ruleset is a collection of “AND / OR” rules that must be met for a campaign to show. You can create multiple rulesets or have just one. Whenever the rules within a single ruleset “pass” (are valid / true), then the campaign will show.
Rules
Rules exist inside of a ruleset. These are the conditions that must be met when a visitor is on your website before a campaign can appear on their screen. This can be a time delay, Exit-Intent, the web visitor going to a specific page, or more! The rules found in the Display Rules View are described in full detail in our display rules guide.
Integrations View
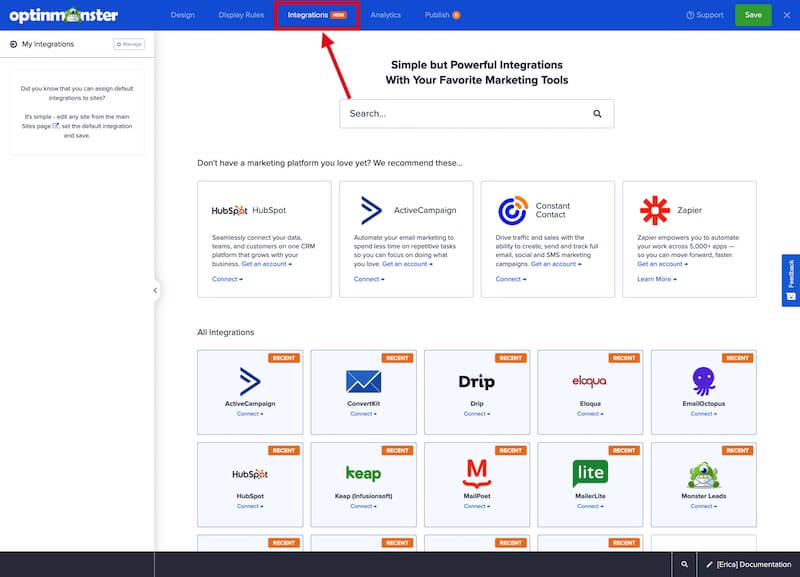
OptinMonster offers three types of integrations, our Native Integrations, Monster Leads, and Custom HTML.
Native Integrations
Native integrations are the integrations where OptinMonster has used the APIs of specific email service providers (ESPs) or customer relationship management (CRM) systems to allow a more fluid, list-building experience. Once you select your ESP from the menu and connect it with OptinMonster for the first time, you can seamlessly connect future campaigns with your list.
Native integrations allow you to collect name, email, and phone number. Some integrations’ APIs offer additional lead options.
Monster Leads
Monster Leads is OptinMonster’s “in-house” way to collect and store new leads gathered from an OptinMonster campaign. If you do not yet have an ESP to integrate with, you can use Monster Leads in the meantime. Or, use Monster Leads as a backup to your current ESP.
Each new campaign is connected to Monster Leads by default, which also allows you to collect name, email, and phone number.
Custom HTML
You can alternatively add a custom form to any OptinMonster campaign using our Form Embed Block, instead of configuring an Integration. This is a great option if we don’t have a direct integration with your Email Service Provider, or our integration doesn’t support the specific functionality you require.
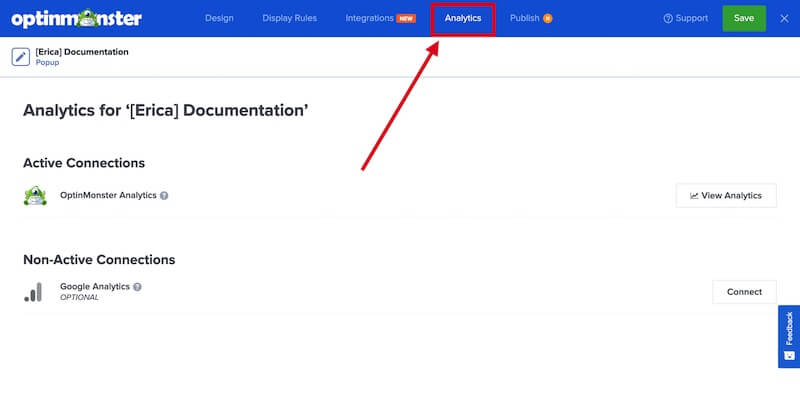
Analytics View
OptinMonster offers our own built-in analytics tracking with no setup required. You can also connect to Google Analytics for more in-depth tracking, but this is optional.
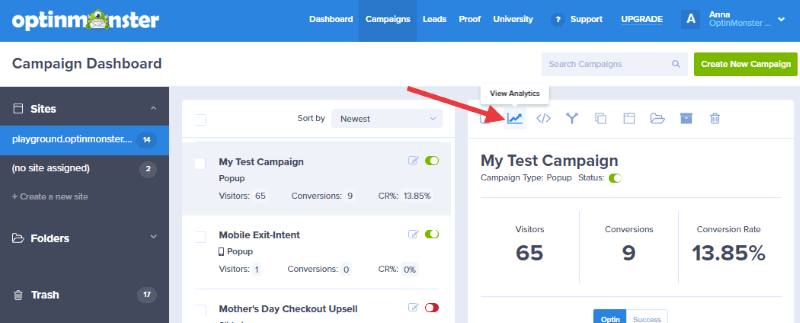
You can see the total number of campaign impressions, conversions, and conversion rate for each of your campaigns on the OptinMonster campaign dashboard, or click the “View Analytics” icon above a campaign to see more information.
Publish View
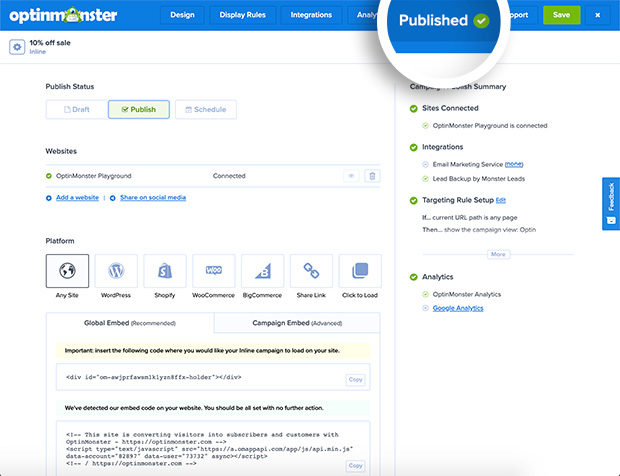
The Publish View contains a lot of helpful information you’ll need while getting your campaign live on your site.
Status
Campaigns can be one of two statuses: Paused or Live. Paused campaigns will not show anywhere. Live campaigns can show on websites if the embed code is present, and the Display Rule conditions are met.
Website(s)
This field will contain the website(s) where you would like this campaign to show when published. At least one site is required for the campaign to appear, but you can add multiple websites where a campaign has permission to load.
It is common for development or testing sites to be sub-domains of the main domain. Therefore, if you have a test site, you would want to have your test site and your live site both assigned to the campaign.
Preview
You can preview the design of your campaign before you launch it. Access the preview option from the Publish screen, following our guide.
Platforms
You can find your OptinMonster embed code options here. Some platforms, such as WordPress or Shopify, have customized solutions for adding the embed code to your website. However, we have a general, account-wide embed code that you can use to allow your campaigns to show on your website(s).
Embed Code
Once you click on your platform, any associated embed code will show below it. You can copy the code directly from this box to use on your site.
Support, Save, and Exit
There are 3 buttons on the top right of the builder.

- Support – This button will show a popup listing common walk-through guides for using OptinMonster. Additionally, you can click here to submit a support ticket.
- Save – This button must be clicked to make sure any changes to your campaign’s design or settings are saved for future use.
- Exit – This button allows you to leave the builder and go back to your campaign dashboard. If you leave without saving, no changes made previously will be applied.
FAQs
How can I learn to design my campaign?
You can learn how to design your campaign through our Creating Your First Campaign guide!

