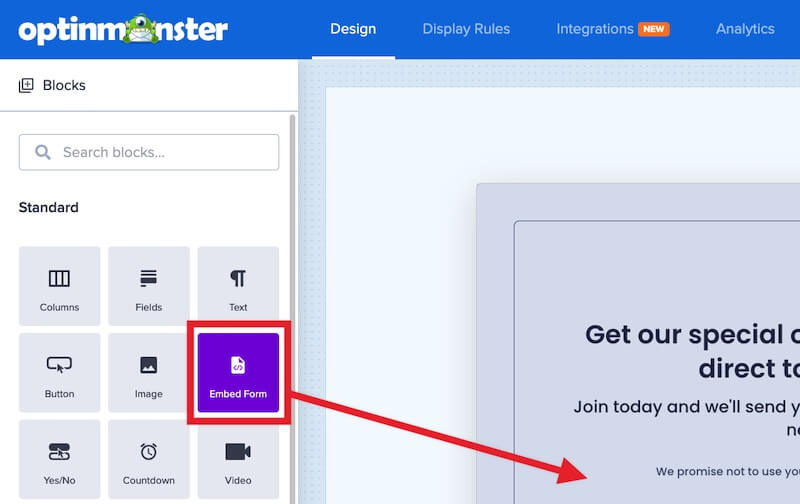
Creating forms is easy using our drag-and-drop editor, and connecting forms to the most popular Email Service Providers (ESP) is too. But sometimes, you may need to use a custom form you’ve created yourself outside of OptinMonster, or to integrate with an email marketing platform we don’t yet support. Our Embed Form block is perfect for embedding an HTML or Javascript form into your OptinMonster campaign.
In this article, you’ll learn how to embed any HTML form into an OptinMonster campaign using the Embed Form block.
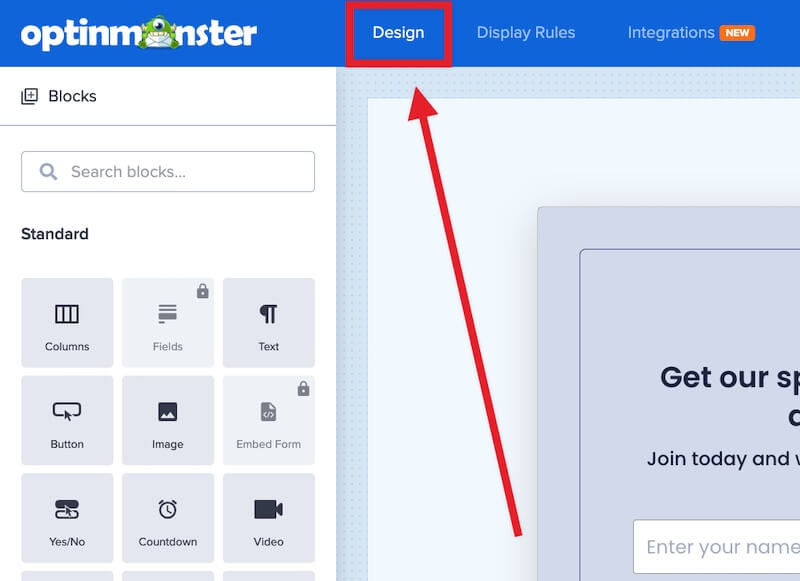
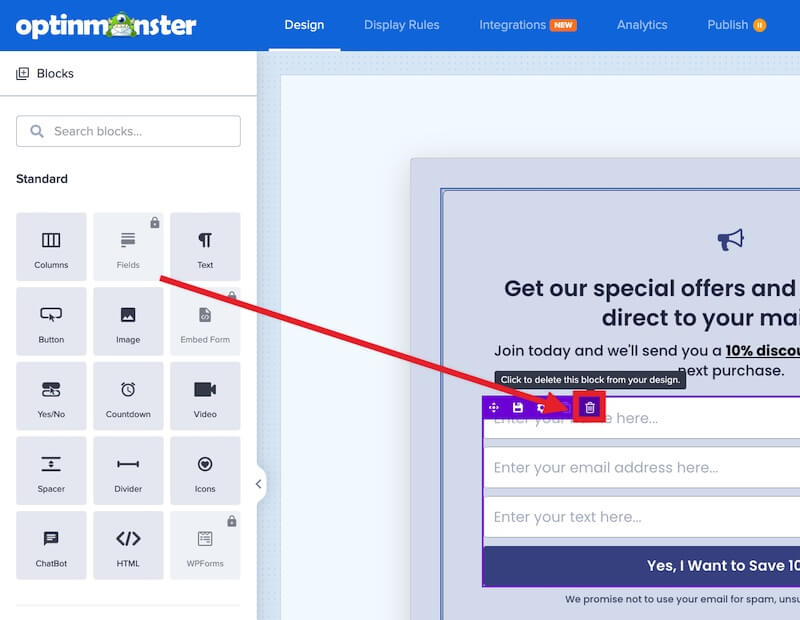
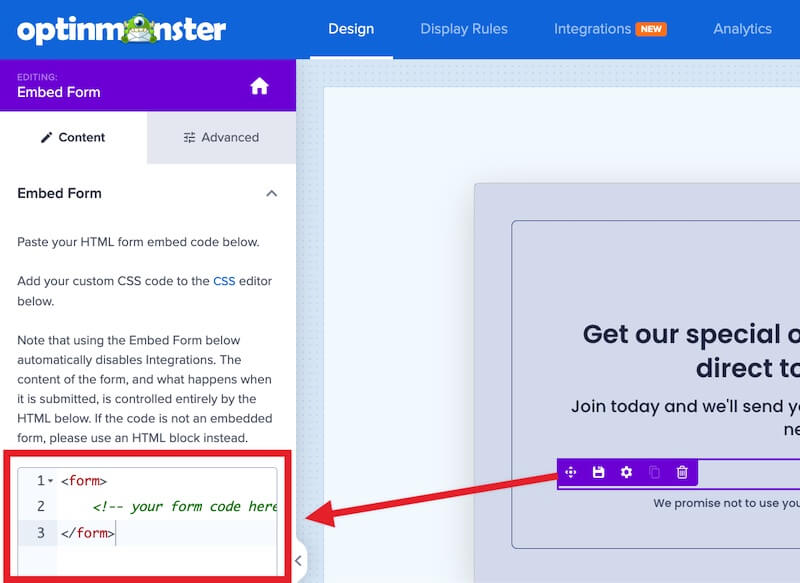
Custom HubSpot forms must be edited following this guide to function correctly. Custom Marketo forms must be edited following this guide to function correctly. Your custom form’s styling may need to be controlled using Custom CSS. Looking to add a WordPress shortcode to your OptinMonster campaign? Learn how to add shortcodes. To add an HTML form to your OptinMonster campaign, follow these steps: There are two options to track conversions and set cookies when your custom HTML form is submitted: Whenever possible, you should use the Javascript method below on your form’s success callback so that the conversion is only accurately recorded when your form is successfully submitted. If your custom HTML form is using Javascript on the submit event, then you’ll want to ensure that the last line of the Javascript submit code is: Notice: If you are doing any redirect if the submission is successful on your customized submission Javascript code, then there is nothing OptinMonster can do to track the conversion. Use the following Javascript on your form’s success callback so that the conversion is only accurately recorded when your form is successfully submitted: There is a particular class that you can use to notify OptinMonster that a conversion has happened and set cookies if they’ve been configured for your campaign. Add the class You can customize the success action for your embedded form to change the campaign view or close the campaign. Use one of the following Javascript examples on your form’s success callback to change to the specific campaign view you’d like to display on submission: Use the following Javascript on your form’s success callback to close the campaign on submission: You may wish to validate the fields in your embedded form but aren’t sure where to begin. The following are examples of validating an HTML form to help you get started. The following code provides an example of Javascript validation for an HTML form: The following code provides an example of Javascript validation with AJAX for an HTML form: If you’re serious about jumpstarting your website growth, then get started with OptinMonster today!
Field Mapping is a brand-new feature available for our most popular Email Service Providers. You can easily add radio buttons, phone fields, text areas, number fields, lists, and more!
Learn more about Field Mapping.Embed Form
Form Events
Track Conversions and Set Cookies
return true;
Javascript
Button Class
om-trigger-conversion to your custom form’s submit button. For example:Success Actions
Change View
Close Campaign
Form Validation
Javascript Validation Example
Javascript Validation with AJAX Example
Our conversion experts will design 1 free campaign for you to get maximum results – absolutely FREE! Click here to get started →
FAQs
How can I control the styling of my custom form?
Custom HTML forms do not automatically inherit the default styling of your optin template. You can control the appearance using Custom CSS.
Get started using Custom CSS with your campaign.
My custom form is in an iFrame element. Can I still track conversions?
Due to the nature of iFrame elements, it is not possible to track clicks that take place within the iFrame element.
This is a limitation of technology and not unique to OptinMonster.
Whenever possible, you should use an HTML or Javascript form embed option if one is provided to you, instead of an iFrame embed.
I’ve added the Embed Form block to my campaign, but the Integrations view in the builder is now disabled; why?
It is not possible to add a custom HTML form and connect with our native Integrations in a single campaign. If the Embed Form block is added to your campaign the Integrations view will be disabled. To resume using a native Integration you’ll need to first delete the Embed Form block from your campaign.
Why are my inline comments being wrapped by multi-line comments?
OptinMonster will wrap all inline comments into multi-line comments, which is necessary for OptinMonster’s proper handling and processing of the code involved.
For example, this:
// Your Comments
becomes this:
/* // Your Comments */
Troubleshooting
I’m using the Button Class to track conversions but the number of conversions does not match the number of leads captured. Why?
Using the Button Class method can result in false conversions being counted.
The Button Class will count any click event on an element containing the class as a conversion. If you add this to a submit button, for example, and the form fails to process successfully on the first click it will still be counted as a conversion!
Whenever possible you should use the Javascript method provided above for the most accurate tracking.
My Javascript form isn’t working; why?
Javascript-based forms are supported. However, a Javascript error in your form code may break your OptinMonster campaign. If that happens, please be sure to reach out to support for assistance.
My form isn’t submitting.
Check that the <form> tag in your embedded form code doesn’t contain the attribute target="_blank".
Browsers have inconsistent support for this action (redirecting the visitor after form submission in a new tab/window), and many will block it outright. This makes it appear your form is somehow broken. If your form contains this attribute, you can safely remove it and check again that the form submits appropriately.

