
Are you looking to boost sales by adding a coupon promotion popup to your site?
Coupon popups are one of the most effective ways of converting website visitors but only when done correctly.
In fact, there are tons of ways to display these popups. However, showing the right coupon to the right people and at the most appropriate time remains the best way to boost conversions.
In this article, we’ll demonstrate how to add a high-converting coupon promotion popup to your website.
But first, let’s understand what exactly this kind of popup campaign is.
What Is a Coupon Popup?
Popups are more than just collecting email addresses. When used properly, popups can be an essential tool for achieving different conversion goals.
And this is where coupon popups and promotional popups come into the picture.
These are targeted messages that offer your customers special discounts, coupons, or incentives to engage with your call to action (CTA).
However, to get the most out of your popup campaigns, you need to display it at the right time without hurting the user experience.
This is where you’d need a premium lead generation tool like OptinMonster:

OptinMonster is the world’s best conversion optimization toolkit that you can use to create high-converting coupon and promotional popups.
It provides everything that you need to create these campaigns.
The best thing is that OptinMonster allows you to build eye-catching popup campaigns without any coding experience.
That means you can create really engaging coupon popups like this in just five minutes:

Plus, OptinMonster’s setup is extremely user-friendly. And you can edit your campaigns with a codeless drag and drop visual builder:

As we discussed, no matter how stunning your popup looks, you still need to display it at the right time and to the right audience to get more conversions.
OptinMonster’s powerful targeting rules like Exit-Intent® Technology help you achieve just that.
This will automatically detect when a visitor is all set to exit your website and at that exact moment will display a popup containing coupons or promotional messages.
It will prompt visitors to take some action on your site before they leave.
This is just one of the many targeting rules OptinMonster has to offer. A few other popular examples include:
- Geolocation: Personalize your offers by targeting people based on their physical locations.
- OnSite Retargeting®: Keep users engaged by showing fresh campaigns to returning visitors.
- MonsterLinks™: Boost conversions by transforming your optin campaigns into clickable links (for buttons or anchor texts).
In fact, all of OptinMonster’s targeting rules are very effective. They’ve helped businesses like Fastrack recover 53% of abandoning visitors or Sportique increase conversions by 200%.
To top it all off, OptinMonster lets you track the performance of your coupon promotion popups.
You’ll get all the analytics that you need in the OptinMonster dashboard.

You can view how many people saw and used your coupons, the best-performing promotional popups, and much more.
Ready to create your own high-converting coupon popup? Then sign up for your 100% risk-free OptinMonster account below:
Now, we’ll help you create your first coupon popup.
Let’s get started.
How to Make a Coupon Popup
Step 1: Install OptinMonster
First, you’ll need an OptinMonster account. Regardless of which platform you’re using (WordPress or otherwise), installing OptinMonster is super easy.
Today, we’ll install OptinMonster with WordPress. But if you’ve used another platform, we recommend checking out this resource: How to Install OptinMonster on ANY Website.
Otherwise, head to your WordPress dashboard.
Click Plugins » Add New from your WordPress side menu, and search for OptinMonster in the WordPress repository.
After you’ve found OptinMonster, click Install Now:

Once the installation process is completed, click Activate:

Now, follow along with the setup wizard to connect the OptinMonster plugin to your WordPress site.
Need some more help? No worries! Check out this comprehensive guide: How to Integrate OptinMonster With Your WordPress Site.
Next, we’ll build your first campaign.
Step 2: Create Your First Coupon Popup Campaign
To get started, click Create New under the Popup campaign on your OptinMonster dashboard.

Next, you’ll need to select a template for your OptinMonster campaign.
Here, we’ve selected the Coupon template to create a coupon popup. This is ready out of the box, so it’s a great place to start.
However, you can select other templates if they’re more suited to your brand’s image or voice.
In fact, OptinMonster comes with 50+ stunning templates (all professionally designed) that you can use right away.
You can either scroll down or use the search box to locate the Coupon template.
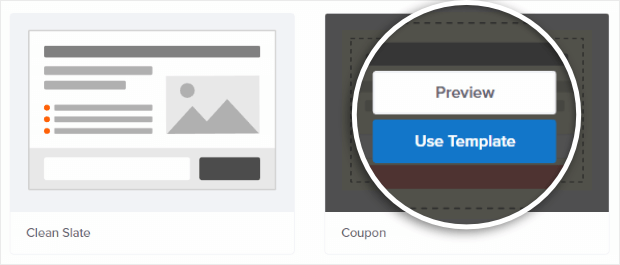
Preview the template and click Use Template once you locate it.
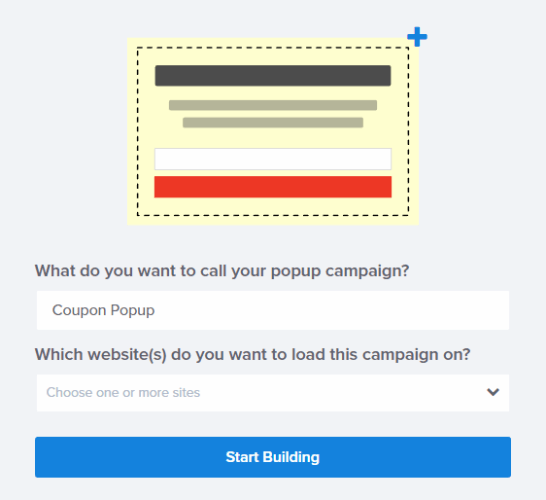
After you select the campaign, name it, select the website where it will appear, and select Start Building:
Now you’re ready to design the campaign.
Step 3: Design Your Campaign
OptinMonster gives you complete control over your campaign design. You can edit the coupon without writing any code, all thanks to the drag and drop builder:

You can use the drag and drop builder to change text, fonts, colors, add images, and a lot more.
Once you start designing your campaign, you’ll see a live preview of the coupon on the right side like this:
Your coupon headline will likely determine how many people stop to read your offer, so make sure it’s powerful and convincing.
You can easily edit your campaign headline using OptinMonster.
All you need to do is to click on the headline and you can type directly in the OptinMonster builder:

You can also edit any text in the coupon just like the way you edited the headline.
Plus, you can even add other features to your campaign, such as:
- Images
- Videos
- Custom HTML
- CTA buttons
- Icons
- And much more…
Click on +Add Blocks, then drag and drop the image element to the live preview.

Images usually reflect your business, the offer you’re making, or both.
But if you struggle to find professional photos, there are also plenty of places to get attractive images for free. Check out our guide to 39 Places to Find Images for Better Conversions.
Using the inline text editor and the drag and drop builder, you can quickly and easily make a stunning campaign in minutes.
Once you’re done modifying your coupon popup’s design, you’ll want to configure the settings that determine when, where, and to whom your campaigns appear.
Step 4: Configure Your Triggers
One of OptinMonster’s most amazing features is its advanced campaign triggers that allow you to display your campaigns when your audience is most likely to take an action.
You can use OptinMonster’s industry-leading target rules to schedule your campaign at the right time and boost conversions.
Here are OptinMonster’s some of the most popular targeting rules:
- Geo-Location: Display campaigns based on the user’s physical location.
- Exit-Intent® Technology: Display campaigns when visitors are about to leave your site.
- On-Site Retargeting®: Display fresh campaigns to returning visitors.
These are just a few of OptinMonster’s most popular display rules, although there are many and all of them are equally effective.
Using these advanced rules, businesses like Hubstaff increased free trial signs ups by 21%.
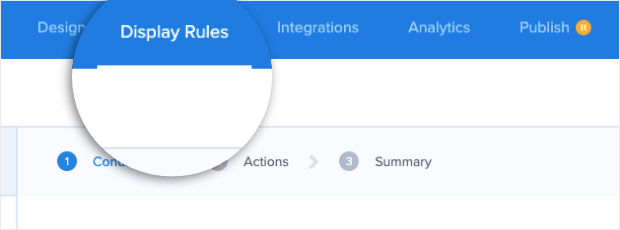
To start using OptinMonster’s campaign triggers and targeting rules, you need to head to the campaign builder and click Display Rules.
Select Trigger (When) from the sub-menu options to ensure that your coupons are displayed at the right time.

Similarly, you can control who views your campaigns.
Select Targeting (When) and click Targeting from the sub-menu options.
Then select the targeting rule that suits your campaign’s specific needs.
For instance, if you want to display campaigns based on the user’s physical location, select Physical Location in the display rule section.

Or if you wanted to catch abandoning visitors, you’d click Exit Intent®:

Then you’ll be able to configure the rule at a more granular level.
With Exit Intent® for example, you can select which devices this rule applies to and the sensitivity level:

Once you’ve found the right display rules to target YOUR audience,
Your popup is almost ready and now you can send it to your leads via email.
Step 5: Connect Your Email Service Provider (ESP)
One of OptinMonster’s most effective features is that it allows you to easily integrate your email service provider (ESP). That means you can send the right coupons and promotional offers to different email lists.
OptinMonster seamlessly connects to some of the most popular email service providers like Constant Contact, Brevo (formerly Sendinblue), MailChimp, and more.
If you want to find out which ESP suits you best, then you’ll want to our article on the 7 best email service providers for small businesses.
Once you have selected the ESP that matches your business requirements, you can hook it up to OptinMonster.
And just like everything else, the integration process is very simple.
Click Integrations at the top of your OptinMosnter dashboard:

You can now click Add New Integration and search for your ESP on the search bar.
In most cases, you’ll need to add your API key to get started.
You can find your API key from your ESP account. Once you enter the API key, you’ll be able to connect your email provider with a single click:

Now, you can send automated coupons and offers every time a new lead takes action with your promotional popups.
All that’s left is to publish your coupon popup.
Step 6: Publish Your Coupon Popup
When you’re satisfied with how your campaign looks and functions, you’re ready to publish your campaign.
Select Publish from the top menu of the OptinMonster dashboard.

You can now switch your coupon popup from Draft to Publish:

Head back to your WordPress editor and ensure that your post is set to Publish.
You can do that by click OptinMonster » Campaigns.
Then changing your coupon popup’s status from Draft to Publish:

You can also create a schedule for your popup campaign:

This allows you to create limited-time promotional offers in just a few clicks. You can select the start and end dates for seasonal promotions and put your lead generation strategy on auto-pilot.
And that’s it! You have now successfully created and published your coupon popups with OptinMonster.
Ready to create your own coupon popup? Then sign up for your 100% risk-free OptinMonster account below:
That’s all for today!
We hope that you enjoyed this post on how to schedule coupon popups.
If that’s the case, you’ll definitely want to check out the following resources:
- How to Schedule a Popup in WordPress in Less Than 10 Minutes
- How to Create a Newsletter Popup in 5 Easy Steps
- How to Make a Lead Generation Quiz That Actually Converts
These posts will help you to boost email signups, leads, and conversions in a short time.
Disclosure: Our content is reader-supported. This means if you click on some of our links, then we may earn a commission. We only recommend products that we believe will add value to our readers.