OptinMonster offers seamless integration with webhooks using our native integration.
In this article, you’ll learn how to connect a webhook to OptinMonster.
Before you start, this integration is available with a Pro and higher subscription.
All subscription plans can add custom forms using the Form Embed block.
As a best practice, we recommend you also connect your campaigns to Monster Leads as a backup.
Connect Webhook
When you create a campaign in OptinMonster that you intend to collect leads with you’ll want to integrate with one or more services to send those leads to.
To send those leads to a webhook, follow these steps:
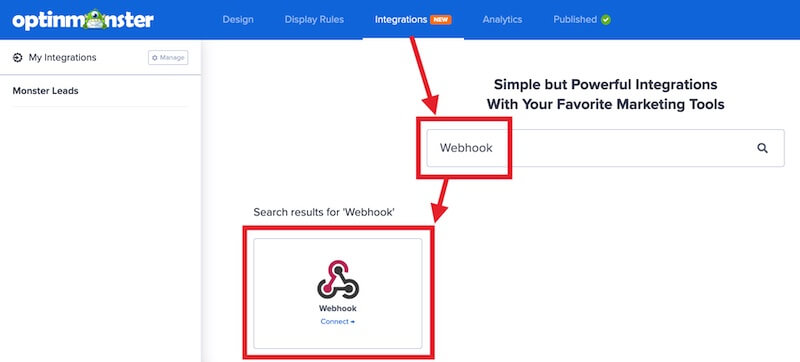
- Navigate to the Integrations view in the campaign builder, search for and select Webhook.
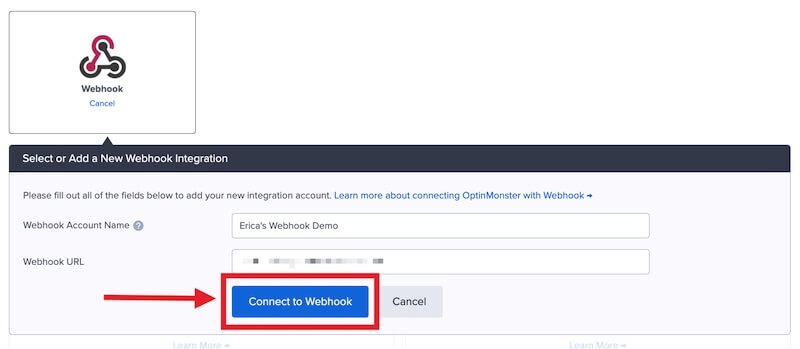
- Next, enter a Webhook Account Name (*internal use only) and enter the Webhook URL into the appropriate fields, then select the Connect to Webhook button.
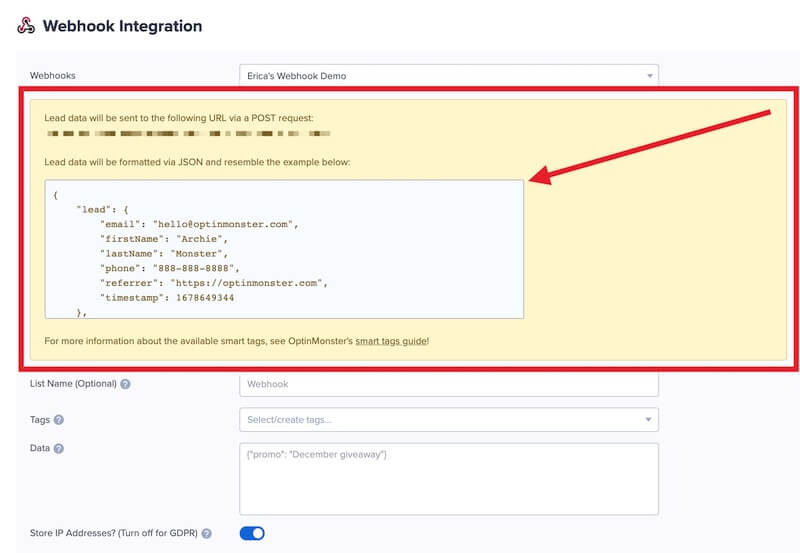
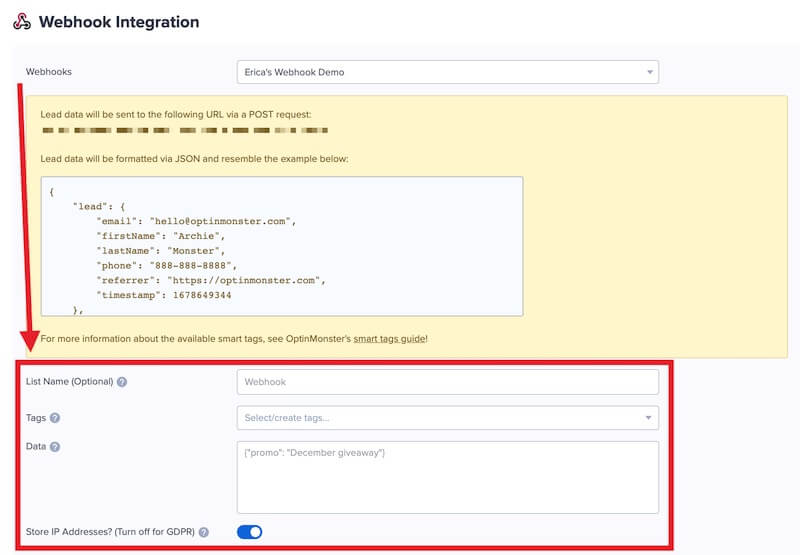
*The Webhook Account Name can be anything that helps you identify the specific integration within OptinMonster. It’s possible to add more than one Webhook integration to your account and this is an easy way to differentiate between them when assigning integrations to individual campaigns. - Once connected, you’ll be provided with an example of how Lead data will be submitted via JSON to your Webhook URL.
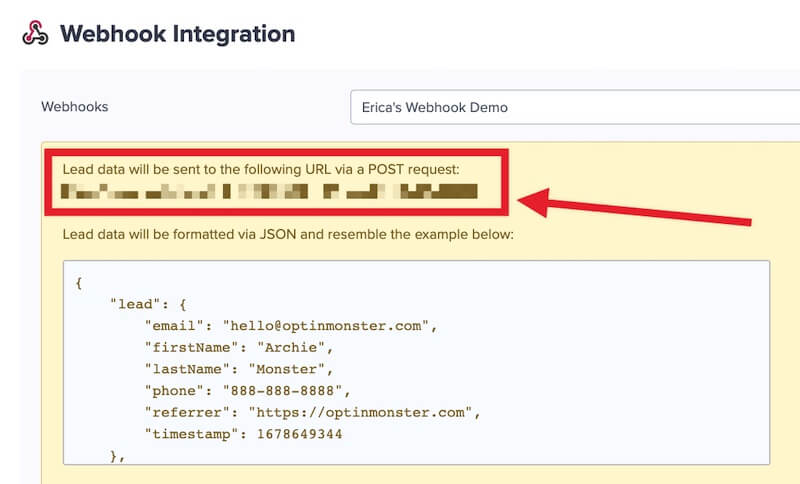
- The same section of your integration will also confirm the Webhook URL data submits to.
- Optional: You can also configure a List Name, assign Tags, additional Data, and configure the Store IP Addresses? (Turn off for GDPR) option.
- When you’re finished, Save your campaign.
Data Structure
For Webhook integrations created on and after November 30, 2023, lead data is formatted via JSON and resembles the example below:
Looking for the payload structure of integrations created before November 30, 2023? See the Changelog section below.
Your webhook can receive the following lead data:
leademail– the email address submittedipAddress– the IP Address of the computer the lead was submitted fromreferrer– the URL of the page the campaign was submitted fromtimestamp– the timestamp when the campaign was submittedprivacyConsent– set totrueif the Privacy Checkbox field is present in your campaign formfirstName– the first name submitted if the name field is present in your campaignlastName– the last name submitted if the name field is present in your campaign formphone– the phone submitted if the phone field is present in your campaign form
lead_optionslist– list name (optional)tags– tags to assign to lead (optional)data– additional custom data that you want associated with each lead (optional)
campaignid– the unique ID of the campaign submittedtitle– the title of the campaign submitted
meta- Extra fields from your campaign are passed through here, by field ID
smart_tagsday– the day of the week the lead was capturedmonth– the month of the year the lead was capturedyear– the year the lead was captureddate– the date the lead was capturedpage_url– the URL of the page where the campaign convertedreferrer_url– the URL of the page where user landed on converted pagepages_visited– total number of pages visited by the user in current visittime_on_site– total time on site spent before convertingvisit_timestamp– time of conversionpage_title– title of the pagecoupon_label– coupon code labelcoupon_code– coupon code that was displayed to user on conversion
You can also pass Smart Tag data along with the lead data using our Webhook integration. Learn more about Smart Tags
Note: Our Webhook integration only includes location smart tag values automatically in the Webhook request body if a geolocation rule is added as a display rule in the campaign.
Example:
Add Extra Fields
This integration supports Field Mapping, so you can easily add radio buttons, phone fields, text areas, number fields, lists, and more!
Before you begin using Field Mapping with Webhooks, please consider the following:
- Custom fields are passed into the
metakey of the JSON payload. - You can also pass Custom Smart Tag data using our Webhook integration. Learn more about Smart Tags.
Email Automations
To send emails automatically to new leads you’ll want to configure email automations within the Email Service Provider account your Webhook sends data to.
Testing
We strongly recommend you test the optin form before publishing your campaign to ensure it is working as you expect.
Webhook.site is a great free Webhook testing tool you can use to quickly expose the JSON data sent from OptinMonster via Webhook.
Before you begin, please be aware of the following details when testing Webhook integrations:
- When testing Webhook submissions, we recommend you pay particular attention to the JSON data captured to ensure all
lead,lead_options,campaign, andsmart_tagsdata is being captured as you expect. The Live Site Inspector tool is the testing feature you’ll want to use for test-submitting an optin form before you’ve Published a campaign live to your site. - We recommend using a completely unique email address each time you test submit your campaign’s form. You can use a free tool like TempMail.io or learn how to create unlimited unique email addresses from a single Gmail account.
- If the lead is captured by your Webhook but no automated emails are sent (and they are expected to) it indicates the integration from OptinMonster to Webhook is correct, and the issue is with the automated email configuration. Email automation is not controlled by OptinMonster in any capacity. If you require assistance in troubleshooting email automations we recommend you reach out to the Email Service Provider you’ve configured the email automations through directly.
Get started testing with the Live Site Inspector tool explained in our guide on how to test an OptinMonster campaign.
Spin-a-Wheel Support
If you are configuring a Gamified spin-to-win campaign, Spin-a-Wheel support is automatically enabled. This will pass the Coupon Label and Coupon Code to your Webhook in the smart_tags key with each lead.
FAQs
What Authentication methods does your Webhook integration support?
At this time we do not support Authentication for Webhook. The data is passed directly to the Webhook endpoint you’ve set for your integration.
Can I send leads to more than one Webhook URL?
Yes! See our Lead Sharing guide to accomplish this.
I’m new to Webhooks, how can I find out more about them?
Some good resources to learn more about the basics of webhooks include:
I’d like to use Webhooks, but am not technical. Can I use Webhooks without writing any code?
Yes, in that instance we recommend using our Zapier integration and configure the Zap to send data from OptinMonster to Webhook. That is the best approach to get started using Webhooks without having to know how to code anything.
See our documentation for more ways to connect OptinMonster and Zapier:
- How to Connect OptinMonster with Zapier
- How to Add Subscribers to a Google Spreadsheet with Zapier
- How to Add Subscribers to Google Contacts with Zapier
- How to Receive Leads to Your Email with Zapier and OptinMonster
- How to Send Subscribers an Email from Gmail with Zapier and OptinMonster
- How to Send Text Messages to New Subscribers using Twilio and Zapier
- How to Receive Text Messages of New Subscribers using SMS by Zapier
How do I collect the First and Last Names?
OptinMonster will automatically detect if someone has entered their first and last names into the Name input field. You only need to enable the Name field in the Fields Element to collect both the First and Last Name.
How can I update the Webhook URL the campaign data is sent to for my integration?
To change the Webhook URL your integration sends data to, follow these steps:
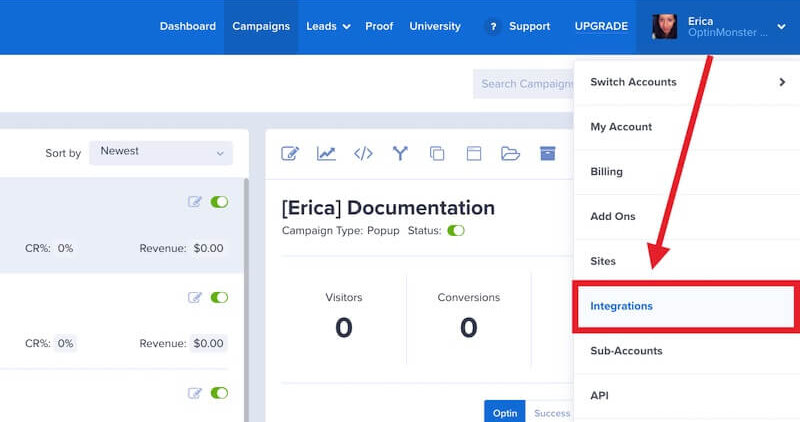
- Navigate to the OptinMonster Account > Integrations page.
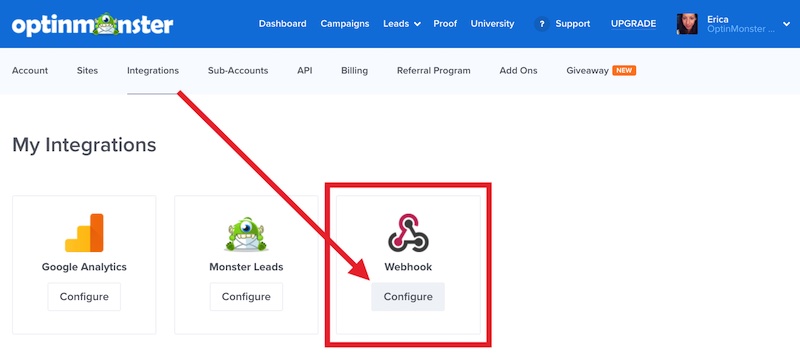
- From the Integrations page, select the Configure button for your Webhook integration.
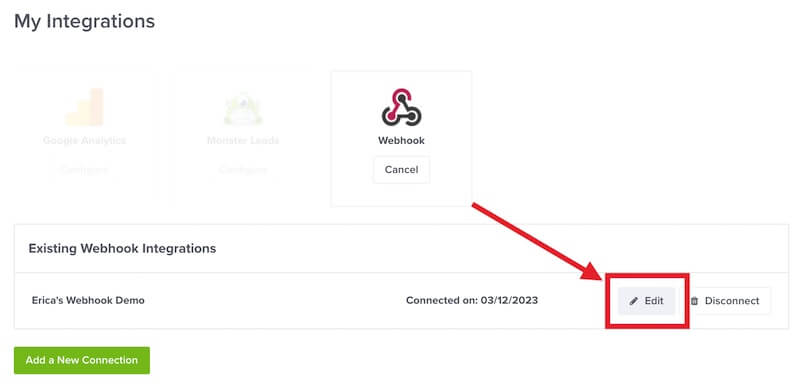
- Locate the specific Webhook integration you want to edit from the list and select the Edit button.
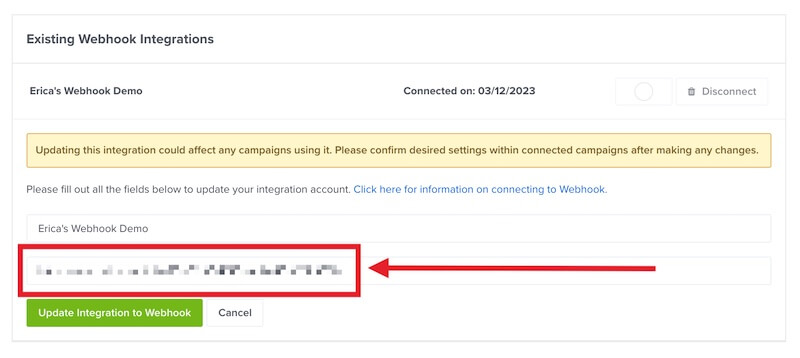
- Enter the new Webhook URL into the second input field to change where JSON data is sent for this integration.
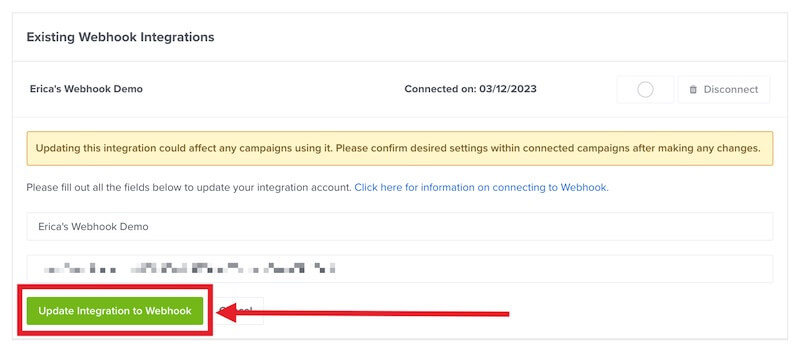
- When you’re finished, selectthe Update Integration to Webhook button to apply the changes to all campaigns using this specific Webhook integration.
Is there a way to provide a custom error message from my Webhook?
If you manage the Webhook server and response, then you can specify your own error message via the Webhook response. If the response contains the “om_error_message” parameter, the error message will show that instead of the default “There was an error submitting your data.” message.
Is there a way to provide response data from my Webhook?
If you manage the Webhook server and response, then you can send back arbitrary data via the Webhook response. If the response contains the “om_response_data” parameter, this will be passed along to the webhook request response in the data parameter. Why would you want this? One example would be to modify the redirect URL for your form action.
Send the following response from your webhook:
And place the following on your site to automatically use the response redirect data for a given campaign:
How can I allowlist webhook requests from OptinMonster IP addresses?
Our webhooks will be sent from one of the following IP addresses:
- 50.19.60.226
- 50.17.52.222
- 54.147.244.173
- 35.153.24.227
- 50.19.138.155
- 50.19.173.212
- 52.44.205.147
- 34.198.233.235
- 50.16.98.100
How can I force the webhook to connect?
Occasionally, the method we use to authenticate and connect your webhook URL may fail. If you would like to force the connection, this is possible using a special query parameter on your webhook URL, ignore_connection_failure=1, e.g.:
https://example.com?ignore_connection_failure=1If your webhook URL already has query parameters, you can add it like this:
https://example.com?param=1&ignore_connection_failure=1The actual ignore_connection_failure=1 parameter will be remove from the URL during the webhook requests, but we use this flag to determine if we should force the connection.
Troubleshooting
The campaign is capturing leads but shows 0 conversions in analytics.
Confirm that conversion tracking is turned on for the submit button in your campaign. See our guide on How to Enable Conversion Tracking.
Changelog
Version 2.0.0 – Release Date: November 30, 2023
- Addition of the
privacyConsentfield to theleadkey in the JSON payload. TheprivacyConsentfield will map the Privacy Checkbox field; - Removal of redundant fields of the
smart_tagskey in the JSON payload. Deleted fields:form_*(Ex.:form_email,form_name,form_phone, etc),campaign_name,cn; - Addition of the
X-OptinMonster-Webhook-Versionheader to the webhook request;
Note: if your integration was created before November 30, 2023, the webhook request will still contain the removed fields.

