Do you want to add a privacy notice or a “We do not spam!” statement to your campaign? Do you need a specific privacy statement in your OptinMonster campaign to give confidence to your website visitors?
In this article, you will learn how add a privacy notice to your campaign.
Add Privacy Notice
To add a privacy notice to your campaign, follow these steps:
- Navigate to the Design view of the campaign builder
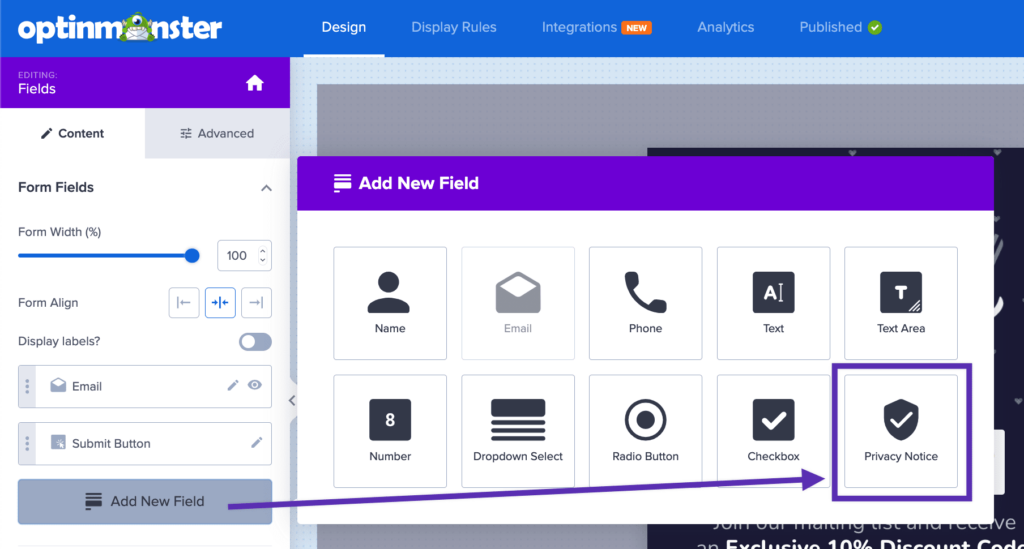
- Next, select the Fields block, click on the Add New Field button in the sidebar, and select the Privacy
- The campaign will automatically add the Privacy Notice to the Fields block. You can directly select the text in the Design pane to edit the wording and styles of the text.
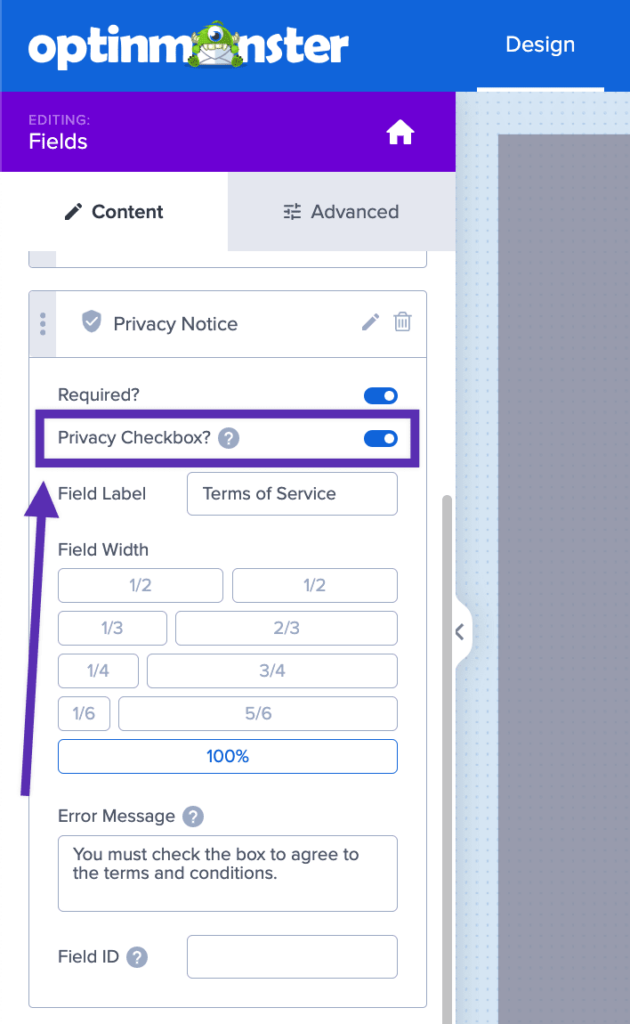
- (Optional) To show a checkbox field next to the Privacy Notice, toggle the option in the sidebar settings.
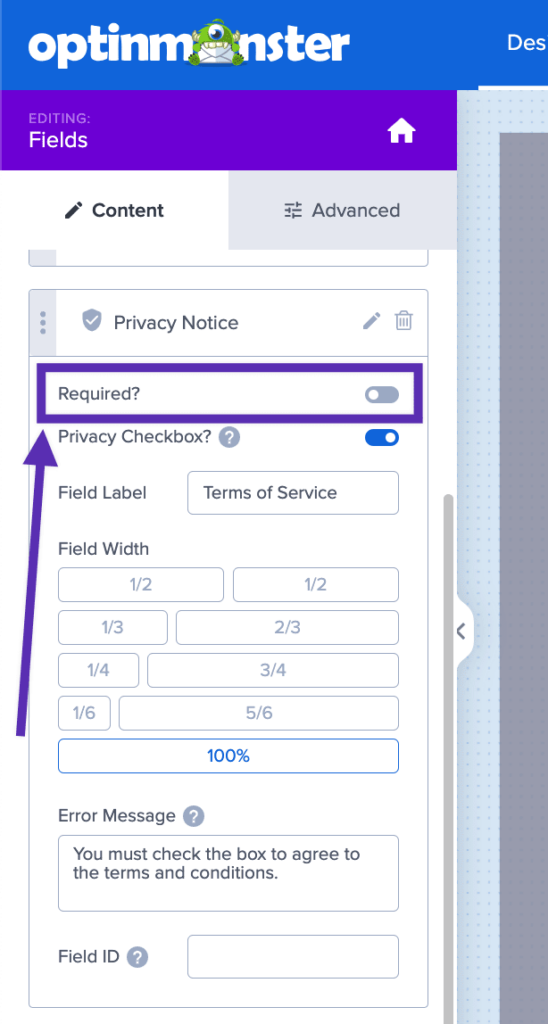
- (Optional) You can choose whether the field is required (must be checked) by toggling the option in the sidebar.
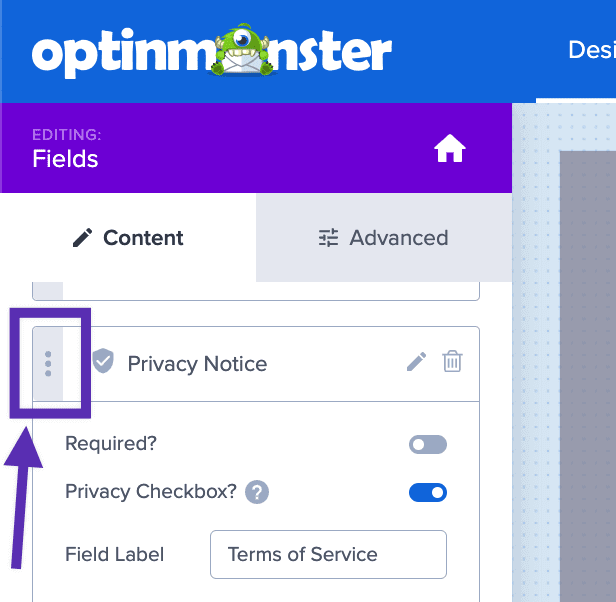
- (Optional) You can reposition the Privacy Notice relative to other fields in the form by selecting the three dot icon and dragging it to a new position.
- When you’re finished, Save your campaign.
FAQs
Is the Privacy Checkbox field compliant with GDPR consent requirements?
No, at this time the Privacy Checkbox field does not pass any data with the lead, so it does not meet GDPR consent requirements.
If your ESP supports Field Mapping, we recommend adding a custom checkbox field configured to capture consent. Alternatively, you can use our Form Embed block to add a custom HTML form to your campaign that contains all required fields.
How can I customize the style of the checkbox using CSS?
You can use Custom CSS to control the styling of the checkbox field.
Use the following CSS to get started styling the checkbox field. This example will make sure the checkbox field stays at the top line if your privacy message spans multiple lines:
Which campaign types and templates support the privacy notice?
All campaign types and templates support the privacy notice.
Is the privacy notice checkbox optional or required?
You can make the checkbox required or optional by toggling the setting in Step 5 above.
If you’re serious about jumpstarting your website business growth, then get started with OptinMonster today!
Get Started With OptinMonster Today!BONUS: Done-For-You Campaign Setup ($297 value)
Our conversion experts will design 1 free campaign for you to get maximum results – absolutely FREE!
Click here to get started →


